Now Reading: How to Reset Remote for Garage Door: Easy Step-by-Step Guide
- 01
How to Reset Remote for Garage Door: Easy Step-by-Step Guide
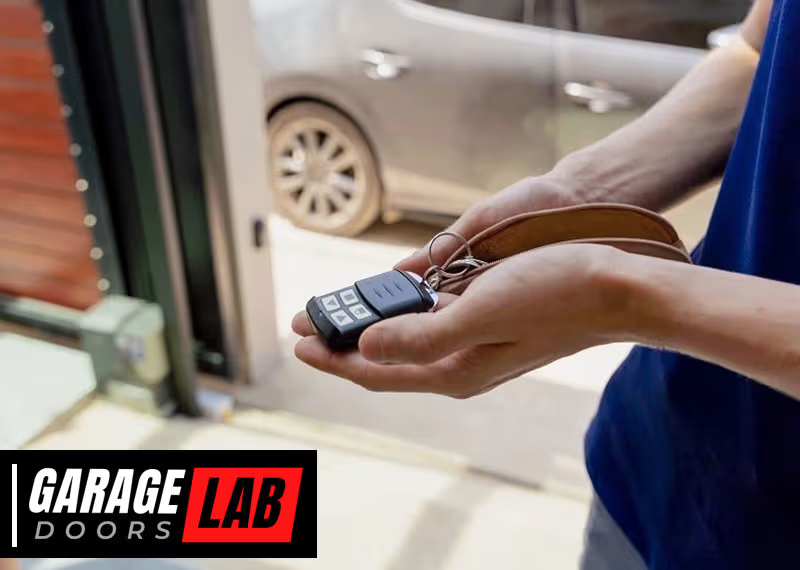
Resetting your garage door remote can feel confusing, especially if you have never done it before. Maybe your remote stopped working, you got a new one, or you want to clear old remotes for security. No matter the reason, knowing how to reset a garage door remote is an important skill for any homeowner. This guide walks you through every detail, from basic steps to advanced tips, so you can handle almost any remote reset situation.
Most people do not realize that garage door remotes are not universal. The reset process depends on the brand, model, and even the year the opener was made. If you try a “one-size-fits-all” method, you might waste time—or even lock yourself out.
This article explains different reset methods, common mistakes, and safety tips. Even if you are not a DIY expert, you will feel confident by the end.
How Garage Door Remotes Work
Before you start, it helps to understand how garage door remotes function. These devices send a coded radio signal to the garage door opener, telling it to open or close. Modern remotes use rolling codes for security, meaning the code changes every time you use the remote. Older systems may use fixed codes set by dip switches.
Most remotes require programming or syncing with the opener unit itself. This means, to reset or add a new remote, you are not just changing the remote—you are updating the opener’s memory.
Why Reset A Garage Door Remote?
People reset their remotes for several reasons:
- Lost or stolen remote: Prevent someone from accessing your garage.
- Remote not working: Fix problems after battery changes or electrical issues.
- New remote added: Sync a new remote with the opener.
- Security: Clear old remotes after moving into a new home.
Resetting removes old codes from the opener’s memory, making lost remotes useless.
Safety First: Preparing To Reset
Resetting a garage door remote is usually safe, but there are important things to do before you start.
- Disconnect Power (if instructed): Some openers want you to unplug the unit before resetting to avoid electrical problems.
- Keep the Area Clear: Make sure nothing blocks the garage door path. The door may move during the process.
- Have Remotes Ready: If you need to reprogram several remotes, keep them nearby.
- Ladder Safety: Most openers are mounted on the ceiling. Use a stable ladder and ask someone to hold it, if possible.
- Read the Manual: Each opener is different. If you have the manual, check it for brand-specific instructions.
Many beginners forget to clear the area. If the door closes suddenly, it could hurt someone or damage your car.
Tools And Materials You May Need
Most resets do not need special tools, but having these on hand can help:
- A sturdy ladder
- Screwdriver (for opener cover or wall mount)
- Flashlight (if the opener is in a dark garage)
- The owner’s manual (for reference)
- Replacement remote (if adding a new one)
Some brands hide the reset button behind covers or light lenses, so a screwdriver might be needed.
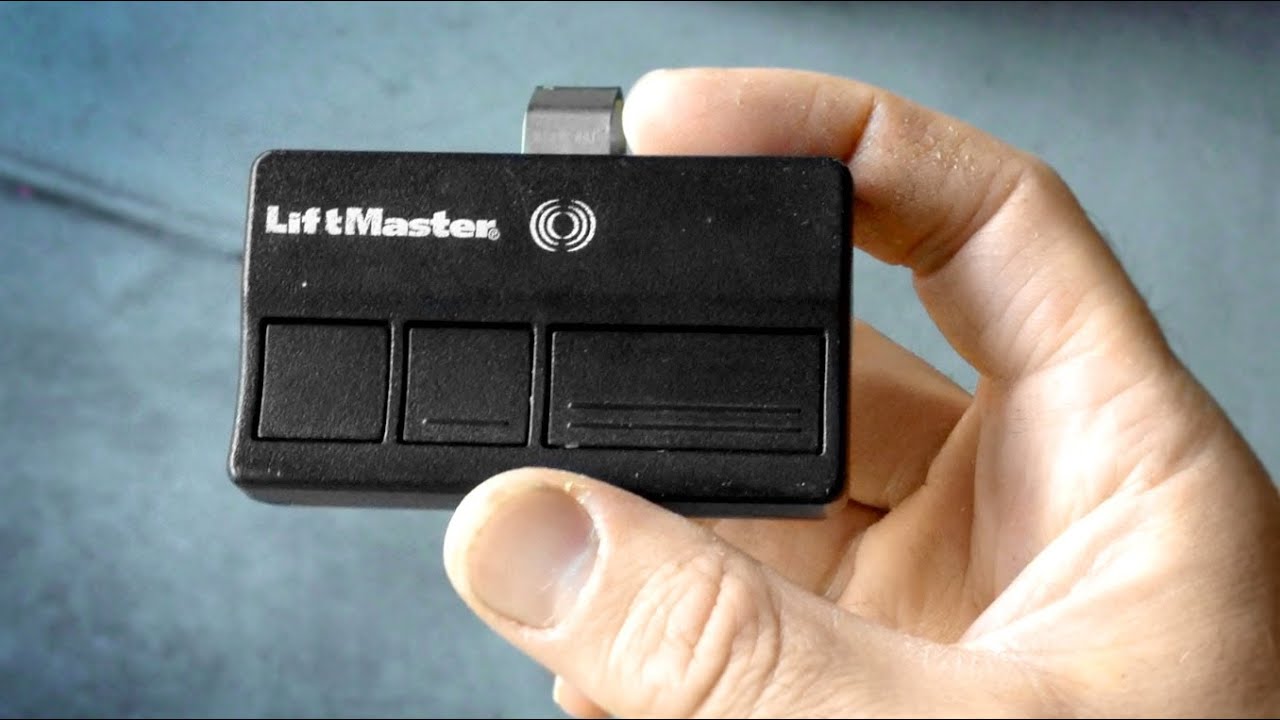
Understanding The “learn” Button
The “Learn” button is key to most modern garage door remote resets. This button is usually found on the back or side of the opener motor unit (mounted on the ceiling). Pressing this button puts the opener into programming mode.
Here’s what to look for:
- Color: Common colors are yellow, purple, red, or green.
- Label: Sometimes labeled as “LEARN,” “SET,” or “PROG.”
- Light: The button may have a small LED that flashes during programming.
Not all openers use a “Learn” button. Older models may have switches instead.
Step-by-step: Resetting The Remote
The exact process depends on your opener brand and age. Most fall into two categories: modern openers with a Learn button and older openers with dip switches.
Resetting Remotes With A Learn Button
- Locate the Learn Button: Climb the ladder and look for the button on the opener’s main unit.
- Press and Hold: Press and hold the Learn button for about 6-10 seconds. The indicator light will usually go out or blink to show the memory is cleared.
- Release the Button: Let go when the light changes.
- Test Old Remotes: Try using an old remote. It should no longer work, showing the reset succeeded.
- Reprogram Remotes: Press the Learn button once (don’t hold). Within 30 seconds, press the button on your remote. The light will blink, confirming the remote is paired.
- Repeat for Extra Remotes: If you have more than one, repeat step 5 for each.
Important: Holding the Learn button too long can clear all programming, including keypads and car openers. Only do this if you want a full reset.
Resetting Older Remotes With Dip Switches
Some openers (usually before 1995) use a row of small switches to set the code.
- Open the Remote: Remove the battery cover to see the switches.
- Find the Opener’s Switches: Look for a matching set of switches on the opener unit.
- Match the Pattern: Use a small screwdriver to set both patterns the same.
- Test the Remote: The door should respond if the codes match.
If you want to reset, simply change the pattern on both the remote and opener.
Resetting Keyless Entry Pads
Many garages also have a wall-mounted keypad. To reset it:
- Clear the Opener’s Memory: Use the Learn button as above.
- Enter Programming Mode: Press the Learn button, then enter your desired code on the keypad within 30 seconds.
- Confirm: The opener light should blink or click to confirm.
Some keypads need a specific sequence (like “*” or “#” before the code), so check the manual.
Reset Instructions For Major Brands
Different brands have unique steps or button colors. Here’s a quick reference for the most common brands.
Chamberlain, Liftmaster, And Craftsman
These brands often use similar openers.
- Learn button color matters:
- Yellow (Security+ 2.0): Press and hold for 6 seconds to erase.
- Purple, red, or green (older models): Hold for 6 seconds.
- After erasing, reprogram each remote as described above.
Genie
- Learn button: Often labeled “Program” or “Learn Code.”
- Press and hold until the LED blinks, then release.
- Press the remote button three times (wait for blinking each time).
Overhead Door
- Learn Code button: Press and release, then press the remote button.
- May need several presses to sync.
Linear
- Learn button: Press, then press remote button. Light blinks to confirm.
Marantec
- Uses a “Programming Connector” for some models. See the manual for details.
Wayne Dalton
- Older models use dip switches.
- Newer models have a Learn button; process is similar to Chamberlain.
Tip: If you do not know your opener’s brand, look for a sticker or label on the motor housing.
When The Remote Still Doesn’t Work
Sometimes, the reset process does not solve the problem. Here are common reasons and what to do:
- Dead batteries: Replace with fresh ones, even if the old ones seem fine.
- Interference: Wireless devices or nearby electronics can block signals.
- Damaged remote: Remotes can break after drops or water damage.
- Outdated opener: Very old openers might not support new remotes.
- Sensor issues: If the safety sensors are blocked or misaligned, the door may not respond.
If all remotes stop working, check the opener’s power supply and fuses.
Clearing All Remotes: Security Reset
If you lost a remote or moved into a new home, you should erase all remotes and keypads from the opener’s memory.
- Press and Hold Learn Button: Hold for at least 6 seconds (sometimes up to 30 seconds for full memory erase).
- Wait for Light Change: The opener light will go out or blink.
- Test All Remotes: None should open the door.
- Reprogram Only the Remotes You Trust.
This is one of the best ways to improve security. Many people forget to do this when buying a house.
How To Add A New Remote After Reset
You do not need to reset the opener for every new remote. Just add it:
- Press Learn Button Once: Do not hold.
- Press Remote Button: Within 30 seconds, press the button on the new remote.
- Wait for Confirmation: Light blinks or opener clicks.
- Test Remote: It should work immediately.
Repeat these steps for each new remote.
Programming A Built-in Car Remote (homelink)
Many modern cars have a built-in garage remote system called HomeLink. To reset and connect it:
- Clear Old Codes: Hold the two outside HomeLink buttons for 10 seconds (until the indicator blinks).
- Pair with Garage Opener Remote: Hold the remote close to the HomeLink button, press both until the car’s indicator blinks.
- Sync with Opener: Press the opener’s Learn button, then press the programmed HomeLink button in your car.
- Test the System.
This process can be tricky. Some vehicles need the ignition on, or require several tries.
Comparison: Modern Vs. Old Garage Door Opener Reset Methods
Resetting garage door remotes has changed over the years. Here’s a simple comparison:
| Feature | Modern Openers (Learn Button) | Older Openers (Dip Switches) |
|---|---|---|
| Security Level | High (Rolling Code) | Low (Fixed Code) |
| Reset Method | Press/Hold Learn Button | Change Switch Pattern |
| Can Erase All Remotes? | Yes | No (must change codes manually) |
| Programming New Remotes | Quick and Simple | Manual, slower |
| Common After 1995? | Yes | No |
Common Mistakes And How To Avoid Them
Many people run into problems when resetting their garage door remotes. Here are some common mistakes and tips:
- Holding the Learn Button Too Long: This erases all remotes, not just one. Only hold if you want a full reset.
- Not Reprogramming All Remotes: After a full reset, every remote and keypad needs to be added again.
- Missing the 30-Second Window: Most openers give you 30 seconds after pressing Learn to program a new remote. Move quickly.
- Forgetting Battery Polarity: Insert new batteries in the correct direction.
- Ignoring Safety Sensors: If sensors are blocked, the door won’t operate, even with a fresh remote.
A little patience and careful following of steps can prevent most issues.

Credit: www.youtube.com
What If You Lost The Manual?
Many homeowners do not have the original opener manual. Luckily, you can find most manuals online. Search for your opener’s brand and model number (usually on a sticker on the motor unit). Manufacturer websites often have PDF downloads.
If you can’t find the manual, follow the basic steps in this guide. Most modern openers use similar reset processes.
Resetting Universal Garage Door Remotes
Universal remotes work with many brands, but setup steps are slightly different.
- Set the Brand Switch: Use the instruction sheet to select your opener’s brand.
- Put Remote in Programming Mode: Usually a small button or switch inside the remote.
- Press Learn Button on Opener: As before.
- Sync Remote and Opener: Within 30 seconds, press the remote button.
Universal remotes are a good choice if you have lost the original, but may require several tries to sync.
Resetting Smart Garage Door Openers
Smart openers (Wi-Fi enabled) can be reset through their app or physical buttons.
- App Reset: Go to device settings, remove or reset the opener, then re-add it.
- Physical Reset: Hold the Learn/Reset button as described earlier.
- Reconnect Wi-Fi: If your opener loses connection, you may need to re-enter your Wi-Fi password.
Most smart openers let you manage users from the app—great for adding or removing family members.
The Role Of Garage Door Sensors
Garage door sensors (the small boxes near the floor) do not directly affect remote programming, but they can stop the door from moving. If your remote works but the door will not close, check the sensors:
- Clean the lenses: Dust or spider webs can block the beam.
- Align the sensors: Both lights should be solid (not blinking).
- Check for wiring damage.
Some people think their remote is broken when the real problem is a sensor issue.
Table: Troubleshooting Remote Issues
Here is a quick reference if your garage door remote still will not work after a reset.
| Problem | Possible Cause | Solution |
|---|---|---|
| Remote unresponsive | Dead battery | Replace batteries |
| Remote works sometimes | Interference, weak battery | Move closer, replace battery |
| Door won’t close | Sensor blocked/aligned | Clean/realign sensors |
| Multiple remotes lost | Need full reset | Erase memory and reprogram |
| Old remote won’t sync | Wrong model | Buy compatible remote |
Upgrading Your Garage Door Opener For Better Security
Older openers with fixed codes are much less secure. Modern openers use rolling codes to prevent hacking. If your opener is from before 1995, consider upgrading:
- Better security: Rolling codes are much harder to copy.
- Smart features: Control your door with a phone app.
- Battery backup: New openers work even during power outages.
- Quieter operation: Belt drives are much quieter than chains.
A new opener usually costs $200–$500 plus installation, but the extra security is often worth it.
How Many Remotes Can I Program?
Most garage door openers can remember 5 to 8 remotes. If you reach the limit, adding a new remote may erase the oldest one. Check your manual for the exact number.
If you have a large family or want to add a keypad, plan your remote usage accordingly.
Dealing With Stuck Or Broken Remotes
Sometimes, a remote gets stuck or broken and won’t reset properly.
- Stuck button: Open the case and check for debris.
- Water damage: Remove battery and let dry (but often needs replacement).
- Cracked case: Tape it shut or buy a new remote.
If a remote is beyond repair, erase it from the opener’s memory for security.
Remote Reset And Home Security
Resetting your garage door remote is not just about convenience. It is a key part of home security. Lost or stolen remotes can be used to break into your garage—and even your home. Always reset the opener after:
- Moving into a new house
- Losing a remote
- Letting go of a housekeeper or tenant who had access
This simple step can block unwanted entry.
Table: Reset Steps By Opener Brand
Here’s a quick brand reference for most common openers:
| Brand | Reset Method | Notes |
|---|---|---|
| Chamberlain/LiftMaster | Hold Learn button 6-10 sec | Light color shows system type |
| Genie | Hold Learn/Program button | Press remote button 3x to sync |
| Overhead Door | Press Learn Code button | May need multiple presses |
| Linear | Press Learn, then remote | Simple process |
| Wayne Dalton | Dip switches (old), Learn button (new) | Check model for method |
Extra Tips For A Smooth Reset
- Label your remotes: Write numbers or names on each remote so you know which is which.
- Keep a backup remote: Store one in a safe place in case you lose your daily remote.
- Check the opener’s power: If the light on the opener is off, check for tripped breakers or unplugged cords.
- Use surge protectors: Power surges can damage the opener’s memory.
Many people do not realize that power outages or surges can cause remotes to unpair. Using a surge protector can save you a future headache.
When To Call A Professional
If you try all these steps and the remote still does not work, it may be time to call a garage door technician. Common reasons include:
- Wiring problems
- Circuit board failure
- Very old opener (parts unavailable)
- Physical damage to the opener
A professional can diagnose and repair complex problems. The cost is usually $75–$200, depending on your location.
Staying Up To Date
Garage door technology changes fast. Consider checking for software updates if you have a smart opener. Manufacturers sometimes release security patches or new features. Visit the official brand website for the latest info, or check reliable resources like Wikipedia.
Frequently Asked Questions
What Should I Do If My Garage Door Remote Stops Working Suddenly?
First, check the remote’s batteries and replace them if needed. If it still does not work, try reprogramming the remote with your opener using the Learn button. Also, check for signal interference from new electronics in your garage. If the problem continues, the remote or the opener’s receiver may need repair.
How Do I Know If My Opener Uses A Rolling Code Or Fixed Code Remote?
Look at the opener’s model number and the year it was made. Most openers after 1995 use rolling codes. If your remote or opener has dip switches, it is a fixed code system. Rolling code systems are more secure and harder to hack.
Is It Safe To Reset My Garage Door Remote Myself?
Yes, resetting is safe for most homeowners if you follow the steps carefully and keep the area clear. Be sure to use a steady ladder and unplug the opener if required. If you feel unsure, ask a friend to help or contact a professional.
Can I Add More Than One Remote After A Reset?
Absolutely! After a full reset, you can program several remotes. Just press the Learn button once for each new remote and press the remote button within 30 seconds. Be aware of your opener’s remote memory limit (usually 5–8 remotes).
What If I Lost My Only Remote And Can’t Get Into The Garage?
If your garage has a keypad, try entering your code to open the door. If not, you may need to use the manual release lever inside the garage (if you can access it another way). As a last resort, call a garage door technician to help you regain entry and reset the system.
Resetting your garage door remote might seem small, but it is vital for home security and daily convenience. With the right steps and a bit of patience, you can handle most reset problems yourself. Remember, keeping your opener’s memory clean and up-to-date protects your family and your belongings. If you ever feel stuck, do not hesitate to get expert help—your peace of mind is worth it.


