Now Reading: How to Reset Keypad on Chamberlain Garage Door Easily
- 01
How to Reset Keypad on Chamberlain Garage Door Easily
Resetting the keypad on your Chamberlain garage door opener can seem confusing, especially if it stops working or you forget your code. Many homeowners face this issue at least once, and it’s a common reason for service calls. But the good news is, you can reset the keypad yourself with a little guidance. This article explains every step, from understanding your keypad’s model to troubleshooting after a reset. Whether you’re dealing with an old keypad or setting up a new one, you’ll find all the answers here.
Garage security is important, and your keypad is a key part of that. If your code is old, known by others, or you bought a house with a used system, you should reset your keypad immediately. The process can help prevent unwanted access and keep your belongings safe.
For most people, the hardest part is figuring out the right steps for their specific Chamberlain model. That’s why this guide covers not just the basics, but also advanced tips, common problems, and what to do when things don’t work as expected.
Let’s dive into everything you need to know about resetting the keypad on a Chamberlain garage door opener.
Understanding Chamberlain Garage Door Keypads
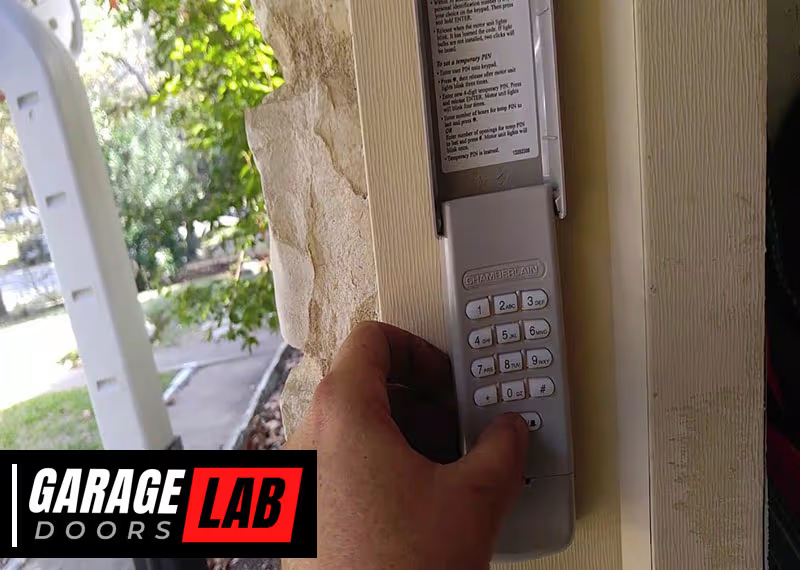
Before you reset, it’s important to know what kind of keypad you have. Chamberlain offers several models with different features. Most are wireless and mount outside the garage. They let you open the door by entering a code, so you don’t need to carry a remote.
Some keypads use a Learn button on the opener, while older ones may have different reset steps. Features like backlighting, one-touch close, or temporary codes can also affect the process. Knowing your keypad’s model helps you find the right instructions and avoid mistakes.
Main Types Of Chamberlain Keypads
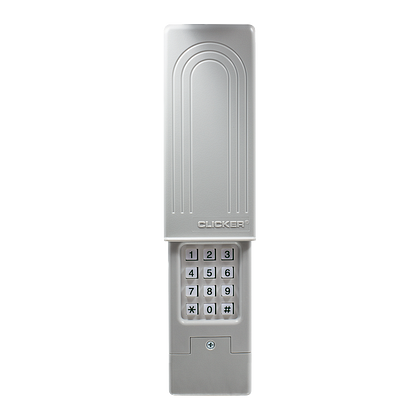
- Wireless Keypad (e.g., 940EV, 940ESTD, 940D, 940CB)
- Smart Keypad (integrated with MyQ technology)
- Wired Keypads (rare for Chamberlain, but some older systems have them)
If you’re not sure about your keypad model, check the back of the device or inside the battery cover. The model number is usually printed there.
Why Reset Your Chamberlain Keypad?
Resetting your keypad isn’t just for when you forget your code. Here are some common reasons:
- Security: Someone else knows your code, or you’ve moved into a new home.
- Malfunction: The keypad stops working or responds slowly.
- New Setup: You want to change the code for convenience.
- Lost Code: You forgot the current code and can’t access the garage.
Resetting is a simple but powerful way to restore control and protect your property.
Tools And Preparation
Before starting, gather these items:
- A ladder (if your garage door opener is ceiling-mounted)
- Flashlight (for dark garages)
- Small screwdriver (for some models)
- Your garage door opener manual (optional, but helpful)
- Fresh batteries (if your keypad is unresponsive)
Safety comes first. Make sure the ladder is stable and the garage is well-lit. If your opener has power, unplug it only if the manual suggests. Most keypads can be reset without cutting power.
Step-by-step Guide: How To Reset Keypad On Chamberlain Garage Door
The process may differ depending on your keypad’s model. This section breaks down the general method, with details for the most common Chamberlain keypads.
1. Locate The Learn Button On Your Opener
Almost all modern Chamberlain openers have a Learn button. This is a small button on the motor unit, usually colored purple, yellow, red, or orange.
- Look on the back or side of the opener unit, near the antenna wire.
- The button may be under a light cover—slide or pop it open if needed.
Tip: The color can tell you about the opener’s age and compatible keypads.
Typical Learn Button Colors
| Button Color | Opener Age | Notes |
|---|---|---|
| Purple | 2011–present | Security+ 2.0, most common today |
| Yellow | 2017–present | Security+ 2.0, advanced features |
| Red/Orange | 1997–2011 | Security+, older systems |
| Green | 1993–1997 | Very old, limited compatibility |
2. Clear Old Keypad Codes (factory Reset)
This step removes all previous codes from the opener’s memory. It’s especially important if you just bought your house or want to be sure nobody else can use an old code.
- Press and hold the Learn button. After about 6–10 seconds, the indicator light will turn off. This means all remotes and keypads have been erased.
- Release the button. The opener is now reset.
Warning: All remote controls and wireless keypads will be erased. You’ll need to reprogram them after this step.
3. Set A New Keypad Code
Now, create a new access code for your keypad. The instructions vary a bit by keypad model. Here’s the method for the most common Chamberlain wireless keypads.
For Most Chamberlain Wireless Keypads (940ev, 940estd, Etc.)
- Press the Learn button on the garage door opener. The indicator light will glow steady for 30 seconds.
- Go to your keypad. Within 30 seconds, enter your desired 4-digit PIN.
- Press and hold the ENTER button on the keypad until the opener light blinks or you hear two clicks. This means the code is set.
- Test the keypad. Wait a few seconds, then enter the PIN and press ENTER. The door should open or close.
Non-obvious insight: If you don’t complete the programming within 30 seconds, the opener exits programming mode. Repeat from step 1 if needed.
For Smart Keypads With Myq
Some newer keypads connect to your smartphone via the MyQ app. Follow the app’s instructions, which may include scanning a QR code or confirming the device wirelessly. The reset process is often similar, but you may need to disconnect and reconnect in the app if issues arise.
4. Test The Keypad
After resetting, always test the keypad several times:
- Try the code at different times of day.
- Test in both daylight and at night (some keypads have backlight issues).
- Check from different distances to see if the signal is strong.
If the door doesn’t respond, check the batteries and repeat the programming steps.
5. Reprogram Other Devices
Remember, a full reset erases all remotes and keypads. If you have car remotes, extra keypads, or smart home connections, reprogram them using the same Learn button process.
Pro tip: Program the most-used device first. If you have trouble, it’s easier to troubleshoot one at a time.
Special Cases: Old Or Unique Keypad Models
Some Chamberlain keypads and openers use different methods, especially older models or those with wired connections.
For Keypads Without A Learn Button
A few older Chamberlain keypads let you reset the code directly on the keypad:
- Open the keypad cover.
- Press and hold the and # keys together until the lights stop blinking.
- Enter a new 4-digit PIN.
- Press ENTER.
Check your manual for exact steps, as these models are less common.
For Wired Keypads
If your keypad is wired into the wall, resetting often means disconnecting power to the opener, reconnecting, and pressing a reset button on the keypad. This is rare for Chamberlain, but if you have a wired system, consult your specific manual.
For Keypads That Still Don’t Work
If the keypad remains unresponsive:
- Replace the batteries. Weak batteries are a common cause of failure.
- Check for physical damage. Water, insects, or age can ruin a keypad.
- Reset at the opener again. Sometimes the process takes several tries.
- Contact Chamberlain support. There may be a hardware fault or compatibility issue.
Troubleshooting: Common Problems After Reset
Resetting should fix most problems, but sometimes the keypad still won’t work. Here’s how to fix the most common issues.
Keypad Not Responding
- Battery issue: Replace the battery and try again.
- Keypad age: Most last 5–7 years. If yours is older, consider replacing it.
- Poor connection: Clean the contacts if you see corrosion.
Door Opens, But Not Every Time
- Weak signal: Ensure the keypad is mounted properly and not blocked by metal or brick.
- Interference: Other wireless devices may cause problems. Try changing the code to reduce issues.
Keypad Flashes Or Beeps
- Incorrect code: Wait a minute and try again.
- Keypad lockout: Some models lock after too many wrong tries. Wait several minutes before retrying.
Can’t Reset—learn Button Not Working
- Power cycle the opener: Unplug for 30 seconds and try again.
- Check the manual: Some openers require a double-press or different timing.
How To Set A Temporary Code
Chamberlain keypads let you create a temporary code for guests, workers, or deliveries. This code works for a limited time or number of uses.
- Enter your main PIN and press .
- Enter the temporary code and press #.
- Specify the number of times (e.g., 2 for two uses) and press ENTER.
The code will expire after use or after 24 hours.
Insight: Many people forget to delete temporary codes. They expire automatically, but it’s smart to check your manual for your model’s limits.
When Should You Replace The Keypad?
Resetting won’t fix every problem. Here are signs you need a new keypad:
- Buttons stick or don’t work
- The case is cracked or water-damaged
- The backlight is dead and you can’t see at night
- The code resets itself often
On average, keypads last about 5–8 years. Upgrading can add features like fingerprint entry, phone control, or better weather resistance.

Key Features To Look For In A Replacement Keypad
If you need a new keypad, consider these factors:
| Feature | Why It Matters | Notes |
|---|---|---|
| Backlit keys | Easier use at night | Safer access after dark |
| Weatherproof case | Longer lifespan | Resists rain, sun, snow |
| Temporary codes | Guest access | Control who enters and when |
| Security+ 2.0 compatibility | Better security | Works with most new openers |
| MyQ integration | Smartphone control | Works with Chamberlain app |
Don’t buy a keypad unless you know it matches your opener’s Security+ system (1.0, 2.0, or newer). Check your owner’s manual or the Chamberlain website for compatibility.
Maintenance Tips For Long-lasting Keypad Performance
A well-maintained keypad will last longer and work more reliably. Here’s how to keep yours in top shape:
- Replace batteries every year, even if it seems fine.
- Clean the keypad gently with a dry cloth. Avoid water or cleaners.
- Check for insects—spiders love to nest inside, which can cause malfunctions.
- Inspect the mounting—make sure it’s tight and not exposed to rain.
- Update codes regularly for better security. Don’t use easy-to-guess numbers like 1234 or your address.
Extra tip: If your keypad is exposed to direct sun, mount a small cover above it. UV rays can damage the plastic and electronics over time.
Security Risks: What To Watch Out For
While a keypad is convenient, it can be a weak spot if not managed well.
- Don’t share your code with anyone you don’t trust.
- Change codes after guests or workers leave.
- Watch for “shoulder surfing”—someone watching you enter your code.
- Check for tampering—scratches, loose mounts, or keypad covers that look out of place.
Insight: Some burglars use code-guessing devices, especially on older openers. If your opener is over 15 years old, consider an upgrade to a model with rolling code technology.
When To Call A Professional
Resetting is usually a DIY job, but sometimes you need expert help:
- If the keypad won’t pair, even after several tries
- If there’s wiring damage or the opener itself malfunctions
- If you see sparks or smell burning—disconnect power and call for service
- If you’re not comfortable on a ladder
Professional service can save you time and prevent bigger problems.
Real-world Example: Resetting A Chamberlain 940ev Keypad
Let’s walk through a typical reset for the popular 940EV keypad:
- Locate the Learn button (purple) on your opener.
- Press and release the Learn button. The light turns on for 30 seconds.
- On the keypad, enter your new 4-digit code.
- Press and hold ENTER until the opener light blinks.
- Test the code. The door should open.
If it doesn’t work, double-check the steps and try again. Many users miss the 30-second window or don’t hold ENTER long enough.
Comparison: Chamberlain Vs. Other Keypad Brands
How does Chamberlain compare to other brands like LiftMaster or Genie?
| Brand | Keypad Reset Process | Compatibility | Security Features |
|---|---|---|---|
| Chamberlain | Learn button, PIN entry | Works with most Chamberlain, LiftMaster | Rolling codes, temporary PINs |
| LiftMaster | Similar (same parent company) | Many Chamberlain/LiftMaster openers | Rolling codes, guest PINs |
| Genie | Learn button, sometimes dual-button | Genie only | Rolling codes, limited temporary access |
| Craftsman | Learn button, PIN entry | Older Chamberlain systems | Rolling codes, basic security |
Chamberlain offers strong security and easy resets, but always check compatibility before buying a new keypad.
Common Mistakes To Avoid
When resetting your Chamberlain keypad, watch out for these errors:
- Not holding the Learn button long enough
- Waiting too long to program the keypad (miss the 30-second window)
- Using a weak or repeated code (like 0000, 1111)
- Forgetting to reprogram other remotes
- Ignoring battery issues
- Skipping the test step—always verify the keypad works before closing up
Non-obvious insight: If you have multiple garage doors, you may need to program each one separately, even if they use the same keypad.
Upgrading To A Smart Garage System
If you’re frustrated with keypad problems, consider upgrading to a smart garage door opener. These systems use your phone for access, let you check the door status remotely, and send alerts if someone tries to enter.
Popular options include:
- Chamberlain MyQ Smart Garage Hub
- LiftMaster Wi-Fi Opener
- Genie Aladdin Connect
These work with most newer Chamberlain openers and are a good choice if you want extra security and convenience.
Resources For Further Help
If you need more help, visit the official Chamberlain support site or watch tutorial videos online. Chamberlain offers detailed manuals and troubleshooting guides.
For deep technical details, see the Chamberlain official support page.
Frequently Asked Questions
How Do I Know Which Chamberlain Keypad Model I Have?
Check the back or inside the battery compartment for a sticker with the model number. Common models include 940EV, 940ESTD, and 940D. Knowing your model helps you find the right reset instructions.
Can I Reset The Keypad Without The Original Code?
Yes. The reset uses the Learn button on the opener, not the old PIN. You do not need to know the old code to erase and reprogram the keypad.
Why Does My Keypad Stop Working After Replacing Batteries?
Sometimes, removing the batteries resets the keypad’s memory. You may need to reprogram the code using the Learn button. If it still won’t work, check for corrosion or damaged terminals.
Is It Safe To Share My Keypad Code With Guests?
Only share your main code with trusted people. For others, create a temporary code that expires after a few uses or a set time. Always delete or change codes after the guest’s visit.
What If My Keypad Still Won’t Reset After Following All Steps?
If you’ve tried all reset steps and the keypad doesn’t respond, the keypad may be faulty or too old. Try replacing the batteries, checking for damage, or resetting the opener again. If nothing works, contact Chamberlain support or consider a replacement keypad.
Resetting your Chamberlain garage door keypad is a smart way to keep your home secure and convenient. With the right steps, you can handle most problems yourself. Remember to check your model, follow each instruction carefully, and test before finishing. Take care of your keypad, update your codes regularly, and you’ll enjoy safe, reliable access for years to come.


