Now Reading: Garage Door Sensors Not Working? Top Fixes You Need to Know
- 01
Garage Door Sensors Not Working? Top Fixes You Need to Know
Garage doors are an essential part of most homes. They keep your car and belongings safe, and they also help you enter and exit your home easily. One key feature that keeps your garage door safe is the garage door sensor. When these sensors stop working, your door may not close, or it could even become dangerous for kids and pets. For homeowners, understanding why garage door sensors fail and how to fix them can save time, money, and frustration.
If you’ve ever pressed your garage door remote and nothing happened—or the door reverses halfway down—you’re not alone. Garage door sensor problems are common, but the causes are not always obvious. This article will guide you through everything you need to know about garage door sensors not working. You’ll learn how these sensors work, common symptoms of failure, step-by-step troubleshooting, and smart ways to fix or prevent problems. By the end, you’ll feel confident handling sensor issues yourself, or knowing when to call a professional.
How Garage Door Sensors Work
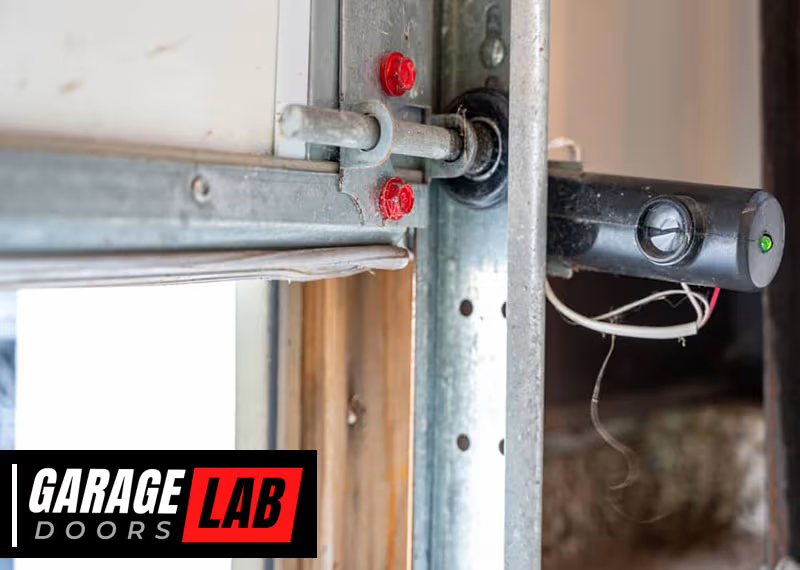
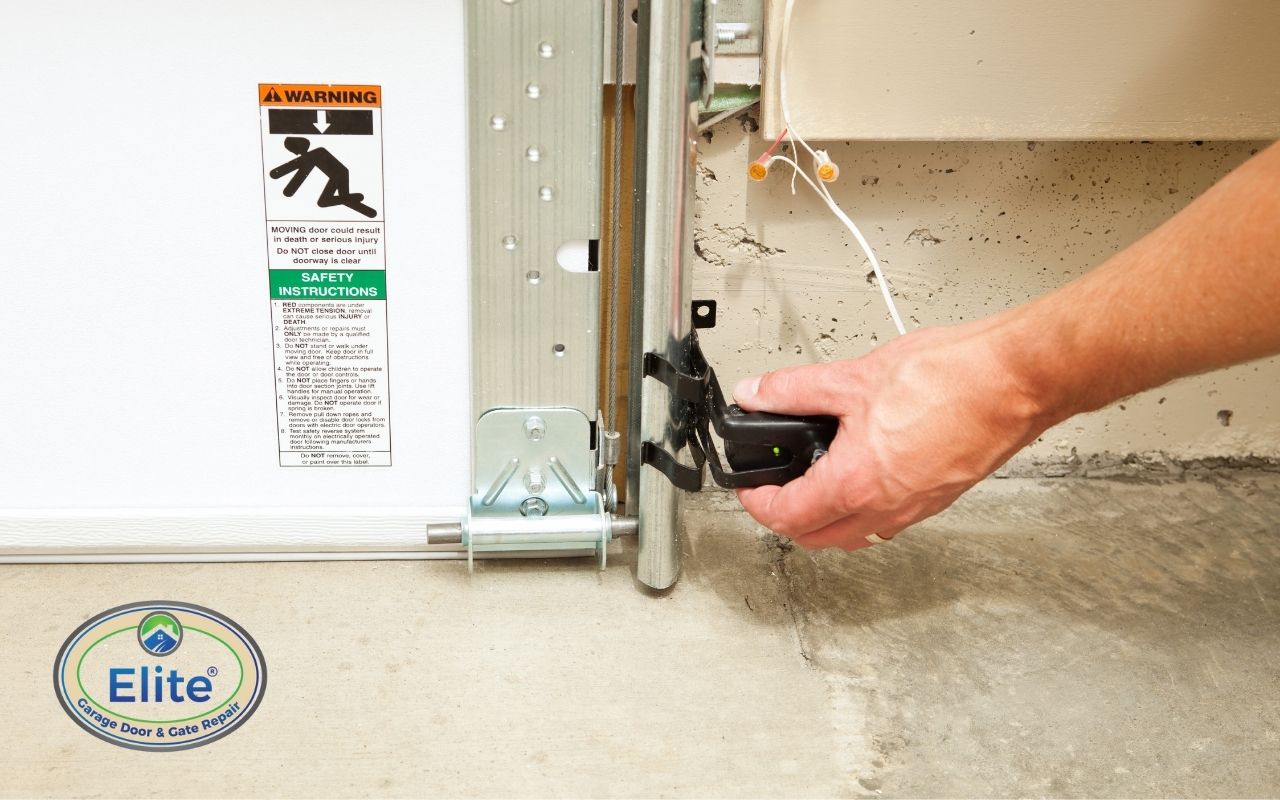
Most modern garage doors have a safety sensor system. These sensors are usually installed near the bottom of the door tracks, about 4 to 6 inches above the ground. They work as a team—one sensor sends an invisible infrared beam to the other. If something breaks this beam, the door will stop closing and reverse to prevent accidents.
The main parts of the sensor system are:
- Emitter sensor (sends the infrared beam)
- Receiver sensor (detects the beam)
- Wires that connect the sensors to the garage door opener
- Indicator lights that show sensor status
If anything interrupts this process, the door won’t close. This prevents injury or damage, but it can also be frustrating when the sensors stop working for other reasons.
Common Symptoms Of Garage Door Sensor Problems
When garage door sensors fail, the signs are usually clear, but not always easy to diagnose. Here are the most common symptoms:
- Garage door reverses before closing
- Garage door won’t close at all (opens fine)
- Indicator lights on sensors are off or blinking
- Remote control works for opening, but not closing
- Wall button works for opening, but not closing
- Garage door only closes when you hold the wall button down
If you notice any of these problems, it’s likely something is wrong with your garage door sensors.
Why Garage Door Sensors Stop Working
Many issues can cause sensors to fail. Some are simple, like dirt or sunlight. Others involve wiring or hardware. Here are the main reasons:
1. Misalignment
If the sensors are not facing each other, the beam can’t connect. Even a small bump or vibration can knock them out of alignment.
2. Dirt And Debris
Dust, cobwebs, or leaves can block the sensor lens. This is one of the most common and easily fixed problems.
3. Sunlight Interference
Strong sunlight can sometimes confuse the sensor, especially if it shines directly into the receiver.
4. Wiring Issues
Loose, frayed, or broken wires can cut off power to the sensors. Rodents sometimes chew the wires, or wires may be damaged by tools.
5. Sensor Damage
Physical damage from bikes, tools, or kids can break the sensors or their mounting brackets.
6. Power Problems
A blown fuse, tripped breaker, or power surge can cut off electricity to the sensors or opener.
7. Moisture And Weather
Rain, snow, or condensation can cause short circuits or corrode sensor parts over time.
8. Old Age Or Faulty Parts
Like any electronic device, sensors can simply wear out after years of use.
Many homeowners overlook the possibility of intermittent failures. Sometimes, sensors work one day and not the next. This can be due to vibrations, loose connections, or temperature changes affecting sensitive components.
Step-by-step Troubleshooting Guide
Before calling a professional, you can try several simple steps to fix sensor issues yourself. Always follow safety precautions—never put your hands near moving parts when the door is operating.
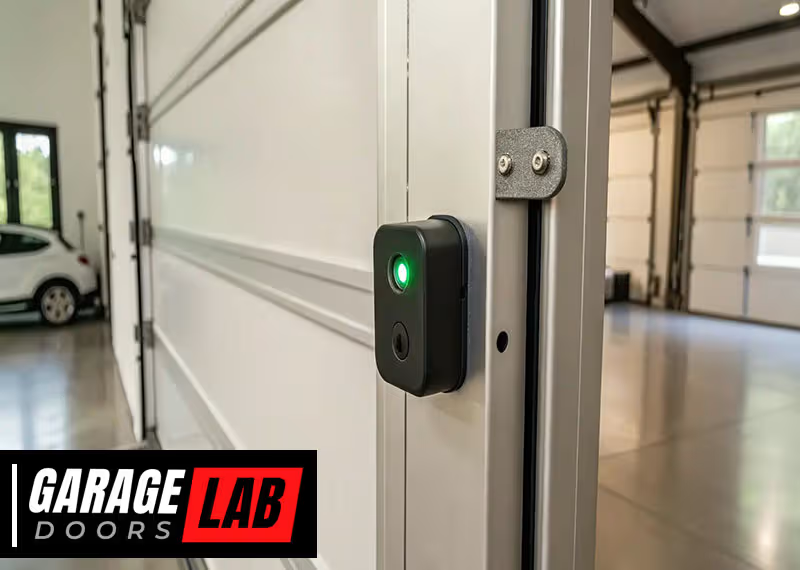
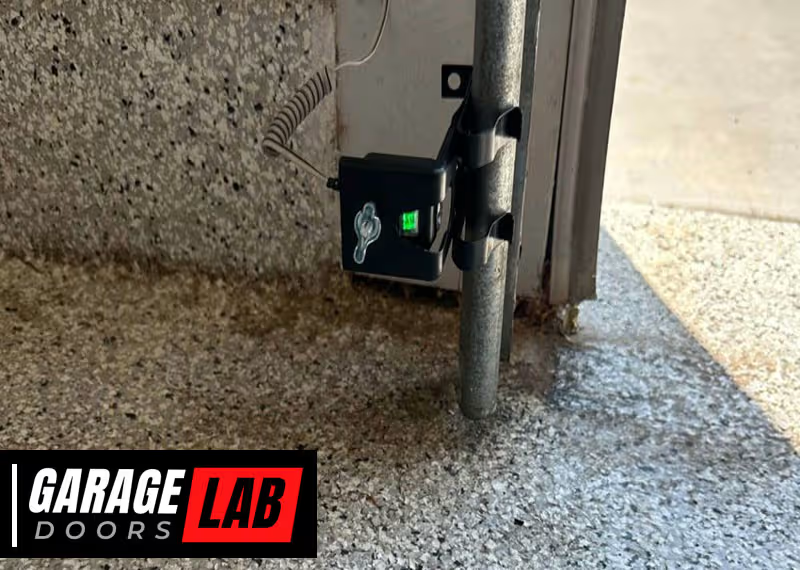
1. Check The Sensor Lights
Look at the small LEDs on each sensor. Most systems use green for “good” and red or yellow for “problem. ” Both lights should be solid, not blinking.
- If one or both lights are off, check the power and wires.
- If one light is blinking, sensors are misaligned.
2. Clean The Sensor Lenses
Gently wipe the lenses with a soft cloth. Do not use harsh chemicals—just water or mild soap.
- Remove any cobwebs, dust, or debris around the sensors.
3. Realign The Sensors
Sensors must face each other directly. Loosen the mounting brackets and move the sensors until both lights are solid.
- A small bubble level or even a ruler can help align them horizontally.
4. Check For Sunlight Interference
If the sun shines directly on the receiver, try shading it with a piece of cardboard. If the problem stops, consider a permanent shade or moving the sensor slightly.
5. Inspect The Wiring
Follow the wires from the sensors to the opener. Look for:
- Loose connections at the sensor or opener
- Frayed, cut, or chewed wires
- Corrosion or rust on terminals
Tighten loose connections. If you find damaged wires, you may need to splice or replace them.
6. Test The Wall Button
Hold down the wall button. Most openers will close the door even if the sensors are not working. This is a safety override feature.
- If the door closes, the problem is likely with the sensors, not the opener.
7. Check Power Supply
Make sure the opener is plugged in and the circuit breaker is on. If other devices in the garage have no power, fix the electrical issue first.
8. Look For Physical Damage
Check both sensors and their brackets for cracks, bent parts, or missing pieces. Replace any broken parts.
9. Test With A Multimeter
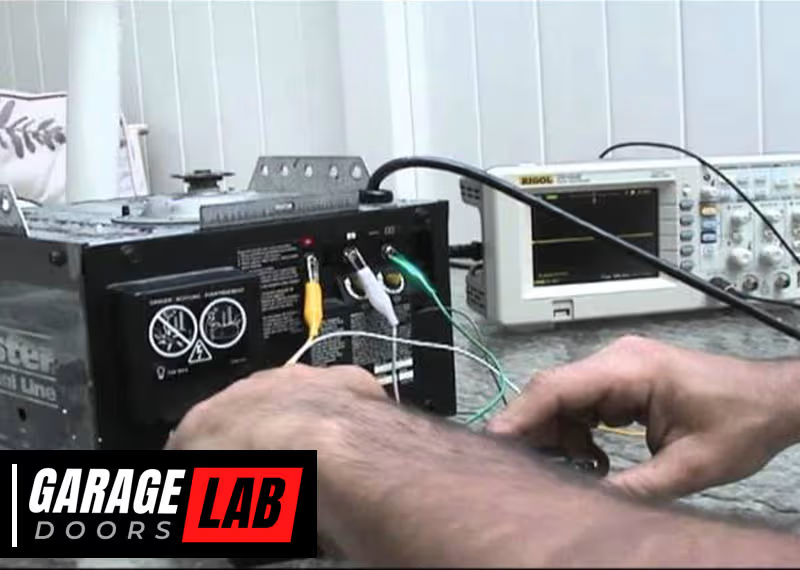
For advanced users: use a multimeter to check for voltage at the sensor terminals. Most systems use low voltage (12–24V). No voltage means a wiring or opener issue.
10. Swap Sensors (if Possible)
If you have a matching spare sensor, swap it with the old one. If the new sensor works, the old one is bad.
Non-obvious insight: Sometimes, the problem is not with the sensors themselves, but with the opener’s logic board. If all else fails, the opener may need service.
Comparing Common Causes And Fixes
To help you understand which problems are most likely and how to fix them, here’s a quick comparison.
| Problem | How Common | DIY Fixable? | Time to Fix |
|---|---|---|---|
| Misalignment | Very common | Yes | 5–10 mins |
| Dirt/Debris | Very common | Yes | 2–5 mins |
| Wiring issue | Common | Maybe | 10–30 mins |
| Sunlight interference | Occasional | Yes | 10–20 mins |
| Sensor damage | Less common | Maybe | 15–60 mins |
| Opener logic board | Rare | No | 1–2 hours |
How To Fix Garage Door Sensor Problems
Now that you know how to troubleshoot, let’s look at how to fix each problem.
Fixing Misalignment
- Loosen the screws holding the sensor brackets (usually with a Phillips screwdriver).
- Move the sensors until both lights are solid.
- Tighten the screws gently—don’t overtighten or you might break the bracket.
- Test the door several times to be sure.
Tip: Sometimes, vibrations from the door opening/closing can slowly knock sensors out of alignment. Check alignment every few months.
Cleaning The Sensors
- Turn off the power to your garage door opener for safety.
- Use a microfiber cloth to gently wipe both sensor lenses.
- Remove any cobwebs, dust, or dirt around the sensors.
- Restore power and test the door.
Non-obvious insight: Even a thin spider web can block enough light to trigger a sensor error.
Repairing Wiring Issues
- Turn off the opener’s power.
- Inspect all wires for damage.
- If wires are loose, reconnect them and tighten the screws.
- For broken wires, use wire connectors or electrical tape to join the ends securely. Replace badly damaged wire sections.
- Turn power back on and check sensor lights.
Example: If a rodent chewed the wires, use protected conduit to prevent future damage.
Blocking Sunlight
- Use a piece of cardboard or plastic to shade the receiver sensor.
- Check if the problem goes away.
- For a permanent fix, try moving the sensor slightly or use a commercial sun shield.
Replacing Broken Sensors
- Buy the correct replacement sensor (check your opener brand and model).
- Disconnect the old sensor’s wires.
- Remove the sensor from the bracket.
- Mount the new sensor and connect the wires.
- Align the sensors and test.
Tip: Replacement sensors are usually sold in pairs. Always replace both for best results.
Fixing Moisture Or Weather Damage
- Dry off wet sensors with a cloth.
- If water gets inside, you may need to replace the sensor.
- Seal the area around the sensors to prevent future moisture problems.
Resetting The Garage Door Opener
Sometimes, a simple reset can fix sensor issues:
- Unplug the opener for 1 minute.
- Plug it back in and test the door.
- Some openers have a “learn” or “reset” button—refer to your manual.
When To Call A Professional
Some problems are beyond the average homeowner’s skills or tools. Call a pro if:
- You can’t get both sensor lights to turn on after basic steps.
- The wiring is complex or inside walls.
- You suspect a problem with the opener’s logic board.
- You are not comfortable working with electricity.
Professional repair is usually fast and can prevent further damage. Labor costs vary by area, but expect $75–$150 for sensor replacement, and more if wiring or opener work is needed.
Preventing Future Sensor Problems
A little maintenance can prevent most sensor issues:
- Clean the sensors every few months.
- Check alignment after storms, earthquakes, or if the door is hit.
- Protect wires from pets, rodents, and garden tools.
- Seal sensors if your garage is damp or exposed to weather.
- Inspect for damage during your regular garage door maintenance.
Non-obvious insight: If your garage is often dusty or full of cobwebs, consider installing a small fan or using a sensor cover to keep debris away.
Different Types Of Garage Door Sensors
While most residential systems use infrared beam sensors, there are several types. Here’s a comparison:
| Sensor Type | Main Use | Pros | Cons |
|---|---|---|---|
| Infrared beam | Safety, closing obstruction detection | Reliable, easy to install | Affected by dirt, alignment, sunlight |
| Pressure sensor | Detects if door hits an object | Works in all light conditions | Can miss small objects or pets |
| Ultrasonic sensor | Advanced garages, commercial use | Very accurate | Expensive, rare in homes |
| Photoelectric sensor | High-end safety systems | Works over long distances | Needs precise installation |
Most US homes use infrared beam sensors. Always check your opener manual for the correct type.
How Garage Door Sensor Failures Affect Safety
Garage door sensors are not just a convenience—they are a safety feature required by law in the US since 1993 for all new garage door openers. They prevent the door from closing on children, pets, or objects. A door without working sensors is a serious hazard.
Data point: According to the Consumer Product Safety Commission, thousands of garage door injuries happen each year, many involving fingers or limbs caught under closing doors. Working sensors prevent most of these accidents.

Common Myths About Garage Door Sensors
Many homeowners believe things about sensors that are not true:
- Myth: You can bypass sensors safely with tape or wire.
- Reality: This is dangerous and illegal in many places. Sensors must be working for safety.
- Myth: Only physical damage can break sensors.
- Reality: Most failures are from dirt, misalignment, or wiring.
- Myth: All sensors are universal.
- Reality: Sensors are often brand-specific. Always match your opener’s brand and model.
- Myth: If the door opens, the sensors are fine.
- Reality: Sensors only affect closing, not opening.
- Myth: You must replace the whole opener if sensors fail.
- Reality: Sensors can be replaced separately in almost all cases.
Understanding these facts can help you avoid costly mistakes.
Cost Of Repairing Or Replacing Garage Door Sensors
If you need to buy new sensors or hire a professional, here’s what to expect.
| Repair/Replacement | DIY Cost | Pro Cost | Time Needed |
|---|---|---|---|
| Clean/realign sensors | $0 | $50–$80 | 5–10 mins |
| Replace one sensor | $20–$40 | $75–$150 | 20–40 mins |
| Replace both sensors | $30–$80 | $100–$200 | 30–60 mins |
| Repair wiring | $10–$30 | $80–$180 | 20–60 mins |
Tip: Always check if your opener is under warranty. Many brands cover sensors for 3–5 years.
Brands And Compatibility
Not all sensors work with all garage door openers. Major brands include:
- Chamberlain / LiftMaster / Craftsman (often cross-compatible)
- Genie
- Linear
- Marantec
- Overhead Door
Always match the brand and model when buying new sensors. Universal sensors exist, but they may not work with every opener.
What To Avoid When Troubleshooting
Many homeowners make mistakes that can make things worse:
- Do not bypass sensors with tape, wire, or by holding down the wall button long-term.
- Do not force the door closed—this can damage the opener or the door.
- Do not ignore blinking lights—they indicate real problems.
- Do not mix and match sensors from different brands unless they are listed as compatible.
The Role Of Regular Maintenance
Garage door sensors are often forgotten until there is a problem. Add them to your regular maintenance checklist:
- Test the door monthly by placing an object (like a roll of paper towels) in the path and closing the door.
- Listen for unusual noises when the door moves.
- Check all safety features—not just the sensors.
Regular attention can catch small problems before they become big repairs.
Where To Find More Information
Many garage door brands offer free troubleshooting guides online. The International Door Association also offers homeowner safety tips. For more technical details, see the official Wikipedia page on garage door openers.
Frequently Asked Questions
Why Does My Garage Door Only Close When I Hold The Wall Button?
This usually means the sensors are not working. Holding the wall button overrides the sensors for safety, but you should fix the real problem as soon as possible.
How Do I Know If My Garage Door Sensors Are Bad?
If the indicator lights on the sensors won’t turn on or stay solid after cleaning and realignment, the sensors may be bad. Try swapping with a known good sensor to confirm.
Can Sunlight Really Cause Garage Door Sensor Problems?
Yes. Direct sunlight can sometimes confuse the receiver sensor and make it think the beam is blocked. Try shading the sensor to test if this is the issue.
Is It Safe To Bypass Garage Door Sensors?
No. Bypassing sensors removes a key safety feature and is against safety codes. Always repair or replace sensors instead.
How Often Should I Check My Garage Door Sensors?
Check every few months, or anytime you notice the door reversing or not closing. Clean and realign as needed for best performance.
Whether you handle repairs yourself or call a professional, understanding garage door sensors not working will keep your home safer and your garage door running smoothly. With a little maintenance and quick fixes, you can avoid bigger problems and keep your family protected.