Now Reading: How to Adjust Liftmaster Garage Door Opener for Smooth Operation
- 01
How to Adjust Liftmaster Garage Door Opener for Smooth Operation
How to Adjust Liftmaster Garage Door Opener for Smooth Operation
A LiftMaster garage door opener can make life easier—until something goes wrong. Maybe your door doesn’t close all the way. Or it slams shut too quickly. Some days, it won’t open smoothly. These issues can be frustrating, but the good news is that most adjustments are simple if you know what you’re doing. This guide will walk you through everything you need to know to adjust your LiftMaster garage door opener, whether you’re a first-time DIYer or have some experience.
You’ll learn what tools you need, how to spot common problems, and how to fix them step by step. You’ll also discover a few tips that even seasoned homeowners sometimes miss. By the end, your garage door should run safely and smoothly, and you’ll feel more confident handling basic repairs in the future.
Understanding Your Liftmaster Garage Door Opener
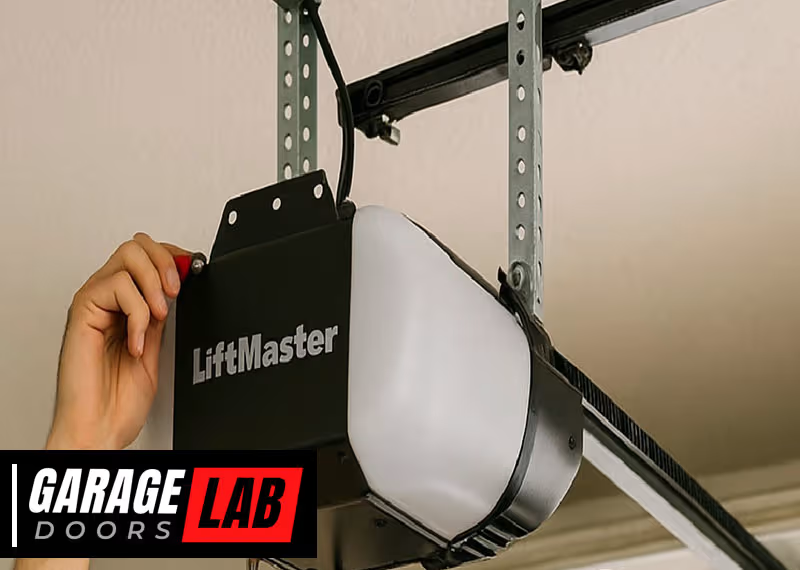
Before making any adjustments, it’s important to understand the basic parts of your LiftMaster opener. Most models use a motorized unit attached to the ceiling, with a rail extending to the door. The opener pulls or pushes the door along this rail. Safety sensors near the floor keep people, pets, and objects safe by reversing the door if something is in the way.
The main adjustable features include:
- Travel limits: Control how far the door opens or closes.
- Force settings: Control how much power the opener uses.
- Safety sensors: Stop the door from closing on objects.
Modern LiftMaster models may also have Wi-Fi, keypads, or battery backup. However, the basic adjustment steps are similar for most units.
Tools And Safety Precautions
Working on a garage door opener is safer than working on the springs or cables, but some caution is still necessary. Here’s what you need to get started:
Tools Required
- Flathead and Phillips screwdrivers
- Stepladder
- Flashlight or work light
- Small adjustable wrench (for chain/belt tension)
- Clean rag
Safety Tips
- Unplug the opener before working on it. Electricity can be dangerous, even in low-voltage systems.
- Never adjust the springs unless you are trained. These are under extreme tension and can cause injury.
- Use a sturdy ladder—never stand on the door or other surfaces.
- Keep children and pets away from the work area.
- Wear safety glasses if you’ll be under the opener or working near moving parts.
A surprising number of people skip unplugging their opener, leading to accidental starts or electrical shock. Another common mistake: using the wrong size screwdriver, which can strip adjustment screws. Take a minute to gather the right tools before starting.
Common Problems That Need Adjustment
Your LiftMaster opener may need adjustment if you notice any of these issues:
- Door won’t fully open or close
- Door reverses before touching the ground
- Door slams shut or won’t close all the way
- Opener hums but door doesn’t move
- Remote works, but wall button does not
Not all problems require an adjustment—some are caused by worn parts or obstruction. But if the door operates, yet doesn’t move as expected, an adjustment usually helps.
How To Adjust Travel Limits
Travel limits control how far your garage door moves in each direction. If your door stops too soon, or keeps running after it’s closed, adjusting the travel limits usually fixes the problem.
Step 1: Locate The Adjustment Screws
LiftMaster openers have two limit screws, usually labeled “Up” and “Down. ” These are found on the side or back of the motor unit. On most models, you’ll find them behind a small plastic panel.
Step 2: Test The Door
Plug the opener back in. Use the wall button to open and close the door. Watch where it stops. If it doesn’t reach the floor, you’ll need to increase the down travel. If it doesn’t open fully, you’ll need to increase the up travel.
Step 3: Adjust The Limits
- Use a flathead screwdriver to turn the “Up” or “Down” screw.
- Turn clockwise to increase travel, counterclockwise to decrease.
- Adjust in small increments—usually a quarter turn at a time.
Step 4: Test And Repeat
After each adjustment, operate the door again. Repeat until the door opens and closes fully, but doesn’t run too far in either direction.
Travel Limits Adjustment Table
Here’s a quick reference to help you remember which way to turn the screws:
| Problem | Which Screw | Which Way to Turn | Expected Result |
|---|---|---|---|
| Door won’t close fully | Down | Clockwise | Increases closing distance |
| Door won’t open fully | Up | Clockwise | Increases opening distance |
| Door runs too far open | Up | Counterclockwise | Reduces opening distance |
| Door runs too far closed | Down | Counterclockwise | Reduces closing distance |
Key tip: If the door reverses when it hits the floor, you may need to adjust both the travel limit and the force (explained next).

How To Adjust Force Settings
Force settings control how much power the opener uses to move the door. Too little force, and the opener will reverse if it feels resistance—even from normal door movement. Too much, and it could damage the door or opener.
Step 1: Find The Force Adjustment Dials
Most LiftMaster openers have two dials, often labeled “Up Force” and “Down Force. ” They are usually next to the travel limit screws.
Step 2: Test Current Force
Open and close the door. Watch for these signs:
- Door stops or reverses before fully open or closed = not enough force.
- Door slams or keeps running after hitting the ground = too much force.
Step 3: Adjust Force
- Increase force: Turn dial clockwise.
- Decrease force: Turn dial counterclockwise.
- Adjust in small increments, about 1/8 turn at a time.
Step 4: Safety Test
After adjusting, test the safety reverse:
- Place a 2×4 piece of wood flat on the floor where the door closes.
- Close the door with the opener. It should touch the wood, then reverse.
- If it does not reverse, decrease the down force.
Force Setting Comparison Table
Use this table to help balance force and safety:
| Door Behavior | Adjustment Needed | Action | Safety Risk? |
|---|---|---|---|
| Stops/reverses mid-way | Increase force | Turn dial clockwise | No |
| Does not reverse on block | Decrease force | Turn dial counterclockwise | Yes |
| Slams hard | Decrease force | Turn dial counterclockwise | Yes |
Non-obvious insight: Many people set the force too high, thinking it will “help” a heavy door. But too much force can mask problems, like a sticking roller or bent track. If your door needs high force to operate, check for mechanical issues.
Adjusting Safety Sensors
Safety sensors are required on all garage door openers made after 1993. They send an invisible beam across the bottom of the door. If anything breaks the beam, the door will not close.
Step 1: Locate The Sensors
Sensors are mounted on the vertical tracks, about 6 inches above the floor, one on each side.
Step 2: Check Alignment
- Both sensors should have a solid (usually green) light.
- If one or both lights are off or blinking, they are out of alignment.
Step 3: Align Sensors
- Loosen the wing nuts holding the sensors.
- Move each sensor until both lights are solid.
- Tighten the nuts carefully.
Step 4: Test Operation
- Close the door with the opener.
- Wave an object (like a broom) through the sensor beam as the door closes.
- The door should reverse immediately.
Pro tip: Sunlight can interfere with sensor operation. If you experience random reversals only at certain times of day, consider shielding the sensors from direct sunlight.
Adjusting Chain Or Belt Tension
A loose chain or belt can cause slapping noises, jerky operation, or even derail the door. Too tight, and you risk damaging the opener.
Step 1: Inspect Tension
- With the door closed, the chain or belt should be about 1/2 inch above the base of the rail at the midpoint.
- It should not sag more than 3/4 inch.
Step 2: Adjust Tension
- Locate the tension nut near the trolley (where the chain or belt connects to the door arm).
- Use a wrench to turn the nut clockwise (tighten) or counterclockwise (loosen).
- Make small adjustments—over-tightening can strip the threads.
Step 3: Test Operation
- Open and close the door.
- Listen for rattling or slapping sounds.
- If the chain/belt is still loose, repeat the adjustment.
Insider tip: Some chain/belt noise is normal. If your opener is still loud after adjustment, consider lubricating the rail with a silicone-based spray (never grease).
Programming The Opener After Adjustment
Most modern LiftMaster openers have a “Learn” button or similar programming process. After adjusting limits and force, you may need to reprogram the travel to make sure remotes and keypads work correctly.
Step 1: Locate The Learn Button
- Usually found on the back or side of the opener unit, often colored yellow, purple, or red.
Step 2: Clear Old Settings (if Needed)
- Press and hold the Learn button for 6 seconds until the light goes out.
Step 3: Reprogram Travel
- Press and release the Learn button. The up arrow indicator will blink.
- Press and hold the up button until the door reaches the desired open position.
- Press the Learn button again. The down arrow blinks.
- Press and hold the down button until the door reaches the closed position.
- Press Learn again to save.
Non-obvious insight: Always reprogram remotes and keypads after major adjustments. Otherwise, you may find remotes stop working or the door behaves unpredictably.

Troubleshooting Persistent Problems
Sometimes, even after careful adjustment, problems continue. Here’s how to deal with common issues:
Door Still Won’t Close Fully
- Check for obstructions in the tracks.
- Clean the safety sensor lenses.
- Lubricate hinges and rollers with garage door lubricant.
Opener Hums But Does Not Move
- Chain or belt may be off track. Inspect and re-seat if necessary.
- Door may be locked—check the manual lock on the inside.
Remotes Or Keypad Not Working
- Replace batteries in remotes and keypads.
- Reprogram as described above.
- Check for radio interference from LED lights or other electronics.
Door Reverses At Same Point Every Time
- Inspect the tracks for dents or bends.
- Check for a misaligned or dirty safety sensor.
When To Call A Professional
If you’ve tried all the adjustments and the door still doesn’t work, the problem may be mechanical. Broken springs, cables, or rollers are dangerous to fix without proper tools and training. In these cases, contact a qualified garage door technician.
Preventive Maintenance For Smooth Operation
A well-maintained opener lasts longer and needs fewer adjustments. Here’s what you can do:
- Lubricate moving parts every 6 months. Use silicone spray on rollers, hinges, and tracks.
- Tighten all bolts and screws. Vibrations can loosen hardware over time.
- Test the safety reversal monthly using a 2×4 block.
- Check balance: With opener disconnected, lift the door by hand. It should stay open about 3 feet off the ground. If not, the springs may need adjustment by a pro.
- Clean sensors regularly with a soft cloth.
- Replace batteries in remotes and keypad annually.
Stat: According to the International Door Association, regular maintenance can extend the life of a garage door opener by 5-7 years.
Comparing Liftmaster Adjustments To Other Brands
While LiftMaster is a leading brand, other openers (like Genie, Chamberlain, or Craftsman) use similar adjustment methods. However, the position and labeling of screws and dials may differ.
Here’s a quick comparison:
| Brand | Limit Adjustment Location | Force Adjustment Type | Sensor Alignment |
|---|---|---|---|
| LiftMaster | On motor unit, side or back | Rotary dials | Manual, with indicator lights |
| Genie | On motor unit, sometimes digital | Rotary dials or buttons | Manual, with LED lights |
| Chamberlain | Same as LiftMaster | Rotary dials | Manual, with indicator lights |
| Craftsman | On motor unit, back | Rotary dials | Manual, with indicator lights |
Tip: Most Chamberlain and Craftsman openers are made by the same parent company as LiftMaster. The process is nearly identical.
Real-world Examples
Let’s consider a real scenario: Emily noticed her garage door would reverse every time it reached the floor. She checked the sensors—both lights were solid. She cleaned the tracks and lubricated the rollers. The problem continued.
Emily followed the steps above and found her down travel limit was set too short. The opener “thought” the door hit an obstruction, so it reversed. After increasing the down travel by a quarter turn and re-testing, the door closed smoothly. She then tested the safety reversal with a block, confirming it worked.
Another common case: Mark’s opener made a loud slapping sound each time it operated. He checked the chain and found it sagged nearly an inch. After tightening the chain, the noise was gone, and the door moved more smoothly.
These examples show that careful adjustment, rather than guessing, solves most everyday garage door problems.
Smart Features And Advanced Adjustments
If you have a newer LiftMaster model with Wi-Fi or MyQ, you can adjust settings using a phone app. This lets you check door status remotely, receive alerts, and set schedules. However, physical adjustments (limits, force, sensors) must still be made at the opener unit.
Some advanced models allow you to set travel limits digitally, often by pressing and holding up/down arrows. Always check your owner’s manual for model-specific steps.
Pro insight: If you experience persistent Wi-Fi or app issues, try resetting your router and updating the MyQ app. Keep firmware updated for best performance.
When To Replace Instead Of Adjust
Sometimes, adjustment is not enough. Consider replacing your opener if:
- It is more than 15 years old (modern units are much safer and quieter).
- You’ve needed frequent repairs in the past year.
- The motor makes grinding or burning smells.
- The opener lacks safety sensors or rolling code technology.
Upgrading to a newer LiftMaster model can add features like battery backup, smartphone control, and quieter operation. For details about smart garage door systems, check out the official LiftMaster website.
Frequently Asked Questions
How Do I Know If My Travel Limits Are Set Correctly?
When set properly, the door should fully open and close without running past the stops. The opener should stop on its own at both ends. If the door reverses at the floor or doesn’t open all the way, adjust the limits.
What Do I Do If My Garage Door Reverses Immediately After Touching The Floor?
This usually means the down travel limit is too short, or the force setting is too low. Try increasing the down travel first. Then test the safety reversal with a 2×4 block.
Why Are My Safety Sensor Lights Blinking?
Blinking lights mean the sensors are not aligned or something is blocking the beam. Clean the lenses, check for obstructions, and realign until both lights are solid.
Can I Adjust The Opener If The Door Is Hard To Lift By Hand?
No. If the door is unbalanced or very heavy, do not adjust the opener. This is a spring problem and should be fixed by a professional. The opener is designed to move a balanced door only.
How Often Should I Perform Maintenance And Adjustment?
Check travel limits, force, and safety sensors every 6–12 months. Test the safety reversal monthly. Lubricate moving parts at least twice a year for best results.
Your LiftMaster garage door opener is designed for years of reliable service, but only if set up and maintained correctly. By learning how to adjust limits, force, sensors, and tension, you’ll keep your system running smoothly and safely. Don’t rush—small, careful adjustments make a big difference. And if you ever feel out of your depth, don’t hesitate to call a pro. A little know-how today saves big headaches tomorrow.


