Now Reading: How to Reprogram Liftmaster Garage Door Remote Easily
- 01
How to Reprogram Liftmaster Garage Door Remote Easily
If your garage door remote has stopped working or you’ve just bought a new one, reprogramming your Liftmaster garage door remote might seem complicated. But it doesn’t have to be. With the right steps, you can have your garage door opening smoothly again in just a few minutes. This guide will walk you through everything you need to know about reprogramming Liftmaster remotes, whether you’re a first-time user or someone who’s done it before but needs a refresher. We’ll cover all the necessary equipment, step-by-step instructions, troubleshooting tips, and even some common mistakes to avoid. By the end, you’ll have the confidence and practical knowledge to handle the process yourself, without needing to call a technician.
Understanding Liftmaster Garage Door Remotes
Before you start, it’s important to know how these remotes work. Liftmaster remotes use radio frequencies to send signals to your garage door opener. Each remote is paired with your opener so that only your remote can open your door. Over time, you might need to reprogram your remote if you change batteries, lose a remote, or add a new one. Liftmaster has several models, but the programming process is similar for most.
Key Components
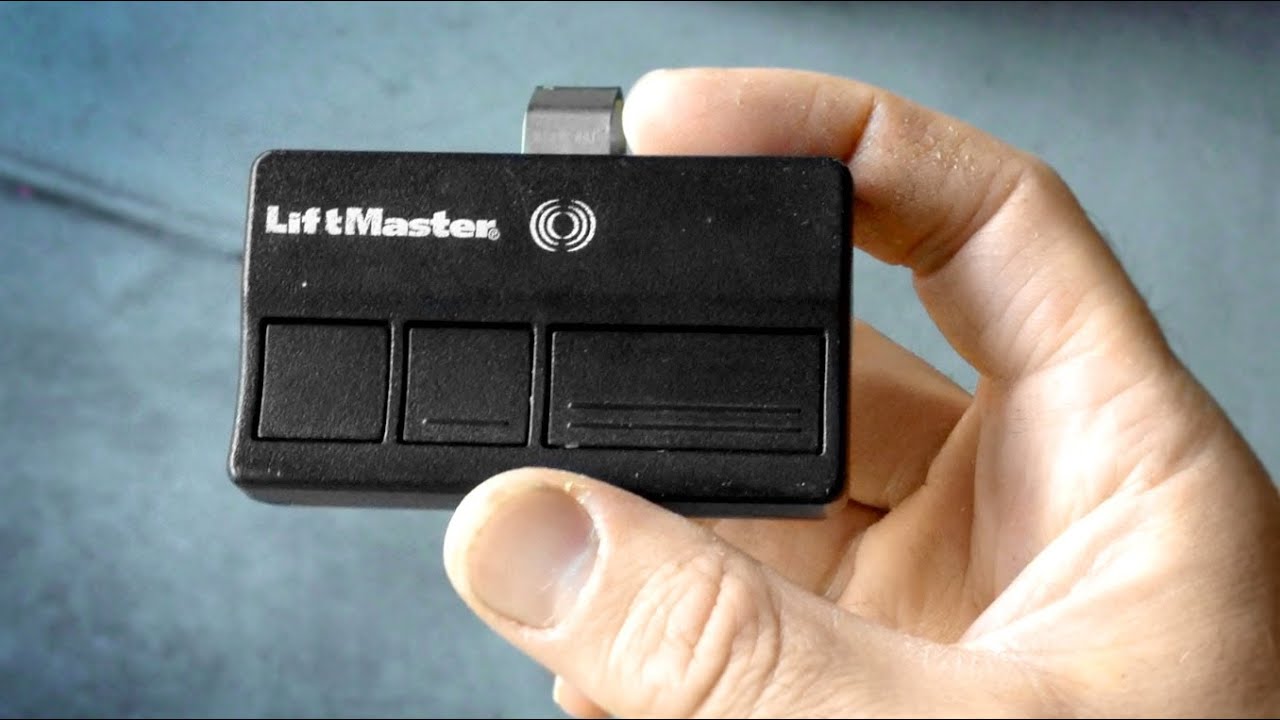
- Remote control: The handheld device you use to open and close the door.
- Garage door opener unit: The motorized box usually mounted on your garage ceiling.
- Learn button: A special button on the opener unit that allows you to pair new remotes.
- Safety sensors: Detect objects in the door’s path and prevent accidents.
Understanding these basics will help you follow the programming process more easily.
When Should You Reprogram Your Remote?
There are several situations when you might need to reprogram your Liftmaster garage door remote:
- Lost or stolen remote: For security, you should erase all codes and reprogram new remotes.
- New remote: Every new remote needs to be paired with your opener.
- Battery change: Sometimes, changing the battery can disrupt the remote’s connection.
- Malfunctioning remote: If the remote stops working, reprogramming can fix the problem.
- Moving to a new home: Resetting remotes ensures previous owners can’t access your garage.
- Adding multiple remotes: If you want more than one remote for your garage door.
Pro tip: If you’re troubleshooting, always check the battery first. Many people overlook this simple fix.
What You Need Before Starting
Preparation is key to avoid frustration. Here’s what you’ll need:
- Your Liftmaster remote(s)
- Access to the garage door opener unit
- A ladder (if the opener is mounted high)
- New batteries (if replacing or unsure of current battery life)
- A flashlight (for dark garages or hard-to-see learn buttons)
Non-obvious insight: Some newer Liftmaster models use a wireless keypad or even smartphone control. This guide covers remotes, but the principles are similar for other devices.
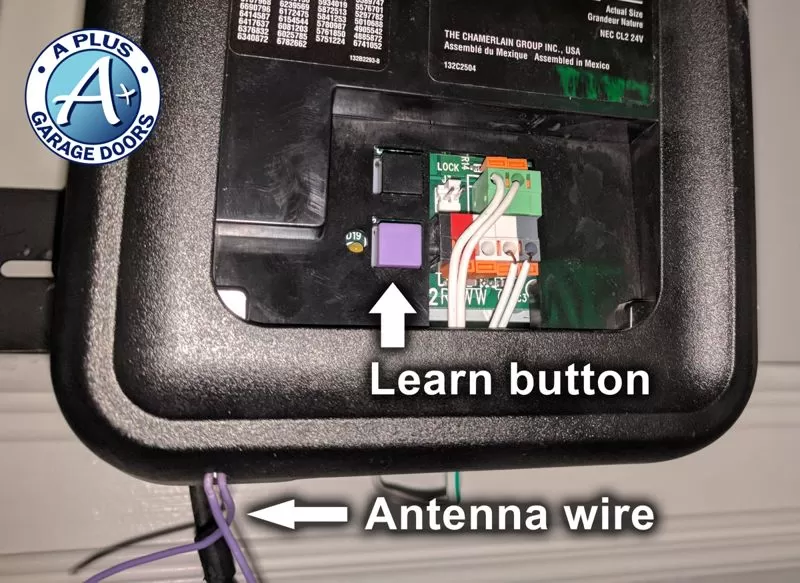
Finding The Learn Button
The learn button is the central part of reprogramming. It’s usually located on the back or side of your garage door opener unit. Here’s how to find it:
- Unplug the opener (if you’re worried about electrical safety).
- Climb the ladder and look at the back or side of the opener.
- Remove the light cover if needed (some models hide the button behind a plastic lens).
- Look for a colored button—it may be yellow, red, purple, or green, depending on the model.
You’ll often see the word “Learn” next to it, or a small LED light nearby.
Pro tip: Take a photo of the learn button and its surroundings. This makes it easier to reference if you need to try again or help someone else.
Step-by-step: How To Reprogram Liftmaster Garage Door Remote
Reprogramming your remote only takes a few steps, but doing them in the right order is important.
1. Prepare The Remote And Opener
Make sure your remote has fresh batteries and that you can reach both the remote and the opener’s learn button easily.
2. Press The Learn Button
- Press and release the learn button on your garage door opener.
- An LED light will turn on or blink, usually for about 30 seconds. This means the opener is ready to learn a new remote.
Non-obvious insight: Do not hold the learn button for more than a few seconds, unless you want to erase all codes (more on this later).
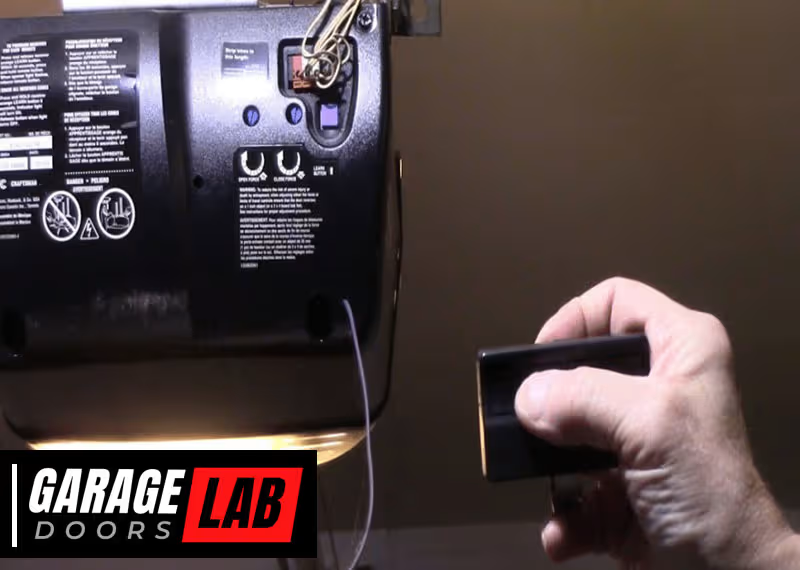
3. Press The Remote Button
- Within 30 seconds of pressing the learn button, press and hold the button on your remote you wish to program.
- Hold the remote close (about 1-2 feet) from the opener.
The opener’s light will flash or you’ll hear a click, indicating successful programming.
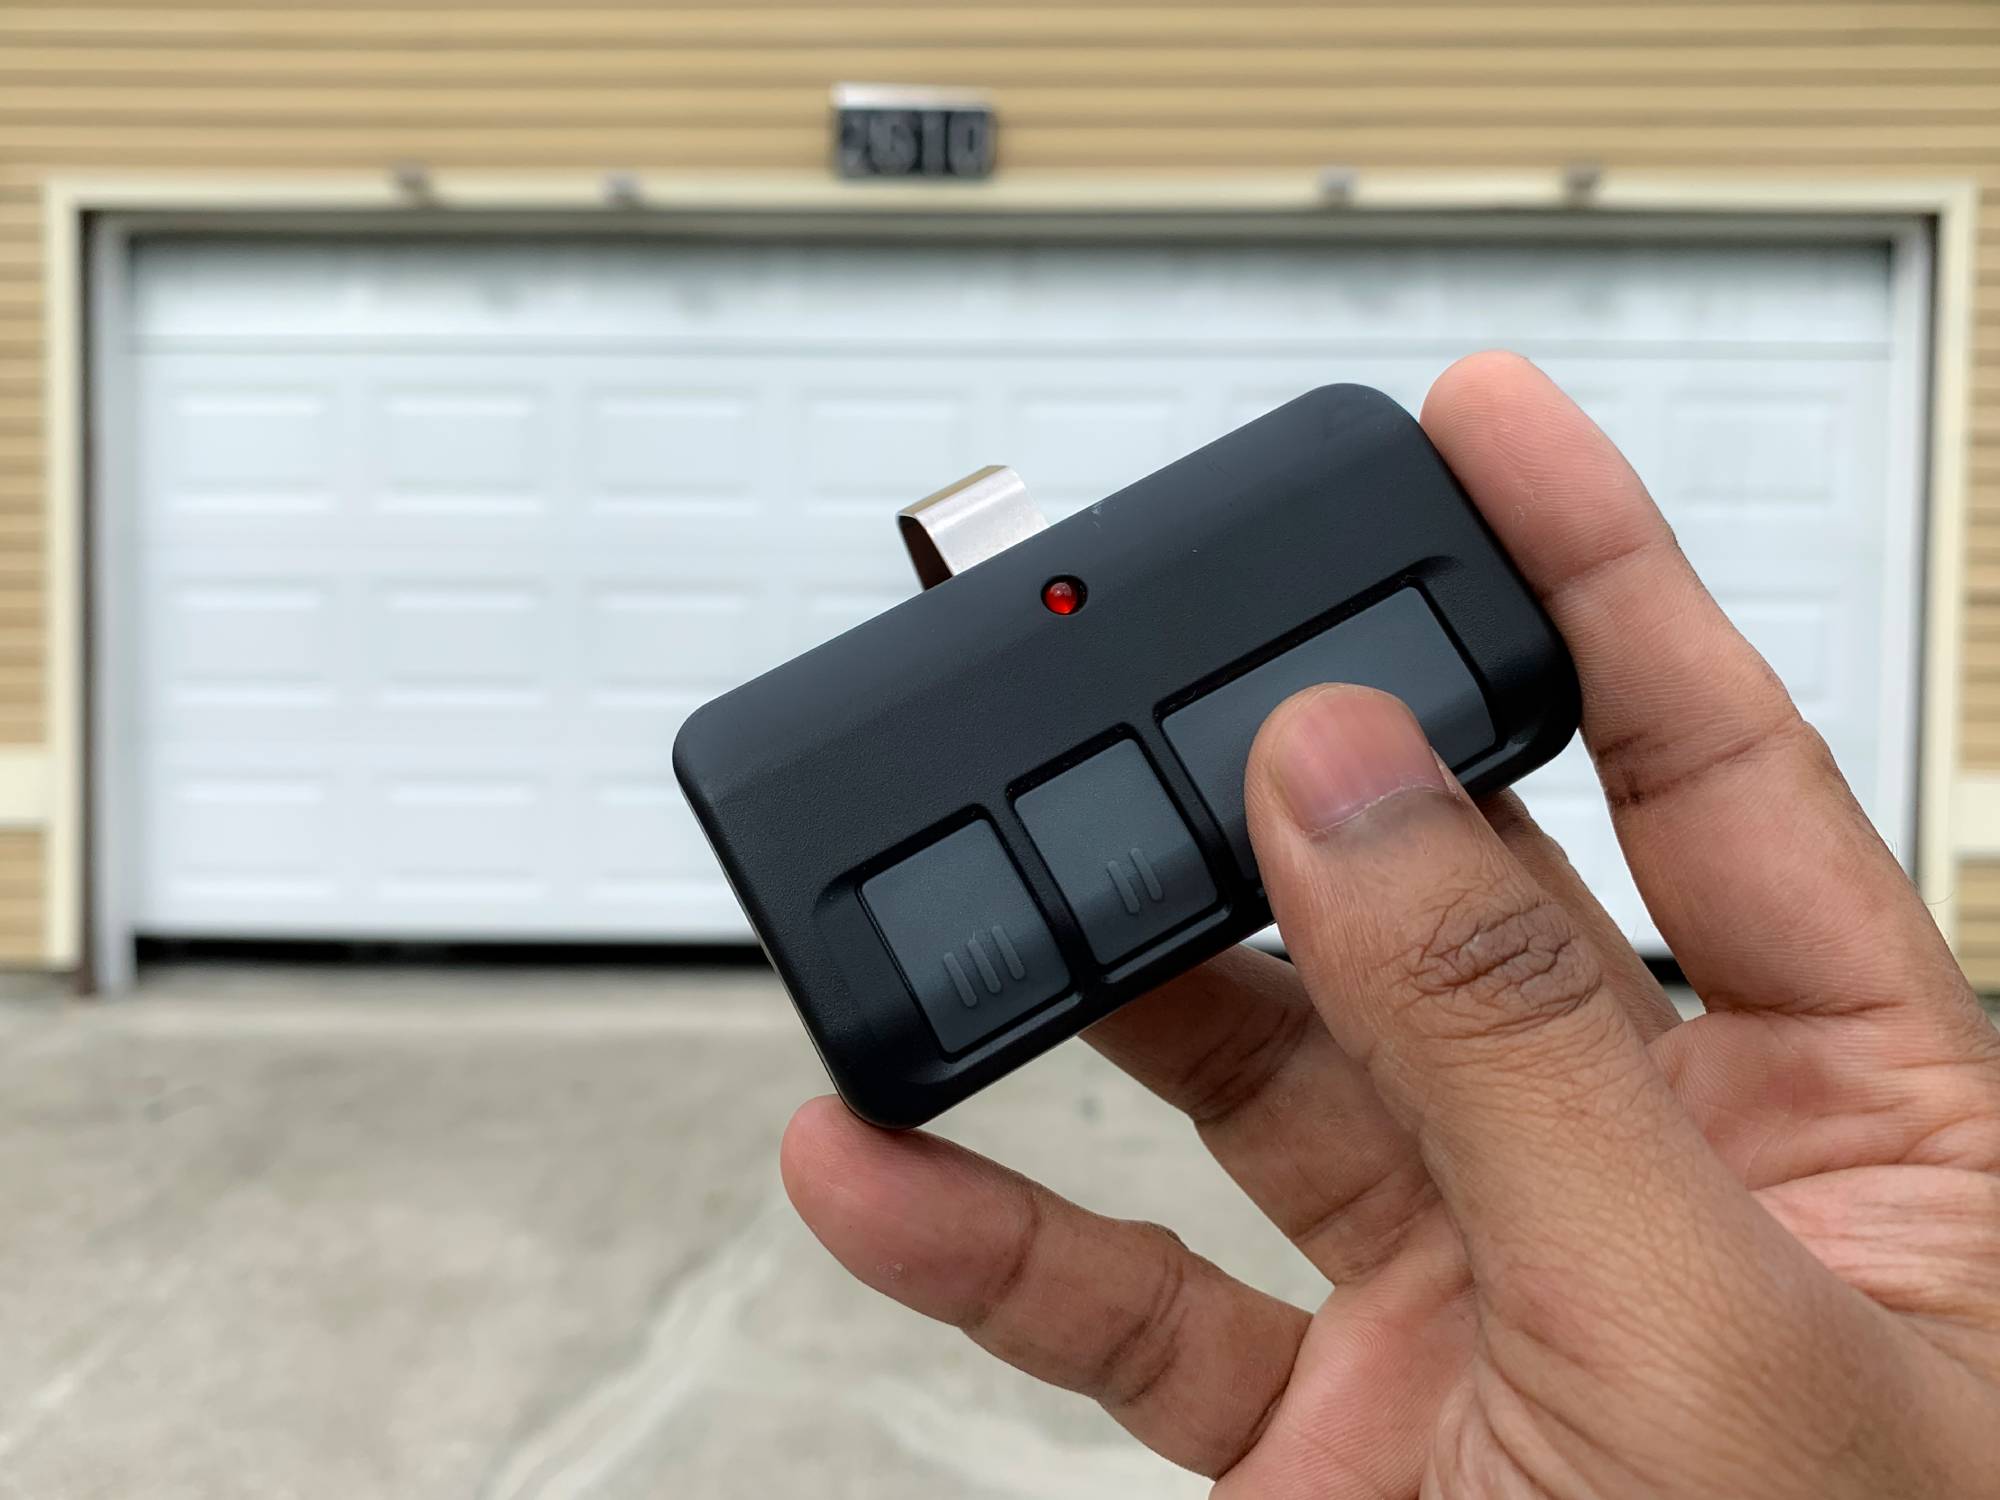
4. Test The Remote
- Step down from the ladder and try the remote from different positions in your garage.
- The door should respond smoothly.
5. Repeat For Additional Remotes
- If you have more remotes, repeat the process for each one.
Pro tip: You can program up to 5-8 remotes on most Liftmaster openers, but check your manual for the exact limit.
Erasing Old Codes (if Needed)
If you lose a remote or move into a new house, erase all old remote codes for safety.
- Hold the learn button for about 6-10 seconds.
- The indicator light will turn off.
- All programmed remotes will be erased.
- Reprogram your remotes as described above.
Important: You’ll need to reprogram every remote after erasing all codes.
Programming A Keypad (optional)
Many Liftmaster systems include a wireless keypad for keyless entry. Here’s how to program it:
- Press and release the learn button on the opener.
- Within 30 seconds, enter your chosen PIN on the keypad, then press Enter.
- The opener light blinks to confirm success.
If you have trouble, check the keypad’s battery or consult your manual for unique steps.
Troubleshooting Common Problems
If your remote isn’t working after you try to program it, don’t panic. Here are some common problems and solutions:
Remote Doesn’t Program
- Check batteries: Weak or old batteries are a common cause.
- Wrong learn button: Some units have multiple buttons; use the main learn button.
- Out of range: Hold the remote closer during programming.
- Time expired: Press the remote within 30 seconds of hitting the learn button.
Remote Works Up Close, Not Far Away
- Signal interference: Electronic devices or metal objects can block signals.
- Weak battery: Replace with a fresh battery.
- Antenna position: Make sure the opener’s antenna is hanging down and not damaged.
Door Opens Or Closes Randomly
- Neighbor’s remote: Rare, but possible with older units. Erase all codes and reprogram.
- Stuck button: Check if a remote button is jammed.
Remote Won’t Work After Power Outage
- Erase and reprogram: Sometimes power surges reset the opener’s memory.
Non-obvious insight: Some remotes have a lock button. If pressed, it can prevent the remote from working until unlocked.
Comparing Liftmaster Remote Models
There are several types of Liftmaster remotes. Here’s a quick comparison of some popular models:
| Model | Buttons | Frequency | Compatibility | Special Features |
|---|---|---|---|---|
| Liftmaster 371LM | 1 | 315 MHz | 2005+ Security+ 2.0 | Simple, reliable |
| Liftmaster 893MAX | 3 | 310, 315, 390 MHz | Most Liftmaster openers | Multi-door control |
| Liftmaster 890MAX | 3 | All major frequencies | Universal | Mini keychain size |
When buying a new remote, check your opener’s compatibility. Not all remotes work with every model.
How To Add A Second Or Third Remote
If you want to give a remote to a family member or keep a spare in your car, you can program multiple remotes to the same opener:
- Follow the same programming steps for each remote.
- Each remote must be programmed separately, but all will work with the opener.
- If you accidentally erase all codes, you’ll need to reprogram all remotes.
Practical tip: Label your remotes with a sticker or marker to remember which one is paired with which door, especially if you have more than one opener.
How To Reprogram After Battery Change
Changing the battery should not erase your remote’s programming, but if the remote stops working, simply reprogram it as described above. Use a new, high-quality battery for best results.
Advanced Tips: Smartphone Control
Some newer Liftmaster models support MyQ technology, which lets you control your garage door from your smartphone. To set this up:
- Download the MyQ app.
- Create an account and follow the in-app instructions to connect your opener.
- You may need your serial number and Wi-Fi information.
This doesn’t replace your remote but adds extra convenience. If you sell your home, remember to remove your account from the opener.
Safety And Security Advice
Keeping your garage secure is just as important as convenience. Here’s how to stay safe:
- Erase old codes if you lose a remote or move into a new house.
- Don’t share your PIN for keypads with anyone you don’t trust.
- Store remotes securely: Don’t leave them in unlocked vehicles.
- Check for updates: Some Liftmaster openers can be updated for better security.
Did you know? Older openers (before 1993) may not have rolling code technology, making them less secure. Consider upgrading if your unit is very old.
How To Identify Your Garage Door Opener Model
Before buying a new remote or trying to program, you need to know your opener’s model. Look for:
- A label on the back or side of the opener unit.
- Model and serial numbers printed on the label.
- Manufacturer’s date, which helps with compatibility.
If you can’t find the label, check your owner’s manual or search the model online.
Pro tip: Take a photo of your opener’s model and serial numbers for future reference.
Comparing Programming For Different Brands
It’s helpful to see how Liftmaster compares with other popular brands:
| Brand | Programming Steps | Frequency Range | Max Remotes |
|---|---|---|---|
| Liftmaster | 3–4 | 310–390 MHz | 5–8 |
| Chamberlain | 3–4 | 310–390 MHz | 5–8 |
| Genie | 4–5 | 315–390 MHz | 7–10 |
| Craftsman | 3–4 | 315–390 MHz | 5–8 |
Liftmaster and Chamberlain programming is almost identical, since they are made by the same company.
What To Do If Reprogramming Fails
If your remote still doesn’t work after several attempts, here are some next steps:
- Double-check compatibility: Not all remotes work with all openers.
- Replace batteries: Even new batteries can sometimes be faulty.
- Inspect the antenna: The small wire hanging from the opener should be straight and not broken.
- Reset the opener: Unplug for 60 seconds, then try again.
- Consult your manual: Some models have unique steps.
- Contact Liftmaster support: They can offer step-by-step help.
If you need more technical details, the official Liftmaster Support site has manuals and troubleshooting guides.
Common Mistakes To Avoid
Even experienced users make mistakes. Here’s what to watch for:
- Holding the learn button too long: This erases all codes, not just one remote.
- Programming during a power surge: Wait for stable power to avoid memory errors.
- Mixing remote models: Not all remotes are universal.
- Forgetting to test: Always test from different spots in your garage.
Practical tip: If you have multiple doors, program one remote at a time to avoid confusion.
How To Keep Your System Working Smoothly
Once your remote is programmed, regular maintenance helps avoid problems:
- Change remote batteries every 1–2 years.
- Keep the opener’s antenna clean and straight.
- Test the safety sensors monthly.
- Lubricate the door’s moving parts every six months.
- Update your system if you notice slow response or weak range.
Replacing A Broken Remote
If your remote is damaged:
- Check your opener’s model number.
- Buy a compatible Liftmaster remote (avoid cheap knock-offs).
- Program it using the steps above.
Pro tip: Keep an extra remote in your home, not just your car, in case you lose one.
Useful Statistics About Liftmaster Remotes
- 70% of U.S. garages use a remote-controlled door.
- Liftmaster is one of the top three garage opener brands in North America.
- The average remote battery lasts 2–3 years.
- Security+ 2.0 technology, used in most modern Liftmaster remotes, changes the code each time for extra safety.
- You can program up to 8 remotes and 1 keypad to most units.
Step-by-step Example: Programming A 893max Remote
Let’s walk through a real example:
- Locate the learn button (yellow) on your opener.
- Press and release the learn button.
- Within 30 seconds, press and hold the button on your 893MAX remote.
- Hold until the opener light blinks.
- Release the button, and test from the ground.
This process takes less than 2 minutes.
How To Program A Universal Remote
If you use a universal remote (not just Liftmaster), the steps are similar:
- Set the universal remote to the correct frequency and brand (check manual).
- Use the learn button on your opener.
- Press the chosen button on your universal remote.
- Wait for confirmation (light blink or click).
- Test and repeat as needed.
Universal remotes are handy for families with different brands of garage doors.
Dealing With Interference And Range Issues
Sometimes your remote works up close but not from the driveway. Causes and fixes include:
- LED light bulbs: These can block signals. Try using a different bulb.
- Wi-Fi routers: Move routers away from the opener.
- Metal doors or siding: Signal can bounce or get blocked; try repositioning the opener’s antenna.
- Low battery: Always use fresh batteries.
Non-obvious insight: Installing a remote antenna extension can boost range if your garage is metal-clad.
How Many Remotes Can One Opener Support?
Most Liftmaster units support up to 8 remotes and 1 keypad. If you reach the limit, you must erase all codes and reprogram from scratch.
Here’s a quick look:
| Opener Model | Max Remotes | Max Keypads |
|---|---|---|
| Security+ (Yellow Button) | 8 | 1 |
| Security+ 2.0 | 8 | 1 |
| Old Security+ (Red/Orange) | 7 | 1 |
If your family needs more remotes, consider using smartphone control (MyQ) for extra users.
Keeping Track Of Your Remotes
Losing track of remotes can be a security risk. Here’s how to stay organized:
- Write down each remote’s serial number and who uses it.
- Remove remotes from sold vehicles or when moving.
- Erase all codes if you lose a remote, then reprogram the ones you keep.
- Store spare remotes in a secure place, not your car’s glove box.
When To Call A Professional
Most people can program a Liftmaster remote themselves, but call a pro if:
- The opener’s learn button is damaged or missing.
- Multiple remotes fail to program.
- The opener itself is malfunctioning.
- You see sparks, smoke, or hear unusual noises from the opener.
Professional help can save time if you’re stuck or worried about safety.
Frequently Asked Questions
How Do I Find My Liftmaster Garage Door Opener’s Learn Button?
Look for a colored button (yellow, red, purple, or green) on the back or side of the opener unit, sometimes behind a light cover. The word “Learn” is often printed next to it.
What Should I Do If My Remote Stops Working After Changing The Battery?
First, double-check the battery is installed correctly and is fresh. If the remote still doesn’t work, simply reprogram it using the learn button process explained above.
Can I Program More Than One Remote To My Liftmaster Opener?
Yes, most Liftmaster openers support up to 8 remotes and 1 keypad. Program each remote one at a time using the same steps.
How Do I Erase All Remotes From My Liftmaster Opener For Security?
Hold the learn button for 6-10 seconds until the indicator light goes off. This erases all codes. You’ll then need to reprogram all remotes you wish to keep.
What If None Of My Remotes Will Program Successfully?
Check for compatibility, try new batteries, inspect the opener’s antenna, and make sure you’re following the steps correctly. If all else fails, contact Liftmaster Support for help.
Reprogramming a Liftmaster garage door remote is a simple process once you know the right steps. With a little preparation and patience, you can do it yourself and ensure your garage stays safe and convenient. If you ever get stuck, don’t hesitate to ask for help or consult the official resources. With this knowledge, you’re ready for any remote control challenge your garage might throw at you.


