Now Reading: How to Set Craftsman Garage Door Remote: Easy Step-by-Step Guide
- 01
How to Set Craftsman Garage Door Remote: Easy Step-by-Step Guide
How to Set Craftsman Garage Door Remote: Easy Step-by-Step Guide
Setting up your Craftsman garage door remote can be simple, but for many homeowners, it is confusing the first time. You want your garage door to open smoothly every time you press the button, whether you are coming home from work or leaving early in the morning. This guide explains everything you need to know, from basic programming to solving common problems. You will find step-by-step instructions, tips for safety, and advice on what to do if your remote does not work. Even if you are not very technical, you can set your Craftsman remote with confidence after reading this article.
Understanding Craftsman Garage Door Remote Systems
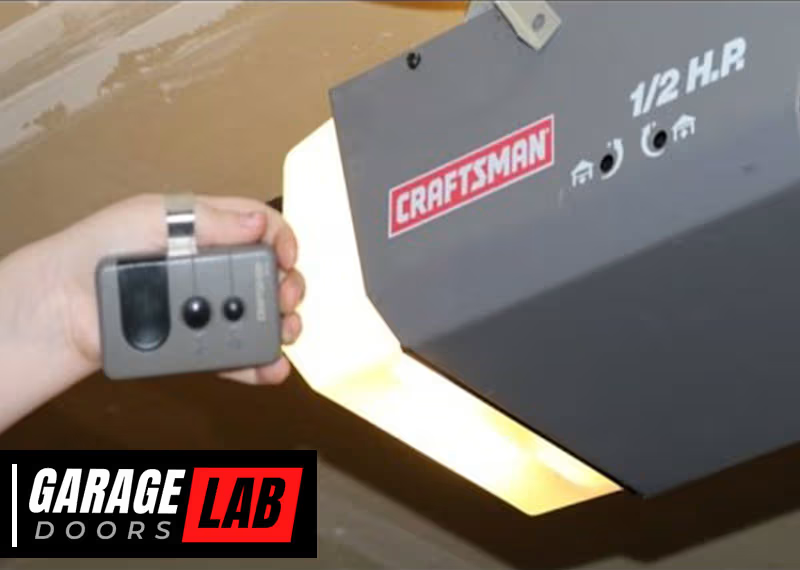
Before you start, it helps to know how these remotes work. Craftsman garage door openers use a wireless signal to communicate between the remote and the opener unit. This signal can be a simple fixed code or a more secure rolling code, depending on the model.
Older Craftsman remotes (made before 1993) often use a series of DIP switches to set the code. Newer models use a Learn button for easier programming and better security. Knowing which system you have will help you follow the right steps.
Many people miss that Craftsman remotes are often made by the same company as Chamberlain and LiftMaster. This means the process for setting the remote is usually similar, and sometimes the remotes are even interchangeable. Always check your opener’s model number and manual for details.
Tools And Preparation
Getting ready saves time and avoids frustration. Here is what you need:
- Your Craftsman garage door remote
- The garage door opener unit (the box hanging from your garage ceiling)
- A sturdy ladder (if your opener is high up)
- The correct battery for your remote (most use a 3V coin cell or 9V battery)
- A small screwdriver (if you need to open the remote)
Check the battery in your remote before starting. A weak battery can cause programming to fail, even if you follow all the steps. If your remote is old, replace the battery first.
If you have multiple remotes or a keypad, plan to program them in one session. Many Craftsman openers can only store a limited number of remotes (usually 3-5).
Identifying Your Craftsman Opener Model
The steps depend on your opener type. Look for a label on the motor unit. Craftsman models often start with 41A, 139, or 200, followed by more numbers. You can also check your user manual or look up the model online.
Most Craftsman openers fall into these categories:
- DIP switch models (pre-1993)
- Learn button models (1993 and later)
- Smart models with MyQ or Wi-Fi (recent years)
The color of the Learn button often tells you the technology used:
- Green or black: Older Security+ or DIP switch
- Red/orange: Security+ 2.0
- Purple or yellow: Newer rolling code
Knowing your model and Learn button color is important because the programming process changes slightly.
Step-by-step: Programming A Craftsman Garage Door Remote
For Remotes With Dip Switches
Some homes still use these older systems. Here is what to do:
- Open your remote: Use a screwdriver to open the battery cover. You will see a row of small switches (usually 8-12).
- Find the opener’s DIP switch panel: This is inside the opener unit. Remove the light cover if needed.
- Match the switches: Set the switches in your remote to exactly match those in the opener. Up = on, Down = off (or 1 and 0).
- Test the remote: Stand clear of the door and press the button. The door should move.
If you have trouble, check for dust or corrosion on the switches. Cleaning them gently with a dry cloth can help.
For Remotes With A Learn Button
Most Craftsman openers since 1993 use a Learn button. The process is much easier:
- Locate the Learn button: It is usually on the back or side of the opener, near the antenna wire. You may need a ladder.
- Press the Learn button: Press and release. A small LED will light up (color depends on model).
- Press the remote button: Within 30 seconds, press and hold the button on your remote you want to program. The opener light will blink, or you will hear a click.
- Release the button: The LED should go off. Your remote is now programmed.
- Test the remote: Press the button from a safe spot. The door should open or close.
If you are programming more than one remote, repeat these steps for each remote, pressing the Learn button each time.
Pro tip: Do not hold the Learn button too long—this can erase all remotes from the opener’s memory.
For Myq And Smart Models
If your Craftsman opener uses Wi-Fi or MyQ, you will need the Craftsman or MyQ app.
- Download the app: Install the Craftsman AssureLink or MyQ app on your smartphone.
- Create an account: Register and log in.
- Follow in-app instructions: Connect your phone to the opener’s Wi-Fi. The app will guide you to press the Learn button and add your remote or phone.
- Name your device: This helps if you have more than one door.
- Test operation: Tap the button in the app or use your programmed remote.
Important: Some Wi-Fi models need a 2.4 GHz network. If you have connection issues, check your router settings.
Programming Keyless Entry Pads
Many Craftsman openers come with a keyless entry pad. These let you open the garage by entering a PIN.
- Enter the programming mode: Press and release the Learn button on the opener.
- Enter your PIN: On the keypad, type your desired 4-digit PIN and press Enter (or the “Learn” key if present).
- Watch for confirmation: The opener light should blink, or you should hear a click.
- Test your PIN: Enter the code again to make sure the door opens.
If you make a mistake, just repeat the process.
Adding, Replacing, Or Removing Remotes
You may want to add a new remote, replace a lost one, or remove one for security.
Adding A New Remote
Just use the Learn button method. Most openers can remember several remotes. But if the memory is full, you must erase all remotes and start over.
Replacing A Lost Remote
If you lose a remote, erase all remotes from the opener to keep your garage secure.
- Hold the Learn button: Press and hold for about 6-10 seconds until the LED goes out.
- Reprogram remotes: Add back only the remotes you have.
Removing A Single Remote
Craftsman openers do not let you delete only one remote. You must clear all and re-add the ones you want.
Extra tip: If you move into a new house, always erase old remotes. You do not know who else might have a remote that works.
Common Problems And Solutions
Even with clear instructions, problems can happen. Here are some issues and how to fix them.
Remote Does Not Work After Programming
- Check the battery: Weak or dead batteries are the most common cause.
- Signal interference: LED bulbs, Wi-Fi routers, or metal objects near the opener can block the signal.
- Out of range: Try standing closer to the opener.
- Memory full: Too many remotes stored. Erase and reprogram.
- Wrong process: Make sure you are using the right steps for your opener type.
Door Opens By Itself
- Code overlap: If your neighbor has a similar system, DIP switch codes can accidentally match. Change the switches.
- Stuck button: Clean your remote and check for dirt.
Remote Only Works Sometimes
- Weak battery: Replace it.
- Antenna issue: Make sure the opener’s antenna wire is hanging down and not damaged.
- Weather: Cold or rain can affect signal. Try from inside the garage.
Keypad Not Working
- Battery: Replace it.
- PIN reset: Reprogram the keypad.
- Worn buttons: If old, the keypad may need replacement.
Opener Light Does Not Blink
Some models confirm programming with a blinking light, but not all. If unsure, listen for a click or try the remote. Check your manual for details.
Safety Considerations When Programming Remotes
Garage doors are heavy and can be dangerous if not used correctly. Here are some tips:
- Keep children away while programming.
- Always stand clear of the door’s path before testing.
- If the door does not move smoothly, stop and check for obstructions.
- If you have an older opener (pre-1993), consider upgrading. Newer models have safety sensors to prevent accidents.
Many people forget to test the safety reversal system after programming. Place a roll of paper towels in the door’s path and close the door. It should reverse immediately when it touches the towels. If not, adjust the sensors or call a professional.
Real-life Example: Programming A Craftsman Remote
Imagine you just bought a used house with a Craftsman opener, model 139. 53985D (a common Security+ model). You want to add a new remote.
- You find the red Learn button on the back of your opener.
- You press and release the button—the LED lights up.
- Within 30 seconds, you press the button on your new remote.
- The garage opener light blinks to confirm.
- You test the remote from your driveway. The door opens smoothly.
If you had trouble, you might check the battery, try again standing closer, or make sure the opener’s antenna wire is not tucked inside the unit.
Comparing Craftsman Remotes: Features And Compatibility
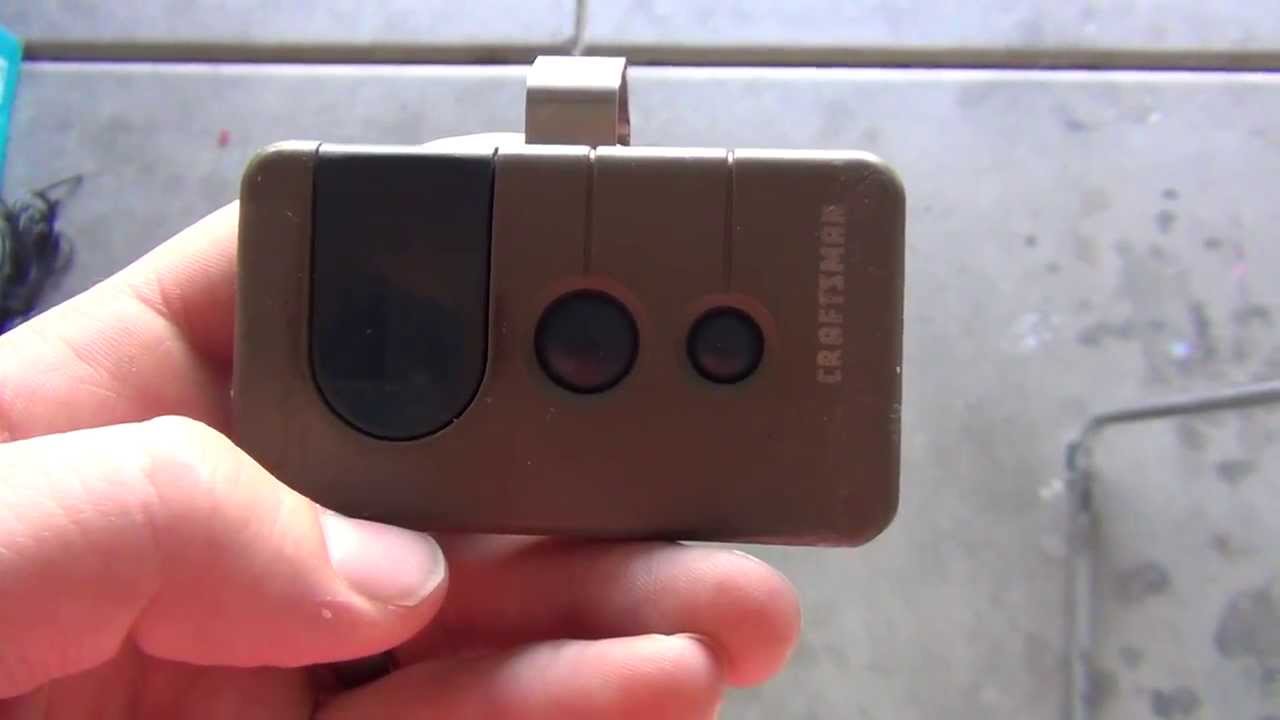
Craftsman remotes come in several styles, from simple one-button designs to multi-button models. Here is a quick comparison of popular models:
| Model | Buttons | Compatibility | Programming Method |
|---|---|---|---|
| 139.53753 | 1 | DIP Switch (pre-1993) | Set switches |
| 139.53681B | 3 | Security+ (Learn button) | Learn button |
| 139.30498 | 3 | Security+ 2.0 (2011+) | Learn button |
| MyQ Smart Control | App-based | Wi-Fi models | App setup |
Non-obvious insight: Many “universal” remotes sold at hardware stores will work with Craftsman openers, but always check compatibility for your model and Learn button color. Not all universal remotes support Security+ 2.0 or MyQ technology.
Table: Learn Button Colors And Their Meaning
For quick reference, here is what the Learn button color usually means for Craftsman openers:
| Learn Button Color | Year Range | Technology | Remote Frequency |
|---|---|---|---|
| Green | 1993-1997 | Security+ | 390 MHz |
| Purple | 1997-2005 | Security+ Rolling Code | 315 MHz |
| Red/Orange | 2005-2011 | Security+ 2.0 | 390 MHz |
| Yellow | 2011-present | Security+ 2.0 Enhanced | 315 MHz |
Tip: Match your new remote to the opener’s Learn button color for the best chance of success.
Upgrading Your Craftsman Remote Or Opener
If your system is very old, you might think about upgrading. Here’s why:
- DIP switch models are not very secure. Anyone with the same code can open your door.
- Newer models have rolling codes, which change every time you press the button.
- Smart openers let you control your door from anywhere with your phone.
You do not always need a new opener. Some companies sell universal receivers that add rolling code or Wi-Fi features to old openers. This can be a cost-effective upgrade.
Maintenance Tips For Reliable Operation
A well-maintained garage door system works better and lasts longer. Here are a few tips:
- Change remote batteries every 1-2 years.
- Keep the opener’s antenna wire clean and hanging straight down.
- Check the safety sensors (the small boxes near the floor) for dust or spider webs.
- Lubricate the door’s moving parts (rollers, hinges) twice a year with garage door lubricant.
- Inspect the door balance: With the opener disconnected, the door should stay halfway open. If not, call a pro.
Most people do not realize that signal problems are often caused by interference from LED light bulbs in the opener or garage. If your remote stops working after you install new bulbs, try changing them to a different brand.
Environmental And Security Concerns
Modern Craftsman remotes are designed to be secure, but you can take extra steps:
- Keep remotes out of sight in your car.
- If you lose a remote, erase all remotes from memory.
- Do not share your PIN or app login with anyone you do not trust.
- For maximum security, choose an opener with Security+ 2.0 or MyQ.
If you care about the environment, recycle old remotes and batteries at a local electronics drop-off. Many stores accept these items for safe disposal.
Table: Common Mistakes And How To Avoid Them
Here are mistakes new users make and how to prevent them:
| Mistake | Why It Happens | How to Avoid |
|---|---|---|
| Programming with a weak battery | Old remotes or new ones out of package too long | Replace battery before starting |
| Holding Learn button too long | Accidentally erases all remotes | Press and release, do not hold |
| Trying to program from far away | Signal does not reach opener | Stand near opener when programming |
| Not checking the Learn button color | Remote may not be compatible | Match remote to opener’s Learn button |
Frequently Asked Questions
What Do I Do If My Craftsman Remote Suddenly Stops Working?
First, replace the battery in your remote. If that does not solve the problem, check the opener’s antenna, make sure you are within range, and look for sources of interference like new LED bulbs. If it still does not work, reprogram the remote using the Learn button.
How Many Remotes Can My Craftsman Opener Remember?
Most Craftsman openers can store 3 to 5 remotes and one keyless entry pad. If you try to add more, the oldest remote may be deleted from memory. If you need more remotes, check your opener’s manual for the exact number.
Can I Use A Universal Remote With My Craftsman Opener?
Yes, but compatibility depends on the opener’s age and technology. Most universal remotes work with Security+ and rolling code models, but may not support Security+ 2.0 or MyQ. Always check the packaging or visit the manufacturer’s website for a compatibility chart.
How Do I Erase All Remotes From My Opener?
Find the Learn button on your opener. Press and hold it for about 6-10 seconds until the LED light goes out. This erases all remotes and keypads. You will need to reprogram any remotes you want to keep.
Where Can I Find My Craftsman Opener’s Manual Or Model Number?
The model number is usually on a label on the motor unit, sometimes under the light cover. Manuals can be found online by searching the model number plus “manual” or by visiting the official Craftsman Support site.
Setting your Craftsman garage door remote is a task you can do yourself with a little patience. By following the steps in this guide, you can enjoy reliable access to your garage and keep your home secure. Always work safely, and remember that good maintenance will keep your system working for years. If you still have trouble, do not hesitate to contact a professional or your local Craftsman dealer for support.


