Now Reading: How to Reprogram Clicker Garage Door Keypad in Minutes
- 01
How to Reprogram Clicker Garage Door Keypad in Minutes
Getting locked out of your garage can be frustrating, especially if the problem is with your keypad. If you use a Clicker garage door keypad, you might need to reprogram it for several reasons—maybe you forgot the code, replaced the opener, or want better security. Understanding how to reprogram your Clicker keypad is not just about pressing a few buttons; it’s about making your garage safer and more convenient. This guide will walk you through every step, with clear instructions, practical advice, and tips from real experience. Even if you’re not tech-savvy, you can follow along and fix your keypad confidently.
Why Reprogram A Clicker Garage Door Keypad?
Most people only think about their garage keypad when it stops working. But reprogramming is important for more than just repairs. Here are some common reasons:
- You forget your code or want to change it for security.
- You install a new garage door opener.
- You move to a new house and inherit an old keypad.
- You notice malfunctions or slow response.
- You suspect someone else knows your code.
Changing your code regularly keeps your garage safe. Unlike regular keys, keypads let you control who enters—so if you share your code with others, remember to update it later.
Another reason people reprogram is to match the keypad with upgraded technology. For example, if you add a new Wi-Fi-enabled opener or integrate with a home automation system, you may need to reset the keypad to work with the latest device.
Also, if you’re renting out your home or just having service people coming in, reprogramming the keypad after their access is a smart move. Many overlook this step, but it’s an easy way to prevent unwanted entry.
Understanding Your Clicker Keypad
Before you start reprogramming, it helps to know what you’re working with. Clicker keypads have several features:
- Wireless control: No need for physical keys.
- Universal compatibility: Works with many brands (Chamberlain, LiftMaster, Genie, etc. ).
- Backlit keys: Useful at night or in low light.
- Multiple codes: Some models let you set temporary codes for guests or workers.
Most Clicker keypads look similar, but small details matter. Look for the model number (usually on the back or inside the battery compartment), as instructions can vary slightly.
Some keypads even have weather-resistant covers or can be mounted at an angle for better visibility. If you have a newer model, you may find features like illuminated number pads that help you see at night or in rain, and a “lock” button for extra security.
Keypad Types
There are two main types:
- Basic Clicker Keypads: Simple, set one code.
- Advanced Clicker Keypads: Allow temporary codes, multiple openers, and extra security.
If you’re unsure about your model, check the manual or visit the manufacturer’s site.
Some advanced models even sync with smart home systems or mobile apps, letting you monitor or change access codes remotely. These features add convenience, but the basic steps of reprogramming remain similar.
If you lose the manual, don’t worry—most instructions are available online, and the programming process usually follows a similar pattern.
Tools And Preparation
You don’t need special tools, but being prepared makes the process smoother. Gather:
- Fresh batteries (AAA or 9V, depending on your model)
- Flathead screwdriver (for opening battery compartment)
- Step ladder (to reach the opener)
- Pen and paper (to note your new code)
- Owner’s manual (optional, for troubleshooting)
Before you begin, make sure the keypad works (lights up) and the batteries are fresh. Weak batteries cause many keypad issues.
You might also want a flashlight if your garage is dimly lit, and a helper to hold the ladder or hand you tools. If your keypad is mounted outside, check the weather—rain and snow can make keypads slippery and harder to program.
Writing down your code before you start saves time. If you’re interrupted during programming, you won’t forget the new code. It’s also helpful to have your garage door opener manual nearby, especially if your opener is older or not a common brand.
Many beginners overlook the importance of checking battery contacts for corrosion—clean them gently with a dry cloth or a cotton swab if needed.
Step-by-step Guide: Reprogramming Your Clicker Keypad
Reprogramming may sound technical, but it’s straightforward if you follow the steps. Here’s how to do it for most Clicker models:
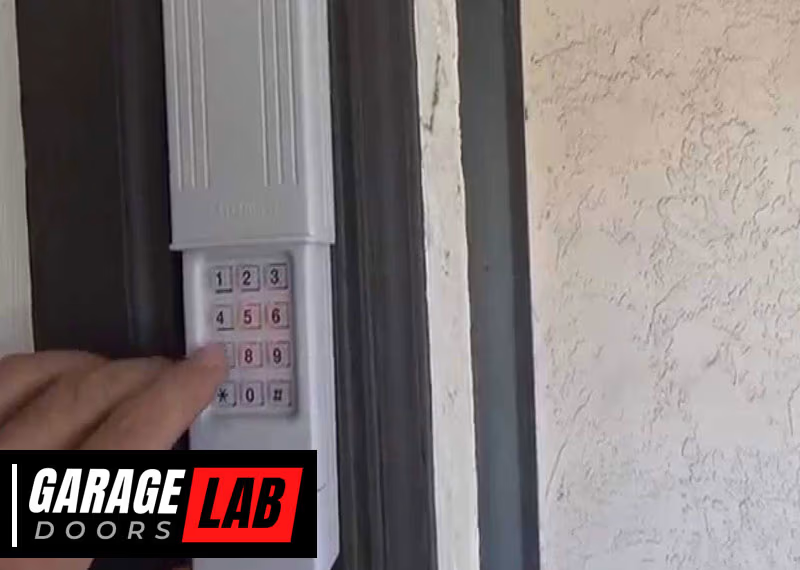
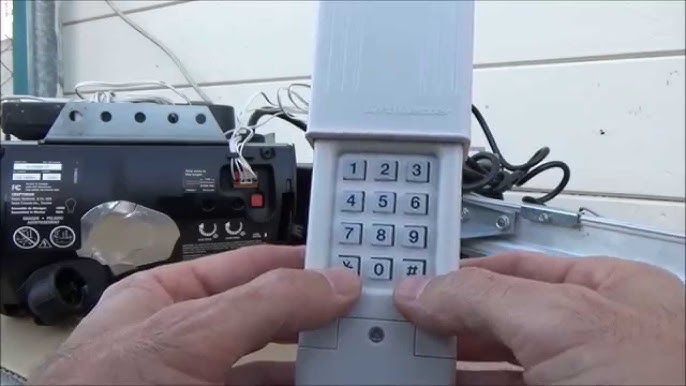
1. Locate The “learn” Button On The Garage Door Opener
The Learn button is usually on the back or side of your opener, near the wiring. It may be colored (yellow, red, purple, or green). If you can’t find it, check your opener’s manual.
The Learn button is sometimes hidden under a light cover or behind a small panel. Gently remove the cover if needed. On some older units, you might find the button labeled “Program” or “Set. ” Don’t confuse this with the “Test” or “Light” buttons.
2. Clear Existing Codes (optional But Recommended)
If you suspect old codes are active, clear them first:
- Press and hold the Learn button for about 10 seconds.
- The opener light will blink or turn off, indicating codes are erased.
This step prevents old codes from working and improves security.
If you have remotes or other keypads, remember that clearing codes will disconnect them. You’ll need to reprogram any remotes after this step. Many people miss this and think their remotes are broken—they’re not; they just need to be re-paired.
3. Enter Programming Mode On The Keypad
- Press and hold the “” and “#” buttons together until the keypad flashes (usually 5–10 seconds).
- Release both buttons.
This resets the keypad and prepares it for a new code.
Wait until the keypad flashes or makes a beep before letting go. If it doesn’t respond, check your battery or try again. On some older keypads, you may need to press a “Learn” or “Program” button instead—check your manual if unsure.
4. Set Your New Code
- Enter your desired 4-digit code (choose something memorable but not obvious).
- Press the “#” button to confirm.
Avoid codes like 1234, 0000, or your birth year. Mix numbers for better security.
A good tip: Don’t use the same code as your house alarm or ATM PIN. If someone learns one, they won’t get access to both. Also, choose numbers that are easy for you to remember but hard for others to guess. Some people use the last four digits of a friend’s phone number or a favorite year mixed with other numbers.
5. Link Keypad To The Opener
- Go back to the opener and press the Learn button once (don’t hold).
- Within 30 seconds, return to the keypad and enter your new code.
- Press the “Enter” button.
The opener light should blink, or you may hear a click—this means the code is accepted.
If you’re working alone, it helps to practice entering the code so you can do it quickly. The 30-second window is strict—if you miss it, just press Learn again.
Some openers require you to enter the code and press “0” instead of “Enter. ” Always check the manual or try both if the first method doesn’t work.
6. Test Your Keypad
Walk outside and enter your new code. The door should open smoothly. If not, repeat the steps and check battery power.
Try the code several times to make sure it works. Test at different times of day—sometimes, temperature changes can affect old keypads. If the door only opens from close range, check for interference from Wi-Fi routers or metal objects.
7. Set Temporary Codes (if Available)
Some Clicker models allow you to set a temporary code for guests or workers:
- Press and hold the “” button until the light flashes.
- Enter a temporary 4-digit code.
- Press “#” and then “Enter.”
Temporary codes usually expire after one use or a set period.
You can also set how many times the temporary code works (for example, five uses) or limit it to certain hours. This is perfect for allowing cleaners, delivery people, or friends to access your garage without giving your main code.
Common Issues And Solutions
Even with clear steps, things can go wrong. Here are frequent problems and how to fix them:
Keypad Not Responding
- Check battery power.
- Clean the keypad (dust or moisture can block buttons).
- Confirm you’re pressing the right buttons.
Sometimes, extreme cold or heat can cause keypads to stop working. If your keypad is outside, try warming it with your hands or a warm cloth (never use open flame). If water gets inside, let it dry fully before trying again.
Code Not Accepted
- Make sure you entered the code during the Learn button’s 30-second window.
- Double-check opener compatibility.
- Repeat steps and reset if needed.
If you have an older opener, make sure the keypad and opener use the same frequency. Some new keypads aren’t compatible with very old openers—this is often missed by first-time users.
Opener Light Doesn’t Blink
- Try a fresh battery.
- Ensure the opener is plugged in and working.
- If your opener has a lock feature, disable it.
Some openers have a “Vacation” or “Lock” switch that blocks remote signals. Make sure this is off. Also, check for power surges or tripped breakers if the opener isn’t responding at all.
Keypad Flashes But Door Doesn’t Open
- Check for interference (nearby electronics can cause problems).
- Move closer to the opener and try again.
- Reprogram both keypad and remote for best results.
Wireless doorbells, baby monitors, or even heavy machinery nearby can cause interference. Try turning off other electronics to test. Sometimes, moving the keypad to a slightly different position solves the issue.
Security Tips For Garage Keypads
Your garage is a main entry point. Improving keypad security is essential:
- Change codes regularly—especially after sharing with guests or workers.
- Use unpredictable codes (avoid birthdays, addresses, or simple sequences).
- Don’t write your code where others can see it.
- If you lose your keypad or remote, erase all codes and reprogram.
- Consider upgrading to smart keypads for added features.
A surprising insight: Many people forget that the garage connects to the house. If your keypad is easy to guess, you risk home security.
For extra safety, install your keypad in a place that’s visible from inside your home but not from the street. Always shield your hand when entering the code if others are nearby.
For more home security advice, websites like SafeWise provide tips on overall garage and home safety.
Advanced Features And Customization
Some Clicker keypads offer extra functions. Here’s how to use them:
Multiple Opener Control
If you have two garage doors, some keypads let you program both:
- Enter programming mode as before.
- Set the first code, link to opener 1.
- Set a second code, link to opener 2.
You can use different codes for each door, or a master code to control both. Make sure you label which code opens which door—this avoids confusion if you have family members or tenants.
Temporary Access
Give workers or guests a temporary code:
- Enter the main code, then “” or “#” depending on your model.
- Set a temporary code.
- Temporary codes expire after use or a set time.
Some models let you set an expiration date or time, which is great for Airbnb hosts or frequent visitors. Always erase temporary codes after use for best security.
Lockout Mode
Some keypads let you lock the keypad after several wrong attempts:
- If someone tries too many wrong codes, the keypad disables for a few minutes.
- This protects against brute-force attacks.
If your keypad is locked out, wait a few minutes and try again. This feature is automatic on most models and helps keep your garage secure.
Data Table: Clicker Keypad Features Comparison
If you’re considering buying or upgrading, here’s how Clicker stacks up against other brands:
| Feature | Clicker | LiftMaster | Genie |
|---|---|---|---|
| Universal Compatibility | Yes | Limited | Yes |
| Temporary Codes | Some models | Most models | Some models |
| Backlit Keys | Yes | Yes | Yes |
| Security Lockout | Yes | Yes | No |
| Multiple Doors | Some models | Some models | Yes |
While Clicker is known for wide compatibility, always double-check with your specific opener model. Some features, like weather resistance and lockout, are only found in newer or premium models.
Real-life Examples: Reprogramming Success
Let’s look at how homeowners solved their keypad issues:
- Tom in Florida: Lost his remote, cleared all codes, set a new code, and added a temporary code for his neighbor while he was away.
- Maria in California: Moved into a new house, erased old codes, programmed the keypad for two garage doors, and improved security by changing codes every month.
- Steve in Texas: Keypad stopped working after a storm. He replaced batteries, reset the keypad, and reprogrammed—door worked perfectly.
Another example: Linda in Michigan had a keypad with sticky buttons after a winter freeze. She cleaned the keypad with alcohol wipes, replaced the battery, and followed the steps above to reprogram. It worked like new.
Or Ravi in New Jersey: He bought a used home and found the garage keypad still using the default code. After following the reset steps, he set a new code, then programmed temporary codes for contractors during renovations—then deleted them when work was finished.
These examples show that reprogramming is practical and improves security.
Practical Tips For Smooth Reprogramming
- Always use fresh batteries before starting.
- Practice entering codes before linking to the opener.
- Keep your code private—don’t share unless necessary.
- If your keypad is old, consider replacing it.
- Test the keypad after programming—check both opening and closing.
Beginners often miss the importance of timing. You must press the new code within 30 seconds of hitting the Learn button; otherwise, it won’t work.
Another tip: If your keypad is exposed to rain or snow, apply a small bead of clear silicone around the edges to prevent moisture damage. This simple step extends the life of your keypad and keeps it reliable.
If your keypad is hard to reach, ask a friend or family member to help. Having two people makes it easier to press the Learn button and enter the code quickly.
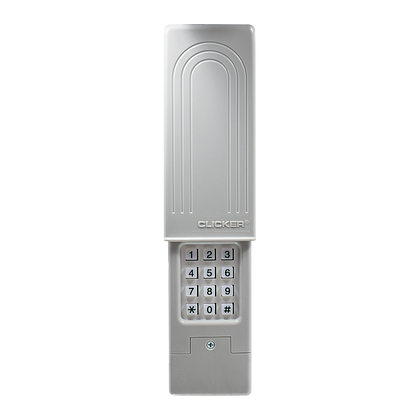
Table: Battery Types And Lifespan
Choosing the right battery helps your keypad last longer.
| Battery Type | Estimated Lifespan | Common Models |
|---|---|---|
| AAA | 12 months | Clicker, Genie |
| 9V | 18 months | LiftMaster |
| CR2032 | 24 months | Some advanced Clicker models |
Change batteries every year for best performance—even if the keypad still works.
It’s also a good idea to use high-quality batteries from trusted brands. Cheap batteries can leak and damage the keypad or cause inconsistent performance.
Troubleshooting: When Reprogramming Fails
Sometimes, things don’t go as planned. Here’s what to do:
- Keypad blinks but opener doesn’t respond: Try reprogramming again, check opener power, and clear codes.
- Keypad doesn’t light up: Replace batteries, clean contacts, and check for corrosion.
- Code works but only sometimes: Move keypad closer, check for interference, and update codes.
If your keypad gets wet, open the battery compartment and let it dry completely before using it again. If the keypad is very old or damaged, replacement is often the best option.
If all else fails, contact Clicker customer support or visit the official Chamberlain Support for help.
Upgrading Your Garage Keypad
If your keypad is old or unreliable, upgrading can boost security and convenience:
- Smart keypads connect to your smartphone, let you change codes remotely, and track usage.
- New models offer fingerprint access, voice control, and better weather resistance.
- Prices range from $30 (basic) to $100+ (advanced).
Compare features, compatibility, and reviews before buying. Don’t just choose the cheapest option; invest in safety.
Smart keypads often send alerts to your phone if someone tries to enter the wrong code multiple times or if the keypad battery is low. This is useful if you travel often or want to monitor who’s coming and going.
Some advanced models even allow integration with Amazon Key or Google Assistant for deliveries and voice access.
Table: Smart Vs. Standard Keypad Comparison
Here’s how smart keypads compare to standard models:
| Feature | Standard Keypad | Smart Keypad |
|---|---|---|
| Remote Code Change | No | Yes |
| Activity Tracking | No | Yes |
| Weather Resistance | Basic | Advanced |
| Price | $30–$60 | $70–$150 |
| Compatibility | Most brands | Limited |
If you live in a cold or wet climate, investing in a weather-resistant smart keypad can pay off in reliability and peace of mind.
Maintenance For Long-term Reliability
A keypad is only as good as its upkeep. Here’s how to keep yours working:
- Clean the buttons every few months—dust and grime cause sticking.
- Replace batteries every year, even if the keypad works.
- Check for weather damage (rain, sun, snow).
- Update codes regularly.
- Test the keypad after storms or power outages.
Many users overlook maintenance, but it prevents bigger problems later.
If your keypad is under a roof or overhang, it will last longer. If not, consider a weather shield or cover to protect it. Also, check for spider webs or insect nests, especially in warm climates—they can block buttons or sensors.
Non-obvious Insights For Beginners
- Timing matters: The programming window is short—practice your steps before starting.
- Code resets erase all access: If you clear codes, remotes and other keypads must be reprogrammed.
- Garage safety affects home safety: A weak keypad code is an easy entry point.
These points are missed by many beginners, but they make a big difference.
Another detail: If your keypad is not flush against the wall, moisture and insects can get inside. Use weatherproof tape or a mounting bracket to seal gaps and extend keypad life.

Frequently Asked Questions
How Often Should I Change My Garage Keypad Code?
Change your code at least once a year, or whenever you suspect it’s been shared. If you use temporary codes for guests or workers, update after their visit.
What Should I Do If My Keypad Stops Working After Reprogramming?
First, check the batteries and clean the keypad. If it still fails, reset the keypad and try reprogramming again. If nothing works, contact customer support or consider replacement.
Can I Program Multiple Garage Doors With One Clicker Keypad?
Yes, some models support multiple doors. Check your manual or look for the “multiple opener” feature. You’ll need to repeat the programming steps for each opener.
Is It Safe To Use A Simple Code Like 1234 For My Keypad?
No, avoid simple codes. Use a mix of numbers that are hard to guess. Simple codes are easy for others to try, reducing your garage security.
What’s The Best Way To Keep My Keypad Working During Winter?
Use weather-resistant models, clean the buttons regularly, and change batteries before cold weather hits. Cold can drain batteries faster, so check power often.
If your keypad is stuck or frozen, gently warm it with your hands and avoid using sharp objects that might damage the buttons.
Reprogramming your Clicker garage door keypad is easier than it looks, and it makes your home safer. With fresh batteries, careful steps, and regular maintenance, your keypad will work reliably for years. Don’t wait until you’re locked out or your code is compromised—take action now and enjoy peace of mind.


