Now Reading: How to Set Homelink Garage Door Opener: Easy Step-by-Step Guide
- 01
How to Set Homelink Garage Door Opener: Easy Step-by-Step Guide
How to Set Homelink Garage Door Opener: Easy Step-by-Step Guide
Setting up your Homelink garage door opener can make your daily routine much easier. No more looking for remote controls or worrying about batteries dying. With just the push of a button inside your car, you can open or close your garage door. But for many, the process of programming Homelink can feel confusing. There are different car models, various garage door opener brands, and sometimes even safety features that need extra steps. The good news is, you don’t need to be a tech expert to get Homelink working smoothly. In this guide, you’ll learn everything you need to know to set up your Homelink system the right way, avoid common mistakes, and solve problems that often confuse beginners.
What Is Homelink And How Does It Work?
Homelink is a universal wireless control system built into many vehicles. It lets you control garage doors, security gates, home lighting, and even some home appliances from your car. Most people use it to open and close their garage doors, replacing the need for a handheld remote.
The Homelink system uses radio frequency signals. When you press a Homelink button, your car sends a signal to the garage door opener, just like your original remote. The main benefit is convenience. You always have the controls in your car, and you can program up to three different devices.
Homelink works with most garage door openers made after 1996. However, some very old or very new openers may require extra steps or adapters. It is also compatible with both “fixed code” and “rolling code” systems. Rolling code openers change their code every time you use them for better security.
What You Need Before You Start
Before you begin programming your Homelink garage door opener, make sure you have everything ready:
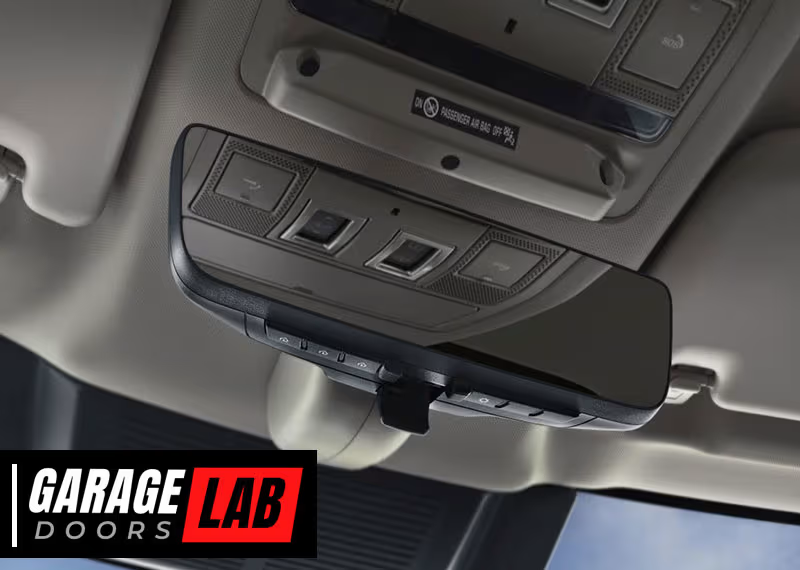
- Your vehicle with Homelink buttons (often on the sun visor, rearview mirror, or overhead console).
- Your garage door remote control (the one you use now).
- Access to your garage door opener unit (the box on your garage ceiling).
- A ladder if your garage opener is out of reach.
- Car key to turn the ignition on (some cars require the engine to be in ‘Run’ or ‘On’ mode).
- Owner’s manuals for your car and garage door opener (helpful for special instructions).
Pro tip: If your garage door opener is a newer “smart” model (like MyQ from Chamberlain), check if you need a Homelink compatibility bridge. Not all smart openers work with older Homelink systems.

Understanding Garage Door Opener Types
Garage door openers come in two main types: fixed code and rolling code. Knowing which type you have will help you follow the correct steps.
| Opener Type | Year Common | Programming Steps | Security Level |
|---|---|---|---|
| Fixed Code | Before 1996 | Simple, one-step | Basic |
| Rolling Code | 1996 – Present | Two-step, includes ‘Learn’ button | High |
Fixed code openers have a set signal, which means anyone with the same code can open your door. Rolling code openers change the code every use, making them much safer.
To check which type you have, look at the opener’s motor unit. If you see a “Learn” or “Smart” button, it’s probably rolling code. If your remote has DIP switches (small toggle switches inside), it’s likely fixed code.
Step-by-step Guide: Programming Homelink To Your Garage Door Opener
Setting up Homelink usually takes about 10-15 minutes. The process is similar for most vehicles and garage door openers, but some steps may vary depending on your car’s make and the opener’s brand.
Step 1: Clear Existing Homelink Buttons (if Needed)
If your car is new, you can skip this step. But if you bought a used car, or if Homelink was programmed before, it’s smart to reset it.
- Turn the ignition on but don’t start the engine.
- Press and hold the two outer Homelink buttons for about 10 seconds.
- Release when the indicator light flashes (it may blink slowly at first, then rapidly).
- Now all buttons are cleared.
Tip: Clearing does not affect other car systems.
Step 2: Choose Which Button To Program
Homelink usually has three buttons. Decide which one you want to use for your garage door. This is your “target” button.
Step 3: Program Homelink With Your Remote (fixed Code Method)
For garage doors with fixed code systems:
- Hold your garage door remote close (1-3 inches) to the Homelink buttons.
- Press and hold your chosen Homelink button and your remote’s button at the same time.
- Keep holding until the Homelink indicator light changes from slow blink to rapid blink (about 20-30 seconds).
- Release both buttons.
- Test by pressing the Homelink button. The garage door should move.
If it works, you’re done! If not, try the process again, making sure you hold both buttons long enough.
Step 4: Program Homelink With A Rolling Code Opener
For garage doors with a rolling code system (most openers made after 1996):
- Repeat the first part of Step 3 to “teach” Homelink your remote’s signal. Hold both buttons until the indicator flashes quickly, then release.
- Now, go to your garage door opener motor (usually on the ceiling of your garage).
- Find the “Learn,” “Smart,” or “Program” button (often colored red, yellow, purple, or orange).
- Press and release this button. You have about 30 seconds to return to your car.
- Quickly press and hold your Homelink button for 2 seconds, then release. Repeat this press/hold 2-3 times until your garage door moves.
- Test the Homelink button to make sure it works.
Insight: Some rolling code openers may need you to repeat the Homelink button press up to 5 times before the door responds. This helps sync the codes.
Step 5: Test And Finalize
Test your Homelink button from different distances and make sure the garage door opens and closes reliably. If you have issues, try reprogramming or check your owner’s manuals for car-specific tips.
Special Programming Steps For Popular Car Brands
Every car has slight differences in Homelink programming. Here’s how some popular brands may vary:
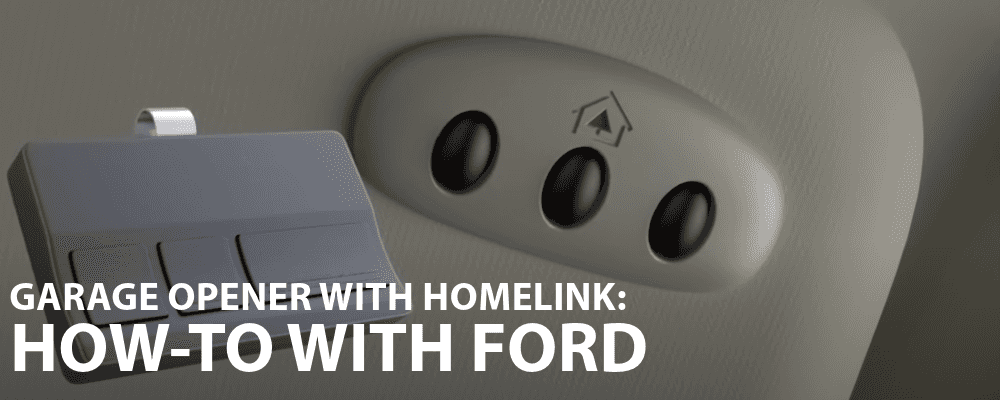
Ford, Lincoln, Mercury
- Some Ford models require the ignition to be in the “Run” position, not just “On.”
- If the Homelink indicator light stays solid, programming was successful.
Toyota, Lexus
- On some models, you must press and release the Homelink button up to 3 times after programming.
- Toyota often places Homelink on the rearview mirror.
Honda, Acura
- If programming fails, try holding the Homelink button for 20 seconds during the learning process.
- Some newer models require you to press the Homelink button twice to activate the door.
Bmw, Mini
- European BMWs may need a Homelink module update for rolling code openers.
- BMW sometimes requires the remote control battery to be fully charged.
Mercedes-benz
- For some models, Homelink setup must be done with the ignition on and the doors closed.
- If you have a newer garage door opener, a compatibility bridge may be necessary.
Non-obvious insight: Some vehicles disable Homelink programming when the car is in motion or if the vehicle’s battery is low. Always park safely and keep your engine running if needed.
Troubleshooting Common Homelink Problems
Even when you follow all steps, things can go wrong. Here’s how to solve the most common Homelink setup issues:
The Indicator Light Never Flashes
- Check the remote’s battery. A weak battery may send a weak signal.
- Make sure the remote and Homelink button are close together.
- Some remotes need to be pressed and released rapidly, not held.
Homelink Programs But The Door Won’t Move
- You might have a rolling code opener. Repeat the “Learn” button step.
- Make sure you pressed the “Learn” button on the garage opener unit, not just the remote.
- Move the car closer to the garage opener during programming.
Homelink Works Sometimes, Not Always
- Check for interference. LED lights, Wi-Fi routers, and metal objects can block signals.
- Try programming with the car windows open or in a different position.
- Ensure the Homelink button is being pressed long enough (some openers need a 2-second press).
Can’t Program Multiple Doors
- Each Homelink button is independent. Start from Step 1 for each door.
- Make sure the opener units are not on the same frequency.
Homelink Doesn’t Work After Power Outage
- Rolling code openers may reset after a power loss. Repeat the “Learn” button step.
- Check your garage opener’s manual for a “reset” or “relearn” section.
Safety And Security Tips
While Homelink is designed for convenience, it’s important to use it safely.
- Never program Homelink while driving. Always do it when parked.
- If you sell your car, clear all Homelink codes to protect your home.
- Store your garage remote in a safe place after programming—don’t leave it visible in the car.
- For homes with small children, keep car keys out of reach to prevent accidental garage operation.
- If your garage opener has a “vacation mode” or lock feature, use it when away for long periods.
Pro tip: Some garage door openers allow you to set temporary codes for guests, which adds another layer of security.
Homelink Vs. Other Garage Door Control Options
Homelink isn’t the only way to control your garage door, but it is one of the most integrated. Here’s a quick look at how it compares with other options:
| Feature | Homelink | Remote Control | Smartphone App |
|---|---|---|---|
| Location | Built into car | Handheld | Anywhere with signal |
| Batteries Needed | No | Yes | No (phone needed) |
| Security | High (rolling code) | Varies | High (with password) |
| Convenience | Very high | Medium | High |
| Setup Complexity | Medium | Easy | Medium to high |
Homelink is especially helpful if you don’t want to depend on your phone or worry about losing remotes. However, if you have a very new “smart” garage opener, check compatibility—sometimes an adapter is needed.
Tips For Getting The Best Homelink Experience
- Check for Homelink updates. Some vehicles allow you to update the Homelink software for better compatibility.
- Keep your remote batteries fresh before programming. Even though Homelink doesn’t need its own battery, a weak remote can cause setup failures.
- Label your Homelink buttons (mentally or with a small sticker) if you program multiple doors or gates.
- Park your car close to the garage opener during setup for the strongest signal.
- Use Homelink for gates or lights if your garage opener has extra channels.
- Don’t rush programming. Waiting for indicator lights to change is important—skip this, and you may have to start over.
- Read both the car and opener manuals. Sometimes a small detail is hidden in the instructions.
- If you move homes, clear your Homelink memory. It’s easy to forget, but it protects your security.
- Ask your dealer for help if you can’t get Homelink to work—they often have experience with specific car models.
- Try a compatibility bridge if your opener is MyQ or another “smart” system. This device lets Homelink talk to newer openers.
Non-obvious insight: Some Homelink systems can control home lighting or alarm systems. If your home has compatible devices, you can add more convenience beyond the garage.
Real-world Example: Setting Up Homelink On A 2020 Honda Accord With A Chamberlain Opener
Let’s walk through a real-world scenario to make the process clear:
- Preparation: Park your Accord in the driveway with the garage door closed. Have your Chamberlain remote and a ladder ready.
- Clear buttons: Since the car is new, skip clearing Homelink.
- Choose a button: Decide to use button 1 for the garage.
- Teach Homelink: Hold the remote 2 inches from the Homelink buttons. Hold both your chosen Homelink button and the remote’s button. The indicator blinks fast after 15 seconds.
- Rolling code step: Go inside the garage, climb the ladder, and press the yellow “Learn” button on the opener unit.
- Sync: In the car, press and hold the programmed Homelink button for 2 seconds, release. Repeat this twice more. The garage door opens.
- Test: Move the car away and return, pressing the Homelink button. The door opens smoothly.
This example shows how setup combines in-car steps with a quick trip to the opener unit.
Compatibility: Which Vehicles And Openers Work With Homelink?
Homelink is built into most major car brands, including Ford, Toyota, Honda, GM, Chrysler, Mercedes-Benz, BMW, Subaru, and more. It is also standard on many luxury vehicles and some trucks and SUVs.
Garage door opener brands compatible with Homelink include:
- Chamberlain
- LiftMaster
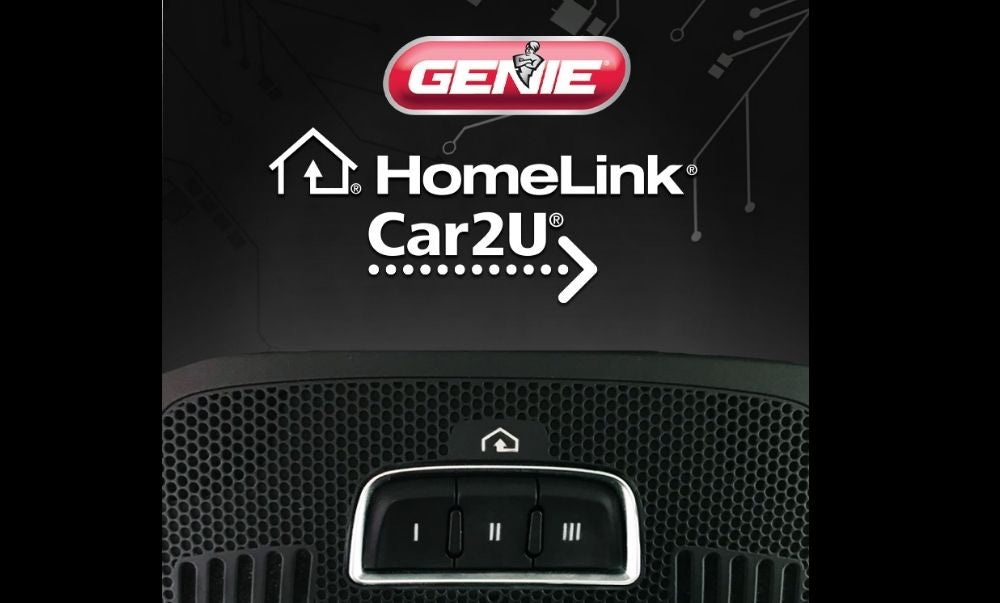
- Genie
- Overhead Door
- Craftsman
- Raynor
- Wayne Dalton
If you have a garage opener from before 1996, you may need an adapter or “repeater” to use Homelink. For smart garage systems, a Homelink compatibility bridge may be needed.
Important: You can check your car’s compatibility at the official Homelink website.
Advanced Features: Homelink And Home Automation
Homelink isn’t just for garage doors. Many systems can also control:
- Home security gates
- Exterior and interior lighting
- Alarm systems
- Smart home devices
Programming these devices works the same way as for garage doors: teach Homelink the remote’s signal, then sync with the device. For smart homes, check for Homelink-compatible adapters or bridges.
Homelink Programming: Do’s And Don’ts
Here are some key things to remember during Homelink setup:
Do’s
- Do check your opener’s type (fixed or rolling code) before starting.
- Do keep your remote battery fresh.
- Do follow indicator lights—wait for blinks or solid lights.
- Do keep safety in mind: Program only when parked.
Don’ts
- Don’t try to program Homelink while driving.
- Don’t skip your vehicle or opener manual—they often have unique steps.
- Don’t leave your garage remote in the car after setup.
- Don’t ignore compatibility issues—older Homelink systems may need a bridge.
Homelink Setup: Quick Reference Chart
To make things easier, here’s a handy overview of the basic steps for most situations:
| Step | Fixed Code Opener | Rolling Code Opener |
|---|---|---|
| Clear Homelink | Optional | Optional |
| Hold Remote to Homelink | Yes | Yes |
| Press Learn Button on Opener | No | Yes |
| Repeat Press Homelink | No | 2-5 times |
| Test Operation | Yes | Yes |
Use this summary to double-check your steps, especially if you’re helping friends or family.
Frequently Asked Questions
How Do I Know If My Garage Door Opener Is Compatible With Homelink?
Most garage door openers made after 1996 are compatible with Homelink. To be sure, check for a “Learn” button on your opener unit or visit the official Homelink compatibility page. If you have a very new “smart” opener, you may need a compatibility bridge.
Can I Program Homelink Without The Original Remote?
For most openers, you need the original remote to teach Homelink the right signal. However, some rolling code openers allow programming directly from the opener unit using the “Learn” button and your car’s Homelink button. This method does not work for all openers.
What Should I Do If Homelink Stops Working After A Power Outage?
Power outages can reset rolling code garage openers. Simply repeat the “Learn” button process (press the button on the opener unit, then the Homelink button in your car) to re-sync. You don’t need to clear Homelink memory unless you want to reprogram a different device.
Is Homelink Safe To Use For My Garage And Home?
Yes, Homelink is very secure, especially with rolling code openers. It uses the same safety features as your original remote. Always clear Homelink memory before selling your car, and don’t leave extra remotes inside your vehicle.
Can I Use Homelink To Control More Than One Garage Door Or Gate?
Yes, you can program up to three devices (garage doors, gates, lights) with the three Homelink buttons. Just repeat the setup process for each device, using a different button each time.
Homelink brings a new level of convenience to your garage and home. With the steps and tips in this guide, you’ll be able to set up your Homelink garage door opener with confidence, solve problems if they arise, and enjoy the security and simplicity it offers every day.


