Now Reading: How to Change a Liftmaster Garage Door Code Easily and Securely
- 01
How to Change a Liftmaster Garage Door Code Easily and Securely
Changing the code on your Liftmaster garage door opener is a simple way to improve your home’s security. Many people never update their code after installation, making it easy for old remotes or previous owners to still have access. Others worry about the process, thinking it’s technical or risky. In reality, with some careful steps and the right guidance, you can reset your code in just a few minutes. This guide will walk you through everything you need to know, from understanding your Liftmaster system to solving common problems. Whether you’ve lost a remote, want to keep your home safer, or are a new homeowner, you’ll find clear instructions here.
Most people change their garage code after moving into a new home or when a remote is lost or stolen. But there are other smart reasons too—such as after a service call, or just to ensure no one else knows your code.
Many Liftmaster models allow you to change the code using a keypad, wall button, or the unit itself. In this article, you’ll learn not only how to change your code, but also how to keep your system secure, what features to look for, and what to do if you get stuck.
You’ll also see real examples, get troubleshooting help, and find answers to questions many beginners have. By the end, you’ll have the confidence to manage your own garage security.
Why Change Your Liftmaster Garage Door Code?
Many people stick with the default code that comes with their garage opener. While this is convenient, it’s also risky. Default codes are easy to guess, and some older remotes work across several models. Changing your code gives you control over who can access your garage. Here’s why it matters:
- Security after a move: If you’ve just moved in, the old owners (or anyone they gave the code to) might still have access.
- Lost or stolen remotes: If a remote is missing, someone could use it to open your garage.
- Regular maintenance: Like changing your locks, updating your code keeps your home safer.
- Service technician visits: After a repair or service call, it’s wise to change your code.
- Peace of mind: Knowing you’re the only one with access is reassuring.
Changing your code also lets you control who can enter, especially if you want to restrict access to family or guests at certain times.
Understanding Your Liftmaster System
Before you change your code, it’s important to know which Liftmaster model you have. The steps can vary based on the opener’s age and features. Here’s what to check:
- Learn Button Color: Newer models have a colored “Learn” button (yellow, red, orange, purple, or green) on the motor unit. The color affects programming steps.
- Keypad, Wall Button, or Remotes: Decide if you’ll use a keypad outside the garage, an inside wall control, or just remotes.
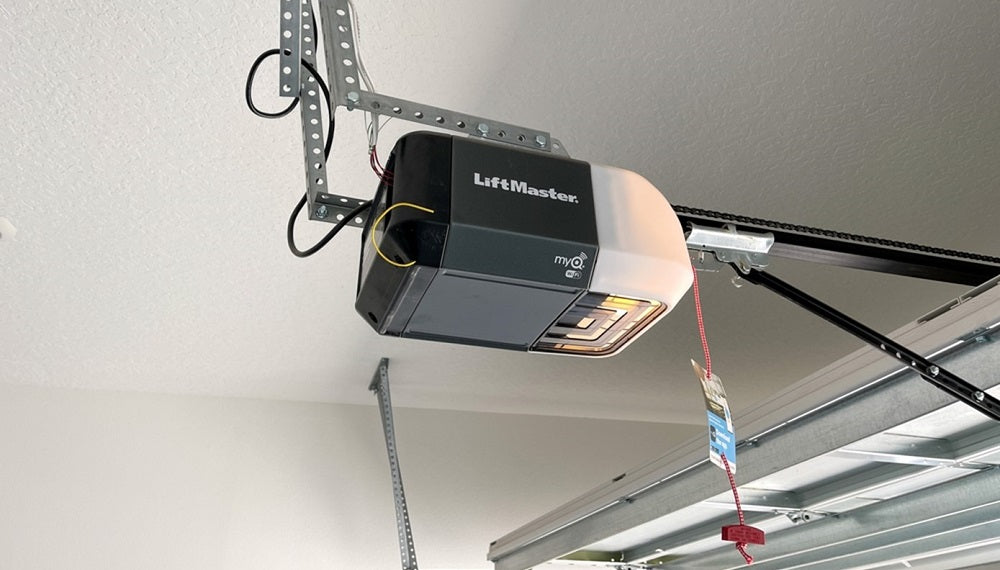
- Smart Garage Openers: Some recent models use MyQ or Wi-Fi for advanced control.
Find your unit’s model number on the motor housing. If you have the user manual, it will list programming details. If not, you can often find it online by searching for your model.
How To Identify Your Learn Button
Open the garage door opener’s light cover. Look for a small button near the wiring terminals. The color of this button tells you what type of remote or keypad works with your system:
| Learn Button Color | Frequency (MHz) | Model Years | Notes |
|---|---|---|---|
| Yellow | Security+ 2.0 (310/315/390) | 2011–present | Most secure, rolling code |
| Purple | 315 | 2005–2011 | Rolling code |
| Red/Orange | 390 | 1997–2005 | Rolling code |
| Green | 390 | 1993–1997 | Fixed code |
Knowing your Learn button color is the fastest way to find the right instructions.
Tools And Preparation
You don’t need many tools to change your garage door code. Here’s what will help:
- Step ladder: To reach the motor unit.
- Flashlight: For dark garages or overhead units.
- Pen and paper: To write your new code before entering it.
- Your remotes/keypad: If reprogramming these.
- Safety glasses: If working in a dusty area.
Before starting, close the garage door and make sure you have access to both the garage interior and, if needed, the outdoor keypad.
Step-by-step: Changing Your Liftmaster Garage Door Code
Depending on your setup, you might change the code using the keypad, a wall control panel, or the motor unit itself. Below are the three main methods.
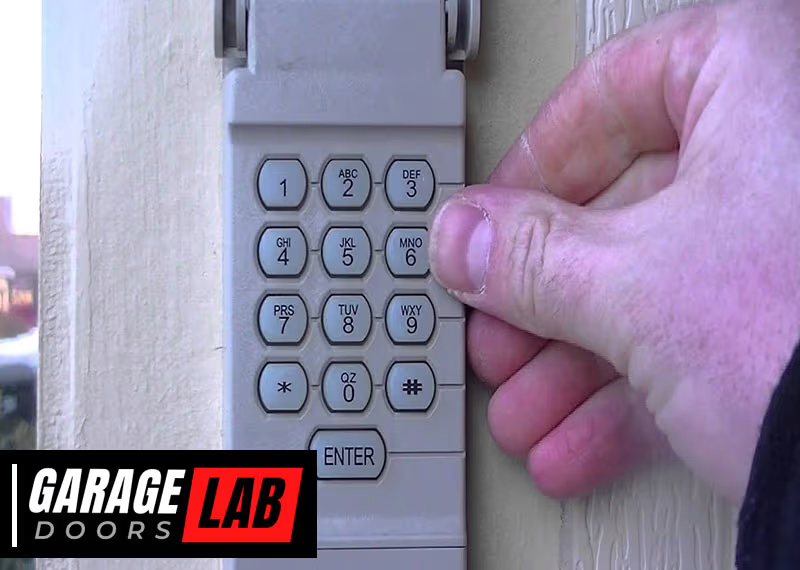
1. Changing The Code With A Keypad
If you have a wireless keypad outside your garage, this is the most common way to change your code. Keypads let you open the garage without a remote.
Steps For Most Keypads (security+ 2.0 And Similar):
1. Clear The Old Code
Open the keypad cover. Press and hold the *“* key and the # key together until the keypad stops flashing (usually about 5–10 seconds). This resets the keypad memory.
2. Enter Your New Code
Type in your chosen 4-digit PIN. Press and hold the *“Enter”* button.
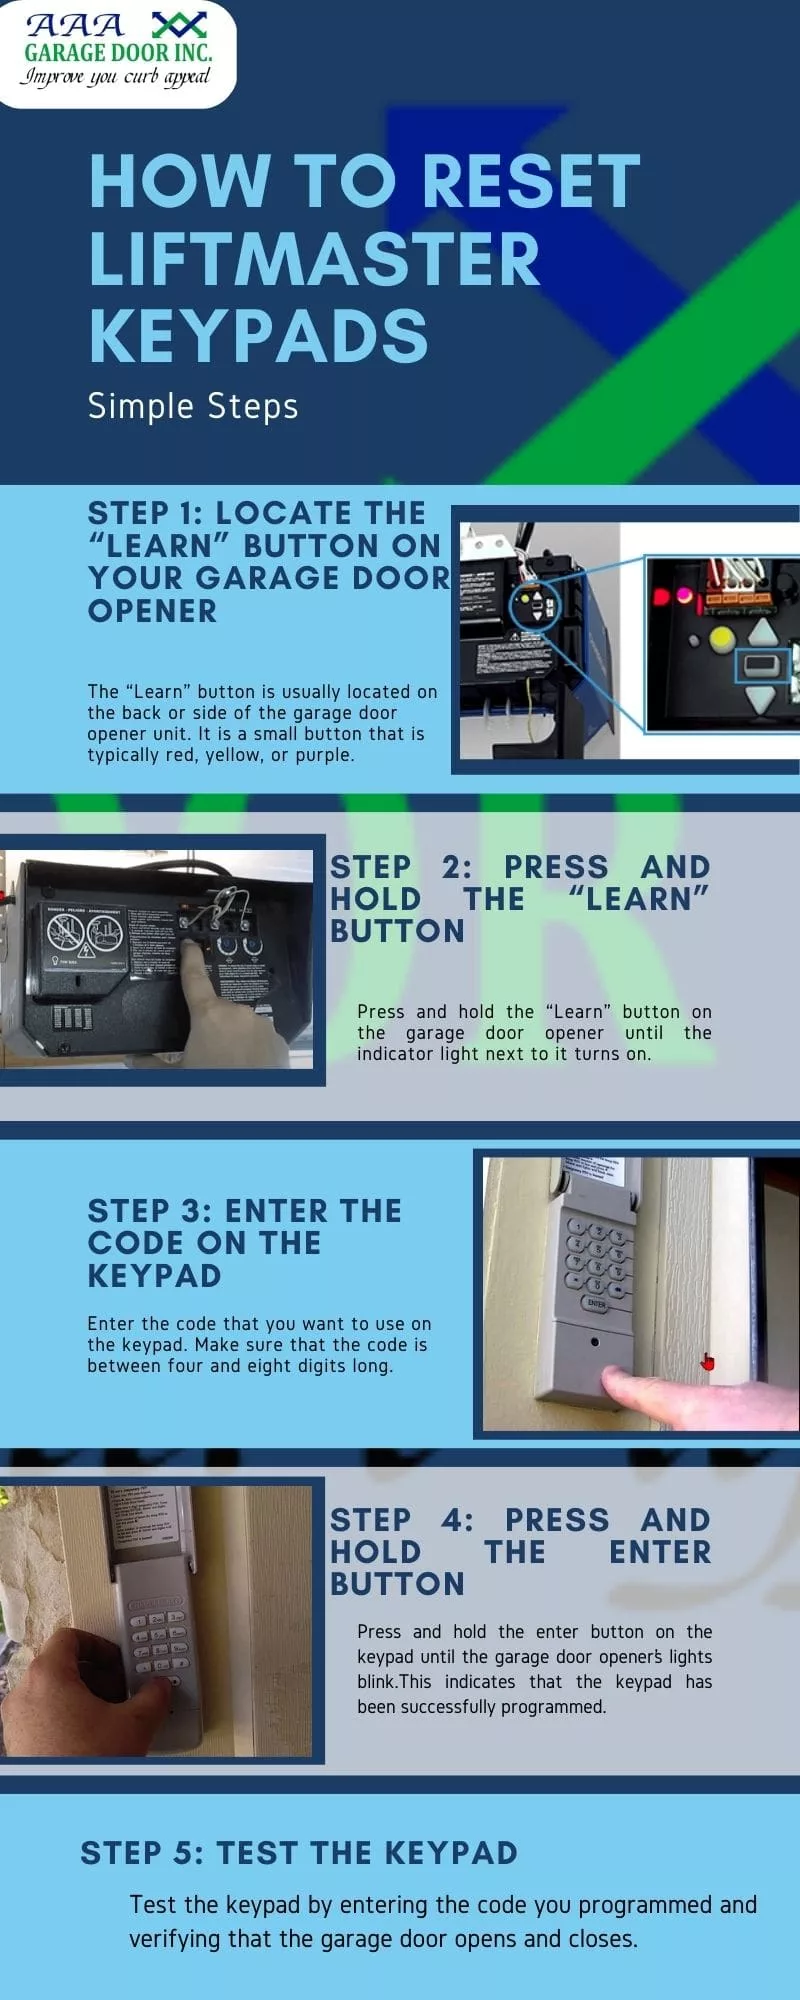
3. Program The Keypad At The Motor
Climb your ladder and locate the Learn button on the opener. Press and release the Learn button (the indicator light will turn on). Within 30 seconds, return to the keypad and press the *“Enter”* button again. The opener light should blink, meaning the new code is accepted.
4. Test The Code
Close the keypad cover. Enter your code to make sure the garage door opens.
Tips:
- Wait for the blinking light. If the light doesn’t blink, repeat the steps.
- Don’t use obvious PINs like “1234” or your address.
- If the keypad does not work, check the battery.
2. Changing The Code Using The Wall Control Panel
Many newer Liftmaster systems have a wall-mounted control panel with a display and menu button. This panel often lets you program a new code without climbing up to the motor.
Steps:
1. Access The Menu
Press the *“Menu”* button on the wall control. Use the arrow buttons to find “Program. ”
2. Choose “keypad” Or “remote”
Select which device you want to program. For keypads, select “Keypad,” then follow the prompts.
3. Enter The New Code
Input your chosen code using the keypad or wall control.
4. Complete Programming
The opener will beep or the light will blink if programming is successful.
5. Test The New Code
Try opening and closing the garage door with your new code.
Tips:
- If you don’t see a menu button, your panel may not support direct programming.
- Some panels require you to hold the “Lock” and “Light” buttons together to enter programming mode.
3. Changing The Code Directly At The Motor Unit
If you don’t have a keypad or advanced wall control, you can reset remotes and codes at the motor.
Steps:
1. Access The Learn Button
Use your ladder to reach the garage door opener. Find the Learn button (check the color).
2. Erase Old Codes
Press and hold the Learn button for 6–10 seconds until the indicator light goes out. This clears all remote and keypad codes.
3. Re-program Remotes And Keypads
Press and release the Learn button again. Within 30 seconds, press the button on your remote or enter your new keypad code, then press *“Enter”*.
4. Repeat For All Remotes
Each remote must be reprogrammed individually.
5. Test All Devices
Make sure each remote and the keypad work with the new code.
Tips:
- Erasing all codes is a good idea if you’re worried about lost or stolen remotes.
- If you have multiple family members, gather all remotes before you start.
Dealing With Common Problems
It’s normal to run into a few snags when changing your code. Here are frequent issues and how to fix them.
The Keypad Or Remote Doesn’t Work
- Check the battery: Most keypads use a 9V or AAA battery. Replace it if the keypad is unresponsive.
- Reset the system: Sometimes, erasing all codes (hold the Learn button for 6–10 seconds) and starting over helps.
- Range issues: Remotes may fail if you’re too far from the opener or if there’s interference from LED bulbs.
The Learn Light Doesn’t Blink
- Wrong timing: Make sure you press the keypad or remote button within 30 seconds of the Learn button.
- Wrong model steps: Confirm you’re using instructions for your exact opener. Older Liftmasters need slightly different steps.
The Door Opens By Itself
- Interference: Other devices or neighbors with similar remotes may trigger your door. Change the code to a new, unique one.
- Stuck button: A remote button stuck in the “on” position can cause random openings.
Keypad Is Not Accepting New Code
- Reset the keypad: Clear the old code fully by holding the *“* and # keys together.
- Check wiring: If wired, look for loose or corroded wires.
Remotes Work, But Keypad Doesn’t
- Out of sync: Keypads and remotes sometimes use different code types. Reprogram both after clearing old codes.
- Model mismatch: Make sure your keypad is compatible with your opener’s Learn button color.
Advanced Features: Smart Garage Openers
If your Liftmaster opener has Wi-Fi or MyQ technology, you can change codes and manage users from your phone. This adds convenience and more security options.
Using Myq App
- Download the app (iOS/Android) and create an account.
- Connect your opener: Follow on-screen steps to link the opener (usually by pressing the Learn button).
- Manage PINs and users: You can add, change, or delete codes from your phone.
Benefits
- Temporary access: Give guests or service workers a code that only works for a set time.
- Alerts and logs: Get notified when the door is opened or closed.
- Remote control: Open or close the garage from anywhere.
Security Tip
With Wi-Fi systems, always use a strong password for your MyQ account and enable two-factor authentication if available. This prevents hackers from accessing your garage.

How Often Should You Change Your Garage Door Code?
While there’s no rule, security experts recommend changing your code at least once a year. You should also do it immediately if:
- You lose a remote
- Someone moves out
- After any service/repair
- You suspect someone knows your code
Some people link code changes with other routine tasks, like checking smoke alarms. This keeps your home safe without extra hassle.
Choosing A Strong Code
Many people use simple codes—birthdays, addresses, or “0000.” These are easy to guess. Here’s how to pick a better code:
- Use random numbers: Avoid sequences or repeats.
- Don’t use personal info: No birthdays, phone numbers, or addresses.
- Change codes for guests: Give visitors a temporary code, then delete it.
A strong code is your first line of defense against break-ins.
How To Program Additional Remotes Or Keypads
Sometimes, you need to add a new remote or keypad for a family member. The process is similar to changing the code.
- Press the Learn button: On the motor unit.
- Press the remote button: Within 30 seconds.
- For keypads: Enter the new code and press *“Enter.”*
- Test the device: Make sure it works.
You can program up to 8 remotes on most newer Liftmaster openers.
Comparing Liftmaster Models And Code Change Methods
If you’re unsure which method suits your opener, here’s a handy comparison.
| Model Type | Year Range | Code Change Method | Key Feature |
|---|---|---|---|
| Security+ 2.0 | 2011–present | Keypad, wall panel, app | Rolling code, Wi-Fi |
| Security+ (Purple/Red) | 1997–2011 | Keypad, Learn button | Rolling code |
| Standard (Green) | 1993–1997 | Dip switches/manual | Fixed code |
For older openers with dip switches, you’ll need to manually set the switches on both the opener and remote to match your chosen code. If you have this type, consider upgrading for better security.
Real-world Example
Let’s say you just bought a house built in 2008 with a Liftmaster opener. You find a purple Learn button inside the motor. You want to change the code and add a new remote.
- Step 1: Press and release the purple Learn button. The indicator light glows.
- Step 2: Within 30 seconds, press and hold the button on your new remote. The opener light blinks, confirming success.
- Step 3: If you have a keypad, enter your new code, then press and hold *“Enter.”* The light blinks again.
You now have full control, and any old remotes won’t work.
Practical Security Tips
Changing the code is only one part of garage security. Here are more ways to stay safe:
- Keep remotes in your car, not visible on a visor.
- Don’t share your code unless necessary.
- Check for firmware updates if you have a smart opener.
- Use a deadbolt lock on the door between the garage and your house.
- Install a motion-sensor light over your garage.
A little extra care can stop most break-ins before they happen.
What Beginners Often Miss
Many first-time users make two common mistakes:
- Not erasing old codes: If you just program a new remote without clearing the memory, lost or stolen remotes may still work.
- Forgetting to test all devices: Always check each remote and keypad after reprogramming. Some may need to be added again.
Also, remember that LED light bulbs in your opener can sometimes block remote signals. If you notice range problems after changing bulbs, try switching to a different brand.
Troubleshooting Table
Here’s a quick guide to common issues and solutions.
| Problem | Possible Cause | Solution |
|---|---|---|
| Keypad won’t program | Dead battery, wrong steps | Replace battery, reset keypad, try again |
| Remotes not working | Not reprogrammed after code change | Re-add remotes using Learn button |
| Opener light won’t blink | Wrong timing, incompatible device | Repeat steps quickly, check model compatibility |
| Door opens randomly | Stuck remote button, code conflict | Check remotes, erase all codes, reprogram |
When To Call A Professional
Most code changes are simple. But if you:
- Can’t find the Learn button
- Have wiring problems
- Opener doesn’t respond at all
- See sparks or smell burning
It’s best to call a certified Liftmaster technician. They have the tools and knowledge to fix complex problems safely.
Keeping Your System Up To Date
Garage door technology improves every year. If your opener is more than 15 years old, consider upgrading. New models have stronger security, quieter motors, and smart features. Liftmaster’s Security+ 2. 0 uses rolling codes that change every time you use the remote, making it almost impossible to hack.
If you’re buying a new opener, check for features like battery backup, Wi-Fi, and smartphone control.
For more on garage door security, you can visit the official Liftmaster Garage Door Security page.
Frequently Asked Questions
What Do I Do If I Forget My New Garage Door Code?
If you forget your code, you’ll need to reset the system. Go to the motor unit, press and hold the Learn button until the light goes out (to erase all codes), then reprogram a new code using the keypad or remote.
Write down your new code and keep it in a safe place.
How Do I Know If My Liftmaster Keypad Is Compatible With My Opener?
Check the color of your opener’s Learn button. Most keypads are labeled with compatible models and years. If your keypad or opener is very old, you may need an upgrade. The user manual or the Liftmaster website can help confirm compatibility.
Can Someone Hack My Liftmaster Garage Door Opener?
Modern Liftmaster openers use rolling codes, which are very hard to hack. However, older openers with fixed codes are less secure. For extra safety, change your code regularly and use a strong PIN. If you use MyQ or Wi-Fi, always secure your account with a strong password.
How Many Remotes Or Keypads Can I Program On My Opener?
Most modern Liftmaster openers support up to 8 remotes and 1-2 keypads. If you reach the limit, you’ll need to erase all codes and reprogram the devices you want to keep.
Why Should I Change My Garage Door Code After Moving Into A New Home?
Previous owners, tenants, or anyone with the old code could still access your garage. Changing the code ensures you’re the only one with entry, keeping your home and family safer.
Changing your Liftmaster garage door code is a simple but powerful step to protect your home. With the right instructions, you can do it in minutes—no special skills needed. By staying alert to security risks and updating your codes regularly, you keep your garage and home safe for years to come.


