Now Reading: How to Set Craftsman Garage Door Opener: Easy Step-by-Step Guide
- 01
How to Set Craftsman Garage Door Opener: Easy Step-by-Step Guide
How to Set Craftsman Garage Door Opener: Easy Step-by-Step Guide
If you just bought a Craftsman garage door opener, you might feel a bit overwhelmed. The box is full of parts, the manual seems complicated, and you’re worried about doing something wrong. But you don’t need to call a professional every time—most homeowners can set up and program their garage door opener with a little guidance. This guide will walk you through every step, from mounting the unit to syncing your remote, and fixing common issues. Whether you’re installing a new unit or reprogramming after a power outage, you’ll find all the help you need here. You’ll also learn helpful tips most beginners miss, so you can avoid frustration and keep your garage secure and reliable.
Understanding Your Craftsman Garage Door Opener
Before you start, it’s important to know what you’re working with. Craftsman garage door openers are popular because they combine reliability with useful features. They usually have a motor unit, a rail assembly, a trolley, sensors, wall controls, and remotes. Some models have Wi-Fi, battery backup, or smart home compatibility.
There are three main types:
- Chain drive: Uses a metal chain; strong but can be noisy.
- Belt drive: Uses a rubber belt; very quiet, ideal for attached garages.
- Screw drive: Uses a threaded steel rod; fewer parts, but can be sensitive to temperature changes.
Knowing your model helps you understand the instructions, since button locations, settings, and features can be different. You can usually find the model number on the motor unit or inside the battery compartment of the remote.
Tip: Take a photo of your opener’s wiring and settings before you begin. This makes it easier to restore things if you get stuck.
What You Need Before You Begin
Getting organized saves time and avoids headaches. Here’s what you’ll need:
- Craftsman garage door opener kit (with all included parts)
- Stepladder (tall enough to safely reach your garage ceiling)
- Drill and bits
- Screwdrivers (flat and Phillips)
- Wrenches or socket set
- Measuring tape
- Level
- Pliers
- Pencil or marker
- Safety glasses
- Work gloves
- Stud finder (helps you mount into solid wood)
- Garage door lubricant (for maintenance)
- A friend or family member (for lifting and aligning the rail)
Pro insight: Some garages have odd ceiling heights or obstacles. Measure everything before you start. Make sure you can open the garage door fully without hitting lights or shelving.
Safety Tips You Cannot Ignore
Garage door openers are powerful machines. A mistake can damage your car, home, or even injure someone. Always:
- Unplug the opener before working on wiring or the motor.
- Support the door with locking pliers or a clamp when adjusting springs or hardware.
- Keep children and pets away during installation and testing.
- Check for loose springs or frayed cables. If you see them, call a pro—torsion springs can be very dangerous.
Beginner mistake: Many skip the sensors or install them too high. Sensors should be no more than 6 inches above the floor to prevent accidents.
Step 1: Assembling The Rail And Trolley
Start by laying out all parts. Read the instructions for your exact model—sometimes screw sizes or steps vary.
- Join the rail sections together. Most click or bolt into place. Make sure they’re straight and tight.
- Slide the trolley (the part that pulls the door) onto the rail before attaching the ends.
- Attach the rail to the motor unit. Usually, a large bolt or pin holds it in place.
- Check for proper alignment. The rail must be straight, or the door won’t move smoothly.
Practical tip: If the rail isn’t level, the opener will strain. Use a level or measure both sides to the floor.
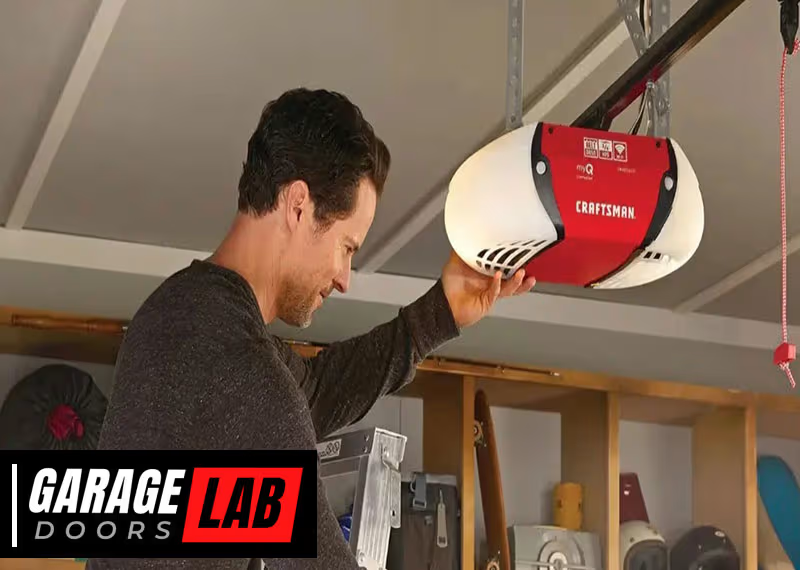
Step 2: Mounting The Opener To The Ceiling
Now, you’ll install the motor unit and rail assembly above your garage door.
- Find the center line of your garage door. Mark it on the header above the door using a pencil.
- Position the header bracket (from your kit) at this mark. Drill pilot holes and secure it with lag screws.
- Lift the rail assembly and hook it onto the header bracket. You may need a helper for this.
- Attach the opener’s motor unit to the ceiling joists using the hanging brackets. The unit should sit at least 7 feet above the floor, and as close to level as possible.
Data comparison: Here’s how Craftsman opener sizes compare for different garage doors:
| Garage Door Size | Recommended Opener Power | Notes |
|---|---|---|
| Single (8×7 ft) | 1/2 HP | Standard for most homes |
| Double (16×7 ft) | 3/4 HP | Heavier doors need more power |
| Oversized (18×8 ft) | 1 HP | For heavy wood or insulated doors |
Pro insight: Check clearance above your opener for lights, ducts, or beams. If the opener can’t sit level, use extension brackets.
Step 3: Connecting The Door Arm And Trolley
The door arm links your garage door to the opener trolley.
- Close the garage door. Attach the straight arm to the trolley.
- Connect the curved arm to the garage door’s top bracket.
- Join the arms together using the bolts and nuts from your kit. The arms should form a solid connection with no slack.
- Test the door by hand. It should move smoothly when disconnected from the opener.
Beginner mistake: Overtightening bolts can bend the arms or damage the door. Tighten until snug, then stop.
Step 4: Installing The Safety Sensors
Safety sensors (also called photo eyes) are required on all garage doors sold in the US. They stop the door if something crosses the path.
- Mount sensors 4–6 inches above the ground, on each side of the garage door track.
- Aim the sensors directly at each other. A green or orange light will turn on when they’re aligned.
- Run the wires along the wall, stapling or tacking them neatly.
- Connect wires to the motor unit. Usually, white wires go to “white” terminal, colored to “black” or “gray”.
Data table: Common sensor problems and fixes
| Problem | Likely Cause | Solution |
|---|---|---|
| Lights off | No power or broken wire | Check connections, replace wire |
| One light blinking | Misalignment | Adjust sensor position |
| Door won’t close | Blocked beam | Remove object from path |
Practical tip: Sunlight can interfere with sensors. Angle them slightly inward if you get “false errors” in the afternoon.
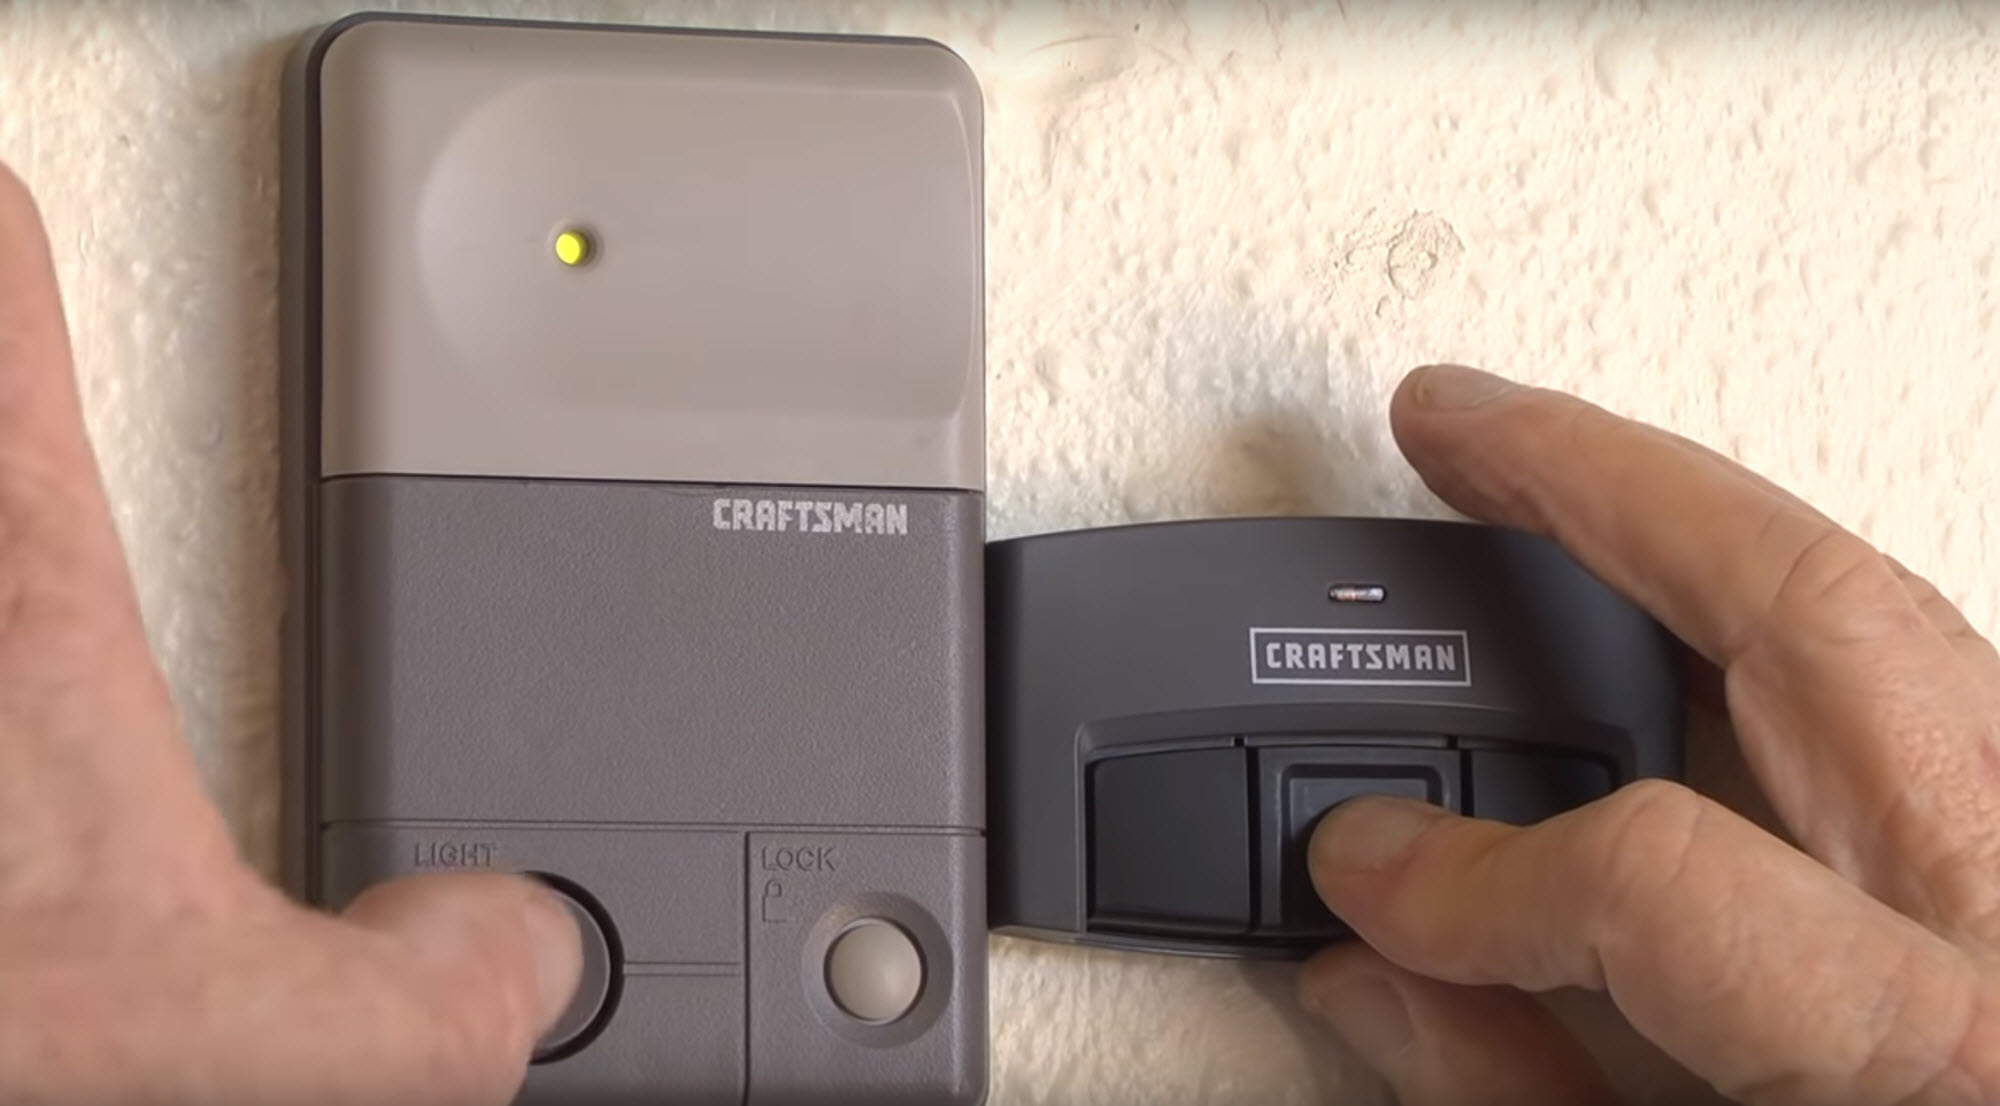
Step 5: Wiring The Wall Control And Power
Most Craftsman openers have a wall-mounted control, either a simple button or a digital panel.
- Run the control wire from the wall location to the opener unit. Use the included staples to keep it neat.
- Connect wires to the correct terminals. Usually, both wall control and sensor wires go to the same set of terminals, but check your manual.
- Plug in the opener. Do not operate yet—finish programming and safety checks first.
Non-obvious insight: Some openers have a “lock” or “vacation” mode. If your wall panel isn’t working, check if this mode is on.
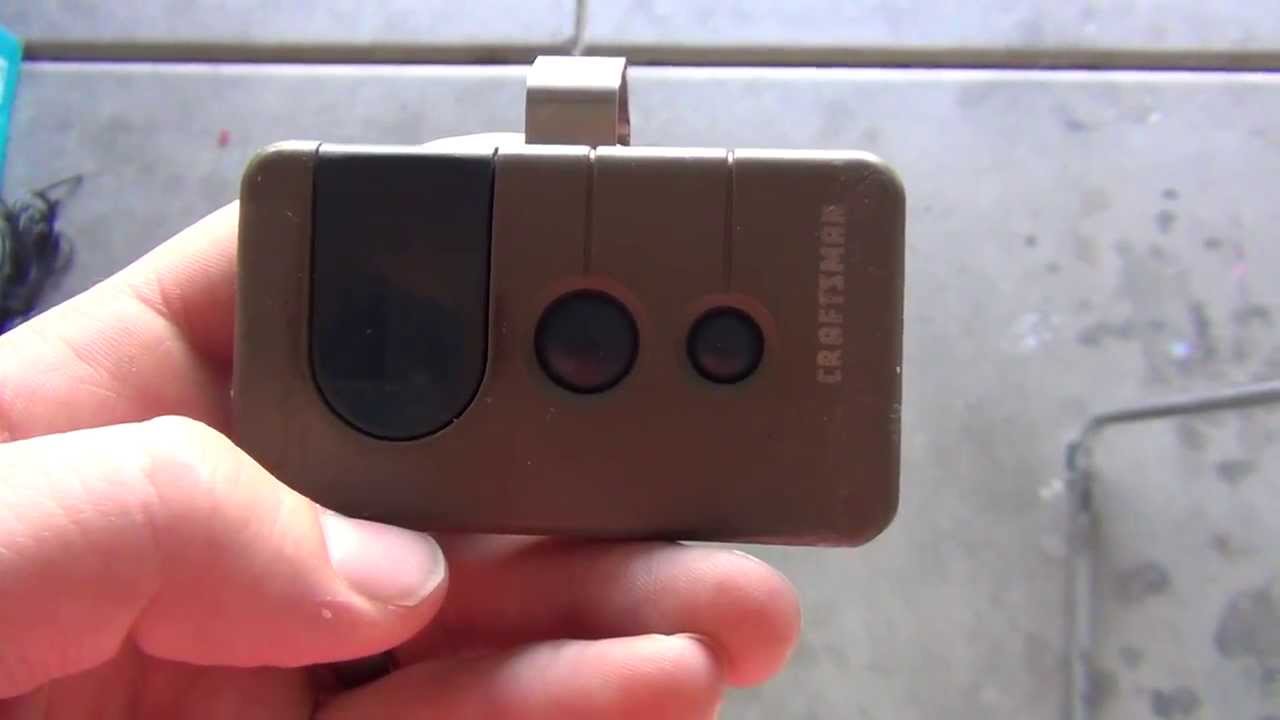
Step 6: Programming The Remote Controls
Now you’ll set up your Craftsman remotes to open and close the door.
- Find the “Learn” button on the opener (usually on the back or side of the motor unit, under a light cover).
- Press and release the “Learn” button. An LED will light up for 30 seconds.
- Within 30 seconds, press and hold the button on the remote you wish to program.
- Release the remote button when the motor unit light blinks or clicks. The remote is now programmed.
Repeat these steps for each remote. Most openers can remember 3–5 remotes.
Non-obvious insight: If your remote stops working after a power outage, repeat these steps. The opener may “forget” remote codes.
Step 7: Setting Travel And Force Limits
Travel limits tell the opener how far to move the door. Force settings control how much pressure the opener uses.
- Locate the limit adjustment screws on the side or back of the motor unit. They’re usually labeled “up” and “down.”
- Use a flat screwdriver to adjust. Turn one direction to increase travel, the other to decrease.
- Test the door: Open and close with the remote. Adjust until the door fully opens and closes without slamming or leaving gaps.
- Set the force adjustment: Too much force can damage the door; too little can stop the door mid-way. Test by grabbing the bottom of the door as it closes—it should reverse when you resist.
Example: If the door stops before fully closing, increase the “down” travel limit. If it bounces open, decrease the “down” force.
Step 8: Testing The Safety Reversal System
This is critical for safety. The door should reverse if it hits something or if the sensors are blocked.
- Place a 2×4 board flat on the floor under the open door.
- Close the door with the remote or wall control.
- The door should touch the board and reverse within 2 seconds. If not, adjust the force and travel settings and test again.
Practical tip: Test this every few months. Dust or misaligned sensors can cause failures over time.
Step 9: Connecting Smart Features (if Available)
Many newer Craftsman openers have Wi-Fi or smart home compatibility.
- Download the Craftsman or MyQ app from your app store.
- Follow in-app instructions to connect your opener. You’ll usually press the “Learn” button, then enter a code or scan a QR code.
- Name your garage and set up notifications for open/close events.
- Test remote control from your phone.
Beginner mistake: Weak Wi-Fi in the garage can cause setup failures. Move your router closer or use a Wi-Fi extender.
Step 10: Final Maintenance And Troubleshooting
Now that your opener is installed, check everything again:
- Lubricate the door tracks, springs, and rollers (never the opener rail).
- Tighten any loose bolts or screws.
- Test the door balance: Disconnect the opener and lift the door halfway. It should stay in place. If not, adjust the springs (call a pro if you’re unsure).
- Clean sensor lenses with a soft cloth.
Common troubleshooting issues:
- Opener hums but doesn’t move: Check for a locked trolley or jam.
- Remote has short range: Replace the battery or move the antenna.
- Wall control not working: Check wiring connections and “lock” mode.
Data comparison: Here’s a quick look at maintenance frequency:
| Task | How Often | Notes |
|---|---|---|
| Lubricate hardware | Every 6 months | Use silicone spray, not grease |
| Test safety sensors | Monthly | Keep lenses clean |
| Check travel/force | Yearly | After power outages or repairs |
Pro insight: If your opener is more than 10 years old, consider replacing it. New openers are quieter, safer, and use less energy.
Real-world Examples And Practical Advice
Many homeowners find the hardest part is wiring and programming. Here are some real stories:
- Remote won’t program: “I followed the manual, but my remote never synced. It turned out I was pressing the ‘Learn’ button too long—just a quick press is enough.”
- Door reverses for no reason: “My door kept reversing halfway down. A spider web was blocking the sensor beam. Cleaning the lens fixed it instantly.”
- Wall control dead: “After installation, the wall control wouldn’t work. I swapped the wires and it worked—my opener had reversed terminal colors.”
Expert tip: Always keep the manual and a list of your programmed remotes in a safe place. If you move or lose a remote, you can erase all codes and reprogram them for security.
When To Call A Professional
Most tasks are DIY-friendly, but some need a pro:
- Broken springs or cables
- Heavy garage doors
- Major electrical issues
- Unusual noises or shaking after setup
If you’re ever unsure, hire a certified technician. Safety comes first.
Resource: For official guides and safety information, visit the Craftsman Support page.
Frequently Asked Questions
How Do I Reset My Craftsman Garage Door Opener?
To reset, unplug the opener for 30 seconds, then plug it back in. If you want to erase all remotes, press and hold the “Learn” button on the motor unit for 6–10 seconds until the light goes out. This clears all codes—reprogram remotes as needed.
Why Does My Garage Door Only Close When I Hold The Wall Button?
This usually means the safety sensors are blocked, misaligned, or have a wiring problem. Check for dirt, sunlight, or obstacles in the sensor path. Make sure both sensor lights are on and solid.
Can I Program My Car’s Built-in Remote With My Craftsman Opener?
Yes, most Craftsman openers work with HomeLink or Car2U systems. Put your car in programming mode, then press the opener’s “Learn” button and follow your car manual’s steps. Some older cars may need a special bridge device.
How Do I Adjust The Force And Travel Limits On My Opener?
Find the adjustment screws on your motor unit, labeled “up/down” or “open/close. ” Turn these slowly, testing the door each time. Increase travel if the door stops too soon, decrease if it slams or reverses. For force, adjust until the door reverses with little resistance.
What Should I Do If My Remote Range Is Very Short?
Replace the remote battery first. If the problem remains, make sure the opener’s antenna is hanging straight down. Avoid LED bulbs in the opener—they can cause interference. Metal garages may need an external antenna kit.
Setting up your Craftsman garage door opener is a rewarding project that saves money and gives you full control over your garage’s safety and convenience. With careful steps, regular maintenance, and the tips above, your opener will run smoothly for years. If you ever feel stuck, don’t hesitate to ask for help—your safety and peace of mind are worth it.


