Now Reading: How to Measure Garage Door Springs: A Step-by-Step Guide
- 01
How to Measure Garage Door Springs: A Step-by-Step Guide
Every garage door relies on springs to operate smoothly and safely. If you’ve ever noticed your garage door struggling to open, closing too quickly, or making odd noises, the problem often starts with the springs. Knowing how to measure garage door springs is essential, whether you’re planning to replace them yourself or want to order the right parts.
Measuring them correctly ensures your new springs fit perfectly, provide the right balance, and help prevent dangerous accidents. It’s a task you can do at home with basic tools, a bit of patience, and careful attention to detail.
Getting the measurements wrong can lead to bigger problems—like a garage door that won’t open, wears out the opener, or even crashes down unexpectedly. Yet, many homeowners and even some handymen miss small details when measuring springs. This guide gives you everything you need to measure garage door springs the right way, even if you have little technical experience.
You’ll learn about the different types of springs, safety steps, the tools required, and every measurement you must take. By the end, you’ll be confident and ready to take control of your garage door’s health.
Understanding Garage Door Springs
Before you start measuring, it’s important to know what kind of springs you have. Garage doors use two main types:
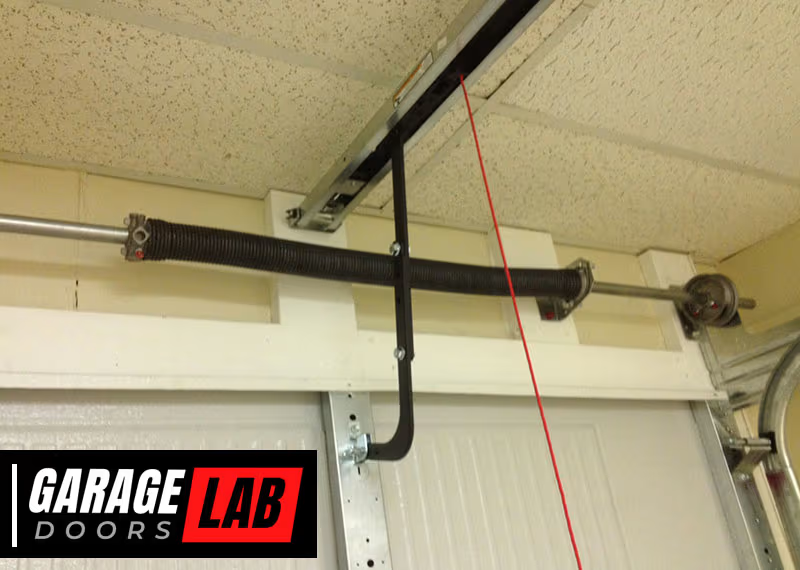
- Torsion springs: These sit above the garage door opening, mounted on a metal shaft. They twist as the door moves.
- Extension springs: Found above the horizontal tracks on either side, these stretch as the door closes.
Most modern garage doors use torsion springs because they are safer and last longer. However, older or lighter doors might still use extension springs. Knowing your spring type is the first step toward accurate measurement, as each type requires a different approach.
Why Accurate Measurement Matters
Springs are not one-size-fits-all. The wrong size can:
- Make the door too heavy or too light to lift
- Cause extra wear on the opener and tracks
- Lead to sudden spring failure, which can be dangerous
By measuring your garage door springs properly, you ensure safe, balanced, and smooth operation for years to come.
Key Components Of Springs
When measuring, it helps to know these terms:
- Wire size: The thickness of the spring wire
- Inside diameter: The width of the spring’s inner opening
- Overall length: The length of the spring when it’s not stretched or compressed
- Wind direction: For torsion springs, this is right or left hand wound
Each measurement plays a role in making sure the new spring matches the old one.
Safety Precautions Before Measuring
Working with garage door springs can be risky. Springs are under high tension and can cause serious injury if handled carelessly. Always follow these safety rules:
- Disconnect the opener: Unplug the power to your garage door opener so the door doesn’t move unexpectedly.
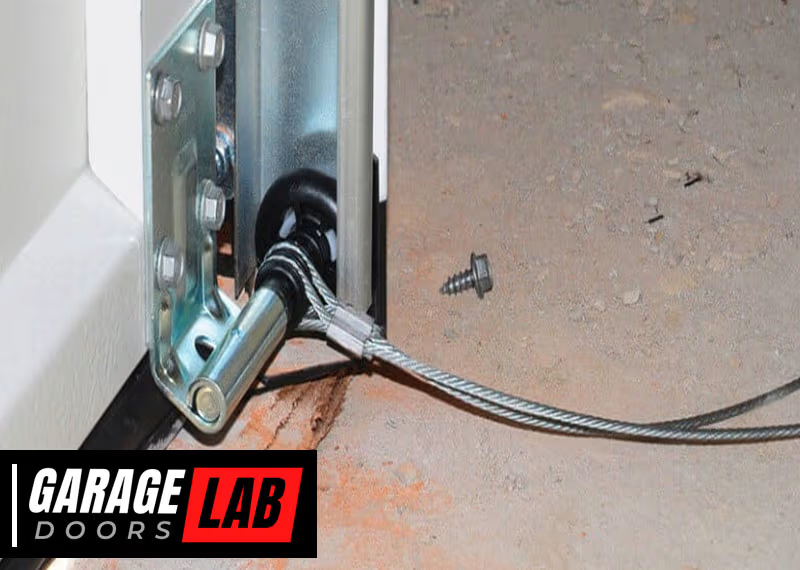
- Secure the door: Make sure the door is in the fully closed position. Use C-clamps or locking pliers to keep it from moving.
- Wear safety gear: Gloves and safety glasses protect you from sharp edges and accidental snaps.
- Do not remove springs: Never try to remove or adjust the springs while measuring. You only need to measure—replacement or removal is a separate, more advanced task.
- Have a helper: If you’re unsure, ask someone to assist or stand by in case you need help.
If you’re not comfortable or the spring is clearly damaged, it’s best to call a professional. But for basic measurement, these steps keep you safe.
Tools Needed For Measuring Garage Door Springs
Having the right tools makes the job easier and more accurate. Here’s what you’ll need:
- Tape measure: A sturdy, easy-to-read tape at least 25 feet long
- Caliper or micrometer: For measuring wire thickness (a ruler can work, but less accurate)
- Pen and paper: To record your measurements
- Camera or smartphone: For taking reference photos
- Flashlight: To see springs clearly in dark garages
Many people skip the caliper, but it’s the best way to get a precise wire size. You can buy a simple, inexpensive caliper at any hardware store.
How To Measure Torsion Garage Door Springs
Torsion springs are the most common type on today’s residential garage doors. Measuring them correctly requires care, but the process is straightforward if you follow these steps:
Step 1: Identify The Spring
Look above the garage door opening. If you see a long coil wound around a metal shaft, you have torsion springs. Most doors have one or two springs. Note their location and if they look identical—if not, measure each separately.
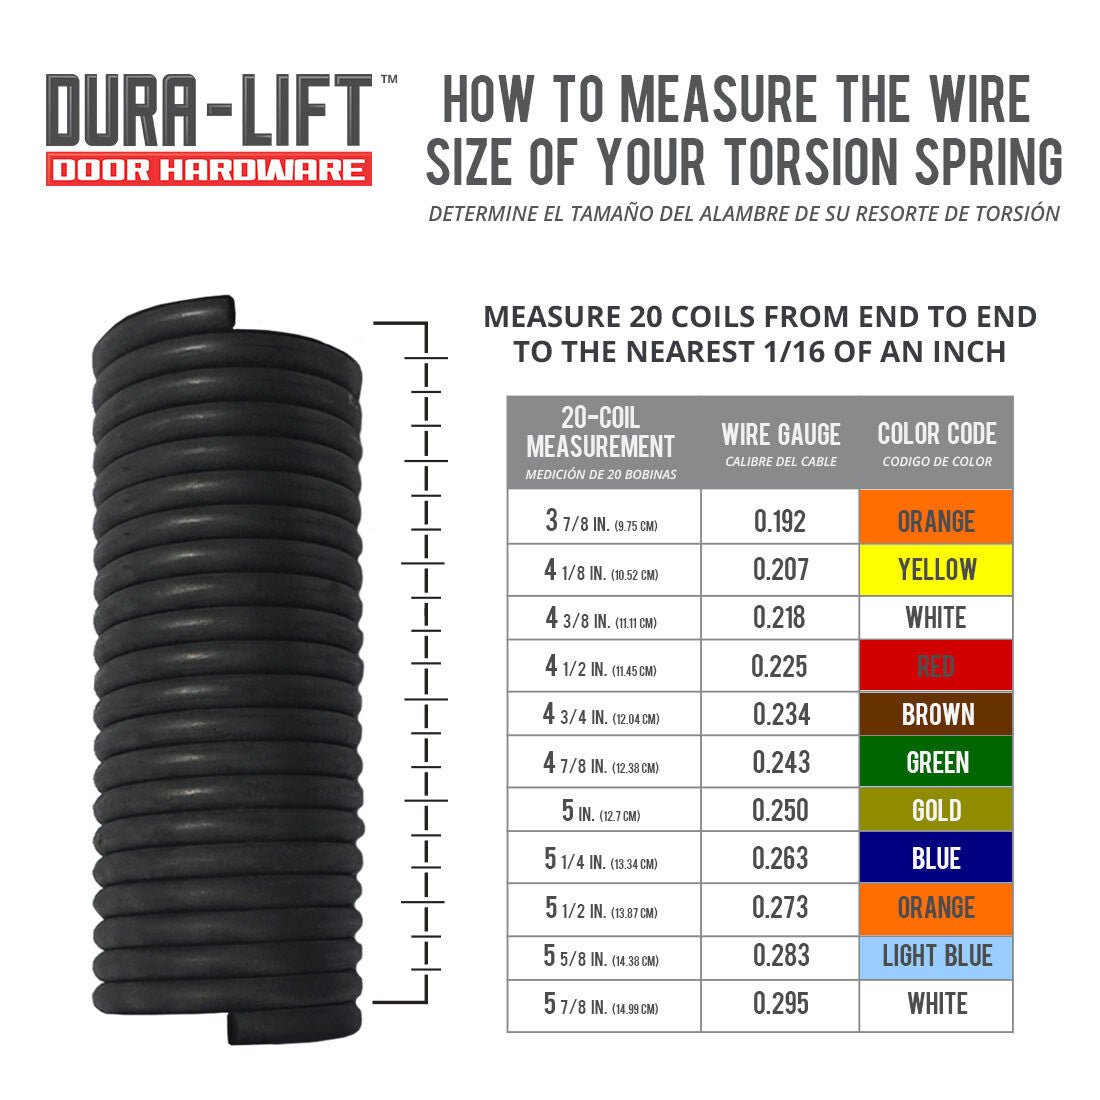
Step 2: Measure The Wire Size
Wire size is the thickness of the spring’s coil. Measuring this accurately is vital, as even a small difference can change how the spring works. There are two main methods:
Using A Caliper
- Place the caliper’s jaws around a single coil.
- Read the measurement in inches (e.g., 0.250”, 0.262”, 0.283”).
- Record the number.
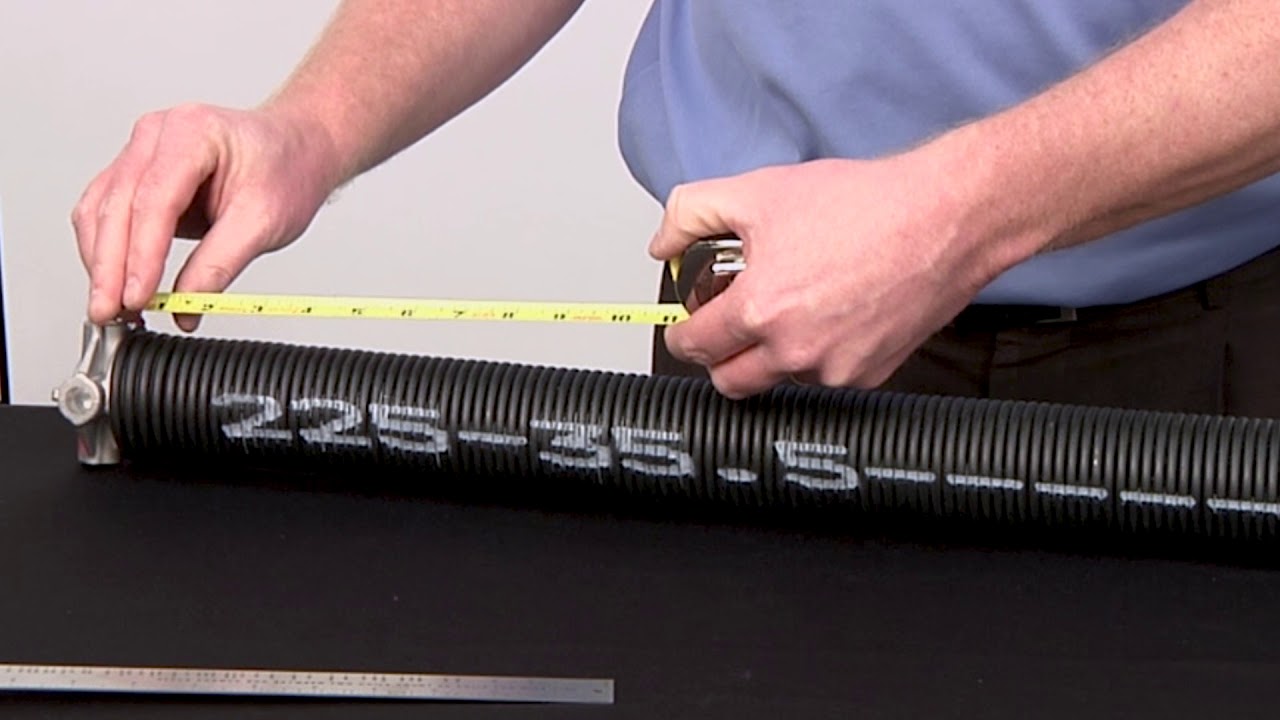
Using A Tape Measure
- Count 10 full coils along the spring.
- Measure the length (in inches) from the start to the end of these 10 coils.
- Divide the measurement by 10 to get the wire size.
Example: If 10 coils measure 2.5 inches, the wire size is 0.250”.
This method works because most garage door spring wire sizes increase in small, standard increments.
Step 3: Measure The Inside Diameter
The inside diameter is the distance across the open center of the spring (not the outside edge). It’s usually stamped on the winding cone or end bracket, but you can measure it yourself:
- Place the tape measure across the inner opening of the spring (not including the wire).
- Record the measurement in inches (common sizes are 1.75”, 2”, or 2.625”).
Step 4: Measure The Overall Length
The length of the spring should be measured with the spring fully relaxed (door open, but for safety, measure with the door closed). Do not include the end cones or brackets—just the coils themselves.
- Place the tape measure at one end of the coil, right where the wire starts.
- Stretch it along the length of the spring to the other end, following the coil (not over the shaft).
- Record the length in inches.
Tip: If your spring is broken, measure both pieces and add them together.
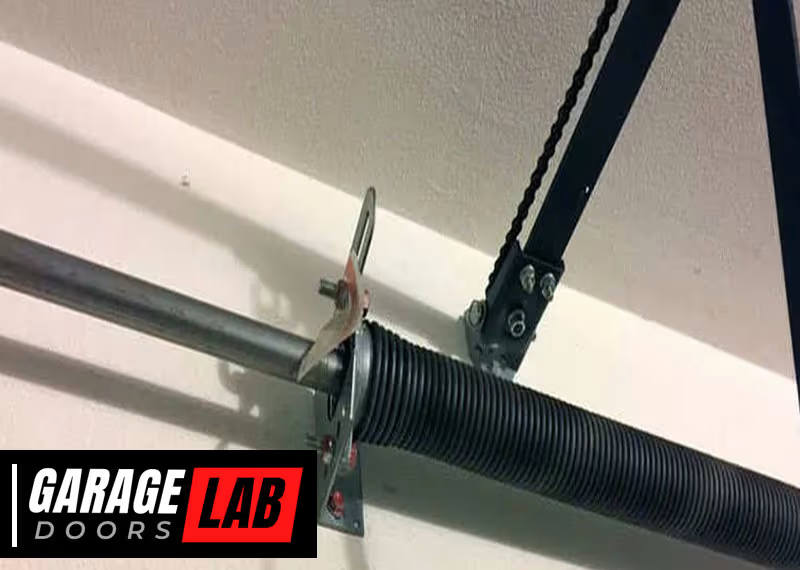
Step 5: Determine The Wind Direction
Torsion springs are either right-hand wound (RHW) or left-hand wound (LHW). This matters because the winding direction must match your door’s setup.
- Stand inside the garage, facing the door.
- If the spring is on the left and the end of the coil points toward you (up and over), it’s left-hand wound.
- If it’s on the right and the end points toward you, it’s right-hand wound.
If you’re unsure, take a photo and compare it to online diagrams or your manufacturer’s guide.
Step 6: Record Any Special Features
Some springs have painted stripes, special ends, or unique shapes. Make a note of any marks or differences, and take a photo for reference. This helps when ordering replacements.
How To Measure Extension Garage Door Springs
Extension springs require a slightly different approach. These are the long, thin springs located along the horizontal tracks. Here’s how to measure them:
Step 1: Identify The Extension Spring
Look above the tracks on each side of the garage door. Extension springs are usually colored, with hooks or loops at the ends. Most doors have one on each side.
Step 2: Measure The Spring Length
With the door closed (spring relaxed):
- Hook the tape measure to one end of the spring, just inside the loop or hook.
- Stretch it to the other end, again just inside the opposite loop/hook.
- Record the length in inches.
If the spring is broken, measure the two pieces end-to-end.
Step 3: Measure The Wire Size
Wire size for extension springs is often less critical than for torsion springs, but still important.
- Use a caliper or micrometer if you have one.
- If not, count 10 coils and measure the length with a tape measure, then divide by 10.
Step 4: Measure The Inside Diameter
- Place the tape measure inside the coil, not including the wire.
- Record the diameter in inches.
Most extension springs have a 1-inch or 1. 5-inch inside diameter.
Step 5: Identify The End Style
Extension springs have different ends:
- Open hook
- Closed loop
- Double loop
- Clip ends
Take note of which style you have, as it affects compatibility.
Step 6: Note The Color Code
Many extension springs have painted color bands. These indicate the spring’s lifting power. Write down the color or take a photo—this can help you match the spring if the other measurements are unclear.
Measuring Springs When They Are Broken
A broken garage door spring complicates measurement, but you can still get accurate results. Here’s how:
- Torsion springs: Measure both broken pieces. Add the lengths together for the total.
- Extension springs: Lay the pieces end-to-end, measure the total length.
- Wire size and diameter: Still measure from the coils and inner opening, as these usually don’t change.
Pro tip: Broken springs may look stretched or distorted at the break. Ignore the broken section and measure the rest.
Common Mistakes When Measuring Garage Door Springs
Even experienced DIYers make errors. Avoid these common mistakes:
- Including cones/brackets in length: Only measure the coil portion, not the metal ends.
- Mixing outside and inside diameter: Always measure the inside diameter.
- Guessing wire size: Small errors can cause big problems. Always measure or use a caliper.
- Measuring under tension: Always measure springs when the door is closed and the spring is relaxed.
- Ignoring wind direction: Right and left hand wound springs are not interchangeable.
- Forgetting to record details: Write down each measurement clearly for both left and right springs.
Why Garage Door Spring Measurements Matter
Precision matters more than most people realize. Here are real reasons why correct measurements are critical:
- Safety: The right spring prevents doors from slamming or flying up.
- Opener longevity: An unbalanced door strains the opener and reduces its life.
- Legal compliance: Some states require specific spring types for heavy doors.
- Cost savings: Mistakes mean buying new springs again, wasting money.
A mismatch of even 1/16” in wire size or 1/4” in length can make a big difference in how the door operates. Manufacturers design springs to balance a specific door weight and size; only the right spring will deliver safe, long-term performance.
Interpreting Your Measurements
Once you have your numbers, you’ll need to match them to the correct replacement spring. Here’s what to do:
- Wire size: Use your caliper or 10-coil measurement to find the closest standard size (e.g., 0.207”, 0.218”, 0.225”, etc. ).
- Inside diameter: Match exactly; most common are 1.75”, 2”, or 2.625”.
- Length: Find a spring with the same or slightly longer length (for torsion springs, length matters less than wire size and diameter for most residential doors).
- Wind direction: Must match your original spring.
- End style or color code: For extension springs, match the loop or hook style and color.
If you’re ordering online, most suppliers have a chart or calculator to help you pick the right part. Always compare your measurements to their specs.
Example Measurement Walkthrough
Let’s see a real-life example:
- You have a two-car garage door with two torsion springs.
- The left spring, measured across 10 coils, is 2.50 inches—so wire size is 0.250”.
- Inside diameter is 2 inches.
- Length is 32 inches.
- Wind direction is left-hand wound (on the left side).
You would order: (1) 0.250” wire size, 2” inside diameter, 32” length, left-hand wound torsion spring.
Repeat for the right spring, adjusting for any differences.
Comparing Torsion Vs Extension Spring Measurements
Here’s a handy comparison for quick reference:
| Feature | Torsion Springs | Extension Springs |
|---|---|---|
| Location | Above door, on shaft | Above horizontal tracks |
| Key Measurements | Wire size, inside diameter, length, wind direction | Length, wire size, inside diameter, end style, color code |
| Common Sizes | 1.75″, 2″, 2.625″ diameters | 1″, 1.5″ diameters |
| Safety | Higher tension, more dangerous to remove | Less tension, but still risky |
Advanced Tips For Accurate Measurement
Sometimes, measuring isn’t as simple as it seems. Here are two advanced tips most beginners miss:
- Take multiple measurements: Springs can wear unevenly. Measure wire size in two or three places and use the most consistent result.
- Check for labels or stamps: Many springs have part numbers, size, or manufacturer stamped on the end cones or brackets. This can confirm your measurements or help you order exact replacements.
What If You Can’t Measure The Spring?
Sometimes the spring is missing, too damaged, or you can’t access it safely. In this case:
- Check the owner’s manual: The original spring size may be listed.
- Look for a manufacturer label: Most doors have a sticker with model and serial number. You can contact the manufacturer for specifications.
- Weigh your garage door: If all else fails, disconnect the door from the opener and use a bathroom scale to weigh the door. With the weight and door height, a spring supplier can recommend the right size.
Table: Common Garage Door Spring Wire Sizes
For reference, here are the most common wire sizes you’ll encounter:
| Wire Size (inches) | 10 Coils Length | 20 Coils Length |
|---|---|---|
| 0.192 | 1.92 | 3.84 |
| 0.207 | 2.07 | 4.14 |
| 0.218 | 2.18 | 4.36 |
| 0.225 | 2.25 | 4.50 |
| 0.250 | 2.50 | 5.00 |
| 0.262 | 2.62 | 5.24 |
| 0.283 | 2.83 | 5.66 |
This table helps you double-check your wire size calculation.

When To Replace Both Springs
If your garage door uses two springs, it’s best to replace both—even if only one is broken. Here’s why:
- Even wear: Springs stretch and weaken over time. Installing a new spring with an old one can cause uneven lifting.
- Prevent future breakdowns: If one spring broke, the other is likely to fail soon.
- Smoother operation: Matching springs keep the door balanced and prevent jerky movement.
Signs Your Measurement Is Off
After installing new springs, check for these warning signs:
- Door is hard to lift or lower by hand
- Door doesn’t stay halfway open
- Opener struggles or makes unusual noises
If you notice any of these, double-check your measurements or consult a professional.
Maintenance Tips After Replacement
Getting the right spring is just the start. Keep your garage door running smoothly with regular maintenance:
- Lubricate springs and hinges every 6 months with a silicone-based spray.
- Check the balance: Disconnect the opener and lift the door halfway. It should stay in place. If it moves, call a technician.
- Inspect for wear: Look for gaps, rust, or cracks in the springs every few months.
- Listen for noise: Squeaking or popping sounds can signal worn-out springs or hardware.
Proper care extends the life of your new springs and keeps your garage door safe.
Table: Troubleshooting Measurement Problems
If you run into trouble, use this quick troubleshooting guide:
| Problem | Possible Cause | Solution |
|---|---|---|
| Door too heavy | Springs too short or thin | Check wire size and length, reorder correct springs |
| Door flies up | Springs too long or thick | Verify measurements, consult supplier |
| Spring doesn’t fit shaft | Wrong inside diameter | Measure inner opening, match exactly |
| Noisy operation | Wrong end style or installation | Check end style, install correctly |
When To Call A Professional
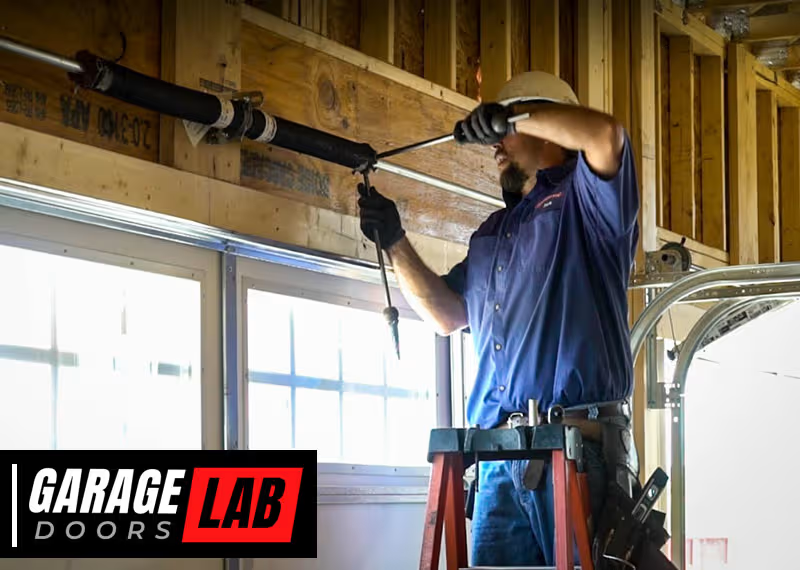
If you feel unsure at any point, or your garage door has unusual features (like high-lift or commercial springs), it’s always wise to contact a certified technician. Springs are under extreme tension; mistakes can be dangerous. A pro can measure, install, and balance everything safely.
For complex doors or unique situations, professionals have specialized tools and training.
Additional Resources
For further reading and diagrams, see the Garage Door Opener Wikipedia page. It offers more technical background and safety information.
Frequently Asked Questions
How Do I Know If I Have A Torsion Or Extension Spring?
Torsion springs are above the door, centered on a shaft. Extension springs are above the tracks on both sides. Torsion springs twist; extension springs stretch.
Can I Measure Garage Door Springs While They Are Still Installed?
Yes, you can measure most springs while they’re on the door—as long as the door is closed, the opener is unplugged, and you do not remove or adjust the spring itself.
What If My Spring Has No Color Code Or Label?
Use the wire size, inside diameter, and length to identify the right replacement. If you’re unsure, photos and measurements help suppliers match your spring.
Is It Safe To Replace Garage Door Springs Myself?
Measuring is usually safe. Replacing springs can be very dangerous due to high tension. If you have no experience, call a professional to avoid injury.
Why Does My Garage Door Have Two Springs?
Two springs balance the door better and reduce wear. If one breaks, always replace both to ensure even lifting and longer life.
The process of measuring garage door springs is detailed, but with the right approach, it’s completely manageable for most homeowners. Careful, accurate measurement is the foundation of a safe and reliable garage door. Take your time, double-check each step, and don’t hesitate to ask for help if you need it.
Your garage door—and your peace of mind—will thank you.