
Disabling garage door sensors is something homeowners sometimes consider for various reasons. Maybe your sensors are malfunctioning, or the door won’t close when it should. Sometimes, you need to run tests or do repairs, and the sensors get in the way.
Whatever your reason, it’s critical to understand how garage door sensors work, the safety risks of disabling them, and the correct way to do it. This guide explains everything you need to know, step by step. You’ll also learn about alternatives, legal considerations, and common mistakes that can save you time and trouble.
Understanding Garage Door Sensors
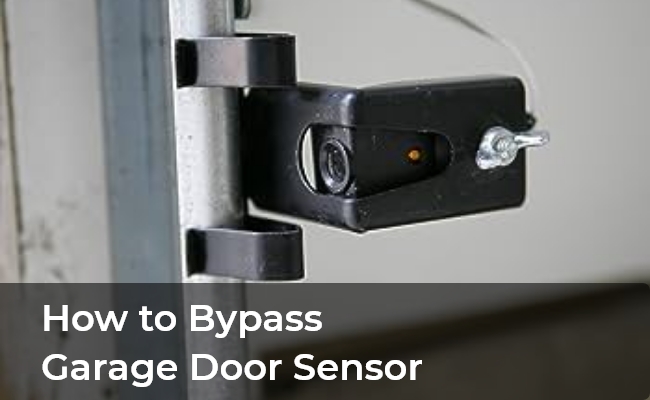
Garage door sensors are a core part of modern garage door openers. They use infrared beams to detect objects or people under the garage door. If something breaks the beam, the sensors send a signal to stop or reverse the closing door.
How Sensors Work
Most garage doors have two sensors, one on each side, mounted about six inches above the ground. One sensor sends an infrared beam, and the other receives it. When the path is clear, the door can close. If something (a child, pet, or object) blocks the beam, the door stops or reverses.
This system helps prevent injuries and damage.
Types Of Garage Door Sensors
There are two main types:
- Photoelectric sensors: The most common, using an invisible light beam.
- Pressure sensors: Installed on the bottom edge of the door, these detect contact with an object.
Most US garage doors made after 1993 use photoelectric sensors because they are more reliable and meet federal safety standards.
Why They Matter
Garage door sensors have saved lives and prevented countless injuries. The Consumer Product Safety Commission reported a significant drop in accidents after sensors became mandatory. Disabling them removes this protection, so it should never be a permanent solution.
Reasons Homeowners Disable Garage Door Sensors
Disabling sensors is usually a temporary solution. Here are the most common reasons people consider it:
- Malfunctioning sensors: Dust, dirt, misalignment, or water damage can cause false signals.
- Garage door won’t close: Sometimes, the door won’t close even when nothing blocks the sensors.
- Testing or repairs: Technicians may need to bypass sensors to check the opener or mechanics.
- False alarms: Sunlight, spider webs, or even leaves can interfere with the infrared beam.
- Upgrades or replacements: During upgrades, sensors may need to be disconnected.
It’s important to try cleaning, realigning, or repairing sensors before choosing to disable them.

Safety Concerns And Legal Issues
Before you disable your garage door sensors, know the risks and rules.
Safety Risks
- Injury to children or pets: Without sensors, the door could close on a person or animal.
- Damage to property: Cars, bikes, or other objects could be crushed.
- Void warranty: Disabling safety features can void your garage door opener warranty.
- Insurance issues: Claims could be denied if an accident happens while sensors are disabled.
Legal Requirements
In the United States, the law requires all automatic garage doors to have safety sensors. The Consumer Product Safety Improvement Act of 1990 made these mandatory for all openers manufactured after 1993. Removing or disabling sensors could make your garage door non-compliant with building codes.
In some states, home inspectors are required to report disabled or non-functioning sensors during home sales.
When Is It Ever Safe?
Disabling sensors should only be done temporarily, such as during repairs or specific troubleshooting. Always reactivate them as soon as possible.
Preparation: Tools And Safety Gear
Before working on your garage door sensors, gather the following tools:
- Screwdriver set (Phillips and flathead)
- Pliers
- Wire nuts or electrical tape
- Step ladder
- Multimeter (optional, for testing)
- Work gloves
- Safety glasses
Wear gloves and glasses to protect your hands and eyes. Never work on a garage door system while it’s plugged in if you are not confident.

Step-by-step Guide To Disabling Garage Door Sensors
Follow these steps carefully to temporarily disable your garage door sensors.
1. Unplug The Garage Door Opener
Safety first. Always unplug the opener from the power outlet before touching any wires or components.
2. Locate The Sensors
Find the two sensors, usually mounted on metal brackets near the bottom of the garage door tracks. They are small boxes with wires running to the opener.
3. Inspect The Wiring
Look at the wires connected to each sensor. Most systems use low-voltage wires (usually white and black or white and red). Note how they are connected so you can restore them later.
4. Disconnect The Sensors
Use a screwdriver to loosen the screws on the wire terminals of each sensor. Gently pull out the wires. You can also cut the wires, but this makes reinstallation harder.
If your opener uses quick-connect plugs, simply unplug the sensors.
5. Secure The Wires
Use wire nuts or electrical tape to cover the exposed wire ends. This prevents short circuits and keeps dust out.
6. Reconnect Power And Test The Door
Plug the opener back in. Try closing the garage door using the wall switch or remote. Most openers will not close with the sensors disconnected. Some may allow you to close the door by holding the wall button continuously.
7. Override The Sensors (if Needed)
If you must close the door, press and hold the wall control button until the door is fully closed. This bypasses the sensors on most openers, but not all brands support this.
8. Restore The Sensors
When you finish your repairs or tests, reconnect the sensor wires exactly as they were, tighten the screws, and make sure the sensors are aligned.
Example: Chamberlain/liftmaster Openers
On popular brands like Chamberlain or LiftMaster, the wall control button method is the only safe way to temporarily bypass sensors. Newer models will not close the door with the remote if sensors are off.
Example: Genie Openers
Genie openers often behave similarly, but the wiring color may be different. Always check your model’s manual.
Alternative Solutions To Disabling Sensors
Disabling garage door sensors is not the only fix if you’re having problems. Try these alternatives first:
Clean The Sensors
Dust, cobwebs, or water spots can block the beam. Gently clean the sensor lenses with a soft cloth.
Realign The Sensors
If the sensors are not facing each other, the beam will not connect. Loosen the mounting screws, adjust the sensors until the indicator lights are steady, then retighten.
Check For Wiring Damage
Look for frayed or broken wires along the sensor lines. Replace damaged wires.
Block Sunlight Interference
Direct sunlight can sometimes trick the sensors. Try shading the sensor with a small piece of cardboard.
Replace Faulty Sensors
If cleaning and realignment don’t work, the sensor may be defective. Replacement sensors are available for most brands.
Data Table: Common Garage Door Opener Brands And Sensor Features
Here is a comparison of top garage door opener brands and their sensor technology:
| Brand | Sensor Type | Bypass Feature | Replacement Cost (USD) |
|---|---|---|---|
| Chamberlain | Photoelectric | Hold Wall Button | $25–$40 |
| LiftMaster | Photoelectric | Hold Wall Button | $20–$35 |
| Genie | Photoelectric | Hold Wall Button | $20–$30 |
| Craftsman | Photoelectric | Hold Wall Button | $20–$35 |
| Linear | Photoelectric | No Bypass | $20–$30 |
Risks Of Disabling Garage Door Sensors
It’s important to understand the risks before making any changes.
1. Injury And Property Damage
The most serious risk is injury to people or pets. Without sensors, the door may close on someone or something unexpectedly. Over 20,000 garage door-related injuries are reported each year in the US, often due to malfunctioning or disabled safety systems.
2. Legal And Insurance Problems
If an accident occurs with disabled sensors, you could be held liable. Some insurance policies will not cover damage if safety devices are tampered with.
3. Opener Malfunction
Some modern openers will not function at all without connected sensors. Disabling them can trigger error codes and stop the door from moving.
4. Home Sale Issues
If you plan to sell your home, a non-working safety system can delay or block the sale.
When Not To Disable Sensors
There are situations when you should never disable your garage door sensors:
- If children or pets use the garage: The risk of injury is too high.
- If the garage is used for living space: People may not expect the door to close automatically.
- If your opener is still under warranty: Disabling sensors can void the coverage.
- If you are unsure about the wiring or repairs: Call a professional instead.
Legal And Code Compliance
Disabling garage door sensors may violate local codes or federal regulations. Here’s how different states approach the issue:
| State | Code Requirement | Inspector Action |
|---|---|---|
| California | Mandatory Sensors | Report if Disabled |
| Texas | Mandatory Sensors | Report if Disabled |
| Florida | Mandatory Sensors | Report if Disabled |
| New York | Mandatory Sensors | Report if Disabled |
| Ohio | Mandatory Sensors | Report if Disabled |
In most US states, disabling sensors is a code violation and must be fixed before a home sale.
Troubleshooting Garage Door Sensor Problems
Sometimes, the problem is not the sensors themselves but the wiring, alignment, or opener settings.
Common Sensor Problems
- Blinking sensor lights: Usually a sign of misalignment or a blocked beam.
- No power to sensors: Check for loose wires or a tripped circuit.
- Door reverses immediately: The sensors may be dirty or faulty.
Step-by-step Troubleshooting
- Check the sensor lights. Both should be solid (not blinking).
- Clean the lenses. Use a dry, soft cloth.
- Realign the sensors. Move them until the indicator lights stop blinking.
- Check all wires. Tighten any loose connections.
- Replace if needed. If sensors are damaged, buy replacements compatible with your opener.
When To Call A Professional
If you have tried all the above and the door still won’t close, call a licensed garage door technician. Electricity, heavy doors, and powerful springs make garage doors dangerous to repair without experience.
Alternatives To Disabling: Sensor Bypass Kits And Smart Openers
If you need to bypass the sensors for a special reason, there are safer alternatives:
Sensor Bypass Kits
Some companies sell bypass kits that allow you to temporarily override the sensors safely. These usually involve a special switch or relay that can be removed later.
Smart Garage Door Openers
Modern smart openers have advanced safety features and remote diagnostics. Some allow temporary overrides via smartphone, but still monitor for safety.
Example: Wi-fi Enabled Openers
Brands like myQ and Genie Aladdin Connect let you monitor your door and receive alerts if something is wrong. This reduces the need to bypass sensors at all.
Tips For Safe Garage Door Operation
To avoid sensor problems, follow these safety tips:
- Test the sensors monthly. Place a roll of paper towels under the door and try closing it. The door should reverse when it touches the roll.
- Clean the sensors regularly. Dust, cobwebs, and water spots can cause false triggers.
- Keep sensors aligned. Make sure both indicator lights are solid.
- Teach children about garage door safety. Never let kids play with remotes or wall buttons.
- Schedule professional inspections. Once a year, have a technician check your system.
Data Table: Sensor Troubleshooting Steps And Solutions
Here’s a summary of common problems and the recommended fix:
| Problem | Possible Cause | Solution |
|---|---|---|
| Door won’t close | Blocked or misaligned sensor | Clean and realign sensors |
| Sensor light blinking | Misaligned sensor | Adjust until lights are steady |
| No power to sensors | Loose wire or tripped circuit | Check wiring and reset circuit |
| Door reverses immediately | Faulty sensor | Replace sensor |
| Sunlight interference | Direct sun on sensor | Shade the sensor |
Non-obvious Insights For Homeowners
Many people overlook these important points:
- Most openers allow you to close the door by holding the wall button. This is a built-in safety bypass for emergencies and does not require rewiring.
- Garage door sensors are often affected by vibrations. If your door shakes or the tracks are loose, the sensors may misalign. Tighten all mounting brackets before assuming the sensors are broken.
- In some cases, interference from LED lighting can disrupt sensor signals. If you installed new garage lights, try turning them off to see if the sensors work.
- Sensor wires can corrode at the connection point. Even if they look clean, disconnect and gently scrape the wire ends before reconnecting.
Frequently Asked Questions
What Happens If I Permanently Disable My Garage Door Sensors?
Permanently disabling sensors removes a key safety feature. The door may close on objects, people, or pets, increasing the risk of injury or property damage. In most places, this is also a building code violation.
Can I Bypass Garage Door Sensors Just With The Remote?
No. Most openers require you to use the wall control button for a temporary bypass. Remotes will not work if the sensors are disabled, as a safety precaution.
How Do I Know If My Sensors Are Misaligned Or Broken?
If the indicator lights on both sensors are not solid, they may be misaligned. Try adjusting them until both lights are steady. If they still do not work after cleaning and realignment, the sensor may be broken.
Is It Legal To Disable Garage Door Sensors In The Us?
No. Federal law requires safety sensors on all automatic garage doors made after 1993. Disabling them is not legal for regular use and may affect home sales or insurance coverage.
Where Can I Get Official Information About Garage Door Safety Rules?
You can find official safety standards and guidelines from the Consumer Product Safety Commission.
Garage door sensors are a critical part of home safety. Disabling them is almost never the best solution. Try cleaning, realigning, or replacing them first, and use the temporary override only when absolutely necessary. If you’re ever in doubt, call a professional—it’s better to be safe than sorry.