Now Reading: How to Put in a Garage Door: Step-by-Step Installation Guide
- 01
How to Put in a Garage Door: Step-by-Step Installation Guide
Putting in a new garage door can feel like a big project, but with the right guidance, tools, and patience, many homeowners can do it themselves. Replacing or installing a garage door is not only about improving your home’s look—it can also boost security, insulation, and value.
This guide will walk you through every step, from preparation to final adjustments, so you can tackle the job with confidence. Along the way, you’ll learn tips experts use and common mistakes to avoid, making sure your new garage door works smoothly for years.
Understanding Your Garage Door Options
Before you start, it helps to know what type of garage door you are installing. There are several main types:
- Sectional doors: The most common in the US, made of horizontal panels that roll up.
- Roll-up doors: Typically for commercial spaces, these are made of narrow slats.
- Swing-out carriage doors: Open like regular doors, often used for a classic look.
- Sliding doors: Move to the side, good for garages with little headroom.
Most homeowners will install a sectional garage door, which is practical, widely available, and easy to automate.
Choosing The Right Material
Garage doors come in different materials. Each has its pros and cons:
| Material | Pros | Cons |
|---|---|---|
| Steel | Strong, secure, low maintenance | Can dent, may rust if not treated |
| Wood | Beautiful, customizable | Heavy, needs regular maintenance |
| Aluminum | Lightweight, rust-resistant | Less strong, can dent easily |
| Fiberglass | Lightweight, resists salt-air corrosion | Can fade, less insulating |
Think about your climate, budget, and how much time you want to spend on maintenance before making your choice.
Gathering Tools And Materials
To install a garage door, you need the right tools and materials. Most installation kits include the door panels, hardware, and tracks. You’ll need to supply:
- Power drill with bits
- Wrenches and socket set
- Screwdriver set
- Level (4-foot is best)
- Tape measure
- Stepladder
- C-clamps or locking pliers
- Hammer
- Pliers
- Sawhorses (for laying out panels)
- Safety glasses and gloves
Pro insight: Many first-timers forget to have a sturdy stepladder and C-clamps. These are essential for working safely and holding parts in place.
Measuring And Preparing The Garage Opening
Correct measurements are crucial for a smooth installation. Don’t trust the old door’s measurements—always measure again.
Key Measurements
- Width and height of the garage door opening (finished space, not just the frame).
- Side room: Space between the opening edge and the wall—should be at least 3.5 inches on each side.
- Headroom: Space between the top of the opening and the ceiling—most sectional doors need 10–12 inches.
- Backroom: Distance from the garage opening to the back wall—at least the door height plus 18 inches.
Write these numbers down. If any measurement is too small, you may need to adjust framing or choose a different door type.
Common mistake: Forgetting to check for pipes, lights, or obstacles in the headroom/backroom area. Clear these before starting.
Removing The Old Garage Door
If you’re replacing a door, safe removal is important. Garage doors have heavy springs under tension, which can be dangerous.
- Unplug the opener (if you have one) and pull the release cord to disconnect the door.
- Secure the door with locking pliers or C-clamps above the bottom roller on both tracks.
- Remove tension from the springs. For extension springs, open the door fully and clamp it; for torsion springs, use winding bars to unwind the spring tension slowly.
- Take off the hardware: Start at the top panel and work down, unscrewing hinges and rollers.
- Remove tracks and old opener if you are replacing them.
Safety tip: If you’re not confident handling springs, call a pro for this part. Torsion springs can cause serious injuries.
Checking And Repairing The Framing
Inspect the garage opening’s framing. Look for:
- Rotting wood or termite damage
- Loose or missing fasteners
- Warped or uneven surfaces
Replace any damaged wood and tighten all fasteners. The door’s weight will stress the frame, so it needs to be solid and square.
Expert tip: Use a long level or string to check if the jambs (sides) are plumb and the header (top) is level. A crooked frame will cause problems later.
Installing The Bottom Bracket And Weather Seal
Start your new door installation with the bottom panel.
- Lay the bottom panel on sawhorses.
- Attach the bottom brackets on both ends. These support the rollers and cables.
- Install the weather seal along the bottom edge. This rubber strip keeps out water, dust, and pests.
Make sure the seal sits flat against the floor. If your garage floor is uneven, trim the seal to fit.

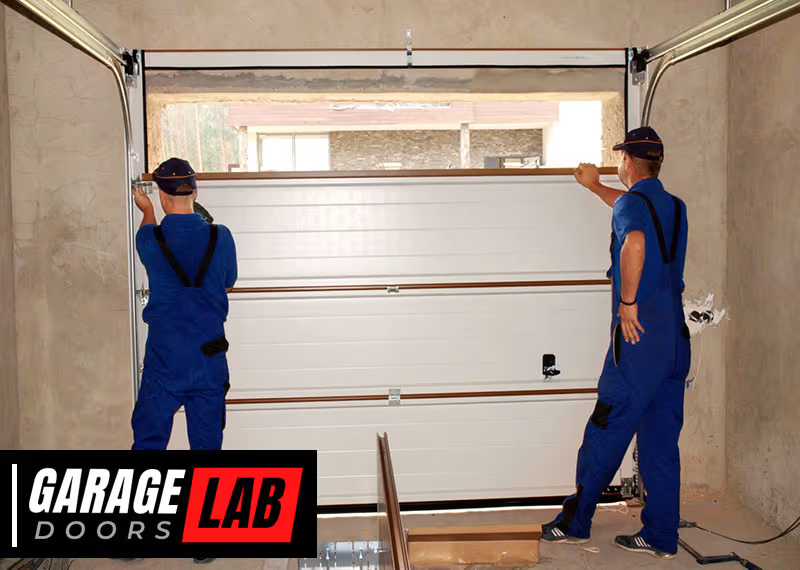
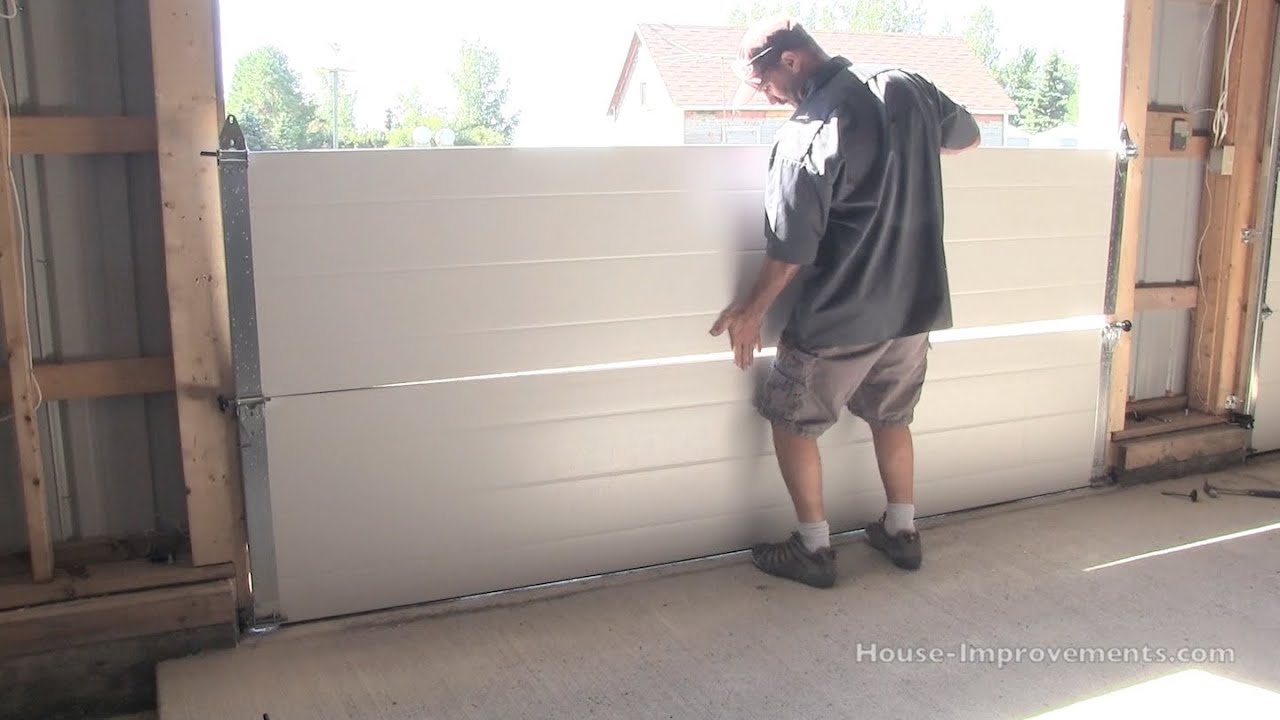
Setting The Door Panels In Place
Now you’ll build the door, one panel at a time.
- Lift the bottom panel into the opening. Use shims to level it side-to-side.
- Nail or clamp the panel temporarily to the door jambs.
- Insert rollers into the brackets on the panel’s sides.
- Slide the vertical tracks over the rollers. Attach the tracks loosely to the jambs.
- Stack the next panel on top, aligning the edges and connecting hinges.
- Repeat for all panels, attaching hinges and rollers as you go.
Check that each panel is level before adding the next. Tighten hardware only after all panels are stacked and aligned.
Non-obvious insight: Some panels look similar but are not identical. Check for label marks or instructions on which is the bottom, middle, or top.
Installing The Vertical And Horizontal Tracks
With panels stacked and rollers in place, it’s time to secure the tracks.
- Vertical tracks: Attach these to the jambs using lag screws. Keep them perfectly vertical. Use a level to check.
- Horizontal tracks: Connect these to the vertical tracks’ curved ends. Secure the other end to ceiling hangers.
The tracks should run parallel and have no bends or twists. If the tracks are not straight, the door may jam or wear out quickly.
Pro tip: Don’t fully tighten track bolts until all panels and tracks are aligned. Small adjustments make a big difference.

Securing The Tracks To The Ceiling And Walls
Strong support is key. Use angle iron or the provided brackets to hang the horizontal tracks from ceiling joists.
- Mark and drill pilot holes in joists for lag screws.
- Install the supports so the tracks are level and secure.
- Double-check alignment with a long level.
If your garage has finished ceilings, use a stud finder to locate joists. Never hang tracks from drywall alone.
Adding The Springs And Lift Mechanism
This is the most technical and potentially dangerous step. Most residential doors use either torsion or extension springs.
Torsion Springs
- Slide the torsion bar into the spring, then mount above the door.
- Attach the cable drums at each end.
- Thread the lifting cables from the bottom brackets, around the drums.
- Wind the springs using winding bars—follow the door instructions for the number of turns.
Extension Springs
- Attach the springs to the rear track hangers.
- Connect the safety cables through the center of the springs.
- Hook the lifting cables to the bottom panel and track pulleys.
- Stretch the springs as you adjust the door.
Warning: Always wear safety glasses and gloves. If you’re unsure, hire a professional for this step.
Non-obvious insight: Some kits come with color-coded springs for left and right sides. Don’t mix them up—they wind in opposite directions.
Installing The Door Opener (optional)
Many homeowners add an automatic garage door opener. If you do, follow the opener manual, but the basic steps are:
- Mount the opener unit to the ceiling, centered above the door.
- Assemble and attach the opener rail to the wall above the door.
- Connect the door arm to the top panel.
- Run wiring for the wall button and safety sensors.
- Plug in and test the opener with the door disconnected at first.
Expert insight: Test the door balance by lifting it halfway by hand. It should stay in place. If it moves, adjust the springs before connecting the opener.
Adjusting And Balancing The Door
Proper balance makes the door easy to open and safe to use.
- Disconnect the opener (if installed).
- Lift the door halfway by hand. It should stay put.
- If the door rises or falls, adjust the spring tension a quarter turn at a time.
- Check for smooth motion and no binding in the tracks.
Never force the door. Sticking means tracks or panels are misaligned.
Pro tip: Lubricate rollers, hinges, and springs with garage door lubricant—not WD-40, which attracts dust.
Final Safety Checks And Testing
Before calling the job done:
- Check all fasteners for tightness.
- Test the emergency release if you have an opener.
- Test the safety reversal system by placing a block under the door; it should reverse when touching the block.
- Watch the door open and close several times, checking for smooth, quiet motion.
Extra advice: Clean up tools and packing materials. Stray screws or nails can puncture tires or cause injury.
Maintenance Tips For Longevity
A well-installed garage door needs regular maintenance to stay safe and quiet.
- Lubricate moving parts twice a year.
- Check balance every six months.
- Inspect weather seals for cracks or gaps.
- Tighten loose screws and bolts.
- Clean tracks with a brush or vacuum.
Neglected tip: Mark the spring winding bar holes with paint. This makes future adjustments easier and safer.
Common Problems And Troubleshooting
Even with careful installation, issues can come up. Here’s how to spot and fix them:
| Problem | Possible Cause | Solution |
|---|---|---|
| Door sticks or jams | Misaligned tracks or rollers | Realign tracks, check for obstructions |
| Door is heavy to lift | Spring tension too low | Increase spring tension |
| Door slams shut | Spring tension too high | Decrease spring tension |
| Opener won’t close door | Safety sensors blocked or misaligned | Clean and align sensors |
| Noisy operation | Lack of lubrication, loose hardware | Lubricate and tighten all hardware |
Pro tip: Keep a log of maintenance and repairs. This helps diagnose future problems faster.
When To Call A Professional
While installing a garage door is possible for skilled homeowners, there are times to call in a pro:
- Dealing with torsion springs if you’re not trained
- Structural issues with the garage frame
- Electrical wiring for openers, if unfamiliar
- Very large or heavy doors (2-car or insulated models)
A professional installer brings not only tools but also experience, which can save time and prevent costly mistakes.
Cost Considerations
Installing a garage door yourself can save money, but there are costs to keep in mind:
- Door kit: $300–$1,200 depending on size and material
- Tools and supplies: $50–$200 if you need to buy/replace items
- Professional installation: $300–$700 (labor only)
- Disposal of old door: Sometimes extra
Hidden costs include fixing mistakes, buying extra parts, or dealing with injuries from springs. Always balance savings with safety and your skill level.
Environmental And Energy Benefits
A new, properly installed garage door can improve your home’s energy efficiency. Modern doors often have insulation (measured as R-value) which keeps heat and cold out.
- Steel doors with polyurethane insulation can have R-values of 12–18.
- Uninsulated doors may have R-values as low as 1–2.
Better insulation means lower energy bills, more comfortable rooms above the garage, and less noise from outside. For climate data and insulation tips, the U.S. Department of Energy has more information.
Non-obvious insight: Even a basic weather seal upgrade can make a big difference in drafty garages.
Real-world Example
Let’s look at a quick example. John, a homeowner in Ohio, replaced his 8×7-foot wooden door with a steel sectional door. He spent about 7 hours (with a friend), used $80 worth of new tools, and kept his costs under $700—half what a pro quoted.
He found leveling the panels and aligning tracks was tricky, but by following the directions and double-checking each step, he finished the project safely. His new door is quieter, better insulated, and has improved his home’s curb appeal.
Frequently Asked Questions
How Long Does It Take To Put In A Garage Door?
Most DIYers can complete the job in 6–10 hours, depending on experience and whether it’s a one- or two-car door. Having a helper can speed up the process, especially when lifting panels.
Can I Reuse My Old Garage Door Opener?
Yes, in most cases. As long as your opener is in good condition and fits the new door’s weight and track system, you can reuse it. Check the opener’s manual for compatibility.
Are Garage Door Springs Really Dangerous?
Yes, especially torsion springs. They store a lot of energy and can cause serious injury if released suddenly. Always use the right tools and safety gear. If in doubt, hire a pro for the spring installation.
How Much Headroom Do I Need For A New Garage Door?
Most sectional doors need at least 10–12 inches of headroom above the opening for tracks and springs. If you have less space, look for “low headroom” kits or consult a door specialist.
What’s The Best Way To Maintain My New Garage Door?
Lubricate all moving parts twice a year, check for loose hardware, inspect weather seals, and test the balance regularly. This keeps your door safe, quiet, and long-lasting.
Putting in a garage door is a project that demands careful planning, the right tools, and attention to detail. For most homeowners, it can be a satisfying way to improve their home’s comfort, value, and appearance. By following each step, staying safe around springs, and not rushing, you can get professional-quality results.
And if you get stuck, remember—help from a pro is just a call away.


