
If you ever find yourself stuck outside your garage because your remote control won’t work, or you just bought a new remote and need to connect it, you’re not alone. Many homeowners need to reprogram a garage door opener at some point, whether it’s due to a lost remote, a new purchase, or simply wanting to improve security. While the process may seem intimidating at first, you can do it with just a little patience and the right information. Understanding how to reprogram your garage door opener is not only useful—it can also save you time and money.
Today’s garage door systems are safer and more secure than ever before. But with this added technology, the steps to reprogram your opener can sometimes get confusing. Different brands, models, and even different years of manufacture can all have their own unique instructions.
This guide will walk you through everything you need to know, from understanding what reprogramming actually means to step-by-step instructions for the most popular brands. Whether you’re a complete beginner or just need a quick refresher, you’ll find clear, actionable advice you can use right now.
What Does It Mean To Reprogram A Garage Door Opener?
Reprogramming a garage door opener means connecting your remote control or keypad to the garage door opener unit so it can send commands. Over time, you might need to do this if you:
- Lose a remote or want to erase old ones for security
- Buy a new remote or keypad
- Move into a new house and need to reset everything
Each garage door opener has a receiver (the motor unit on the ceiling) that “listens” for a code from remotes. When you reprogram, you’re teaching the opener which remotes to accept.
Most modern systems use rolling code technology, which changes the code each time you press the button. This prevents code theft. Older systems might use fixed codes, which are less secure.
Common Reasons For Reprogramming
You might need to reprogram your garage door opener for several reasons. Here are the most common:
- Lost or stolen remote: If you lose a remote, reprogramming removes it from the system, so someone who finds it can’t use it.
- New remote or keypad: When you buy a new remote, you must link it to the opener.
- Moving into a new home: It’s smart to clear all old codes so previous owners can’t access your garage.
- Malfunctioning remote: Sometimes a remote just won’t work, even after changing the battery. Reprogramming can solve this.
- Security upgrades: If you’re worried someone has your code, resetting and reprogramming will give you peace of mind.

Understanding Your Garage Door Opener System
Before you start, it helps to know what you’re working with. Garage door openers are usually made up of these main parts:
- Motor unit: Mounted on the ceiling of your garage
- Remote controls: Handheld devices or car-integrated buttons
- Wall keypad: A keypad mounted outside or inside your garage
- “Learn” button: A small button on the motor unit used for programming
There are three major brands in the US: Chamberlain, LiftMaster, and Genie. Each has its own methods for reprogramming. The “learn” button is the key to almost all reprogramming steps.
Where To Find The Learn Button
The “learn” button is usually:
- On the back or side of the motor unit
- Behind a light cover or panel
It is often colored (yellow, red, orange, or purple) and may be labeled.
Tip: Always check your opener’s manual for details. If you don’t have it, most are available online from the manufacturer’s website.
Tools And Preparation
Before starting, gather everything you’ll need:
- Ladder: To safely reach the motor unit
- Your new remote or keypad
- A small flashlight (if your garage is dark)
- Owner’s manual (optional but helpful)
Safety note: Make sure the garage door is closed while you work. Keep children and pets away from the door area.
Step-by-step: How To Reprogram A Garage Door Opener Remote
While the details vary by brand, the general process is very similar. Here’s a step-by-step method that works for most modern openers:
- Climb the ladder to the motor unit.
- Locate the learn button. This may require removing a light cover.
- Press the learn button. Hold it until the indicator light turns on or blinks (usually 1–2 seconds).
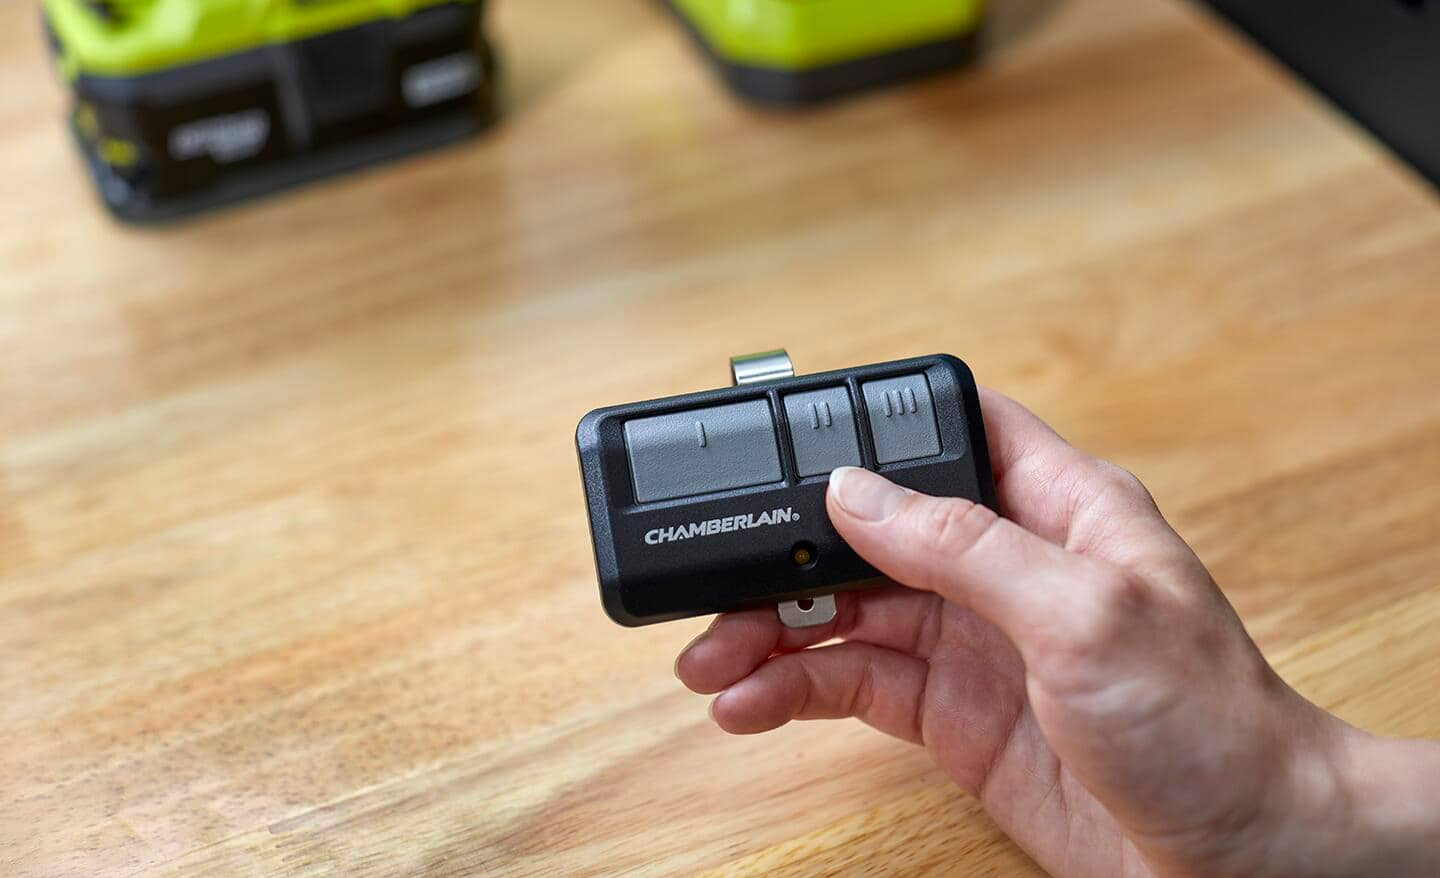
- Press the remote button. Within 30 seconds, press the button on the remote you want to program. The opener’s light may flash or you’ll hear a click.
- Test the remote. Step away and press the remote button. The garage door should move.
If you have multiple remotes, repeat step 4 for each one.
Example: Chamberlain And Liftmaster Remotes
Chamberlain and LiftMaster use similar steps:
- The learn button is often yellow or purple.
- After pressing the learn button, you have 30 seconds to press the remote.
- If successful, the light on the unit blinks once.
Example: Genie Remotes
Genie openers use a “learn code” button:
- Press and hold the learn code button until the indicator blinks.
- Press the remote button three times.
- The opener should move or the light will blink to confirm.
Troubleshooting Tip
If the remote won’t program:
- Try clearing all codes from the opener (see next section).
- Check the battery in the remote.
- Make sure you are within range (stand directly under the opener).
Erasing Old Codes And Remotes
Sometimes you need to erase all stored remotes—especially if you move into a new home or a remote is lost. Here’s how:
- Find the learn button on the motor unit.
- Press and hold the learn button for 6–10 seconds. The indicator light will turn off or blink.
- Release the button. All remotes and keypads are now erased.
You will need to reprogram any remotes or keypads you want to keep.
Non-obvious insight: If you erase all codes, your wall-mounted button inside the garage may also stop working. Be ready to reprogram that too.
How To Program A Garage Door Keypad
Many garages have a keypad outside the door. Programming the keypad is a little different than a remote.
Basic Steps For Most Keypads
- Press the learn button on the motor unit.
- Within 30 seconds, enter your chosen PIN on the keypad and press “Enter” (or a similar button).
- Wait for confirmation. The opener’s light should flash.
Some keypads require you to enter a manufacturer code first, or a sequence of button presses. Always check your manual for details.
Tip: Choose a PIN you’ll remember, but not something obvious like “1234.”
Programming A Genie Keypad
Genie keypads often use the following method:
- Press “Program” on the keypad until the indicator blinks.
- Enter your PIN and the “Up/Down” button.
- Press the learn button on the opener.
- Within 30 seconds, enter the PIN on the keypad and press “Up/Down.”
Non-obvious insight: Some Genie keypads let you control up to three doors with one keypad. Read your manual for multi-door instructions.
Programming A Built-in Car Remote (homelink Or Car2u)
Many new cars have built-in garage door buttons (HomeLink or Car2U). Programming these is a bit more complex, but still doable.
Steps For Homelink Systems
- Clear HomeLink memory (if needed):
- Hold the first and third buttons until the indicator blinks (about 20 seconds).
- Hold your handheld remote close to the HomeLink button.
- Press and hold both the HomeLink button and the remote button.
- The indicator will blink slowly, then quickly when programmed.
- Press the learn button on your garage door opener.
- Within 30 seconds, press the programmed HomeLink button.
- The door should move.
Not all openers are compatible with all car systems. Check your car’s manual for specifics.
Common Problem
Some older garage door openers are not compatible with built-in car systems. In that case, a “bridge” accessory may be needed.
Reprogramming After A Power Outage
Most modern openers retain programming after a power outage. However, sometimes a long outage or surge can erase codes. If your remote stops working after a blackout, try reprogramming as described above.
Tip: If your opener is old (from the 1990s or earlier), consider upgrading. Newer models are more reliable and secure.
Special Security Features: Rolling Codes Vs Fixed Codes
Modern openers use rolling codes for security. This means the code changes every time you use the remote.
Older openers use fixed codes, which are less secure. If your opener uses DIP switches, you set the code manually.
How To Tell Which System You Have
- Rolling code: No DIP switches inside remote, uses a learn button.
- Fixed code: Small switches inside the remote and opener (usually 8–12 switches).
If you have a fixed code system, reprogramming means matching the switches in the remote to those in the opener.
Safety tip: Fixed code openers can be hacked. Consider upgrading for better security.
How To Program Multiple Remotes Or Keypads
You can usually program several remotes and keypads to the same opener. Most units support 5–8 devices.
- Repeat the programming steps for each remote or keypad.
- If you reach the limit, the oldest programmed remote will be removed when you add a new one.
Example: If your opener supports 6 remotes and you add a 7th, the first one is deleted.
What To Do If Your Remote Still Doesn’t Work
If you’ve followed all the steps and your remote still won’t work, try these troubleshooting tips:
- Replace the remote battery. Most remotes use a coin cell battery.
- Check for interference. LED light bulbs or wireless devices nearby can block the signal.
- Inspect the antenna. Make sure the opener’s antenna (usually a thin wire) is hanging down and not broken.
- Reset everything. Erase all codes and program again.
- Try a different remote. If one works but the other doesn’t, the remote may be defective.
If none of these work, the opener’s receiver could be faulty. In that case, contact a professional.
How To Program Older Garage Door Openers
If your opener is more than 20 years old, it may not use a learn button. Instead, you’ll see DIP switches inside the remote and opener.
Steps For Dip Switch Systems
- Open the remote and the opener’s panel.
- Match the switches in the remote and the opener. Each switch can be up or down (or on/off).
- Test the remote.
Important: Do not share your switch pattern with others, as this is your “code.”
Brand-by-brand Comparison Of Reprogramming Methods
Here’s a simple comparison of the steps for the three most popular garage door opener brands.
| Brand | Learn Button Location | Steps to Program Remote | Special Notes |
|---|---|---|---|
| Chamberlain | Back or side of motor unit, often yellow | Press learn button, then remote button | Supports rolling code, 30-second window |
| LiftMaster | Near wiring terminals, under light cover | Press learn button, then remote button | Very similar to Chamberlain |
| Genie | Under light lens, labeled “Learn Code” | Press “Learn Code,” then remote button 3 times | May support multiple remotes/keypads |
Security: When And Why To Reprogram
Reprogramming your garage door opener is a key part of home security. Here’s when you should always reprogram:
- After buying a new home
- If a remote is lost or stolen
- If you suspect someone else has access
- After a service visit (if a technician used a test remote)
Non-obvious insight: Garage doors are a main entry point for burglars. Reprogramming after you move into a new home is as important as changing the locks on your doors.
Tips For Reliable Operation After Programming
Once you’ve programmed your remotes and keypads, keep your system working smoothly:
- Replace remote batteries every 1–2 years.
- Avoid storing remotes in hot cars. Heat can damage the battery.
- Clean the opener’s antenna with a dry cloth.
- Don’t block the opener with metal objects or fluorescent lights.
When To Call A Professional
Most people can reprogram their garage door opener themselves. But call a pro if:
- The opener is very old or doesn’t have a learn button
- You see frayed wires or sparks
- The door moves erratically or makes loud noises
Real-world example: If your opener is more than 25 years old, getting a new one may cost less than repeated repairs.
What To Do With Old Remotes
After reprogramming, you may have extra remotes. For safety:
- Remove batteries before disposal
- Do not give away remotes with your code still set
- Recycle electronics if possible

Quick Reference: Typical Programming Steps By Brand
Here’s a handy summary for quick reference.
| Brand | Remote Programming | Keypad Programming | Max Devices |
|---|---|---|---|
| Chamberlain | Learn button, press remote | Learn button, enter PIN on keypad | 8 |
| LiftMaster | Learn button, press remote | Learn button, enter PIN on keypad | 8 |
| Genie | Learn code, press remote 3x | Program button, enter PIN, learn code | 7 |
How To Find Programming Instructions For Your Model
If you’re unsure about your opener model or don’t have the manual:
- Look for a label on the motor unit (often on the back or side)
- Search for the brand and model number online
- Visit the manufacturer’s website for PDF manuals
Tip: Many brands have video tutorials on YouTube and their websites.
Keeping Your Garage Secure After Reprogramming
After reprogramming, it’s smart to update your overall garage security:
- Change PINs regularly. Especially if you think someone saw you enter it.
- Keep remotes out of sight in your car. Don’t leave them on the dashboard.
- Consider a smart garage door opener. These let you control the door from your phone and monitor access logs.
For more on garage security, check this Consumer Reports guide.
Frequently Asked Questions
How Long Does It Take To Reprogram A Garage Door Opener?
For most openers, reprogramming a remote or keypad takes about 5–10 minutes. More complex systems or built-in car remotes may take up to 20 minutes. Always allow extra time if you need to erase old codes first.
Can I Reprogram My Garage Door Opener Without The Remote?
Yes, you can program a new remote or keypad using only the learn button on the motor unit. However, to program a built-in car system, you’ll usually need an existing remote for the process.
Will Reprogramming Erase All Existing Remotes?
Not always. If you just add a new remote, old ones stay programmed. If you hold the learn button for 6–10 seconds, this erases all remotes and keypads. Always check what you want to keep before erasing.
Why Won’t My New Remote Program To The Opener?
Common reasons include:
- Wrong remote type (not compatible)
- Dead battery in remote
- Too far from the opener during programming
- Interference from wireless devices or lights nearby
Double-check the model numbers and try fresh batteries.
Is It Safe To Reprogram My Own Garage Door Opener?
Yes, as long as you follow safety steps:
- Use a sturdy ladder
- Keep the door closed while working
- Keep fingers away from moving parts
- If unsure, call a professional
Reprogramming is a standard homeowner task.
Securing your garage means more than just convenience—it means peace of mind for you and your family. Taking the time to learn how to reprogram a garage door opener puts you in control of your home’s security. With clear steps and a little patience, you can handle remotes, keypads, and even in-car systems. Remember, if something doesn’t work right away, take a breath and try again. If you need extra help, most manufacturers offer phone support or online manuals. You’ve got this—your garage and your home are safer because of your efforts.