Now Reading: How to Reset a Liftmaster Garage Door Opener Quickly and Easily
- 01
How to Reset a Liftmaster Garage Door Opener Quickly and Easily
How to Reset a Liftmaster Garage Door Opener Quickly and Easily
Resetting a garage door opener can feel overwhelming, especially if you have never done it before. If you own a LiftMaster garage door opener, learning how to reset it is a valuable skill. Maybe your remote stopped working, or perhaps you want to erase old codes for better security. Whatever the reason, understanding the process can save you time, money, and unnecessary stress.
A garage door opener is more than just a motor; it is the heart of your garage entry system. When it stops working right, your daily routine is affected. Some people think you need to be a technician to fix these problems.
The truth is, with the right steps and a little patience, most homeowners can reset their LiftMaster opener themselves. This article will walk you through every step, explain why each is important, and help you avoid common mistakes. You will also find tips for specific situations, like lost remotes or power surges.
Let’s dive into everything you need to know about resetting a LiftMaster garage door opener.
Understanding Liftmaster Garage Door Openers
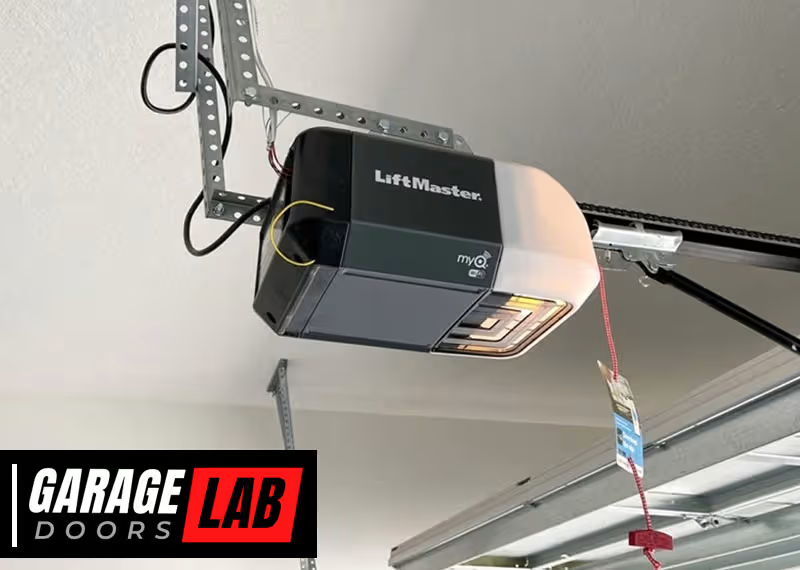
Before starting the reset process, it helps to understand how LiftMaster openers work. These devices use radio signals, logic boards, and safety features to control your garage door. Each opener has a control panel, remote transmitters, and a main unit mounted on your garage ceiling.
LiftMaster is part of the Chamberlain Group, one of the most trusted brands in the U.S. Their products are known for durability and advanced security technology, such as rolling code technology (Security+ or Security+ 2.0). This feature changes your door code each time you use the remote, stopping code grabbers from copying your signal.
Most modern LiftMaster openers also have a Learn button. This small button is the key to resetting and reprogramming your system. You will find it on the main unit, often behind a light cover. The color and location of the Learn button can vary by model.
If you are not sure which LiftMaster model you have, check the label on the motor unit. Common models include 8165, 8500, 8550, and the newer Elite and Premium Series.
Why You Might Need To Reset Your Liftmaster Opener
There are several reasons you might need to reset your garage door opener:
- Lost or stolen remote: For security, you should erase all stored codes and remotes.
- Troubleshooting: If the opener or remotes stop working, a reset can solve many problems.
- After power surges: Electrical storms or outages can corrupt the memory.
- Selling or buying a home: Always reset the opener when moving in or out.
- Adding new remotes or keypads: Sometimes, you must clear old codes to program new devices.
Many people overlook the security risk of old codes. If you bought a house and did not reset the opener, someone with an old remote could still enter your garage. Resetting removes all previous connections and starts fresh.
Safety Precautions Before You Begin
Safety should always come first. Garage door openers are strong machines. Incorrect handling can lead to injury or damage.
- Unplug the opener if you will be working near wiring or the motor.
- Keep children and pets away from the work area.
- Do not stand under the open door during resets.
- Read your user manual for model-specific instructions.
Most resets are safe to do with the power on, but if you need to open the main unit or check wiring, always cut the power.
Tools And Materials You May Need
Resetting a LiftMaster opener usually does not require special tools. However, having these items ready can make the process smoother:
- A sturdy stepladder
- Screwdriver (if you need to remove the light cover)
- Your remotes or keypad (to reprogram after reset)
- Flashlight (for dark garages)
- User manual (for reference)
Even if you do not need all these items, preparing ahead can prevent delays.
How To Reset A Liftmaster Garage Door Opener: Step-by-step
Now, let’s get into the core steps for resetting your LiftMaster system. This section will cover the most common reset: erasing all remote controls and keypads from the opener’s memory. This process is sometimes called a “factory reset,” but note that it does not change the physical settings of the door or motor.
Step 1: Locate The Learn Button
The Learn button is usually near the antenna wire on the motor unit, behind the light cover. It is often red, yellow, orange, or purple. On some models, the button may say “Learn” or just have a small LED beside it.
- Tip: If your opener is older (pre-1993), you may have DIP switches instead of a Learn button. These models need a different reset process, explained later.
Step 2: Clear The Opener’s Memory
- Press and hold the Learn button (for about 6-10 seconds).
- The LED next to the button will light up solid, then turn off.
- Release the button. All remote controls and keypads are now erased from memory.
- Important: Any person with a previously programmed remote can no longer open your garage.
- Non-obvious insight: Some models have a “double-press” requirement. If the first hold does not work, try pressing and holding again.
Step 3: Reprogram Remotes And Keypads
After a reset, none of your remotes or wireless keypads will work. You must add them again.
- Press and release the Learn button (do not hold this time).
- The LED will light up for 30 seconds.
- Within this window, press the button on your remote you want to program.
- The opener light will blink or you’ll hear a click. This means successful programming.
- Repeat for each remote and keypad.
- Tip: If you have a wireless keypad, enter your desired 4-digit code, then press Enter. Some models need you to press the Learn button before entering the code.
Step 4: Test Your System
Close your garage door. Test each remote and keypad to be sure they work. If a device does not work, repeat the programming steps. Sometimes, remotes need new batteries after a reset.
Step 5: Restore Security Features
If your LiftMaster opener uses MyQ or another smart system, you may need to reconnect your Wi-Fi or smart home features. Usually, you do this through the LiftMaster app after resetting remotes.
- Non-obvious insight: Resetting the opener does not erase your MyQ app account. You only need to reconnect the opener to Wi-Fi if you did a full power reset or changed routers.
Resetting Older Liftmaster Models (dip Switch Type)
If your opener is from the early 1990s or before, it may use DIP switches instead of a Learn button.
- Open the motor unit cover (usually held by a screw).
- Inside, you will see a row of small switches (up or down).
- Set all switches to a new random pattern.
- Open your remote(s), and match the same pattern.
- Close covers and test.
- Tip: These units are less secure than modern rolling code models. If security is a concern, consider upgrading.

How To Reset After A Power Outage Or Surge
A power outage or lightning strike can sometimes “confuse” the opener’s logic board. If your garage door is not responding after a surge, try the following:
- Unplug the opener from the outlet.
- Wait 60 seconds.
- Plug it back in.
- Test your remotes. If they do not work, do a full reset using the Learn button.
- Practical example: If your opener is making a clicking noise but not moving, unplug it before resetting. This can clear simple electronic glitches.
Resetting The Keypad Only
Sometimes, you only want to reset a wireless keypad (not all remotes).
- Press and hold the Learn button until the LED goes out (erases all devices).
- Press and release the Learn button again.
- Enter your new keypad code, then press Enter.
- The light blinks if programming is successful.
If you want to change just the keypad PIN and not reset everything:
- Enter your current PIN.
- Press and hold the key until the light blinks.
- Enter your new PIN, then Enter.
Resetting The Myq Smart Garage System
If you use the MyQ smart control system, resetting involves a few extra steps.
- On your opener, press and hold the Learn button until the LED turns off. This erases all MyQ devices.
- Open the MyQ app.
- Remove the old device from your app, then add it again as a new device.
- Follow app instructions to complete Wi-Fi setup.
- Non-obvious insight: MyQ resets do not affect your remote controls unless you also clear the opener’s memory.
Common Problems And How To Fix Them
Resetting does not always solve every issue. Here are common problems you might face, and how to address them:
Remote Still Not Working After Reset
- Check the remote’s battery.
- Make sure you are within range (stand under the opener for testing).
- Reprogram the remote, following steps exactly.
- If the remote blinks but does not open the door, it may be broken.
Keypad Not Responding
- Confirm you entered the right code.
- Try programming the keypad closer to the opener.
- Replace keypad batteries.
- Some keypads have a lockout feature after repeated wrong codes; wait 10 minutes and try again.
Opener Light Does Not Blink When Programming
- The Learn button might not be working. Try unplugging the opener for 30 seconds, then retry.
- For older models, check for loose wires inside the motor unit.
Door Moves A Few Inches, Then Stops
- This is usually a safety sensor issue, not a programming problem.
- Check for objects or dirt blocking the sensors near the door tracks.
- Make sure the sensors’ LEDs are solid (not blinking).
Table: Common Reset Problems And Solutions
| Problem | Likely Cause | Recommended Fix |
|---|---|---|
| Remote not working | Battery dead or not programmed | Replace battery, reprogram remote |
| Keypad fails after reset | Incorrect code or weak battery | Reset code, replace battery |
| Opener unresponsive | Logic board glitch | Power cycle, then reset again |
| Door reverses or stops | Sensor misalignment | Realign sensors, clean lenses |
Comparing Liftmaster Models: Reset Methods
Each LiftMaster model follows a similar process, but details can vary. Here’s a quick comparison:
| Model Series | Learn Button Color | Reset Steps |
|---|---|---|
| Security+ (1997-2005) | Red/Orange | Hold Learn button 6 sec, reprogram remotes |
| Security+ 2.0 (2011-present) | Yellow | Hold Learn button 6 sec, reprogram remotes/keypads |
| DIP Switch models (pre-1993) | N/A | Change switch pattern in both opener and remotes |
| MyQ-enabled (2012-present) | Purple/Yellow | Reset Learn button, then reconnect Wi-Fi in MyQ app |
Advanced Tips For A Trouble-free Reset
Resetting is not always straightforward. Here are some advanced tips:
- Label your remotes after reprogramming, especially if you have multiple doors.
- If you share your garage with family members, make sure everyone reprograms their remotes right after the reset.
- For smart home integration (Alexa, Google Home), you may need to re-link LiftMaster in your smart home app after a reset.
- Some newer openers have a backup battery. If you unplug the opener and it still powers on, disconnect the battery too.
- Always test the wall control panel after a reset to confirm it still works.
Security After Resetting
A reset gives you a fresh start, but do not stop there. For the best security:
- Change your keypad PIN from time to time.
- Do not share your PIN with neighbors or service people.
- If you have a smart system, enable two-factor authentication if available.
- Check the opener’s light cover and housing for signs of tampering.
Garage break-ins have increased in some areas. Resetting old codes and updating your security settings are simple, effective steps.
When To Call A Professional
Some problems are best handled by a trained technician:
- If your opener will not reset (no response from the Learn button)
- If the door moves on its own after a reset
- If you see sparks, smoke, or frayed wires
- If you are uncomfortable working on a ladder or near electricity
A professional can also inspect your system for hidden issues, like worn gears or electrical shorts.

Table: Diy Vs. Professional Reset
| Reset Task | DIY Possible? | When to Call a Pro |
|---|---|---|
| Erase and reprogram remotes | Yes | Never responds or repeated failure |
| Change keypad code | Yes | Keypad not working after reset |
| Replace logic board | No | Burnt smell, sparks, or dead unit |
| Fix sensor wiring | Sometimes | Confusing wiring, no power at all |
Real-world Examples
- Lost remote at a hotel: Jane lost her remote while on a trip. She used the Learn button to erase all codes, then reprogrammed her new remote. Her old remote could no longer open the door.
- Power surge after storm: Mike’s opener stopped responding after a thunderstorm. He unplugged the unit, waited a minute, then did a full reset. Everything worked again.
- Moving to a new house: A family bought a new home with a LiftMaster opener. They reset the system to erase all old codes and added their own remotes and keypad codes for safety.
These examples show that resets are not just for fixing problems—they also improve security and peace of mind.

Frequently Asked Questions
How Do I Know If My Liftmaster Opener Has A Learn Button?
Most LiftMaster models made after 1993 have a Learn button on the motor unit. It is often red, yellow, orange, or purple. You might need to remove the light cover to see it. If your opener has only DIP switches, it is an older model without a Learn button.
Will Resetting Erase All My Remotes And Keypads?
Yes. When you hold the Learn button for 6-10 seconds, all remotes and wireless keypads are erased from the opener’s memory. You must reprogram each device afterward to use them again.
Why Does My Garage Door Still Not Open After Resetting?
If your door does not open after a reset, check the remote batteries, confirm you programmed devices correctly, and make sure the safety sensors are not blocked. If the opener is still unresponsive, you may need to power cycle it or call a professional.
Is There A Way To Reset Only One Remote Without Affecting Others?
No. LiftMaster openers do not let you erase a single remote without clearing all devices. You must erase all codes and then reprogram only the remotes you want to keep.
Where Can I Find The Official Liftmaster Reset Instructions?
You can find official reset instructions for all models on the LiftMaster Support website. Always follow your model’s manual for the safest and most accurate steps.
Resetting your LiftMaster garage door opener does not have to be stressful. With the right instructions, you can handle most problems quickly and safely. Taking these steps improves your security, helps you manage remotes and keypads, and keeps your garage running smoothly. Whether you are fixing a problem or just want to feel safer, knowing how to reset your opener is a skill every homeowner should have.


