Now Reading: How to Change Genie Garage Door Keypad Easily and Fast
- 01
How to Change Genie Garage Door Keypad Easily and Fast
Changing a Genie garage door keypad can feel overwhelming, especially if you have never done it before. But with the right guidance, you can replace or reprogram your keypad in a short time, improve your home’s security, and save money on professional service. Whether your keypad is old, malfunctioning, or you simply want to update the code, this guide will walk you through every step. You’ll find clear instructions, helpful tables, and answers to common questions so you can handle the process confidently—even if you’re not a “handy” person.
Understanding Genie Garage Door Keypads
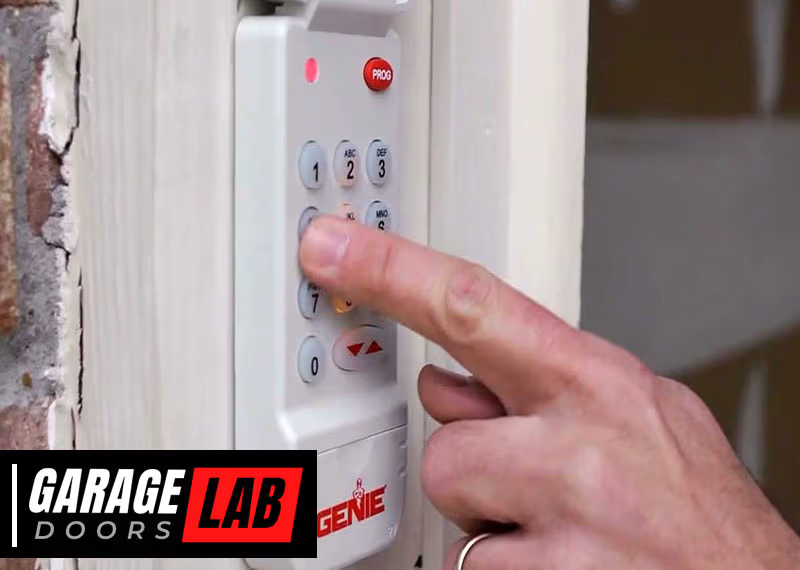
Before you start, it helps to know what a Genie garage door keypad does and why it matters. The keypad is a small device outside your garage that lets you open and close the door by entering a code. It connects wirelessly to your Genie opener inside the garage. Most keypads are weatherproof, backlit for night use, and allow you to set personal codes for family or trusted friends.
Key Benefits of a Genie Keypad:
- Convenience: No need for remote controls or keys.
- Security: Only users with the code can open the garage.
- Access management: Codes can be changed easily if you move or want to restrict access.
Many people don’t realize that a keypad is also a safety feature. If your opener remote is lost or stolen, someone could get into your garage. Updating your keypad code blocks unauthorized entry.
When Should You Change Your Genie Keypad?
Some homeowners wait until their keypad stops working. But there are smarter reasons to act sooner:
- Malfunctioning Keypad: Buttons don’t respond, or the code works inconsistently.
- Forgotten Code: You don’t remember the code, or someone else had it.
- Security Concerns: After moving, renting, or losing a remote.
- Battery Leaks: Old batteries can corrode contacts, damaging the unit.
- Physical Damage: Cracked, faded, or water-damaged keypads.
Tip: Even if your keypad works, changing the code yearly is a good security habit.
Tools And Materials Needed
You don’t need special tools, but being prepared saves time.
- New Genie wireless keypad (if replacing)
- Small Phillips screwdriver
- Fresh batteries (usually AAA or 9V)
- Ladder (if keypad is high up)
- Pen and paper (to record codes)
- User manual (for your Genie model)
Non-obvious insight: Many Genie keypads look similar but have different programming steps. Always check your model number before starting.
Replacing Vs. Reprogramming: What’s The Difference?
Some people confuse replacing a keypad with reprogramming it. Here’s a clear comparison:
| Action | When to Do It | What It Involves |
|---|---|---|
| Replace Keypad | Broken, old, or lost keypad | Remove old unit, install new, program code |
| Reprogram Keypad | Change code, add new user | Enter new code sequence, no hardware change |
Practical advice: If your keypad is physically fine but you want a new code, you only need to reprogram it.

Credit: www.wikihow.com
Step-by-step Guide: Replacing A Genie Garage Door Keypad
Changing the whole keypad is simple but requires attention to detail. Follow these steps:
1. Remove The Old Keypad
Start by taking out the old unit. Most are attached with two screws on the top and bottom.
- Use a screwdriver to loosen screws.
- Gently pull the keypad from the wall.
- If it’s stuck, wiggle it side to side.
- Disconnect any wires (rare, most are wireless).
Hidden tip: Take a photo of the old keypad’s position. This helps you install the new one at the same height.
2. Prepare The New Keypad
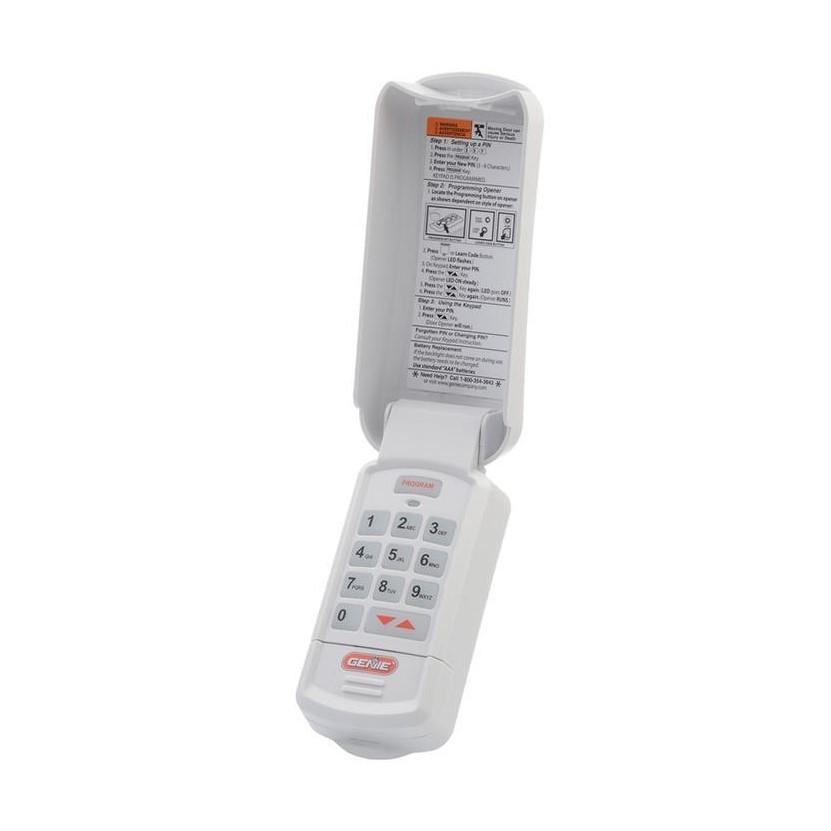
Unpack your new Genie keypad. Insert the batteries as shown in the manual. Some models have a small “reset” button inside the battery compartment.
- Remove battery cover.
- Insert new batteries, matching + and – symbols.
- Press any button to confirm power (usually lights blink).
Pro insight: Don’t skip battery installation—even if the unit is new, weak batteries can cause programming errors.
3. Mount The New Keypad
Hold the new keypad at the desired spot. Mark screw holes with a pencil.
- Drill small pilot holes if needed.
- Secure keypad with screws.
- Make sure it is level and snug, but not too tight (plastic can crack).
Common mistake: Overtightening screws can break the housing.
4. Link Keypad To Garage Door Opener
Now, you need to “teach” the opener to recognize the new keypad. Genie uses “Learn” or “Program” buttons on the opener motor unit.
- Find the Learn/Program button (usually under a light cover).
- Press and release this button. An indicator light will blink (color varies by model).
- Within 30 seconds, enter your chosen PIN on the keypad.
- Press the Up/Down or Program key (check manual for your model).
- Wait for confirmation: The garage door opener light blinks or clicks.
Expert insight: Timing is critical. If you wait too long after pressing Learn, you must repeat the step.
5. Test The Keypad
Enter your code and press the main button. The garage door should move. Test several times to ensure reliable operation.
- Try at night to test backlighting.
- Check all buttons for responsiveness.
- Test from different distances.
Note: Some Genie models let you set temporary codes for guests. Check your manual for instructions.
Step-by-step Guide: Reprogramming A Genie Keypad
If your keypad works but you want a new code, you only need to reprogram it. The process depends on the model, but here are standard steps for most Genie wireless keypads.
1. Clear Old Codes
Many Genie keypads require you to clear the memory before adding a new code.
- Open the keypad cover.
- Press and hold the Program and Up/Down buttons together for 5-10 seconds.
- Release when the LED blinks rapidly (or after a set number of flashes).
Important: If the keypad does not clear, remove the batteries for a minute and try again.
2. Enter A New Pin
- Press and hold the Program button until the LED blinks.
- Enter your new 4-digit PIN.
- Press the Program button again.
- The LED should confirm with a blink or beep.
Security tip: Avoid simple codes like 1234 or your birth year.
3. Sync With The Opener
- Go to the garage door opener motor.
- Press the Learn/Program button (indicator light will start blinking).
- Within 30 seconds, enter your PIN on the keypad and press the Up/Down button.
- The opener should respond with a click or light flash.
Hidden insight: If you have multiple Genie openers, you can program the same keypad to control them by repeating the process for each opener.
4. Confirm The New Code
Test your code multiple times. Try opening and closing the door from a distance. If it doesn’t work, repeat the steps carefully.
Common mistake: Not pressing the keypad buttons firmly enough or waiting too long between steps.
Special Cases: Older Keypads And Advanced Features
Not all Genie keypads are the same. Some older models use DIP switches or different programming steps. Here’s how to handle special cases:
Keypads With Dip Switches
These are less common but found on openers from the 1990s and early 2000s.
- Open the keypad and find a row of small switches.
- Match the switch pattern to your opener’s receiver (usually inside the garage).
- Set the same ON/OFF pattern using a small screwdriver.
Non-obvious tip: If your opener still uses DIP switches, consider upgrading. Newer keypads offer better security.
Multi-code Keypads
Some Genie keypads can control more than one door.
- Assign a unique code for each door.
- Program each code to a different opener.
- Test each code to confirm correct pairing.
Advanced feature: Some models allow you to set a temporary PIN for guests, which expires after one use or a set time.
Troubleshooting Common Problems
Even with careful setup, you might face issues. Here’s how to solve the most frequent problems.
Keypad Not Responding
- Check and replace batteries.
- Clean battery contacts if corroded.
- Make sure the keypad is not in direct sunlight (can cause overheating).
Code Works Intermittently
- Move closer to the garage door.
- Check for wireless interference (Wi-Fi routers, LED lights).
- Reprogram the keypad, ensuring each step is followed precisely.
Keypad Flashes But Door Doesn’t Move
- Confirm you pressed the Learn/Program button on the opener.
- Try re-entering the code within the 30-second window.
- If still not working, reset both keypad and opener.
Keypad Buttons Stick
- Gently clean the keypad with a dry cloth.
- Do not use water or spray cleaners.
- If buttons are badly stuck, replacement is best.
Door Opens Randomly
- Someone else may know your code.
- Reprogram the keypad with a new, unique PIN.
- Check for neighbors with similar Genie systems (rare, but can cause signal confusion).
Genie Keypad Models: Differences And Compatibility
Genie has released several keypad models over the years. Understanding the differences helps you choose the right replacement and follow correct programming steps.
| Model | Works With | Programming Method | Notable Features |
|---|---|---|---|
| GK-R | Most Genie Intellicode (1997+) | Wireless, Learn button | Backlit, temporary PIN, weatherproof |
| GWK | Older Genie, DIP switch | Manual switch matching | Simple, no temporary PIN |
| GK-BX | Genie openers post-2011 | Wireless, Learn button | Improved range, battery indicator |
Tip: Always check your Genie opener’s serial number or user manual to confirm compatibility.
Safety And Security: What To Know
Changing your keypad is about more than convenience; it’s a smart security move. Here’s how to make your garage safer:
- Choose a unique PIN: Don’t use addresses, birthdays, or common patterns.
- Change codes regularly: At least once a year.
- Delete old codes: If you move or give access to temporary guests.
- Check the keypad location: Place it where it’s visible but not easily reached by someone outside a car.
Little-known fact: Some newer Genie models allow you to lock the keypad after several wrong attempts, preventing brute-force entry.

Credit: store.geniecompany.com
Maintenance Tips For Genie Garage Keypads
A clean and well-maintained keypad lasts longer and works better. Here’s how to keep yours in top shape:
- Clean monthly: Wipe with a dry or slightly damp cloth.
- Replace batteries yearly: Even if the keypad works, old batteries can leak.
- Protect from weather: If your keypad is exposed, consider a weather shield.
- Check screws: Make sure the unit is firmly attached, but don’t overtighten.
- Inspect for bugs: Sometimes insects nest inside the housing; check and clean gently.
Real-world tip: In cold climates, battery performance drops. Always use quality alkaline batteries and keep spares handy.
Upgrading To A Smart Genie Keypad
If you’re replacing an old keypad, consider upgrading to a smart model. These connect to Wi-Fi or smart home systems for extra convenience.
Benefits of Smart Keypads:
- Control from your phone
- Receive alerts if the door is left open
- Set codes for delivery drivers or cleaners
Caution: Installation is similar, but you’ll need to connect the keypad to your Wi-Fi. Always follow the manufacturer’s instructions carefully.
Cost Comparison: Diy Vs. Professional Installation
Many homeowners wonder whether to handle this themselves or call a pro. Here’s a quick cost breakdown.
| Option | Average Cost | Pros | Cons |
|---|---|---|---|
| DIY Replacement | $30–$70 (keypad only) | Save money, learn new skill | Takes time, possible errors |
| Professional Installation | $100–$200 (parts + labor) | Expert work, warranty, no hassle | Higher cost, scheduling needed |
Straight advice: If you can use a screwdriver and follow instructions, most people can change or reprogram a Genie keypad without paying for professional help.
Environmental Disposal: Old Keypads And Batteries
Don’t just throw your old keypad or batteries in the trash. Here’s how to dispose of them responsibly:
- Batteries: Drop off at local recycling centers or stores that accept them.
- Old keypad housing: Most can go in household trash, but remove batteries first.
- Electronic waste: Some areas have special e-waste programs; check local rules.
Eco insight: Recycling batteries prevents harmful chemicals from polluting the environment.
Credit: store.geniecompany.com
Real-life Examples: What Homeowners Learned
Hearing from others can help you avoid common mistakes. Here are two quick stories:
Example 1:
A homeowner replaced their keypad but used an easy code (1111). Within a week, their teenager’s friends guessed the code and opened the garage. Lesson: Always choose a strong, unique code.
Example 2:
Someone followed the manual but their keypad didn’t work. The problem? They didn’t press the Learn button on the opener, only on the keypad. Lesson: Both parts (keypad and opener) must be synced.
Hidden value: Save time by watching a quick video on the Genie website if you get stuck. Many models have video guides.
Common Myths About Genie Keypads
Some beliefs about garage keypads are outdated or wrong. Let’s clear up a few:
- Myth: All Genie keypads work with all openers.
*Fact:* Older openers may not work with new keypads. Always check compatibility.
- Myth: Keypad codes never expire.
*Fact:* Some models allow temporary codes that expire.
- Myth: Changing the batteries deletes the code.
*Fact:* Most Genie keypads keep codes even if batteries are removed briefly.
- Myth: Keypads are unsafe.
*Fact:* When programmed with a strong PIN, modern Genie keypads are very secure.
Frequently Asked Questions
How Do I Find My Genie Keypad Model Number?
Check inside the battery compartment or on the back of the keypad housing. The model number is usually a combination of letters and numbers (e. g. , GK-R or GWK). If you can’t find it, visit the Genie official website for help.
What Should I Do If My Keypad Still Doesn’t Work After Programming?
Double-check battery installation, confirm you pressed the Learn button on the opener, and repeat the programming steps. If it still fails, reset both the opener and keypad. If the problem continues, your keypad may be faulty and need replacement.
Can I Program A Genie Keypad Without The Old Code?
Yes. Most Genie keypads let you clear old codes using the Program button and then set a new one. If your keypad asks for the old code first, check your manual for a reset option or contact Genie support.
How Many Codes Can I Set On My Genie Keypad?
Most Genie keypads let you set one main PIN and, on newer models, a temporary or guest code. Check your model’s manual for exact numbers, as features vary.
Where Can I Find Official Programming Instructions For My Genie Keypad?
The official Genie website offers manuals and video guides for all models. Visit Genie Company Support for step-by-step instructions and troubleshooting.
Making changes to your Genie garage door keypad gives you more control over your home’s security and convenience. With the right steps, anyone can handle this task safely and confidently. Always keep your codes private, change them regularly, and maintain your keypad for years of trouble-free use. If you ever have doubts, consult your opener’s manual or reach out to Genie support for expert help.


