Now Reading: How to Change Keypad on Garage Door: Step-by-Step Guide
- 01
How to Change Keypad on Garage Door: Step-by-Step Guide
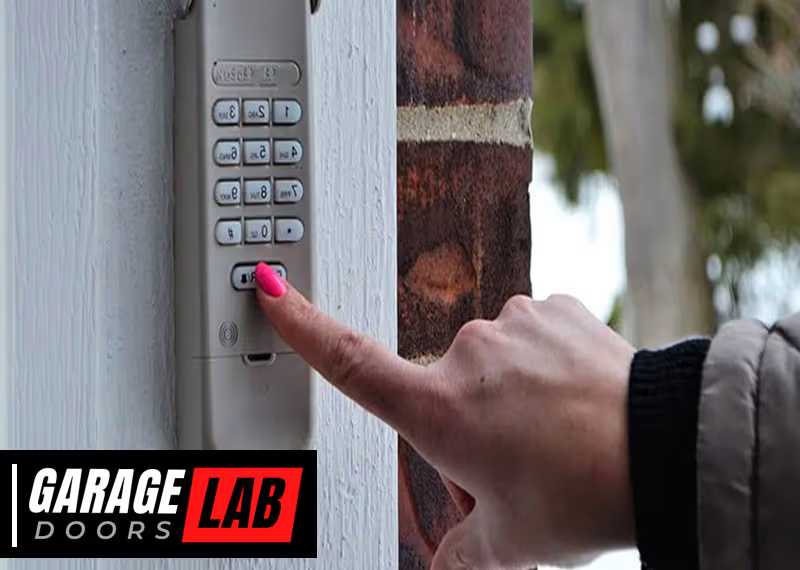
Changing the keypad on your garage door is a practical task that many homeowners can handle themselves. Maybe your old keypad stopped working, or you want to upgrade to a more secure system. You might worry this task needs a professional, but with the right tools and clear instructions, you can do it safely and efficiently.
This guide will walk you through everything you need to know—step by step—to replace your garage door keypad and restore confidence in your home’s security.
Understanding how your garage door keypad works will help you choose the right replacement and avoid common mistakes. We’ll explore different types of keypads, tools you’ll need, how to remove the old keypad, install the new one, and program it correctly.
Along the way, you’ll learn what to watch for, how to troubleshoot, and how to keep your garage secure for years to come.
Why Replace Your Garage Door Keypad?
A garage door keypad is a small device, but it plays a big role in your home’s convenience and security. Over time, keypads can wear out, become damaged, or stop working due to weather exposure. Sometimes, you might want to upgrade to a newer model with better features or a more secure code system.
Some signs it’s time to replace your keypad:
- Buttons stick or fail to respond
- The keypad doesn’t light up or display numbers clearly
- The cover is cracked or missing
- You want to upgrade to a wireless or backlit model
- The keypad is no longer compatible after a garage door opener update
Replacing your keypad can help you avoid lockouts, prevent unauthorized access, and make daily life easier.
Types Of Garage Door Keypads
Before you begin, it’s important to know the different garage door keypad types. Not every keypad fits every opener, and choosing the right one will save you time and frustration.
Wired Vs. Wireless Keypads
- Wired keypads: Connect directly to your opener with wires. Less common in modern homes, but some older systems use them.
- Wireless keypads: Communicate with the opener by radio signal. Easy to install and move.
Universal Vs. Brand-specific Keypads
- Universal keypads: Work with many brands, like Chamberlain, LiftMaster, Genie, and Craftsman. Great if your opener brand is common or you want flexibility.
- Brand-specific keypads: Made for a particular opener brand. Often offer advanced features, like one-touch close or rolling code technology.
Key Features To Consider
When shopping for a new keypad, think about:
- Backlit buttons for nighttime use
- Weather resistance for outdoor installation
- Rolling code security to protect against code theft
- Battery type and lifespan
- Ease of programming
Here’s a quick comparison of popular keypad types:
| Keypad Type | Works With | Main Feature | Typical Price |
|---|---|---|---|
| Universal Wireless | Multiple brands | Easy programming | $30-$60 |
| Brand-Specific Wireless | One brand | Advanced security | $40-$80 |
| Wired Keypad | Older openers | No batteries | $20-$50 |
Pro tip: Always check your garage door opener’s model number before buying a keypad. Compatibility is the most common issue for DIY installers.
Tools And Materials You’ll Need
Getting ready is half the job. Here’s what you’ll need for most keypad replacements:
- New keypad (universal or brand-specific, based on your opener)
- Screwdriver (Phillips and flathead)
- Drill (optional, for new holes)
- Level (for neat installation)
- Measuring tape
- Pencil or marker
- Step ladder
- New screws (usually included with keypad)
- Batteries (if not included)
- Owner’s manual for your garage door opener
Some keypads come with mounting templates or double-sided tape. Check the box before you start.
Removing The Old Garage Door Keypad
Taking out the old keypad is usually straightforward, but a careful approach can prevent damage to your garage wall or opener. Here’s how to do it safely:
- Test the old keypad. Make sure it’s not working due to a simple fix, like dead batteries or a stuck button.
- Turn off the garage door opener’s power. Unplug the unit or switch off the breaker. This prevents accidental activation.
- Open the keypad cover. Remove any visible screws. Most outdoor keypads are mounted with two to four screws.
- Gently pull the keypad from the wall. If it’s wired, note where the wires attach. Take a clear photo for reference.
- Disconnect wires (if present). Loosen the terminal screws with your screwdriver and pull the wires out.
- Remove old mounting hardware. Take out any anchors or screws so the area is ready for the new keypad.
Common mistake: Ripping the keypad off the wall can damage the surface or the wires. Move slowly and use the right tools.

Choosing The Right Replacement Keypad
Selecting the correct replacement is essential for a smooth installation. Here’s how to make the best choice:
- Check your opener brand and model. Look for a label on the garage ceiling unit.
- Decide between universal and brand-specific. Universal keypads are widely available, but features may be basic. Brand-specific keypads often support advanced functions.
- Consider security features. Look for rolling code technology, which changes the access code every time you use it. This blocks code grabbers.
- Review user ratings. Read reviews for reliability and ease of installation.
- Examine weatherproofing. If your keypad will face rain or sun, ensure it’s rated for outdoor use.
Here’s a side-by-side look at key features from two common options:
| Feature | Universal Wireless | Brand-Specific Wireless |
|---|---|---|
| Compatibility | Many brands | One brand only |
| Programming Ease | Moderate | Easy |
| Security (Rolling Code) | Sometimes | Usually |
| Weatherproofing | Varies | Good |
If in doubt, check your opener’s manual or manufacturer’s website. If you have a newer Chamberlain or LiftMaster unit, a brand-specific keypad is often the best fit.
Installing The New Keypad
Once you have your new keypad, it’s time for installation. Follow these steps for a professional result:
1. Choose The Right Location
The keypad should be easy to reach, but not visible from the street. Place it about 5 feet from the ground—high enough to avoid small children, but low enough for adults.
- Avoid areas exposed to direct rain or snow.
- Mount at least 1 foot from metal objects to avoid signal interference.
2. Mark And Drill Holes
Most keypads come with a mounting template. Hold it against the wall and mark the screw positions with your pencil. If you’re using the old keypad’s holes, check alignment. Drill new holes if needed.
3. Install Mounting Hardware
If your wall is wood, screw directly into the surface. For brick or stucco, use wall anchors. Tap them gently into the drilled holes before installing screws.
4. Attach The Keypad
Line up the keypad’s holes with the screws. Secure the keypad to the wall, but don’t over-tighten—you might crack the plastic.
5. Connect Wires (if Needed)
If your keypad is wired, connect the wires to the correct terminals. Match the wire colors to your reference photo or the manual’s diagram. Tighten the screws securely.
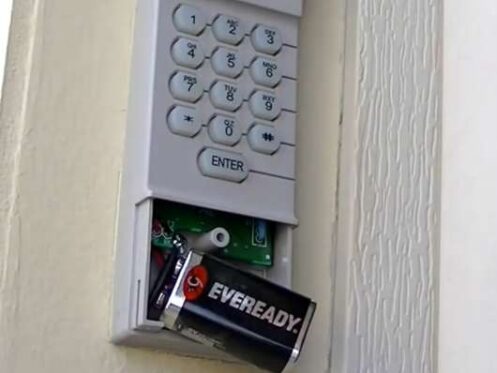
6. Install Batteries
Most wireless keypads use AA or AAA batteries. Insert them according to the diagram inside the cover. Replace the cover and ensure it clicks securely.
Practical tip: Test the fit before final tightening. If the keypad feels loose, adjust the screws or add a washer.
Programming The Garage Door Keypad
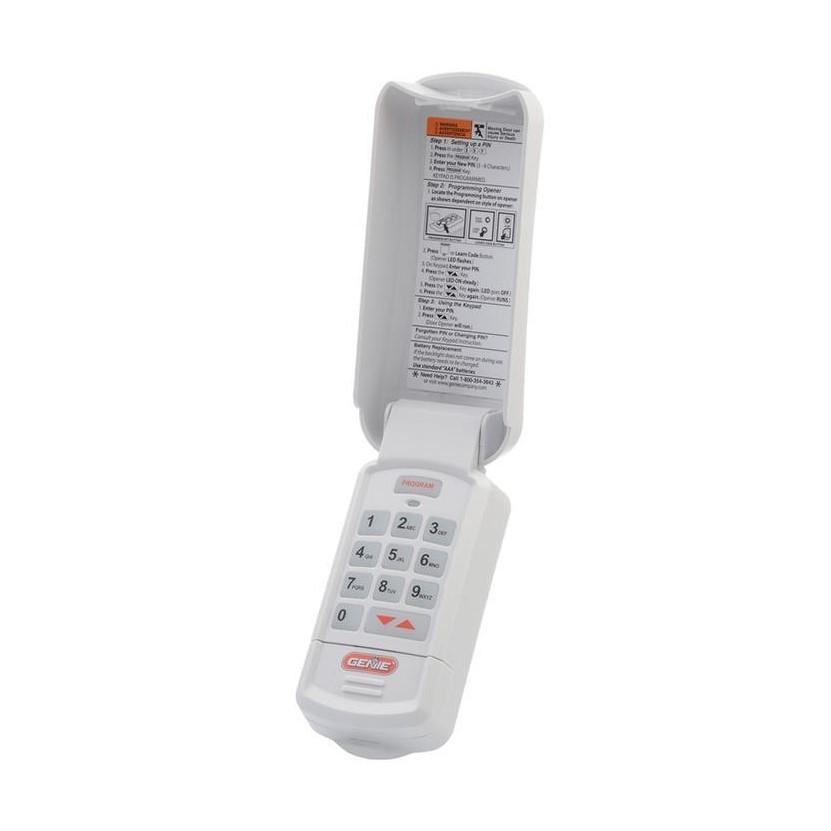
The most important step is programming the keypad to talk to your garage door opener. This process can vary, but most modern keypads follow a similar pattern:
Step-by-step Programming
- Read the keypad manual. Each model is different, so follow the steps for your brand.
- Locate the “Learn” button on the opener. Usually found on the back or side of the ceiling unit. It may be red, yellow, purple, or another color.
- Press and release the “Learn” button. You’ll have 30 seconds to complete the next step.
- Enter your chosen PIN on the keypad. Most keypads accept a 4-digit code.
- Press the “Enter” or “Send” button. The garage door opener light should blink, or you’ll hear a click.
- Test the keypad. Enter the PIN and press “Enter.” The garage door should open or close.
If your opener supports multiple doors, you may need to repeat the process for each one.
Common Programming Problems
- Keypad won’t program: Make sure you pressed the right “Learn” button and used the correct sequence.
- Opener doesn’t respond: Check battery orientation and signal range.
- Old codes still work: Reset the opener’s memory and program only the new keypad.
Hidden insight: Some openers store old codes even after keypad replacement. Always clear the opener’s memory if you’re concerned about security.
Testing And Troubleshooting
Now that your keypad is installed and programmed, test it several times to ensure everything works smoothly:
- Try entering the code at different times of day (in sunlight or darkness)
- Stand back and check for range issues
- Test in rainy weather if possible
If you run into problems, consider these solutions:
- Keypad doesn’t light up: Replace batteries or check wiring.
- Buttons stick: Clean with a soft cloth and ensure no debris is blocking them.
- Opener only works from close range: Move the keypad further from metal or reset the opener.
If the keypad still doesn’t work, consult your opener’s manual or contact the manufacturer for support.
Safety And Security Tips
Your garage keypad is a gateway to your home. A few extra steps can help keep your property safe:
- Change your PIN every 6–12 months.
- Don’t use simple codes like 1234 or your address.
- Keep the keypad clean and check for wear.
- Limit who knows the code—only trusted family members.
- If you move, erase all old codes from the opener’s memory.
Expert tip: Some advanced models allow you to set temporary PINs for guests or service workers. Delete these codes after use.
Maintaining Your Garage Door Keypad
A little maintenance goes a long way. Follow these tips to keep your keypad working for years:
- Replace batteries every 12–18 months, or sooner if the keypad dims.
- Clean the surface with a damp cloth—avoid harsh chemicals.
- Inspect for cracks or water damage after storms.
- Test the code monthly to catch problems early.
- Update codes if you suspect someone else knows your PIN.
Non-obvious insight: In very cold climates, batteries may drain faster. Keep a spare set nearby, especially in winter.
When To Call A Professional
Most garage door keypad changes are DIY-friendly. However, it’s smart to call a pro if:
- You see damaged wires or signs of electrical problems
- The keypad still doesn’t work after careful installation and troubleshooting
- Your garage door opener is very old and parts are hard to find
- You want a fully integrated smart system (Wi-Fi, app control, etc.)
A professional can also help if you need to program multiple openers or link the keypad to a smart home system.
Cost To Change A Garage Door Keypad
Here’s what you can expect in terms of costs:
- Keypad price: $30–$80, depending on type and brand
- DIY tools: Most people already have the basic tools
- Professional installation: $75–$150 for labor
If you’re comfortable with a screwdriver and following instructions, DIY can save you money.
Here’s a cost comparison:
| Option | Keypad Cost | Labor Cost | Total |
|---|---|---|---|
| DIY (Universal) | $40 | $0 | $40 |
| DIY (Brand-Specific) | $60 | $0 | $60 |
| Professional Install | $40–$80 | $75–$150 | $115–$230 |
Upgrading To Smart Garage Keypads
If you’re considering a future-proof solution, smart keypads offer extra features:
- Control your garage door from a smartphone app
- Receive alerts when the door opens
- Set up temporary codes for deliveries or guests
These models usually cost more ($80–$150) and may require Wi-Fi or Bluetooth setup. Make sure your garage door opener supports smart features before buying.
Pro insight: Some smart keypads can integrate with smart home hubs, such as Alexa or Google Home. Research compatibility before purchase.
For more details on smart home security, see this helpful resource: Consumer Reports.
Frequently Asked Questions
How Long Does It Take To Change A Garage Door Keypad?
For most people, the process takes 30 to 60 minutes. If you need to drill new holes or troubleshoot programming issues, it might take longer.
Can I Use Any Keypad With My Garage Door Opener?
Not always. While universal keypads work with many brands, some openers require brand-specific models. Always check compatibility before buying.
What Should I Do If The New Keypad Doesn’t Work?
Double-check your battery installation, ensure the programming steps are correct, and confirm the keypad is within range of the opener. If problems persist, consult the opener’s manual or contact customer support.
How Often Should I Replace My Garage Door Keypad?
Most keypads last 5–10 years with proper care. Replace sooner if the buttons fail, the cover cracks, or the keypad stops responding.
Is It Safe To Change The Garage Door Keypad Myself?
Yes, for most modern systems, DIY replacement is safe. Turn off power before handling wires, and follow the instructions closely. If you see damaged wiring or can’t get the keypad to work, contact a professional.
Changing your garage door keypad is a smart way to boost security and convenience. By following these clear steps, you can finish the job with confidence and keep your home protected. Whether you’re upgrading to a newer model or just replacing a worn-out keypad, the right approach will make the process smooth and stress-free.


