Now Reading: How to Set Up Liftmaster Garage Door Opener: A Step-by-Step Guide
- 01
How to Set Up Liftmaster Garage Door Opener: A Step-by-Step Guide
How to Set Up Liftmaster Garage Door Opener: A Step-by-Step Guide
Setting up a LiftMaster garage door opener can feel like a big job, but with the right steps, you can do it confidently—even if you’re not an expert. Many people choose LiftMaster because it is one of the most trusted brands for garage door openers, known for its reliability, safety, and smart features. Whether you are installing a new unit or replacing an old one, this guide will walk you through everything you need to know, from unpacking the box to connecting your opener to Wi-Fi.
You’ll also learn some tips that even seasoned DIYers sometimes miss, like how to avoid interference with your home’s Wi-Fi and how to make sure your sensors stay properly aligned. By the end, you’ll know not only how to set up your LiftMaster garage door opener, but also how to troubleshoot common issues and keep your system running smoothly for years.
Understanding Your Liftmaster Garage Door Opener
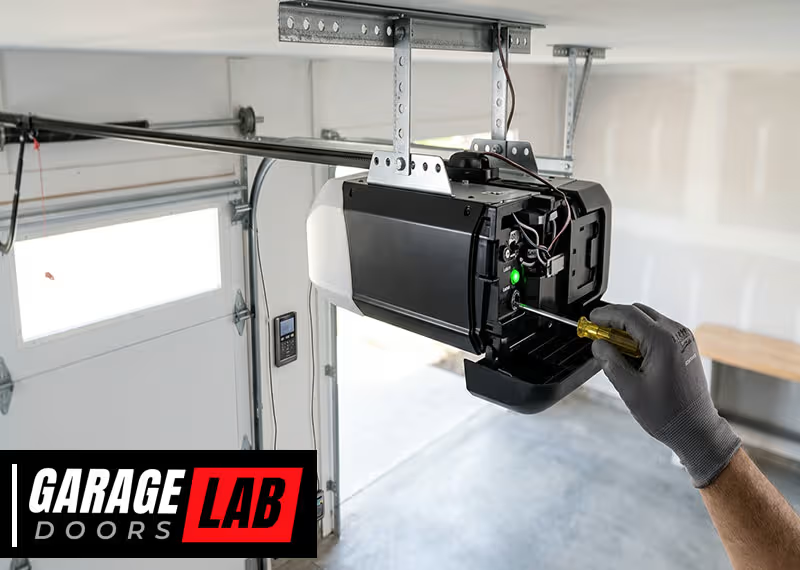
Before you begin the installation, it’s important to understand the main parts of a LiftMaster garage door opener and the tools you’ll need. There are several different models, but most share the same basic components.
- Motor Unit: This is the main device that powers the door.
- Rail Assembly: Guides the door as it opens and closes.
- Trolley: Moves along the rail and pulls the door.
- Safety Sensors: Detect objects in the path of the door.
- Wall Control Panel: Lets you control the opener from inside your garage.
- Remote Controls: Open and close the door from your car or outside.
- Emergency Release Cord: Allows you to open the door manually during a power outage.
Most LiftMaster openers also include Wi-Fi connectivity for smartphone control and smart home integration.
Tools And Materials You’ll Need
Gather all the tools and materials before you start. This saves time and reduces frustration.
- Power drill and bits (1/4″ and 5/16″ recommended)
- Adjustable wrench
- Socket set
- Stepladder (at least 8 feet tall)
- Screwdrivers (flathead and Phillips)
- Pliers
- Tape measure
- Level
- Safety glasses and gloves
- Light bulbs (if not included)
- Extension cord (if outlet is far)
Some garages may require extra wood for mounting or angle iron for support, especially if the ceiling joists are not in the right place.
Know Your Door Type
Not all garage doors are the same. Most LiftMaster openers work with sectional doors (the most common type), but not all work with one-piece tilt-up doors. Check your door type before you begin.
Preparing For Installation
A good installation begins with good preparation. Before you even open the box, take these steps to make the job easier and safer.
Inspecting Your Garage Door
Your garage door must be in good working order before adding an opener. Here’s how to check:
- Balance Test: Disconnect the opener (if you have one) and lift the door halfway. It should stay in place. If it falls or rises, the springs may need adjustment.
- Roller and Track Condition: Look for worn rollers or bent tracks. Replace any damaged parts.
- Lubrication: Apply garage door lubricant to hinges and rollers for smooth operation.
If your door is unbalanced or has broken springs, fix these problems before installing the opener. A poorly balanced door will strain the new opener and may cause it to fail.
Measuring And Planning
Take careful measurements to avoid problems during installation.
- Headroom: The distance from the top of the door to the ceiling should be at least 2 inches above the opener’s rail.
- Backroom: The distance from the door to the back wall should be the door height plus 18 inches.
- Power Outlet: There should be a grounded outlet within 6 feet of the opener motor.
If you don’t have enough headroom or a nearby outlet, plan for extra materials or call a professional electrician.
Checking The Parts
Open the box and lay out all the parts. Use the instruction manual’s parts list to make sure nothing is missing. Missing hardware is a common frustration—don’t wait until you’re halfway through to notice!
Assembling The Rail And Opener
Now you’re ready to start assembling your LiftMaster garage door opener. This is usually done on the ground before you hang anything overhead.
Step 1: Assemble The Rail
Most LiftMaster kits come with several rail sections.
- Lay out the rail pieces on the floor in the correct order.
- Slide the pieces together until they click or lock.
- Secure them with the provided screws or bolts.
- Attach the trolley to the rail.
Check that the rail is straight and all connections are tight. A misaligned rail can cause noisy or jerky door movement.
Step 2: Attach The Rail To The Motor Unit
- Stand the motor unit on its end.
- Align the rail with the motor’s opening.
- Insert the rail and secure it with bolts.
- Attach the idler pulley (if your model uses one) at the end of the rail.
Double-check that all bolts are tight before moving on.
Step 3: Install The Chain Or Belt
LiftMaster openers use either a chain drive or a belt drive. Both install in a similar way.
- Loop the chain or belt around the sprocket on the motor.
- Pass it around the idler pulley.
- Connect the ends using the master link or tensioner.
- Adjust the tension so there’s about a half-inch of slack at the center.
Too much slack will cause noise; too little will strain the drive.
Step 4: Mount The Light Cover And Bulbs
Install the light bulb(s) in the motor unit. Use only bulbs rated for garage door openers (usually 60 watts or LED equivalent). Avoid compact fluorescent bulbs—they can interfere with the opener’s remote signal.
Mounting The Opener
With the opener assembled, you’re ready to lift it into place. This part often requires a helper.
Step 1: Secure The Header Bracket
- Find the center of the garage door above the door frame.
- Mark the spot for the header bracket, usually 2″–6″ above the door’s high point.
- Drill pilot holes.
- Attach the bracket with lag screws.
The header bracket must be anchored into solid wood, not just drywall.
Step 2: Attach The Rail To The Header Bracket
- Lift the assembled opener and rest the rail on a stepladder.
- Connect the rail to the header bracket using the provided clevis pin and fastener.
- Check that the rail is level.
If working alone, you can prop up the opener with a ladder and blocks, but having a helper makes this step safer.
Step 3: Hang The Motor Unit
- Hold the motor unit above the garage floor (about 7 feet high).
- Use angle iron or the provided brackets to suspend the motor from the ceiling joists.
- Secure with lag screws.
- Make sure the unit is level and straight with the rail.
The opener should be high enough that the door won’t hit it when open, but low enough to reach for servicing.
Step 4: Attach The Emergency Release Rope
Tie the emergency release rope to the trolley handle. The handle should hang about 6 feet from the ground, within easy reach.
Installing The Door Bracket And Arms
The door bracket connects the opener to the garage door itself. Proper installation is critical for smooth operation.
Step 1: Install The Door Bracket
- Find the door’s center and mark the location.
- Drill pilot holes.
- Attach the bracket with the provided screws.
For lightweight doors, you may need to reinforce the mounting area with a wood block.
Step 2: Attach The Curved Door Arm
- Connect the curved arm to the door bracket.
- Attach the straight arm to the trolley.
Step 3: Join The Arms
- Overlap the two arms and bolt them together.
- The arms should form a solid connection, not a loose hinge.
Check the manufacturer’s instructions for the correct angle and length.
Wiring And Installing The Safety Sensors
Safety sensors are a must for modern garage doors—they prevent the door from closing if something is in the way.
Step 1: Mount The Sensors
- Place each sensor on either side of the garage door, 4″–6″ above the floor.
- Use the provided brackets to attach them to the track or wall.
- Sensors must be lined up facing each other.
Step 2: Run The Wires
- Route the wires along the wall and ceiling to the opener motor.
- Staple the wires neatly, but don’t pinch them.
- Connect the wires to the correct terminals on the opener (usually marked black and white).
Step 3: Test Alignment
Most LiftMaster openers have a sensor light. If the sensors are misaligned, the light will blink or not come on. Adjust until both sensor lights are steady.
Non-obvious tip: Even a small cobweb, dust, or sunlight can cause sensor misalignment errors. Keep sensors clean and out of direct sunlight if possible.
Installing The Wall Control Panel
The wall control panel lets you open or close the door from inside your garage. It also controls lights and lock features.
Step 1: Choose A Location
Mount the control panel near the door to your house, at least 5 feet above the floor (out of reach of children).
Step 2: Run The Wires
- Route the wire from the opener to the control panel.
- Use insulated staples to secure the wire.
- Connect the wire to the terminals on the opener and control panel.
Step 3: Attach The Panel
- Screw the panel to the wall.
- Snap on the cover.
Some models have advanced panels with motion sensors or LCD screens; follow your manual for special instructions.
Connecting Power And Testing The System
Now it’s time to plug in the opener and test all functions.
Step 1: Power Up
Plug the opener into the grounded outlet. The light should turn on, and you may hear a beep.
Step 2: Test The Door Operation
- Press the wall button to open and close the door.
- Watch for smooth, quiet movement.
- Check that the door fully opens and closes.
If the door doesn’t move, stop and check your wiring, alignment, and power.
Step 3: Set The Travel Limits
Travel limits tell the opener how far to open and close the door. Most modern LiftMaster openers have electronic limits.
- Hold the up or down button to set the open and close positions.
- Adjust until the door stops just at the floor and just above the opening.
If the door reverses before closing or won’t open all the way, adjust the limits as needed.
Step 4: Test The Safety Sensors
Place a small box or object in the door’s path. Try closing the door—it should reverse as soon as the sensor is blocked.
Important insight: Do not bypass or disable the sensors. This is a major safety hazard and violates building codes.
Step 5: Test The Force Settings
Force settings control how hard the opener pushes or pulls the door.
- Open and close the door by hand; it should feel balanced and not too heavy.
- If the opener struggles, increase the force setting slightly.
- Too much force can damage the door or hurt someone.

Programming Remotes And Keypads
Modern LiftMaster openers come with one or more remote controls and often a wireless keypad.
Programming Remotes
- Press the “Learn” button on the opener (usually under a light cover).
- The indicator light will blink.
- Press the remote button you want to use.
- The opener light will blink, confirming programming.
You can program several remotes to the same opener.
Programming The Wireless Keypad
- Press the “Learn” button.
- Within 30 seconds, enter your chosen 4-digit code on the keypad.
- Press the Enter button.
The keypad will now open or close the door with your code.
Clearing All Codes
If you move into a new house or lose a remote, clear all codes:
- Hold the “Learn” button for 6–10 seconds.
- The indicator light will turn off.
- All remotes and keypads are now erased—reprogram as needed.
Tip most people miss: For maximum security, always clear old codes when moving into a new home.
Connecting To Wi-fi And Myq App
Many LiftMaster openers now support Wi-Fi and the MyQ app, which lets you control your door from anywhere.
Step 1: Check Wi-fi Signal
Before connecting, check that your garage has a strong Wi-Fi signal. Weak signals cause unreliable operation.
Pro tip: If your Wi-Fi is weak, use a range extender in the garage.
Step 2: Download The Myq App
Get the MyQ app from the Apple App Store or Google Play Store.
Step 3: Connect The Opener
- On the opener, press the Wi-Fi or “Learn” button (look for the Wi-Fi symbol).
- Follow the app’s instructions to connect to your home network.
- Name your garage door and test remote operation.
Step 4: Set Up Alerts And Schedules
The MyQ app allows you to:
- Receive alerts when the door opens or closes
- Set schedules to automatically close the door at night
- Share access with family or trusted friends
Non-obvious insight: Many people skip setting up alerts. These can warn you if you accidentally leave the door open, adding an extra layer of security.
For more details, the official LiftMaster MyQ page has helpful guides.
Troubleshooting Common Problems
Even after careful installation, you may run into some common issues. Here’s how to solve them.
The Door Won’t Close
- Check the safety sensor alignment—most problems are due to blocked or misaligned sensors.
- Make sure nothing is in the door’s path.
- Check for broken wires or loose connections.
The Remote Doesn’t Work
- Replace the batteries.
- Reprogram the remote using the steps above.
- Make sure you’re in range (usually 100–150 feet).
The Opener Is Noisy
- Check that the rail and chain/belt are properly lubricated.
- Tighten any loose bolts or screws.
- Replace worn rollers with nylon rollers for quieter operation.
The Door Reverses Before Closing
- Adjust the travel limits.
- Reduce the down force if it’s too high.
- Check for obstructions or binding in the door tracks.
The Wi-fi Connection Drops
- Move your router or use a Wi-Fi extender.
- Make sure your garage door opener’s firmware is up to date.
Maintenance And Safety Tips
Regular maintenance keeps your LiftMaster garage door opener running smoothly and safely.
Monthly Checks
- Test the safety reverse by placing an object in the door’s path.
- Listen for unusual noises.
- Check the battery in your remote and keypad.
Lubrication
- Lubricate door hinges, rollers, and springs every 6 months.
- Do not lubricate the opener’s chain or belt unless the manual instructs.
Visual Inspection
- Look for frayed wires or worn parts.
- Make sure the sensors are clean and secure.
Security Updates
- Change your MyQ app password regularly.
- Remove access from former users.
Practical advice: Write down your opener’s serial number and keep it with your home records. This helps if you ever need support or warranty service.

Comparison: Chain Drive Vs. Belt Drive Liftmaster Openers
It’s helpful to understand the difference between chain drive and belt drive models.
| Feature | Chain Drive | Belt Drive |
|---|---|---|
| Noise Level | Louder, metal-on-metal | Quieter, smoother operation |
| Durability | Very durable | Durable, but belt may wear out over time |
| Cost | Less expensive | More expensive |
| Best For | Detached garages | Attached garages, bedrooms nearby |
Comparison: Liftmaster Vs. Other Brands
How does LiftMaster compare to other leading garage door opener brands?
| Brand | Wi-Fi Features | Reliability | Price Range |
|---|---|---|---|
| LiftMaster | Excellent (MyQ app) | Very high | $$–$$$ |
| Chamberlain | Good (MyQ app) | High | $–$$ |
| Genie | Some models only | High | $–$$$ |
| Craftsman | Limited | Moderate | $–$$ |
Non-obvious tip: Chamberlain and LiftMaster are made by the same parent company, but LiftMaster is considered more professional-grade, with sturdier parts.
Advanced Features And Accessories
LiftMaster openers can be customized with add-ons and accessories.
- Battery Backup: Keeps your opener working during power outages.
- Smart Home Integration: Works with Alexa, Google Assistant, and other platforms.
- Automatic Door Lock: Adds extra security.
- Vehicle Compatibility: Many new cars have built-in HomeLink systems that pair with LiftMaster.
Ask your dealer or check the LiftMaster website for compatible accessories.
Safety And Legal Compliance
Installing a garage door opener is more than just convenience—it’s a safety issue.
- All openers sold since 1993 must have photoelectric safety sensors.
- Never remove or bypass these sensors.
- Check your local building codes for special requirements.
If you rent your home, get permission from the owner before installing a new opener.

Frequently Asked Questions
Why Won’t My Liftmaster Garage Door Opener Close All The Way?
This is usually due to safety sensor misalignment or something blocking the sensors. Check for blinking sensor lights, clean the lenses, and ensure nothing is in the door’s path.
How Do I Reset My Liftmaster Opener?
Hold the “Learn” button on the opener for about 10 seconds until the indicator light turns off. This clears all remote and keypad codes. You’ll need to reprogram your remotes and keypads.
Can I Install A Liftmaster Opener Myself, Or Should I Hire A Professional?
Most handy homeowners can install a LiftMaster garage door opener with basic tools and patience. However, if you’re unsure about electrical work or your door needs spring adjustment, it’s safer to call a pro.
How Do I Connect My Opener To Wi-fi?
Press the Wi-Fi or “Learn” button on the opener, then follow the instructions in the MyQ app. Make sure you have a strong Wi-Fi signal in your garage for best results.
What Should I Do If My Remote Control Stops Working?
Replace the remote’s battery, reprogram the remote, and make sure you’re within range. If it still doesn’t work, clear all codes from the opener and reprogram each remote.
Setting up a LiftMaster garage door opener is a project that rewards careful planning and attention to detail. With each step, you’re adding safety, convenience, and value to your home. Take your time, follow these instructions, and enjoy the confidence that comes with a job well done. If you ever feel stuck, consult the official manual or check the LiftMaster Customer Support for expert help.


