Now Reading: How Many Turns On A 7Ft Garage Door Spring
- 01
How Many Turns On A 7Ft Garage Door Spring


The garage door is a complex piece of machinery, and its springs are arguably the most critical components. They bear the immense weight of the door, making it easy to lift and close. When these springs are not functioning correctly, or if they are improperly installed, it can lead to significant safety hazards and operational issues.
One of the most common questions homeowners and technicians alike have concerns the number of turns on a 7-foot garage door spring. This isn’t a simple number; it’s a calculation deeply tied to the specific weight of the garage door it’s meant to lift.
Understanding this calculation is crucial for proper installation, maintenance, and repair. An incorrectly wound spring can either be too tight, putting excessive strain on the opener and other components, or too loose, failing to counterbalance the door’s weight effectively. This can result in jerky movements, premature wear and tear, or even the door failing to stay open or close properly, posing a risk to property and people.
This guide aims to demystify the process, providing a comprehensive look at how to determine the correct number of turns for a 7-foot garage door spring, emphasizing safety and efficiency.
Key Takeaways
- The number of turns on a 7-foot garage door spring is not a fixed value but is directly determined by the door’s weight.
- A torsion spring system is typically used for garage doors, requiring precise winding to counterbalance the door’s weight.
- Winding cones are essential for the winding and unwinding process, and set screws secure the spring in place.
- The “full wind” is the point where the spring is fully tensioned to lift the door.
- Safety is paramount when working with garage door springs, as they store significant energy.
- Incorrect spring tension can lead to premature wear, opener strain, and safety hazards.
- Consulting a professional is recommended if you are unsure about spring replacement or adjustment.
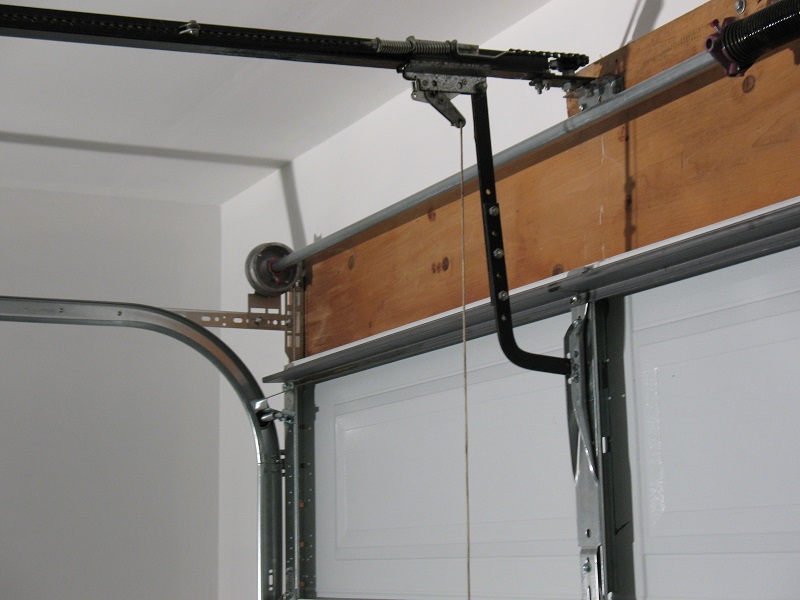
Credit: ddmgaragedoors.com
Understanding Garage Door Spring Systems
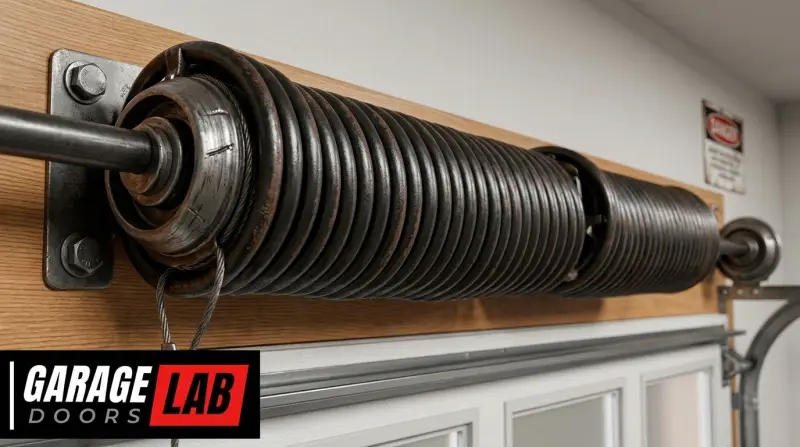
Garage doors rely on a counterbalance system to make them easy to operate. The most common type is the torsion spring system, which is mounted on a rod above the garage door opening. These springs are essentially heavy-duty steel coils that twist as the door closes, storing energy, and then unwind as the door opens, releasing that energy to help lift the door. A 7-foot garage door typically refers to the height of the door itself, not the spring. The springs are designed to match the door’s weight and dimensions.
Torsion Springs Vs. Extension Springs
While torsion springs are prevalent, some older or lighter-duty garage doors might use extension springs. These run parallel to the horizontal tracks and stretch as the door closes, storing energy. When the door opens, they contract, assisting in lifting. However, torsion springs are generally preferred for their durability, safety (they are less likely to snap and cause injury), and more consistent counterbalance throughout the door’s travel. For the purpose of this discussion, we will focus on torsion springs, as they are most commonly found on 7-foot garage doors.
Components Of A Torsion Spring System
A functional torsion spring system involves several key components:
- Torsion Spring(s): The coiled metal springs that provide the lifting force. A 7-foot door might have one or two springs, depending on its weight and width.
- Winding Rods: Sturdy metal bars used to wind and unwind the torsion spring.
- Winding Cones: These are attached to the ends of the spring and have holes that the winding rods fit into. One cone is fixed to a stationary bracket, while the other (the winding cone) is used for tensioning.
- Center Bracket: This holds the stationary end of the spring(s) and is attached to the wall above the garage door.
- Cable Drums: These are attached to the ends of the torsion spring shaft, near the pulleys. As the shaft turns, the cables wind onto or unwind from the drums, lifting or lowering the door.
- Spring Shaft/Rod: The metal bar that the torsion spring is mounted on.
- Set Screws: Used to secure the winding cone and the stationary cone to the shaft, preventing them from slipping.
Understanding these parts is fundamental before attempting any adjustments or installations related to spring tension.
The Crucial Role Of Door Weight
The weight of the garage door is the single most important factor determining the number of turns required for its torsion springs. A 7-foot garage door can vary significantly in weight based on its material (wood, steel, aluminum, insulated), size (width), and design. A lightweight, uninsulated steel door will weigh considerably less than a heavy, solid wood door of the same dimensions.
Why Weight Matters
The spring’s purpose is to counterbalance the door’s weight. When properly tensioned, the spring’s stored energy should make the door feel almost weightless when you lift it manually. This allows the garage door opener to do its job efficiently without being overstressed.
- Too Light: If the spring is over-tensioned (too many turns), it will fight against the door’s natural closing motion, putting excessive strain on the opener, cables, and drums. This can lead to premature failure of these components.
- Too Heavy: If the spring is under-tensioned (too few turns), it won’t provide enough lift. The door will feel heavy, and the opener will struggle, potentially burning out its motor. In severe cases, an under-tensioned spring might not hold the door open, causing it to slam shut unexpectedly.
Determining Your Garage Door’s Weight
Accurately determining your garage door’s weight is the first critical step before calculating spring tension.
- Manufacturer Specifications: Check the door’s documentation or the manufacturer’s website. This is the most reliable method.
- Weighing the Door: If documentation is unavailable, you can weigh the door. This requires disconnecting the opener and carefully lifting the door manually. You might need a spring scale (also known as a force gauge or load cell) attached to the lifting handle. With the door halfway open, the scale reading in pounds will approximate the force needed to hold it there, which is directly related to its weight.
- Example: If a spring scale reads 150 lbs when attached to the lifting handle and holding the door halfway open, the door weighs approximately 150 lbs. This is a simplified approximation, as friction and track angle play minor roles, but it’s generally sufficient for spring calculation.
- Professional Measurement: Garage door technicians have specialized tools and experience to accurately weigh doors.

Credit: mygaragedoorparts.com
Calculating Spring Tension: The Math Behind The Turns
Once you know the door’s weight, you can begin to calculate the required spring tension. For torsion springs, the tension is applied by winding the spring. The number of turns is directly proportional to the force needed to lift the door.
The Formula And Its Variables
While there isn’t a single universal formula etched in stone that applies to every single spring and door combination due to variations in spring wire diameter, coil length, and manufacturer specifications, the general principle is based on the weight the spring needs to counterbalance.
A common approach for calculating the number of turns for a torsion spring is:
Number of Turns = (Door Weight in Pounds × 0.4) / Spring Wire Diameter in Inches
However, this formula is a simplification and often requires adjustment based on the specific spring’s properties and the desired tension. A more practical approach involves using charts or calculators provided by spring manufacturers, or understanding the concept of “pounds per inch of deflection.
“
A more common and practical method for calculating the required spring tension (in inch-pounds) is:
Required Spring Tension (in-lbs) = Door Weight (lbs) × Distance from Shaft to Cable Drum Center (inches)
Once you have the required tension in inch-pounds, you then determine the number of turns based on the specific spring’s characteristics (wire diameter, number of coils, free length).
Spring Wire Diameter And Spring Rate
Two critical properties of a torsion spring are its wire diameter and its spring rate.
- Wire Diameter: This is the thickness of the steel wire used to make the spring. A thicker wire (larger diameter) means a stronger spring.
- Spring Rate: This is a measure of how much force is required to twist the spring a certain amount. It’s usually expressed in inch-pounds per degree of twist or per revolution.
Manufacturers provide specifications for their springs, including their free length (when not under tension) and their rated load (the weight they can lift with a specific number of turns).
The “full Wind” Concept
The full wind refers to the maximum number of turns the spring is designed to handle for a particular door weight. This is the point where the spring is sufficiently tensioned to counterbalance the door.
- Initial Winding: When a new torsion spring is installed, it’s typically mounted with its stationary cone secured and the winding cone loose. The winding process begins by inserting winding bars into the holes of the winding cone and rotating the spring.
- Incremental Turns: Each full rotation of the winding bar is one turn. The spring is wound incrementally, and at specific points, the winding cone is secured with set screws to prevent it from unwinding.
- Balancing the Door: The goal is to add enough turns until the door can be manually lifted and held in any position with minimal effort. When the door is halfway open, it should ideally stay put without holding it.
Example Calculation (illustrative)
Let’s assume:
- Your 7-foot garage door weighs 150 lbs.
- You are using a specific torsion spring with a wire diameter of 0.218 inches (often denoted as 0.218 x 2-3/8 x 32, where 2-3/8 is the inside diameter and 32 is the free length in inches).
- Based on manufacturer data or spring rate calculations, this spring requires approximately 30 inch-pounds of torque per revolution.
- The distance from the center of the spring shaft to the point where the cable wraps around the drum is 4 inches.
- Calculate Required Torque:
Torque = Door Weight × Distance from Shaft to Drum Center
Torque = 150 Lbs × 4 Inches = 600 Inch-pounds
2. Calculate Number Of Turns:
Number Of Turns = Required Torque / Torque Per Revolution
Number of Turns = 600 inch-pounds / 30 inch-pounds/revolution = 20 revolutions
So, for this illustrative example, you would need to wind the spring approximately 20 turns.
Important Note: This is a simplified illustration. Real-world calculations often involve more detailed spring rate charts and considerations for the door’s travel. Always refer to the spring manufacturer’s specifications or consult a professional.
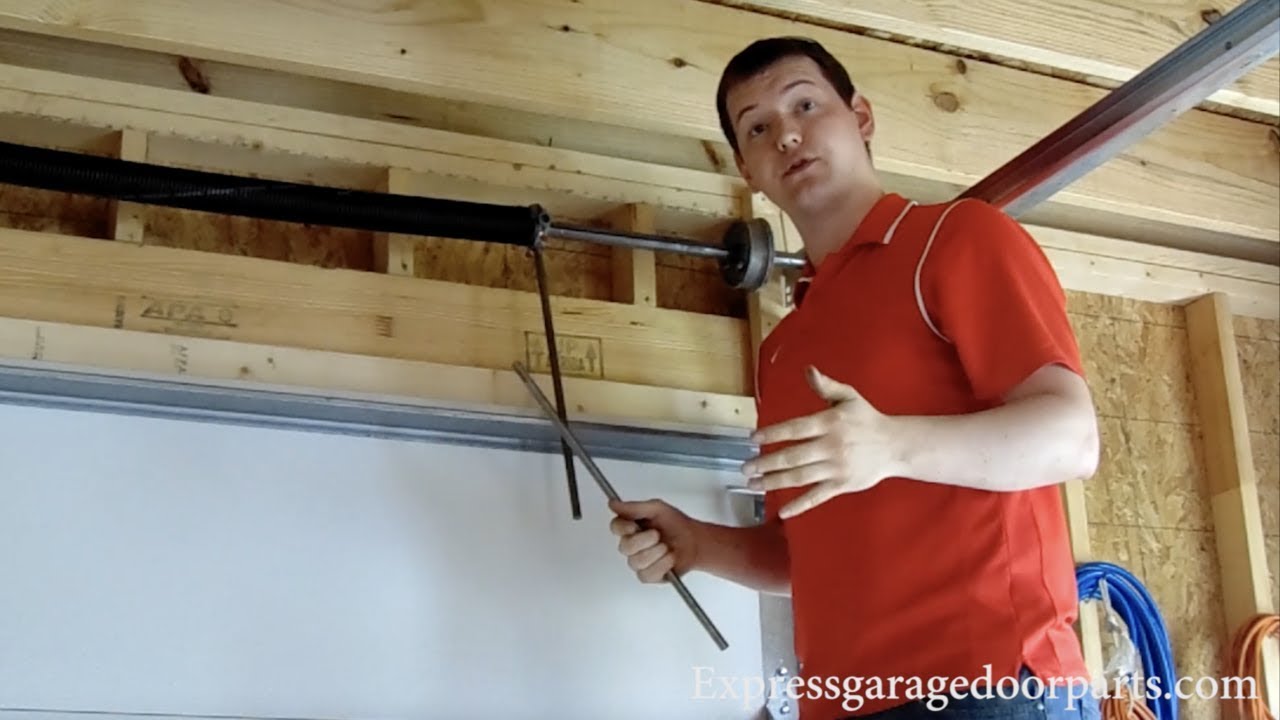
Credit: www.youtube.com
The Winding And Unwinding Process: Safety First
Working with garage door springs is inherently dangerous. The springs store a tremendous amount of energy, and mishandling them can lead to severe injury or death. Always prioritize safety.
Essential Safety Precautions
Before you even think about touching a winding bar, adhere to these crucial safety measures:
- Disconnect the Opener: Always disengage the garage door opener from the door. This prevents the opener from engaging unexpectedly while you’re working on the springs. There’s usually a red emergency release cord hanging from the opener’s trolley. Pull this cord to disconnect the opener.
- Secure the Door: Once the opener is disconnected, use C-clamps or locking pliers on the vertical track to prevent the door from moving. This is especially important if you’re working on the springs *before* winding or unwinding.
- Use the Correct Tools: You need specifically designed winding bars (not screwdrivers or pipes). These are sturdy steel rods that fit snugly into the winding cone holes. You’ll need two.
- Wear Safety Gear: Always wear safety glasses to protect your eyes from flying debris or snapping metal. Heavy-duty gloves are also recommended.
- Never Stand Directly Under a Taut Spring: The stored energy is immense. If a spring or component fails, it can whip around with incredible force.
- Work with a Partner: Having a second person can provide assistance and an extra set of eyes for safety.
- Understand Spring Types: Be certain you are working with the correct type of spring (torsion vs. extension) and that it’s rated for your door.
Winding The Torsion Spring
Winding a torsion spring involves applying tension by rotating it.
- Secure the Stationary Cone: Ensure the stationary cone, attached to the bracket at the center of the shaft, is firmly secured to the wall and the shaft.
- Insert Winding Bars: Insert one winding bar into the bottom hole of the winding cone (the one at the end of the spring assembly).
- Apply Tension: Using the second winding bar, engage the next hole up (or the next available hole if winding upwards) and pull downwards to rotate the spring. This stores energy.
- Incremental Winding: Move the first winding bar to the next hole up, and repeat the process with the second bar. Continue this process, winding in increments of a quarter turn or a full turn at a time.
- Securing the Spring: As you wind, the winding cone will move towards the stationary cone. Periodically tighten the set screws on the winding cone to prevent it from slipping back.
- Determining the Number of Turns: As discussed earlier, the target number of turns is based on the door’s weight and the spring’s specifications. You’ll typically wind until you reach the calculated number of turns.
- Testing the Tension: Once the calculated number of turns is reached, tighten the set screws firmly. Release the clamps securing the door. Slowly raise and lower the door manually. It should feel balanced, holding its position halfway open. If it drifts up or down, you may need to add or remove a quarter or half turn.
Unwinding The Torsion Spring
Unwinding is necessary when replacing a broken spring or reducing tension. This process is equally dangerous and must be done carefully.
- Follow All Safety Precautions: Disconnect the opener, secure the door, wear safety gear, etc.
- Loosen Set Screws: Carefully loosen the set screws on the winding cone.
- Insert Winding Bars: Insert winding bars into the holes of the winding cone.
- Controlled Release: Slowly and deliberately use the winding bars to allow the spring to unwind. This should be done in small increments (e.g., a quarter turn at a time). The spring will release its stored energy.
- Prevent Snapping: Never allow the winding bars to slip out of the holes while the spring is under tension. This can cause the bars to fly off violently.
- Full Unwind: Continue unwinding until all tension is released from the spring.
Common Issues And Troubleshooting
Even with careful calculation and winding, issues can arise. Understanding common problems can help diagnose and resolve them.
Door Feels Too Heavy Or Too Light
- Too Heavy: This indicates the spring is under-tensioned. You need to add more turns. Carefully follow the winding procedure, adding a quarter or half turn at a time and testing the balance until the door feels light and balanced.
- Too Light (Drifts Up): This indicates the spring is over-tensioned. You need to reduce the tension. Carefully follow the unwinding procedure, removing a quarter or half turn at a time and testing the balance. Be cautious, as over-tensioning can damage components.
Spring Sagging
- Visual Cue: If the spring visibly sags in the middle when the door is closed, it’s likely under-tensioned. This means it’s not providing enough counter-force.
- Solution: Add more turns to the spring.
Broken Spring
- Symptoms: A loud bang or snap is often heard, and the door will suddenly feel extremely heavy and difficult to lift. The spring will have a visible break in the coil.
- Action: Do not attempt to operate the door. A broken spring cannot be repaired; it must be replaced. Replacement involves fully unwinding the old spring (carefully!) And installing a new one with the correct specifications. This is a task best left to professionals due to the inherent dangers.
Opener Strain Or Failure
- Symptoms: The opener motor runs, but the door doesn’t move, or it moves sluggishly. You might hear straining noises from the opener.
- Cause: Often caused by incorrect spring tension (either too much or too little), leading the opener to bear too much of the door’s weight. It could also indicate worn-out opener components.
- Solution: First, ensure the spring tension is correctly balanced. If the problem persists, the opener itself may need adjustment or repair. For opener adjustments, adjusting a Chamberlain opener or adjusting the chain on a garage door opener are common procedures if the issue lies there.
Factors Affecting The Number Of Turns
While door weight is paramount, several other factors can influence the precise number of turns needed for a 7-foot garage door spring.
Spring Type And Manufacturer
Different manufacturers produce springs with varying tempering processes, wire grades, and design specifications. A spring from one brand might require slightly different tensioning than a seemingly identical spring from another brand. Always refer to the specific manufacturer’s guidelines for the spring you are installing.
Door Height Vs. Width
A 7-foot door refers to its height. However, the width of the door also impacts its overall weight and the torque required. A wider door, even if the same height and material, will generally be heavier. The calculations must account for the door’s total weight, regardless of whether the 7-foot dimension refers to height or width (though 7-foot typically denotes height).
Cable Drum Offset
The distance from the center of the torsion spring shaft to the point where the garage door cable wraps around the cable drum is critical. A larger offset requires more torque to turn the shaft, meaning more spring tension is needed for the same door weight.
This distance is usually fixed by the drum’s design and mounting position.
Friction In The System
While not directly factored into the winding calculation, friction within the garage door system (rollers, hinges, tracks) adds resistance. A well-maintained system with properly lubricated rollers (see how to lubricate garage door rollers) will require slightly less spring tension than one with significant friction. However, the primary calculation should focus on the door’s dead weight.
Desired Balance Point
While the ideal is for the door to stay put halfway open, some users prefer a slightly different balance point. However, deviating significantly from the neutral balance can put undue stress on components. Sticking to the neutral balance point is generally recommended for longevity and safety.
When To Call A Professional
Working with garage door springs is not a DIY task for the faint of heart. The potential for serious injury is significant. Here are situations where calling a professional garage door technician is the wisest course of action:
- Uncertainty About Door Weight: If you cannot accurately determine your garage door’s weight.
- Broken Spring Replacement: This is the most common and critical reason to call a pro. The energy stored in a torsion spring is immense.
- Lack of Proper Tools: If you don’t have the correct winding bars or safety equipment.
- Discomfort or Fear: If you feel uncomfortable or intimidated by the process. Your safety is worth more than any potential savings.
- Repeated Issues: If you’ve tried to balance the door, and it consistently feels off, there might be underlying issues with the door or opener that a professional can diagnose.
- Complex Systems: For very large, heavy, or custom garage doors, professional assessment is essential.
A professional technician has the experience, tools, and knowledge to safely and correctly tension or replace your garage door springs. The cost of a professional service call is minimal compared to the potential cost of an injury. For context on overall garage door costs, you might find this guide on garage door costs helpful.