Now Reading: How to Fix the Sensors on a Garage Door: Easy DIY Guide
- 01
How to Fix the Sensors on a Garage Door: Easy DIY Guide
A garage door is more than just a way to keep your car safe—it’s a key part of your home’s security and daily convenience. But nothing can be more frustrating than pressing the remote and seeing your garage door refuse to move because of a sensor issue.
If you’ve ever walked through the rain to manually open a stuck door, you know how important those sensors are. The good news? Fixing garage door sensors is something most homeowners can handle with simple tools and a bit of patience.
This guide will walk you through everything you need to know to diagnose, fix, and maintain your garage door sensors. We’ll look at how sensors work, signs of problems, step-by-step repair instructions, and tips to prevent future issues. With clear language and practical advice, you’ll learn how to get your garage door back to smooth, safe operation—and possibly save on a costly service call.
How Garage Door Sensors Work
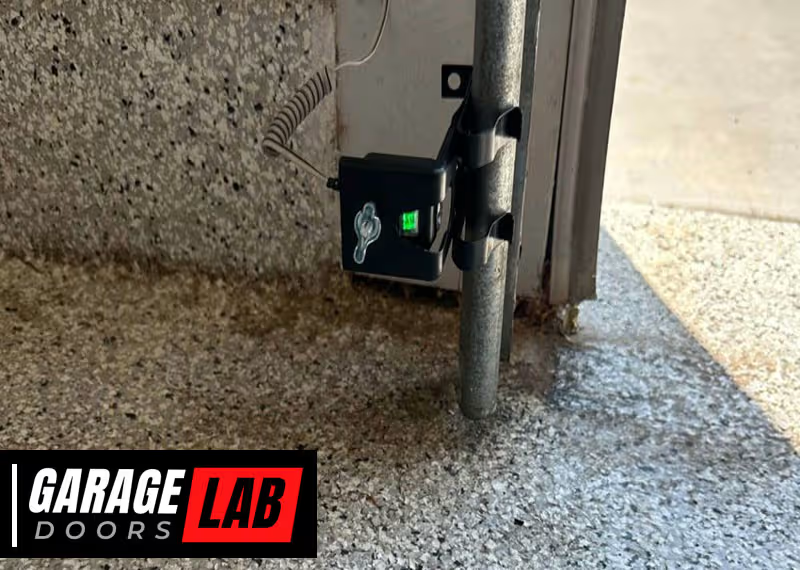
Garage door sensors are safety devices found near the bottom of each door track. Their job is simple but critical: to stop the door from closing if something (or someone) is in the way. Most modern systems use photoelectric sensors, sometimes called “photo eyes.” These sensors work in pairs—one sends an invisible infrared beam, the other receives it. If the beam is broken, the door will not close.
Sensors became standard after 1993, when the US government required them for all new automatic garage door openers. This change greatly reduced accidents, especially involving children and pets.
There are three main components in a sensor system:
- Sender (emitter): Shoots a beam of infrared light across the door opening.
- Receiver: Sits on the other side and waits for the beam.
- Wiring & connectors: Cables that link sensors to the garage door opener.
If any part fails—due to dirt, misalignment, loose wires, or damage—the system won’t work correctly. Understanding how these pieces fit together is the first step to fixing them.
Common Signs Of Sensor Problems
Knowing the warning signs can help you spot sensor issues before they become a bigger problem. Here are the most common clues:
- Door won’t close: The opener tries but reverses or stays open.
- Flashing lights: One or both sensor lights blink, indicating trouble.
- Door only closes when you hold the wall button: This bypasses the sensors, so if the door works this way, the sensors are likely the issue.
- Sensor lights are off: No power or connection problem.
- Door reverses for no clear reason: Sensors might be falsely detecting something.
If you see any of these, it’s time to take a closer look at your sensors.

Safety Precautions Before You Start
Before you start working on your garage door sensors, safety is key. Here’s what to do:
- Unplug the opener: Always disconnect power to avoid electric shock or accidental movement.
- Use proper tools: A screwdriver, pliers, soft cloth, and a level are usually enough.
- Keep children and pets away: The door could move unexpectedly during testing.
- Wear safety glasses: Protect your eyes from dust or debris.
Never stand under a moving garage door, even during testing. If you’re unsure at any point, call a professional.
Diagnosing The Sensor Problem
Fixing sensors starts with finding the real cause. Here’s a step-by-step way to diagnose the issue:
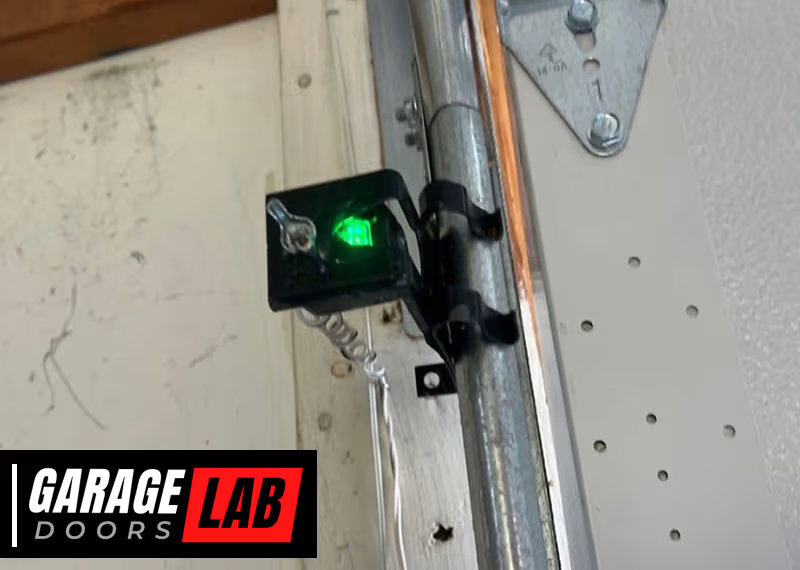
1. Check Sensor Lights
Look at the small LED lights on each sensor. Usually, one will be green (receiver) and the other amber or yellow (sender). If both are solid, the sensors are probably working. If one or both are off or blinking, there’s likely a problem.
2. Clean The Sensors
Dirt, spider webs, or even water spots can block the beam. Gently wipe both sensor lenses with a soft, dry cloth. Avoid harsh chemicals—they can scratch or damage the lens.
3. Look For Obstructions
Check for anything in the sensor’s path. Small objects, leaves, or even sunlight hitting the lens can break the beam.
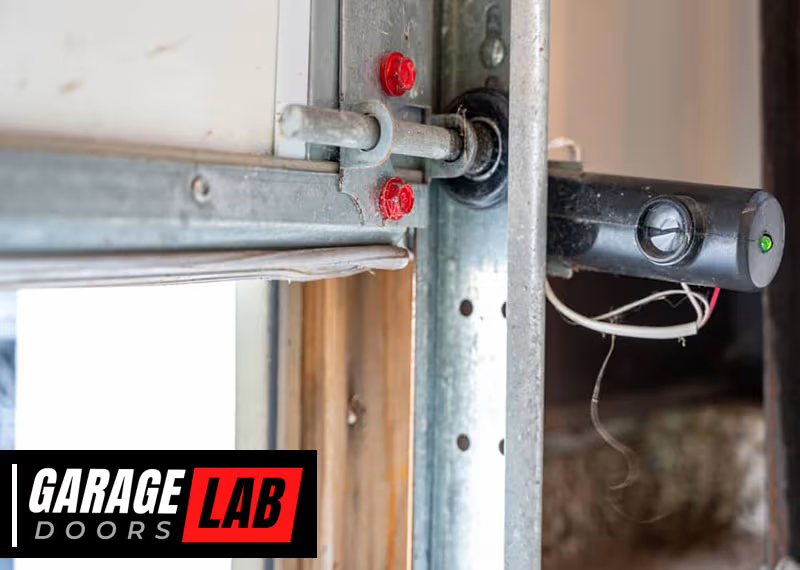
4. Inspect Sensor Alignment
Sensors must face each other exactly. If one is bumped, the beam won’t reach the receiver. Use a level to check if both sensors are at the same height and pointing straight.
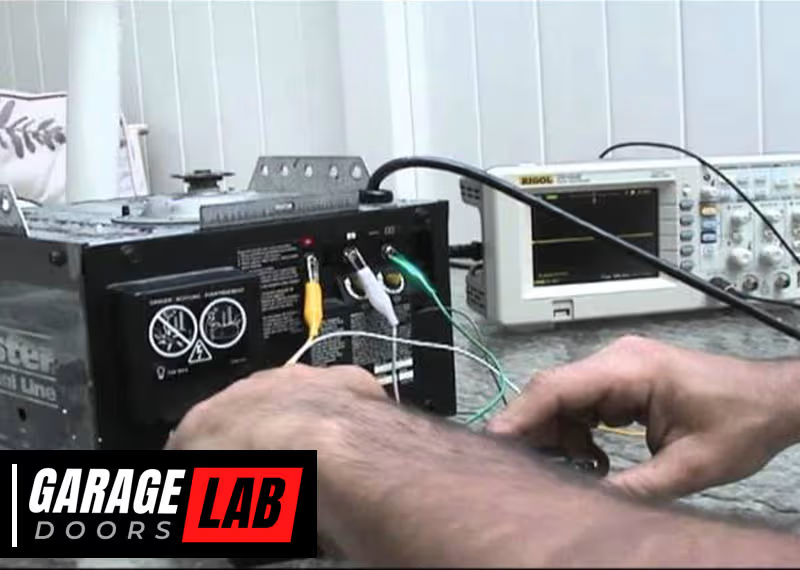
5. Examine Wiring
Look for loose, broken, or chewed wires (rodents sometimes nibble on them). Tug gently to see if connections are secure.
6. Test The Door
Try closing the door using both the remote and the wall button. Does the behavior change? If the door only works with the wall button held down, sensor issues are likely.

Step-by-step Guide: How To Fix Garage Door Sensors
Ready to fix the problem? Here’s a detailed, practical guide to getting your sensors back in action.
1. Clean The Sensor Lenses
Dust, bugs, and debris are common causes of sensor failure.
- Gently wipe each sensor lens with a soft, lint-free cloth.
- If dirt is stubborn, use a mild glass cleaner sprayed on the cloth (not directly on the lens).
- Check for condensation or water spots, especially after rain.
2. Clear The Sensor Path
Even a leaf or cobweb can break the beam.
- Remove anything near the sensors—bikes, tools, trash cans.
- Check for plants or weeds growing into the path.
- Try closing the door again.
3. Realign The Sensors
Misalignment is one of the most frequent causes of sensor trouble.
- Loosen the mounting brackets by hand or with a screwdriver.
- Move the sensors so they point directly at each other.
- Use a level to ensure both are at the same height.
- Watch the sensor lights—when both are solid (not blinking), they are aligned.
- Retighten the brackets.
4. Secure Loose Or Damaged Wiring
Wiring issues are less common but do happen, especially in garages with pests.
- Inspect wires from the sensor to the opener for cuts, frays, or chew marks.
- Tighten any loose connections using a screwdriver.
- For broken wires, strip a small section of insulation and twist the wires together. Secure with a wire nut or electrical tape.
- If you see severe damage, consider replacing the entire wire.
5. Check For Moisture Damage
After heavy rain or snow, water can get inside the sensor’s casing.
- Dry the area around the sensors.
- If condensation is inside the sensor lens, you may need to replace the sensor.
- Make sure the sensors are mounted at least 4-6 inches above the ground to avoid puddles.
6. Test The Garage Door
Once you’ve cleaned, realigned, and checked wires, test the door.
- Try the wall button and remote.
- If the problem is fixed, both sensor lights should be solid, and the door should close smoothly.
- If not, move to the next steps.
7. Replace Faulty Sensors
Sometimes, sensors just wear out. If all else fails:
- Buy a compatible replacement sensor—make sure it matches your opener brand and model.
- Unplug the opener.
- Disconnect old sensors by unscrewing and loosening the wire connections.
- Attach new sensors using existing wires and brackets.
- Plug the opener back in, and align the new sensors as before.
- Test the door.
8. Adjust Sensor Sensitivity (if Available)
Some openers let you adjust sensitivity.
- Check your opener manual. Look for a dial or screw marked “force” or “sensitivity.”
- Adjust in small steps. Too much sensitivity can cause false errors; too little can ignore obstructions.
- Always test after changes.
9. Shield Sensors From Sunlight
Direct sun can “blind” sensors.
- Install a small shade or cover (like a piece of cardboard) to block harsh light.
- Make sure not to block the beam itself.
10. Secure Mounting Brackets
Loose or wobbly mounts cause frequent misalignment.
- Tighten screws or bolts holding the sensor brackets.
- Replace damaged brackets if they won’t hold sensors steady.
Comparing Common Sensor Problems
Understanding the differences between sensor issues can save you time. Here’s a quick look at symptoms and likely causes:
| Symptom | Possible Cause | Fix |
|---|---|---|
| Flashing sensor light | Misalignment, dirty lens | Clean & realign sensors |
| No sensor lights | No power, broken wire | Check wiring & power |
| Door reverses at bottom | Obstructed beam, faulty sensor | Clear path, replace sensor |
| Works only with wall button held | Sensor issue | Clean, realign, or replace |
When To Call A Professional
Most sensor issues are easy for homeowners to fix, but sometimes you need expert help. Call a professional if:
- Wires are deeply damaged or burned.
- Sensors are physically broken (cracked casings, water inside).
- You’ve tried all steps and still have problems.
- The opener itself is malfunctioning.
Professional repair can cost between $100 and $200, depending on the problem. Always get a quote before work begins.
How To Prevent Future Sensor Problems
A little maintenance goes a long way. Here’s how to keep your sensors working year-round:
- Clean lenses monthly: Dust and cobwebs build up fast.
- Check alignment after storms or bumps: Even a soccer ball can knock sensors off.
- Inspect wiring twice a year: Look for damage or loose connections.
- Keep sensor path clear: Don’t store objects in front of sensors.
- Mount sensors 4-6 inches off the ground: Protects from water and dirt.
- Teach family to be gentle: Children and pets sometimes bump sensors.
Regular attention prevents most problems and extends sensor life.
Key Differences: Sensor Types And Brands
Not all sensors are the same. Here’s a quick comparison of popular brands and their features:
| Brand | Sensor Type | Compatibility | Average Price (Pair) |
|---|---|---|---|
| Chamberlain/LiftMaster | Photoelectric | Chamberlain, LiftMaster, Craftsman | $25–$40 |
| Genie | Photoelectric | Genie only | $20–$35 |
| Overhead Door | Photoelectric | Overhead Door, Genie | $30–$45 |
Always match replacement sensors with your opener brand and model. Mixing brands can cause compatibility issues.
Real-world Example: A Typical Sensor Fix
Let’s look at a common situation. Maria notices her garage door won’t close unless she holds the wall button. The sensor lights are blinking. Here’s what she does:
- Unplugs the opener for safety.
- Wipes both sensors clean with a soft cloth.
- Notices one sensor is slightly crooked—she straightens it.
- Sensor lights turn solid.
- Plugs the opener back in. The door now closes with the remote.
Maria’s fix took less than 10 minutes and cost nothing. The most overlooked step here was sensor alignment—even a small bump made a big difference.
Two Insights Most People Miss
- Sunlight interference is common: Many homeowners don’t realize that direct sunlight can confuse sensors. If your garage faces west or south, consider shading the sensors.
- Sensors can be affected by garage vibration: Over time, the vibration from the door’s opening and closing can slowly knock sensors out of alignment. Checking alignment every few months prevents surprise failures.
Tools And Materials You May Need
Having the right tools makes repairs easier. Here’s a quick checklist:
- Screwdriver (usually Phillips)
- Soft cloth
- Mild glass cleaner
- Pliers
- Level
- Electrical tape or wire nuts
- Replacement sensors (if needed)
Most fixes use only basic tools you already have.
Detailed Troubleshooting For Persistent Problems
If you’ve tried the basics and your sensors still won’t work, try these advanced steps:
Test The Opener Logic Board
If both sensor lights are off and wiring is fine, the opener’s logic board may be faulty. This part controls the opener’s “brain. ” Replacing it is more complex and may require a pro.
Check For Interference
Nearby devices (like security systems or LED lights) can sometimes interfere with the sensor’s signal. Try turning off other electronics in the garage and see if the problem goes away.
Inspect For Ground Faults
A faulty ground connection can cause unpredictable sensor behavior. Make sure your opener is grounded according to the manufacturer’s instructions.
Cost Comparison: Diy Vs. Professional Repair
How much can you save by fixing sensors yourself? Here’s a quick comparison:
| Repair Option | Typical Cost | Time Required | Success Rate |
|---|---|---|---|
| DIY (clean/realign) | $0 | 10–30 minutes | High |
| DIY (replace sensors) | $20–$45 | 30–60 minutes | High |
| Professional repair | $100–$200 | 1–2 hours (including wait time) | Very High |
DIY fixes are usually fast and cheap, but call a pro if you’re unsure.

Environmental Factors That Affect Garage Door Sensors
Sensors are designed to work in a typical garage, but the environment can sometimes cause trouble:
- Humidity: High moisture can corrode wires or cause condensation inside sensors.
- Cold weather: Wires can become brittle and break.
- Sunlight: Bright light confuses some sensors.
- Dust and pollen: Build up quickly on lenses.
Installing sensors a few inches above the floor and cleaning regularly reduces these risks.
Quick Tips For Long-lasting Sensors
- Use a soft brush or compressed air to clean lenses if cloth doesn’t remove all dust.
- Apply a small drop of silicone to wire connections to prevent corrosion.
- Check brackets for rust—replace if needed.
- Keep pets and children from playing near sensors.
Regular maintenance is the easiest way to avoid sensor headaches.
Frequently Asked Questions
Why Does My Garage Door Only Close When I Hold The Wall Button?
This means the safety sensors are not working correctly. The wall button bypasses the sensors, allowing you to force the door closed. Common causes include dirty lenses, misalignment, or wiring problems. Try cleaning and realigning the sensors first.
How Do I Know If My Garage Door Sensor Is Bad?
Check the sensor lights. If one or both are off or blinking, there’s likely a problem. After cleaning and aligning, if the lights still don’t turn solid, the sensor may be faulty. Replacing the sensor is usually the next step.
Can I Use Any Brand Of Sensor With My Garage Door Opener?
No. Garage door sensors are brand- and model-specific. Mixing brands often leads to compatibility problems. Always buy sensors that match your opener’s brand and model number.
What Tools Do I Need To Fix Garage Door Sensors?
You’ll need a screwdriver, soft cloth, level, and possibly pliers and electrical tape. For wiring repairs or sensor replacement, a wire stripper and new sensors may be needed. Most fixes use common household tools.
Where Can I Find More Information About Garage Door Safety?
For further details on garage door sensor safety and standards, you can visit the Wikipedia page on garage door openers.
Fixing garage door sensors might seem tricky, but with patience and the right steps, most issues can be solved in under an hour. Regular cleaning, careful alignment, and attention to wiring will keep your garage door working safely and reliably.
If problems do pop up, you’re now prepared to handle them—or know when it’s time to call for help.