Now Reading: How to Override Garage Door Sensors Safely and Easily
- 01
How to Override Garage Door Sensors Safely and Easily
A garage door is one of those home conveniences you rarely think about—until it stops working. Most modern garage doors use sensors to keep you and your property safe. These small devices, usually near the bottom of the door tracks, detect if something is in the way and stop the door from closing. But what if you need to override garage door sensors temporarily? Maybe your sensors are malfunctioning, you’re troubleshooting, or you need your garage door to work even if the safety system fails. Knowing how to override garage door sensors safely can save you time, money, and headaches.
Before you try to bypass these safety features, it’s essential to understand how they work, why they’re important, and what risks are involved. This guide walks you through everything you need to know, from basic garage door sensor functions to advanced troubleshooting and safe override methods.
By the end, you’ll have a deep understanding and practical steps for overriding garage door sensors responsibly—without putting anyone or anything at risk.
How Garage Door Sensors Work
Garage door sensors are more than just small black boxes on either side of your garage. They are part of a safety system designed to prevent accidents and property damage. Most sensors use infrared beams to detect obstacles. When the beam is broken (for example, by a child, pet, or object), the door automatically reverses direction or won’t close at all.
The system includes two main parts:
- Transmitter sensor – Sends an invisible infrared beam across the bottom of the garage door opening.
- Receiver sensor – Detects the beam from the transmitter. If the beam is blocked, the signal is interrupted.
When both sensors are aligned and the path is clear, the door operates normally. If the sensors are misaligned, dirty, or blocked, the garage door may refuse to close. This is a crucial safety feature, especially since the U. S.
Consumer Product Safety Commission (CPSC) made such sensors mandatory in 1993 after many injuries involving automatic doors.
Why Would You Need To Override Garage Door Sensors?
There are valid reasons you might want to override your garage door sensors—though you should always use caution. Some common situations include:
- Malfunctioning sensors: If sensors are dirty, misaligned, or broken, your door may not close even when there’s no actual obstruction.
- Temporary need: During construction, cleaning, or moving large items, the sensors can get blocked.
- Weather issues: Sun glare, snow, or rain can sometimes interfere with sensor operation.
- Testing and troubleshooting: To identify if the problem is with the sensors, you may need to bypass them briefly.
- Emergency access: In rare cases, you might need to open or close the garage door during a power outage or system failure.
It’s important to remember that overriding sensors removes a layer of safety. Always take extra care, and never override sensors if children or pets are nearby.
Safety Considerations Before Overriding Sensors
Before you try to override any safety system, stop and consider the risks. Garage doors are heavy and can cause serious injury or property damage. Here are some key safety tips:
- Never leave the door unattended while overriding sensors.
- Clear the area: Make sure children, pets, and objects are not under the door.
- Use manual mode if possible; this is usually the safest override method.
- Restore safety sensors as soon as possible after your task.
- Check local laws: Some areas have regulations about disabling safety features.
- Document the override if you’re in a rental or managed property, to avoid liability.
A surprising insight: Many homeowners don’t realize that insurance claims for garage door accidents may be denied if safety features were bypassed without a valid reason.
Methods To Override Garage Door Sensors
Now, let’s look at the most common, safe, and effective ways to override garage door sensors. Some methods are temporary; others may involve more technical steps. Choose the method that matches your situation and comfort level.
1. Using The Garage Door Opener’s Manual Release
Most automatic garage door openers include a manual release cord. This is usually a red rope hanging from the opener rail.
How to use it:
- Stop the door: Make sure the door is fully closed or open, if possible.
- Locate the red cord: Pull it down firmly. This disconnects the door from the opener.
- Operate the door by hand: You can now lift or lower the door manually.
This method is the safest override since it doesn’t disable the sensors but lets you bypass the automatic system entirely. It’s especially useful during a power outage.
Tip: Make sure the door is balanced. If it’s hard to lift, the springs may need repair—don’t force it.
2. Pressing And Holding The Wall Button
Many garage door openers have a “hold to close” feature. If your sensors are malfunctioning, pressing and holding the wall-mounted button (not the remote) will force the door to close.
How it works:
- Press and hold the wall button until the door is fully closed. If you release it early, the door will stop or reverse.
This method temporarily overrides the sensors without disconnecting or rewiring them. However, the door will not close automatically with a remote during this time.
Insight: Not all openers support this feature, especially older models. Check your opener’s manual or look for a label near the wall button.
3. Realigning Or Cleaning The Sensors
Sometimes, the problem is not with the sensors themselves but with their alignment or cleanliness. Overriding isn’t always necessary.
Steps:
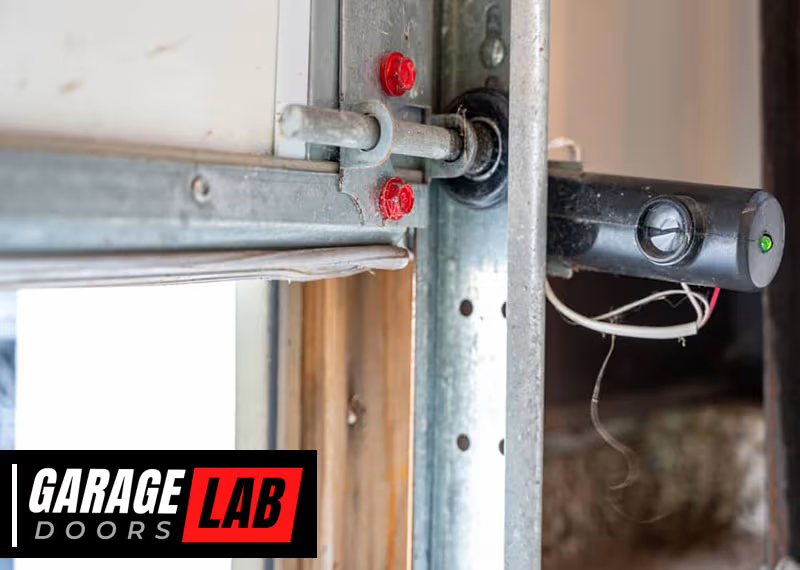
- Wipe the lenses with a soft cloth.
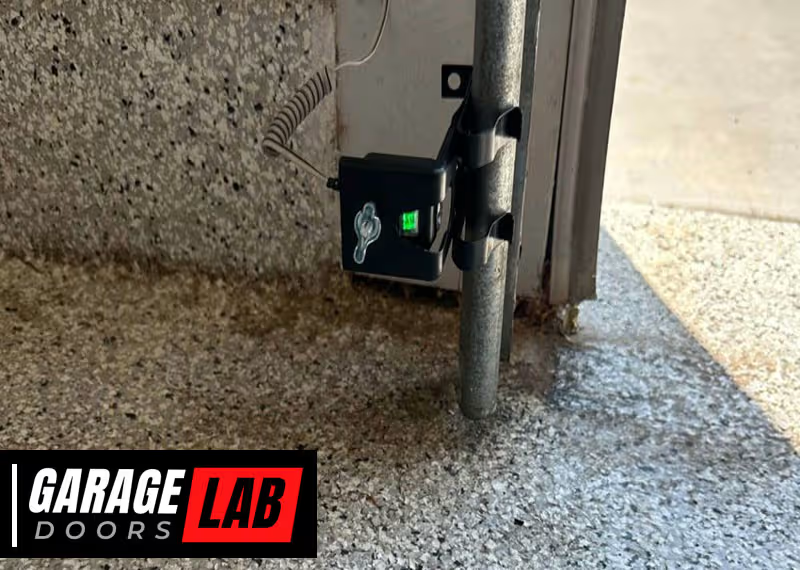
- Check the indicator lights: Most sensors have a green or red LED. If the light is off or blinking, realign the sensor until the light is steady.
- Tighten mounting brackets if loose.
Surprisingly, over 60% of sensor issues are caused by simple misalignment or dirt. Fixing these can restore normal function without needing to override.
4. Bypassing Sensors With Electrical Tape Or Wire
This method is more advanced and not recommended unless you’re comfortable with DIY electrical work. It should only be used for troubleshooting, not as a permanent solution.
How to do it:
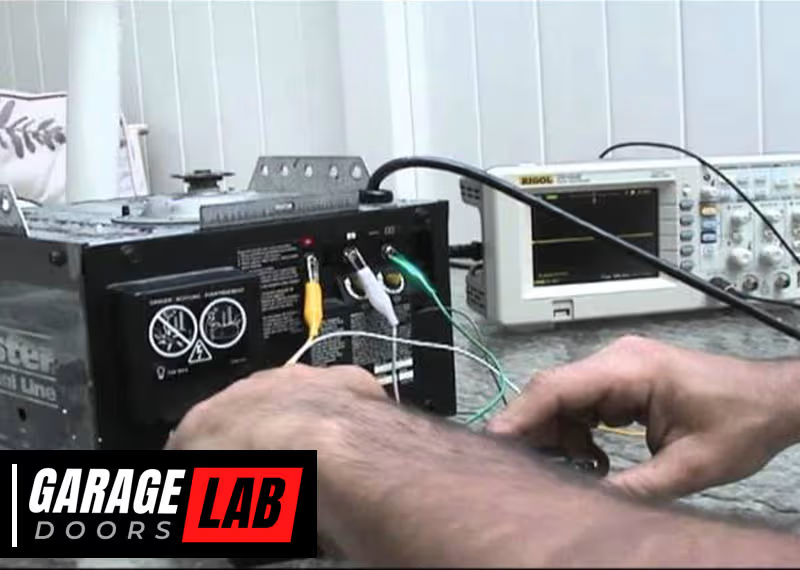
- Locate the sensor wires: These run from the sensors to the opener.
- Disconnect the sensors: Turn off the power, then unplug the wires from the opener.
- Create a short circuit: Use a small piece of wire to connect the two sensor input terminals on the opener. This tricks the system into “thinking” the sensors are aligned.
Warning: This removes safety features. Only use this method if you must, and restore normal wiring afterward.
5. Using A Jumper Wire At The Opener
This is similar to the tape/wire method but is done directly at the motor unit.
Steps:
- Unplug the opener.
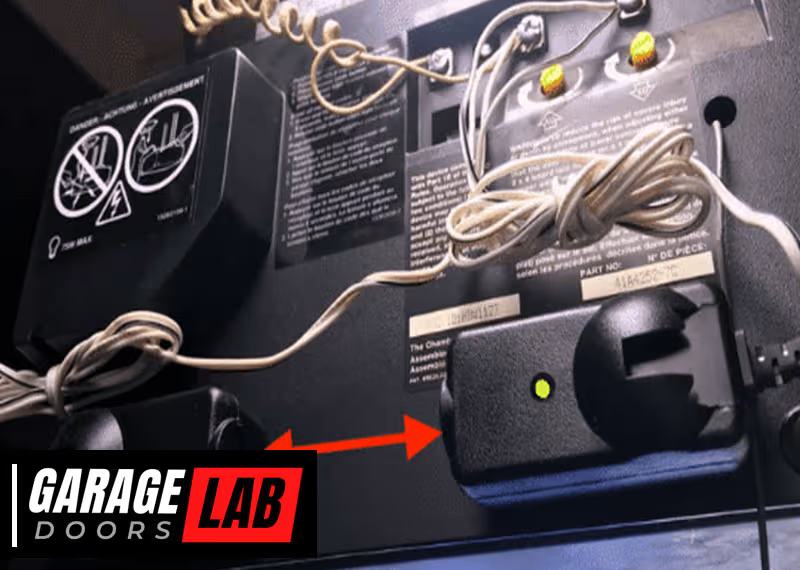
- Find the sensor terminals (often labeled as “sensor” or “safety”).
- Insert a jumper wire between the terminals.
- Plug the opener back in and test.
This method is common for troubleshooting but not for daily use. Always remove the jumper when done.
6. Disabling Sensors In The Control Panel (if Supported)
Some newer garage door openers allow you to temporarily disable sensors through their digital control panels. This option is usually buried in the settings menu.
How to find it:
- Refer to your opener’s manual for instructions.
- Look for options labeled “sensor override,” “bypass,” or “service mode.”
This is the cleanest way to override sensors, but not all brands support it.
7. Contacting Professional Support
If you’re unsure, contact a professional garage door technician. They have tools and knowledge to safely troubleshoot and override sensors when needed.
Bonus insight: Many brands provide customer support lines. Sometimes, a phone call can solve the problem without a service visit.
Step-by-step: How To Override Garage Door Sensors (detailed Guide)
Let’s walk through the most common method—using the wall button to override malfunctioning sensors.
Step 1: Inspect The Area
Check for any obstacles near the sensors and the door. Clear away toys, debris, or tools.
Step 2: Try Normal Operation
Test the door with the remote and the wall button. Note if the door only works with the button held down.
Step 3: Press And Hold The Wall Button
If the door refuses to close with the remote but works when you hold the wall button:
- Press and hold the button until the door is fully closed.
- Release the button only when the door is at the floor.
This overrides the sensor block for a single close cycle.
Step 4: Restore Normal Operation
After your task, realign or clean the sensors to restore safety. Test the door with the remote to confirm.
Common Issues That Make Overriding Necessary
Sometimes, sensor problems are a symptom of a bigger issue. Here are a few examples:
- Sunlight interference: Direct sun can “blind” sensors. Try shading them or adjusting their angle.
- Water damage: Rain, irrigation, or condensation can cause short circuits.
- Rodents or insects: Chewed wires or nests can block sensors.
- Vibration: Over time, vibrations can knock sensors out of alignment.
If you find these issues, fix them first. Overriding is only a temporary solution.
Pros And Cons Of Overriding Garage Door Sensors
It’s important to weigh the benefits and risks of overriding your garage door’s safety features.
| Pros | Cons |
|---|---|
| Restores door function during emergencies | Removes safety for people and pets |
| Allows access if sensors fail | May void warranties or insurance |
| Helps with troubleshooting | Can cause property damage if door closes on objects |
Non-obvious insight: Some insurance companies require evidence that safety features were operational during an accident. Overriding sensors can affect claim outcomes.
Garage Door Sensor Brands And Their Override Features
Not all sensors and openers are created equal. Here’s a look at how leading brands handle sensor overrides.
| Brand | Override Option | Special Notes |
|---|---|---|
| Chamberlain/LiftMaster | “Hold to close” wall button; manual release cord | Some models support digital override in control panel |
| Genie | Wall button hold; manual disconnect | Sensor cleaning often fixes issues |
| Craftsman | Wall button hold; manual release | Similar to Chamberlain |
| Marantec | Manual release only | No digital override on most models |
| Ryobi | Wall button hold; manual release | App-based override for some smart models |
Manufacturers are always improving features, so check your specific model’s manual for the latest options.
What To Do After Overriding Sensors
After you’ve bypassed the sensors, don’t forget to restore them as soon as possible. Here’s how:
- Reconnect any wires that were disconnected.
- Remove jumper wires if used.
- Realign sensors until the indicator lights are steady.
- Test the door with the remote and wall button.
- Inspect for any damage to sensors or wiring.
It’s easy to forget this step, but restoring safety features is essential for long-term safety.
Legal And Liability Issues
In the United States, garage door sensors are legally required on all new automatic garage doors since 1993. Overriding them, especially on a permanent basis, can have legal and financial consequences.
- Home insurance: Claims may be denied if an accident occurs while sensors are disabled.
- Landlord/tenant law: Renters may be liable for disabling safety devices.
- Resale issues: Home inspectors may flag overridden sensors during a sale.
If you have a unique situation, consult a legal or insurance professional before bypassing safety systems.
When You Should Not Override Garage Door Sensors
Sometimes, it’s better not to override sensors—even temporarily. Avoid bypassing if:
- Children or pets use the garage frequently.
- The garage is a main entry point for your family.
- You’re unsure of the override process.
- The door is heavy or unbalanced.
Always prioritize safety over convenience.
How To Prevent The Need For Overrides
Most override situations are avoidable with proper sensor maintenance. Here are some tips:
- Clean sensors monthly with a soft, dry cloth.
- Check alignment whenever the door won’t close.
- Inspect wiring for signs of wear or damage.
- Add sun shields if sunlight causes frequent problems.
- Schedule annual professional maintenance.
A small effort in maintenance can save you from risky overrides later.
Troubleshooting Garage Door Sensors: A Quick Reference
If your garage door sensors are acting up, try these steps before overriding:
| Problem | Possible Cause | Solution |
|---|---|---|
| Door won’t close | Dirty sensors | Clean with soft cloth |
| Sensors blinking | Misalignment | Realign until steady light |
| One sensor light off | Loose wire | Check and reconnect wiring |
| Intermittent operation | Sunlight/interference | Adjust angle or add shade |
| Door reverses before closing | Obstruction in path | Clear objects/debris |
In many cases, a quick clean or adjustment can fix the issue without the need for an override.
Expert Tips For Safe Garage Door Sensor Overrides
- Keep a flashlight handy in the garage. Poor lighting makes troubleshooting harder.
- Label sensor wires with tape before disconnecting. This makes reconnection easier.
- Photograph the wiring before you start. You’ll have a reference for reassembly.
- Use insulated tools if working near electrical terminals.
- Never force the door if it feels jammed. Call a pro instead.
These simple tips can prevent mistakes and help you restore safety quickly.

Myths And Misunderstandings About Garage Door Sensor Overrides
Let’s clear up a few common myths:
- “Overriding sensors is always dangerous.” Not true—temporary, careful overrides with proper precautions are sometimes necessary for repairs.
- “If the door won’t close, the sensors are broken.” Sometimes it’s just dirt or sunlight.
- “You can permanently bypass sensors without problems.” This is risky and may be illegal.
- “Only professionals can fix sensors.” Many issues are easy for homeowners to solve safely.
Understanding these facts helps you make better decisions about sensor overrides.
Frequently Asked Questions
What Happens If I Permanently Bypass My Garage Door Sensors?
Permanently bypassing sensors removes a critical safety feature. The door can close on people, pets, or objects without warning. It may also void your warranty, cause insurance issues, and could be illegal in some areas. Always restore sensors after temporary overrides.
Why Does My Garage Door Only Close When I Hold The Wall Button?
This usually means your sensors are blocked, misaligned, or dirty. The opener is in “hold to close” mode, which overrides the sensors for safety, but requires manual supervision. Clean and realign the sensors to restore normal function.
Are There Any Smart Garage Door Openers That Let You Safely Override Sensors?
Some modern smart garage door systems allow temporary sensor bypass through their digital control panels or mobile apps, usually for maintenance. Always follow the manufacturer’s instructions and restore safety features immediately after.
How Do I Know If My Garage Door Sensor Is Malfunctioning?
Typical signs include blinking lights on the sensor, the door refusing to close, or only closing when you hold the wall button. Check for dirt, misalignment, or wiring problems before attempting an override.
Where Can I Find More Information About Garage Door Safety Standards?
You can find detailed standards and guidelines at the official U.S. Consumer Product Safety Commission website. This resource covers regulations, safety tips, and updates on garage door systems.
A well-maintained garage door sensor system keeps your home safer for everyone. Overriding sensors should be a last resort, used only when you fully understand the risks and responsibilities. With the right knowledge and precautions, you can manage your garage door confidently—even when things go wrong.