
When your garage door opener suddenly stops responding to your remote or keypad, it can be a perplexing and sometimes frustrating experience. Whether you’ve recently moved into a new home, had a power surge, or simply want to enhance your home security by clearing old codes, knowing how to reset your garage door opener is a valuable skill. This process is often referred to as resetting the code, but it more accurately involves clearing the opener’s memory of paired remotes and keypads, and sometimes resetting the travel limits or force settings.
Resetting the code on your garage door opener is not a complex procedure, but it requires understanding the specific model you have and following the correct sequence of steps. Different brands and even different models within the same brand can have slightly varied reset procedures.
This guide will walk you through the general principles and common methods for resetting various types of garage door openers, ensuring you can regain control of your garage access efficiently and securely. We’ll cover when a reset is necessary, the common reasons for doing so, and detailed steps for popular brands, helping you troubleshoot and resolve common issues.
Key Takeaways
- Understand Why You Need to Reset: A reset is typically needed after losing remotes, selling a home, experiencing security concerns, or after power interruptions that affect opener settings.
- Locate the “Learn” Button: The “Learn” button on the garage door opener motor unit is central to most reset procedures. Its location and color can vary by brand.
- Follow Brand-Specific Procedures: Each manufacturer (LiftMaster, Chamberlain, Genie, Craftsman, etc.) Has its own method for resetting. Always consult your owner’s manual if possible.
- Clearing Remotes vs. Full Reset: Some procedures only clear paired remotes, while others reset the entire unit, including travel limits and force settings.
- Safety First: Always disconnect the power to the opener before performing any internal adjustments or extensive resets, and ensure the garage door is in a safe, non-obstructed position.
- Reprogramming Required: After a full reset, all remote controls and keypads will need to be reprogrammed to work with the opener.
Why Reset Your Garage Door Opener Code?
There are several practical reasons why you might need to reset the code on your garage door opener. Understanding these scenarios can help you determine if a reset is the right solution for your problem.
New Homeownership And Security
When you purchase a new home, one of the first security measures you should take is to reset the garage door opener codes. The previous owners may have given out remotes or keypad codes to various individuals, and you have no way of knowing who still has access. By performing a full system reset, you ensure that only the remotes and keypads you program yourself can operate the garage door, giving you complete control over who enters your garage. This is a fundamental step in home security and peace of mind.
Lost Or Stolen Remotes/keypads
Misplacing a garage door remote or keypad, or worse, having one stolen, presents a significant security risk. If a remote or keypad falls into the wrong hands, unauthorized individuals could gain access to your garage and potentially your home. In such cases, a remote code reset is crucial. This process clears the opener’s memory, rendering the lost or stolen device useless. You will then need to reprogram your existing or new remotes and keypads. For specific instructions on clearing remotes, you might find resources like how to reset garage door remote easily helpful.
Malfunctioning Remotes Or Keypads
Occasionally, a garage door remote or keypad may stop working correctly. This could be due to a low battery, internal malfunction, or a synchronization issue with the opener. Before assuming the remote or keypad is broken, a code reset can sometimes resolve the problem by forcing the opener and the remote to re-establish their connection. If the issue persists after a reset and reprogramming, then the remote or keypad itself may need replacement.
Power Surges Or Outages
Significant power surges or prolonged power outages can sometimes disrupt the memory or settings of electronic devices, including garage door openers. The opener’s internal computer might lose its programmed codes or settings like travel limits. In such instances, a reset procedure can help restore the opener to its default state, allowing you to re-establish its proper function and re-pair your remotes and keypads.
Troubleshooting Opener Issues
When your garage door opener is behaving erratically, perhaps opening or closing unexpectedly, or not responding consistently, a system reset can be a valuable troubleshooting step. It clears out any potential software glitches or corrupted data that might be causing the malfunction. After a reset, you’ll need to re-enter all your settings and reprogram your access devices. This is similar to rebooting a computer when it’s not working correctly.

Credit: www.youtube.com
Understanding Garage Door Opener Components For Resetting
Before diving into the reset process, it’s helpful to understand the key components of your garage door opener system that are involved in coding and operation.
The Motor Unit And The “learn” Button
The motor unit, typically mounted on the ceiling of your garage, is the brain of your garage door opener system. It houses the motor that lifts and lowers the door, the logic board that controls its functions, and crucially, the “Learn” button. This button is the primary interface for programming and resetting your opener. Its location, color, and appearance can vary significantly by manufacturer.
- LiftMaster/Chamberlain: Often a square button, usually purple, red/orange, green, or yellow, located on the back or side panel of the motor unit, near the hanging antenna.
- Genie: Typically a rectangular button, often red or green, found on the rear panel of the motor unit, usually near the terminal screws for wiring.
- Craftsman: Similar to LiftMaster and Chamberlain, it usually has a colored button (often red or green) on the motor unit’s rear panel.
Remote Controls And Keypads
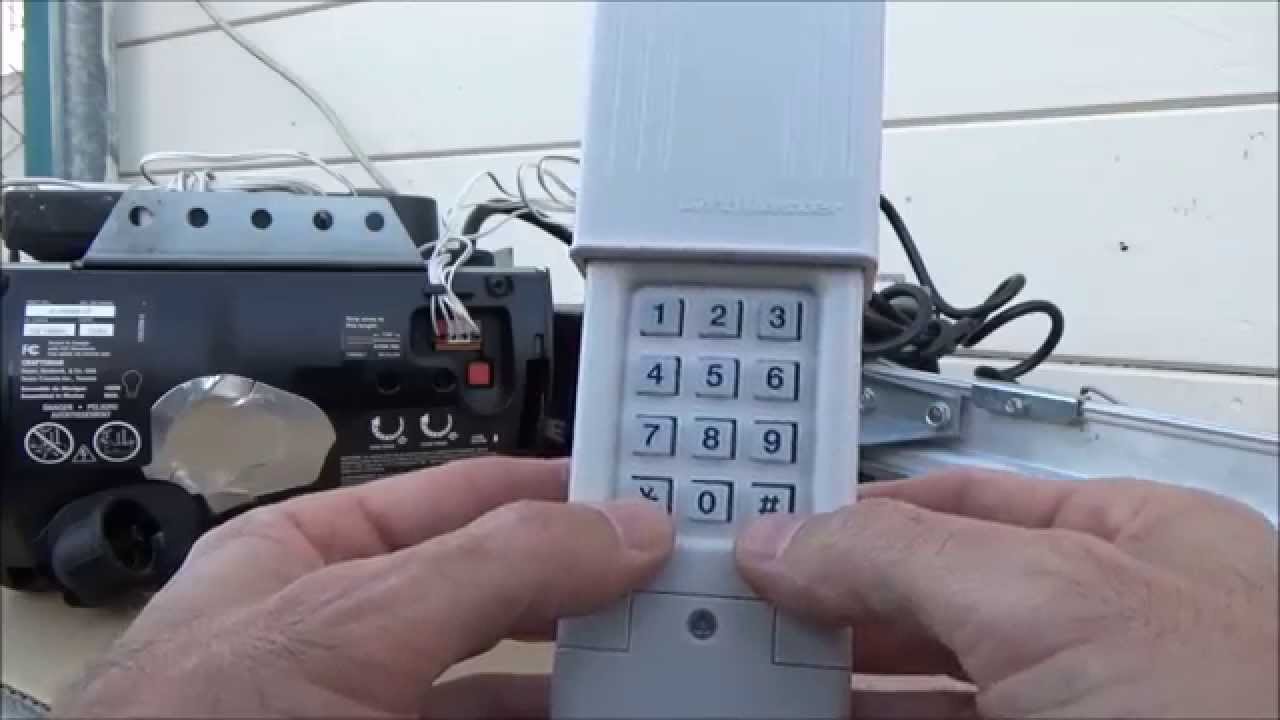
Remote controls (or clickers) are handheld devices that transmit a radio frequency signal to the opener when a button is pressed. Keypads are mounted outside your garage and allow entry via a personal identification number (PIN). Both devices are programmed to send a specific code that the opener recognizes. Resetting the opener essentially erases these recognized codes.
Travel Limits And Force Settings
Beyond just the remote codes, garage door openers have travel limits (which tell the door when to stop at the fully open and fully closed positions) and force settings (which determine how much force the opener will exert before reversing, a safety feature). Some reset procedures will also reset these settings to their factory defaults, requiring you to re-adjust them. For instance, if your door isn’t opening or closing fully, you might need to adjust these limits, a process detailed in guides on how to adjust chain on garage door opener for smooth operation, though this is distinct from a code reset.
The Logic Board
The logic board (or receiver board) is the main circuit board inside the motor unit. It interprets signals from the remote, keypad, and safety sensors, and controls the motor. The “Learn” button is directly connected to this board, and pressing it initiates a process that erases or adds codes to its memory.

Credit: www.youtube.com
General Steps For Resetting Your Garage Door Opener
While specific instructions vary by brand, most garage door opener reset procedures follow a general pattern. The core idea is to erase the opener’s memory of previously paired devices.
Step 1: Locate The “learn” Button
This is the most critical first step. You’ll need to identify the “Learn” button on your garage door opener’s motor unit. It’s usually a small, colored button. Refer to the manufacturer’s guide or the diagrams provided in this article’s brand-specific sections if you’re unsure. It’s often near the antenna wire.
Step 2: Prepare For The Reset
- Safety First: Ensure the garage door is fully closed or in a position where it won’t cause injury or damage when the opener’s settings are reset. You may want to disconnect the emergency release cord if you are concerned about the door moving unexpectedly.
- Power Consideration: For most remote code resets, you do not need to unplug the opener. However, if you are performing a more comprehensive reset that might affect travel limits or force settings, it’s often recommended to disconnect the power to the opener at the electrical outlet.
Step 3: Initiate The Reset
The method for initiating the reset varies:
- Press and Hold the “Learn” Button: For many models, you’ll need to press and hold the “Learn” button for a specific duration (often 10-30 seconds).
- Press the “Learn” Button Briefly: Some systems require a quick press and release of the button.
- Press and Release Multiple Buttons: Certain advanced systems might require a combination of button presses.
Step 4: Observe Indicator Lights
As you press and hold the “Learn” button, you will typically see an indicator light on the motor unit.
- Light On: The light might turn on and stay solid.
- Light Flashing: The light could start flashing, indicating it’s ready to accept a new code or that it has entered programming mode.
- Light Turns Off: For a full memory clear, the light often turns off after a certain period of holding the button.
Step 5: Confirm The Reset
After releasing the “Learn” button, the indicator light will usually signal the status.
- Rapid Flashing: Often indicates that the memory has been cleared.
- Solid Light: May indicate that the opener is now in “learn” mode, waiting for a remote signal.
Example: On many LiftMaster and Chamberlain models, pressing and holding the “Learn” button for about 30 seconds will cause the indicator light to go out, signifying that all previously programmed remotes have been erased from memory.
Step 6: Reprogram Remotes And Keypads
Once the reset is complete, your garage door opener will no longer recognize any of your previous remotes or keypads. You will need to reprogram each device individually. This usually involves pressing the “Learn” button on the motor unit again, and then immediately pressing the button on the remote or entering the code on the keypad you wish to pair. The opener’s indicator light will typically flash or turn on to confirm successful pairing.
Credit: www.youtube.com
Brand-specific Reset Procedures
The exact steps for resetting your garage door opener depend heavily on the brand. Here we outline common procedures for popular manufacturers. Always refer to your owner’s manual for the most accurate instructions for your specific model.
Liftmaster And Chamberlain Garage Door Openers
LiftMaster and Chamberlain are part of the same company, and their reset procedures are often very similar, primarily revolving around the colored “Learn” button.
Clearing All Remotes And Keypads
- Locate the “Learn” Button: Find the “Learn” button on your LiftMaster or Chamberlain motor unit. It’s usually a square button, and its color (purple, red, orange, green, yellow) indicates the radio frequency and generation of the opener. The indicator light is typically located next to it.
- Press and Hold: Press and hold the “Learn” button for approximately 30 seconds.
- Observe the Indicator Light: The indicator light next to the “Learn” button will likely turn on, then flash, and finally turn off. Releasing the button when the light turns off signals that the memory has been cleared.
- Test: Try operating your garage door with a remote. It should no longer work.
- Reprogram: You will now need to reprogram all your remotes and keypads by following the instructions in your owner’s manual, which typically involves pressing the “Learn” button again and then pressing the desired button on your remote or entering your PIN on the keypad. For more detail on specific remotes, you can check out resources like how to reset Liftmaster garage door opener remote.
Resetting Travel Limits And Force Settings (more Comprehensive Reset)
For a full factory reset that includes travel limits and force settings, the procedure may involve unplugging the unit.
- Unplug the Opener: Disconnect the garage door opener from its power source.
- Locate Adjustment Buttons: On the motor unit, find the buttons used to set travel limits and force. These are often labeled “Up,” “Down,” and “Program” or similar.
- Press and Hold Specific Buttons: While the opener is unplugged, press and hold the “Up” and “Down” buttons simultaneously for about 10-15 seconds.
- Plug In and Observe: Plug the opener back into the power source while still holding the buttons. Release the buttons once the opener’s light flashes or the unit makes a noise.
- Reprogram Everything: This action often resets travel limits and force settings to factory defaults. You will then need to reprogram your remotes and keypads and re-adjust the travel limits and force settings according to your owner’s manual.
Genie Garage Door Openers
Genie openers often use a red or green “Learn” button. The reset process typically involves this button and the indicator light.
Clearing All Remotes And Keypads
- Locate the “Learn” Button: Find the “Learn” button on the Genie motor unit, usually located on the back panel near the terminal screws. There is typically an LED indicator light next to it.
- Press and Hold: Press and hold the “Learn” button for approximately 15-20 seconds.
- Observe the Indicator Light: The LED indicator light will illuminate and then begin to flash. Releasing the button when the light starts flashing indicates that the memory has been cleared.
- Reprogram: All previously paired remotes and keypads will now be erased. You must reprogram them. This usually involves pressing the “Learn” button briefly and then pressing the desired button on your remote or entering your PIN on the keypad within 30 seconds. If you’re trying to reprogram a keypad, consult guides on how to reprogram Genie garage door keypad.
Resetting Travel Limits And Force Settings
For Genie openers, resetting travel limits and force settings might be a separate procedure, often involving specific adjustment screws or buttons on the motor unit. Consult your Genie owner’s manual for exact steps, as this varies greatly by model series (e.
g. , GeniePro, Intellicode).
Craftsman Garage Door Openers
Craftsman openers, often manufactured by the same companies as Chamberlain and LiftMaster, share similar reset procedures.
Clearing All Remotes And Keypads
- Locate the “Learn” Button: Find the “Learn” button on your Craftsman motor unit. It’s typically a colored button (often red or green) on the rear panel, near the antenna.
- Press and Hold: Press and hold the “Learn” button for about 30 seconds.
- Observe the Indicator Light: The indicator light will illuminate and then turn off. Releasing the button at this point clears the memory.
- Reprogram: As with other brands, all remotes and keypads will need to be reprogrammed. This is a common step, and detailed guides like how to reset garage door remote Craftsman can be very useful.
Resetting Travel Limits And Force Settings
Similar to Chamberlain and LiftMaster, a full factory reset that includes travel limits and force settings might require unplugging the unit and pressing specific button combinations. Always refer to your Craftsman manual for precise instructions.
When A Full System Reset Is Necessary
While clearing remotes is a common reset task, there are situations where a more comprehensive full system reset is advisable. This goes beyond just erasing remote codes and often involves resetting the opener’s core operating parameters.
Example Scenario: Persistent Opener Glitches
Imagine a homeowner, Sarah, whose garage door opener started behaving erratically. It would sometimes stop mid-travel, and other times reverse without an obstruction. She tried reprogramming her remotes, but the problem persisted. After consulting her owner’s manual, she discovered that a full factory reset might resolve internal software glitches. This involved unplugging the opener and pressing a combination of buttons. After performing the reset, she had to reprogram her remotes and keypads, and critically, re-set the travel limits and force sensitivity. In her experience, this solved the erratic behavior, suggesting a software issue rather than a mechanical one.
Other Scenarios Requiring A Full Reset:
- After a Major Electrical Event: A severe power surge or brownout could corrupt various settings on the logic board, necessitating a complete reset to factory defaults.
- Troubleshooting Complex Issues: If simpler troubleshooting steps (like checking sensors or lubricating parts) haven’t resolved an issue, a full reset can be a last resort before calling a technician. Guides on how to open your garage door manually, such as how can I open my garage door manually, are useful to know before performing extensive resets.
- Selling Your Home: While clearing remotes is essential, a full system reset ensures all custom settings are removed, providing a clean slate for the new owners.
A full system reset essentially returns the opener to the state it was in when it left the factory. This means you’ll need to reconfigure everything from scratch: remote controls, keypads, travel limits, and force settings.
Resetting Travel Limits And Force Settings
Resetting the travel limits and force settings is a distinct process from clearing remote codes, though sometimes it’s part of a larger factory reset. These settings are crucial for the safe and efficient operation of your garage door.
Understanding Travel Limits
Travel limits tell the opener when the door is fully open and when it is fully closed. If these are set incorrectly, the door might not open all the way, might not close completely, or could even damage itself or the opener by trying to travel too far.
Understanding Force Settings
Force settings control how much force the opener applies to move the door. This is a critical safety feature. If the door encounters an obstruction (like a person or a pet), the opener is designed to reverse direction upon detecting a certain level of resistance. If the force setting is too high, the opener might not reverse, posing a safety hazard. If it’s too low, the door might reverse prematurely, preventing it from closing properly.
How To Reset And Adjust Them
The procedure for resetting and adjusting travel limits and force settings varies significantly by manufacturer and model. Generally, it involves:
- Locating Adjustment Controls: These are typically buttons or adjustment screws on the motor unit, often labeled “Up,” “Down,” “Limit,” “Force,” or similar.
- Clearing Existing Settings: Some models have a specific button combination or procedure to clear existing limit settings before programming new ones. This might involve unplugging the unit and pressing specific buttons simultaneously.
- Programming New Limits: You’ll usually manually move the door to the desired fully open and fully closed positions using the opener’s controls or by pulling the emergency release cord. Then, you’ll use the adjustment buttons to set these positions as the new limits.
- Setting Force: You’ll then test the door’s operation and adjust the force settings up or down as needed, ensuring it reverses reliably upon encountering slight resistance.
Pro Tip: Always perform adjustments to travel limits and force settings with the garage door disengaged from the opener (using the emergency release cord) so you can manually move it freely. Re-engage the opener afterward to test. You may need to consult guides on how to adjust a Chamberlain garage door opener easily if you have that brand.
Comparison Of Reset Procedures By Brand
To illustrate the differences, here’s a simplified comparison of how common brands approach resetting their openers.
| Feature | LiftMaster/Chamberlain | Genie | Craftsman |
|---|---|---|---|
| **Primary Reset Button** | Colored “Learn” button | Red/Green “Learn” button | Colored “Learn” button |
| **Clearing Remotes** | Press & hold “Learn” for ~30 secs | Press & hold “Learn” for ~15-20 secs | Press & hold “Learn” for ~30 secs |
| **Indicator Behavior** | Light turns off after holding | Light flashes after holding | Light turns off after holding |
| **Full System Reset** | May involve unplugging & button combo | Varies by model; often separate screws/buttons | May involve unplugging & button combo |
| Travel/Force Adjust | Separate buttons/screws on motor unit | Separate adjustment screws/buttons | Separate buttons