Now Reading: How to Reset Garage Door Quickly and Safely
- 01
How to Reset Garage Door Quickly and Safely
Resetting a garage door may seem complicated, but it’s a task most homeowners can handle with patience and clear instructions. Whether your garage door is stuck, the remote isn’t responding, or you’re troubleshooting after a power outage, knowing how to reset your garage door is vital.
A properly reset garage door restores safety, prevents costly repairs, and gives peace of mind. In this guide, you’ll discover step-by-step methods, practical advice, and expert tips for resetting various garage door types. You’ll also learn how to avoid mistakes that beginners often make and understand when it’s best to call a professional.
Understanding Why Garage Doors Need Resetting
Garage doors are complex systems with moving parts, sensors, and electronic controls. Over time, these parts can malfunction. Common reasons you may need to reset your garage door include:
- Power outages disrupting the opener’s memory
- Remote control failures or lost synchronization
- Sensor misalignment
- Manual override activation
- Software updates for smart garage doors
- After emergency release usage
Each problem requires a slightly different approach. Resetting isn’t just about pushing a button—it’s about diagnosing, fixing, and testing for safe operation.
Types Of Garage Door Systems
Before you start, it’s important to know what kind of garage door system you have. The method to reset can vary depending on the type.
Chain Drive Systems
These are the most common and affordable. A chain drive uses a metal chain to move the door. They’re durable but noisy.
Belt Drive Systems
A belt drive uses a rubber belt, making it quieter. Belt drives are ideal for attached garages where noise matters.
Screw Drive Systems
A screw drive has fewer moving parts and is easy to maintain. It uses a threaded steel rod to lift the door.
Direct Drive And Smart Systems
Direct drive systems have the motor itself move along the track. Smart garage doors connect to Wi-Fi and may require app-based resets.
Manual Garage Doors
Older doors may not have electric openers. Resetting these usually involves mechanical adjustments, not electronics.
Identifying your system helps you follow the right steps later in this guide.
Safety Precautions Before You Reset
Never skip safety. Garage doors are heavy, and improper handling can cause injury or damage. Before you begin:
- Disconnect Power: Unplug the opener or turn off the breaker.
- Wear Protective Gear: Gloves and safety glasses help prevent injuries.
- Clear the Area: Remove pets, children, and objects from the garage.
- Read the Manual: Each system may have unique safety warnings.
- Check for Broken Springs: If you see a broken spring, don’t attempt a reset—call a professional.
Some beginners overlook the importance of disconnecting power. This mistake can lead to electric shock or accidental movement of the door.
Step-by-step Guide To Resetting Garage Door Openers
Most modern garage doors use electric openers. Resetting them involves a few clear steps. Here’s how you can do it:
1. Disconnect The Opener
Unplug the opener from the power source. For battery backup units, remove the battery.
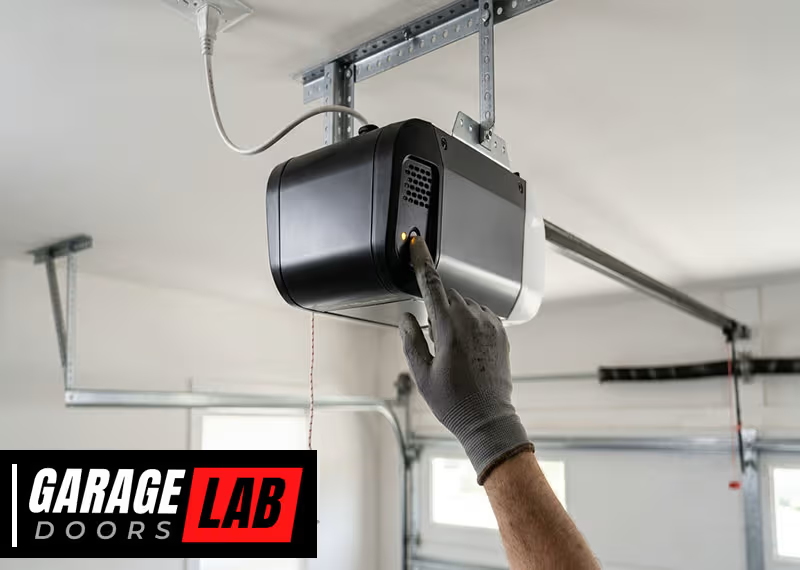
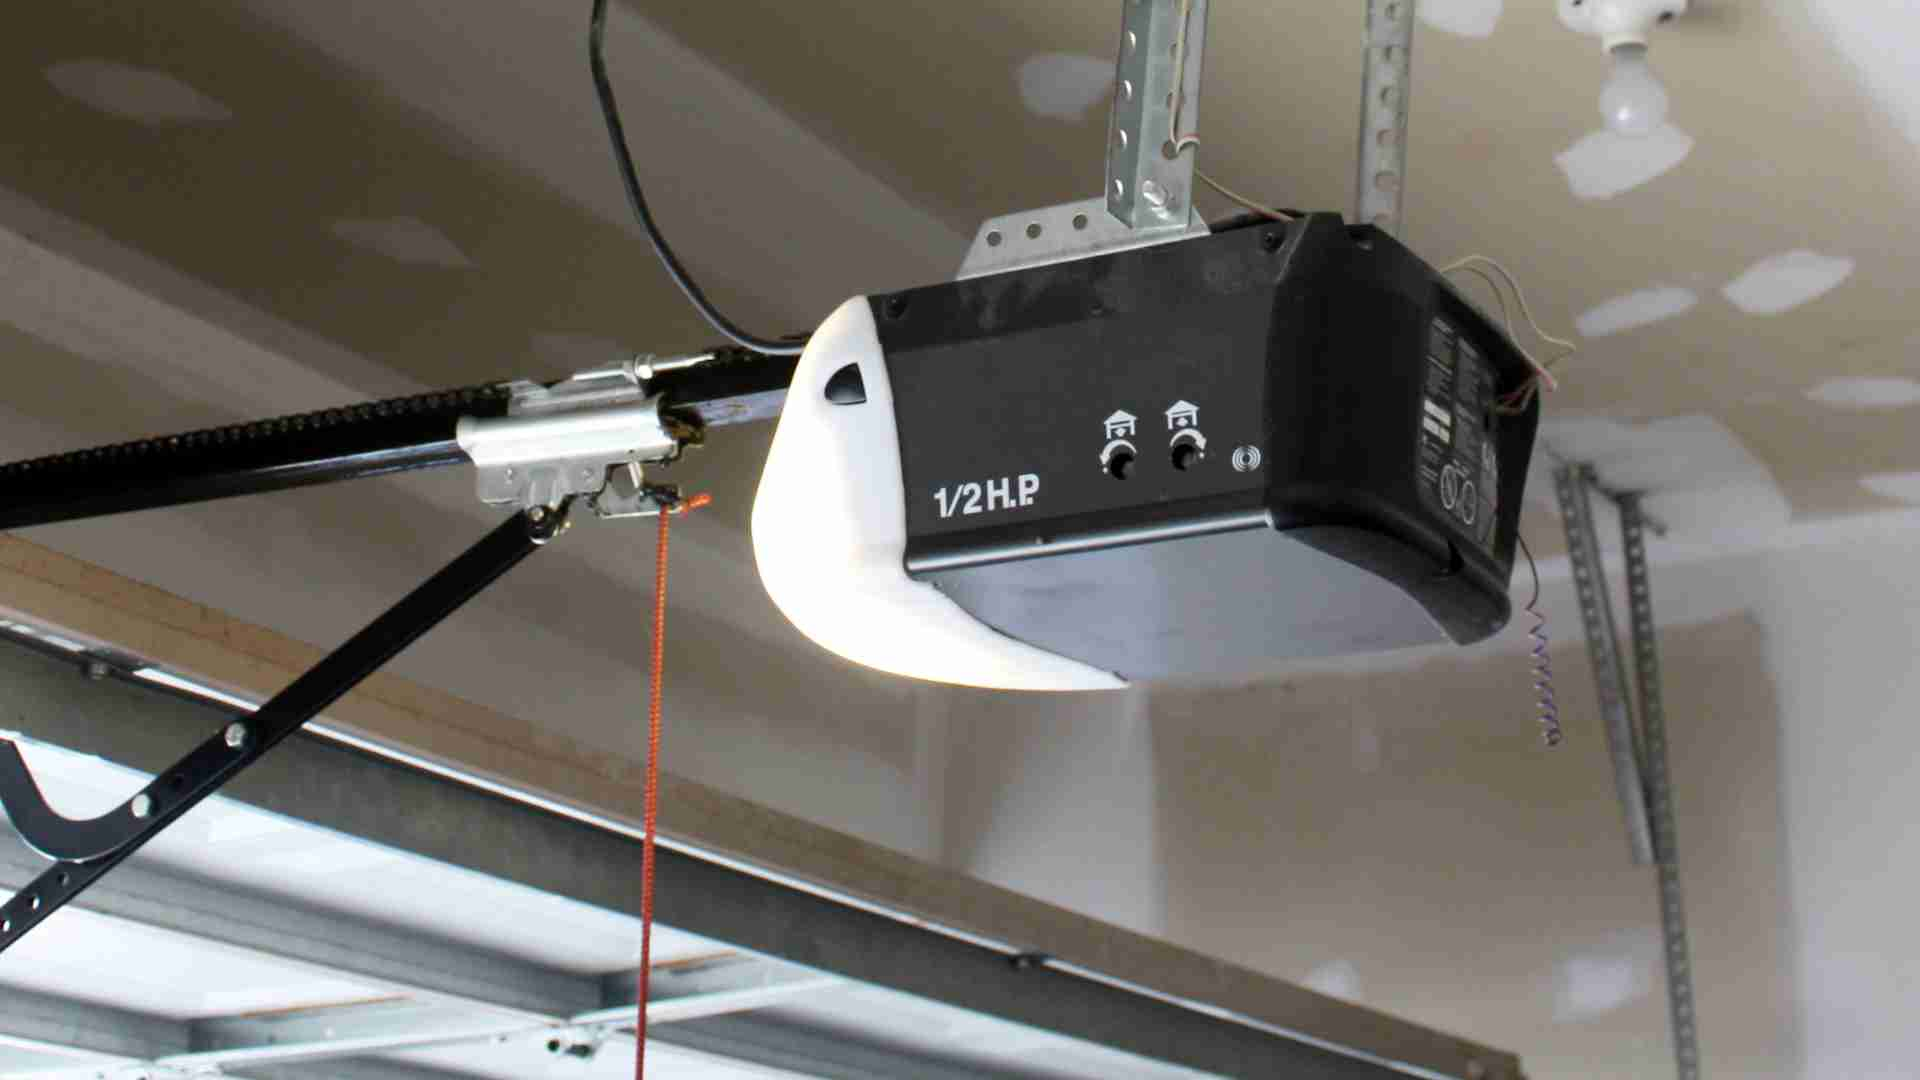
2. Locate The Reset Button
Most openers have a reset button on the motor unit or control panel. Sometimes it’s labeled “Learn” or “Smart.”
3. Press And Hold
Press and hold the reset button for 10-30 seconds. You may see a blinking light or hear a beep indicating the reset process.
4. Reconnect Power
Plug the opener back in or reinstall the battery.
5. Test The Door
Use the remote or wall switch to open and close the door. If it works, the reset was successful. If not, repeat the steps or check for other issues.
6. Reprogram Remotes
After resetting, most systems require you to reprogram remotes. Press the “Learn” button, then press the button on your remote. Wait for confirmation (usually a flash or beep).
7. Reset Keypads
If your garage door uses a keypad, follow the manufacturer’s instructions to set a new code.
8. Check Safety Sensors
Garage doors have safety sensors near the bottom. Make sure they’re aligned and clean. Misaligned sensors will prevent the door from closing.
9. Perform A Full Cycle Test
Open and close the door several times. Watch for smooth movement and listen for unusual sounds.
10. Adjust Limits And Force Settings
Most openers have limit settings and force adjustments. These control how far the door travels and how much force it uses. Use a screwdriver to adjust these to manufacturer specs.
Many beginners forget to test the door after each step. This can lead to frustration if problems remain undetected.
Resetting Garage Door After Power Outage
Power outages can cause the opener to lose its settings. Here’s how to reset after a blackout:
- Wait for Power Restoration: Do not attempt a reset until power is stable.
- Check Battery Backup: If your opener has one, make sure it’s charged.
- Perform a Standard Reset: Follow the steps above.
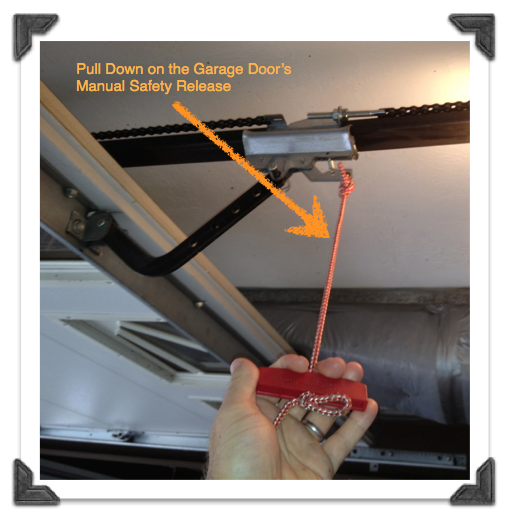
- Manual Operation: If the door won’t move electrically, use the emergency release cord to operate the door manually.
- Reconnect the Trolley: After manual operation, pull the cord towards the opener to reconnect the door.
Some smart openers may require an app-based reset after a power outage. Always check your user manual for specifics.
Resetting Garage Door Remote Control
Remotes often lose synchronization. To reset:
- Remove Batteries: Wait 30 seconds before reinstalling.
- Press Reset/Learn Button: On the opener, press the button.
- Press Remote Button: Hold it until the opener confirms pairing.
- Test Range: Stand at different distances to ensure the remote works.
If your remote still fails, consider replacing the batteries or buying a new remote.
Resetting Garage Door Keypad
Keypads control access without a remote. Resetting involves:
- Find the Program Button: Usually on the back of the keypad.
- Enter Default Code: Refer to your manual for the code.
- Set New Code: Enter a new 4-6 digit code as instructed.
- Test Entry: Try opening and closing the door with the new code.
Keypads often require resetting after battery changes. If yours won’t reset, check for stuck keys or water damage.
Resetting Garage Door Sensors
Sensors prevent accidents by detecting obstacles. If your door won’t close, sensor issues may be the cause.
- Clean Sensors: Wipe both sensors with a soft cloth.
- Check Alignment: The sensors should face each other directly.
- Reset Sensor Circuit: Unplug the opener for 30 seconds, then plug back in.
- Check Indicator Lights: Most sensors have lights—green for alignment, red for error.
If the sensors are still faulty, inspect wires for damage.
Resetting Garage Door After Manual Override
Manual override lets you open the door during a power failure. After using it, you must reset the system.
- Pull Emergency Release Cord: This disconnects the door from the opener.
- Move Door Manually: Open or close to desired position.
- Reconnect Trolley: Push the cord towards the opener until it clicks.
- Test with Opener: Try opening and closing the door with remote or wall switch.
Some homeowners forget to reconnect the trolley, leading to the opener running without moving the door.
Resetting Smart Garage Door Systems
Smart systems use apps and Wi-Fi. Resetting often involves digital steps:
- Open Manufacturer App: Log in to your account.
- Find Reset Option: Usually under settings or devices.
- Follow Prompts: Confirm reset and re-pair your opener.
- Update Firmware: Check for updates, as old firmware can cause issues.
- Reconnect Wi-Fi: Enter your network details.
Smart systems may have unique reset codes or steps. Always consult online guides or manufacturer support.
Resetting Garage Door Springs And Cables
Springs and cables balance the door. They don’t require electronic resets, but if they break, the door won’t move correctly.
- Identify the Problem: Look for gaps in springs or frayed cables.
- Do Not Attempt DIY Repair: These parts are under high tension and can cause injury.
- Call a Professional: Only trained technicians should reset or replace springs and cables.
Some beginners try to fix springs themselves, which is dangerous. Always seek expert help.
Resetting Garage Door Limits And Force
Limits control how far the door opens and closes. Force settings control how much power the opener uses.
- Locate Adjustment Screws: Usually on the opener unit.
- Adjust Up/Down Limits: Use a screwdriver to change door travel distance.
- Adjust Force Settings: Increase or decrease based on door weight.
- Test Door Movement: After each adjustment, test to ensure correct operation.
Incorrect limit settings can cause the door to slam or not fully close. Always adjust in small increments.

Troubleshooting Common Reset Problems
Sometimes, resetting doesn’t solve your issue. Here’s how to troubleshoot:
- Door Won’t Move: Check power, remote batteries, sensor alignment.
- Remote Doesn’t Work: Reprogram, change batteries, check signal interference.
- Keypad Not Responding: Reset code, replace batteries, check wiring.
- Door Moves Unevenly: Inspect tracks, rollers, springs for wear.
- Door Opens but Won’t Close: Clean and align sensors.
If problems persist, contact customer support or a licensed technician.
Comparing Garage Door Opener Brands And Reset Features
Different brands have unique reset methods. Here’s a comparison:
| Brand | Reset Button Location | Remote Reprogramming | Smart Features |
|---|---|---|---|
| Chamberlain | Back of motor unit | Press Learn, then remote | Wi-Fi app, firmware updates |
| LiftMaster | Side panel | Learn button, keypad reset | App integration, battery backup |
| Genie | Top of unit | Remote sync button | Smart home compatible |
| Craftsman | Front control panel | Remote pairing, keypad setup | Basic smart features |
Choosing the right brand makes resets easier. Check your manual for exact steps.
Resetting Garage Door For Security
Security is a major concern. Resetting helps protect your home:
- Change Remote Codes: Prevent old remotes from working.
- Update Keypad Codes: Set new, unique codes regularly.
- Enable App Security: Use two-factor authentication on smart systems.
- Test After Reset: Ensure no unauthorized remotes or codes work.
Some homeowners forget to update codes after a reset, leaving doors vulnerable.
Garage Door Reset Costs And Professional Services
Resetting yourself is usually free. However, professional help may be needed for complex issues.
| Service | Average Cost | When Needed |
|---|---|---|
| Basic Reset | $0 (DIY) | Remote, keypad, sensor issues |
| Spring/Cable Repair | $150–$350 | Broken or worn parts |
| Professional Diagnosis | $50–$100 | Persistent electronic problems |
| Full Opener Replacement | $250–$500 | Old or non-resettable systems |
When in doubt, contact a professional. Paying for safety is always worth it.
Real-world Examples Of Garage Door Resets
Example 1: After a storm, Jessica found her garage door wouldn’t respond. She unplugged the opener, pressed the reset button, and reprogrammed her remote. The door worked perfectly afterward.
Example 2: Mike had a smart garage door that lost Wi-Fi connection. He used the app to reset and update firmware, restoring control from his phone.
Example 3: Linda’s keypad stopped working after a battery change. She followed the manual, entered the default code, and set a new code. The door opened smoothly.
These examples show that most resets can be managed at home, but knowing the correct steps is crucial.
Maintenance Tips To Avoid Future Resets
Resetting isn’t always the answer. Regular maintenance prevents problems:
- Lubricate Moving Parts: Use garage door lubricant on tracks, rollers, and hinges.
- Check Sensors Monthly: Clean and align sensors to prevent false errors.
- Test Remotes: Replace batteries every 6-12 months.
- Inspect Cables and Springs: Look for wear, gaps, or fraying.
- Update Smart Systems: Keep firmware current for best performance.
A beginner tip: Many people skip monthly checks, which leads to larger problems later.
Common Mistakes To Avoid When Resetting
- Skipping the Manual: Always read the instructions for your model.
- Ignoring Safety Steps: Disconnect power before touching any part.
- Forgetting to Test: After each step, test to confirm success.
- Using Wrong Tools: Use only recommended tools for adjustments.
- Not Updating Codes: Change codes for remotes and keypads after a reset.
One insight: Beginners often overlook the need to reset remotes and keypads separately from the opener.
Garage Door Reset Statistics
- Over 70% of garage door failures are due to remote or sensor issues.
- 25% of homeowners call professionals for resets they could do themselves.
- Smart garage door sales grew 18% in 2023, increasing the need for digital resets.
These numbers show that learning to reset your garage door is a valuable skill.
When To Call A Professional
While most resets are simple, call a professional if:
- Springs or cables are broken
- The opener makes strange noises after a reset
- You see sparks or smell burning
- The door won’t move even after multiple resets
Professional help ensures safety and prevents damage.
How Weather Affects Garage Door Resets
Cold weather can cause metal parts to contract, affecting sensors and limits. Hot weather can expand parts and affect electronics. If you notice reset problems after temperature changes, check for:
- Stiff Tracks
- Sensor Misalignment
- Remote Battery Drain
- Delayed Response
Weather-related issues usually require only minor adjustments.
Choosing The Right Garage Door Opener For Easy Resets
If you plan to upgrade, choose an opener with:
- Visible Reset Button
- Clear Manual
- Smart Features
- Easy Remote Pairing
Comparing features can save time and prevent headaches.
| Feature | Basic Model | Smart Model |
|---|---|---|
| Reset Button | Manual, less visible | Digital, app-based |
| Remote Pairing | Physical button | App or button |
| Security Codes | Change manually | Change via app |
| Firmware Updates | None | Automatic |
| Sensor Reset | Manual alignment | Digital calibration |
Smart models offer easier resets, but basic models are reliable and affordable.
Using Online Resources For Garage Door Resets
Many manufacturers offer online guides and videos. For reliable information, visit Family Handyman. This site covers troubleshooting, repairs, and maintenance tips for all garage door types.
Frequently Asked Questions
What Should I Do If My Garage Door Won’t Open After A Reset?
First, check power to the opener and remote batteries. Make sure sensors are aligned and clean. If the door still won’t open, try manually releasing the door and operating it by hand. If this works, reconnect the trolley and test again.
If problems continue, a professional may need to inspect the springs or electronics.
How Often Should I Reset My Garage Door Opener?
There’s no set schedule for resets. Reset only when you notice problems like remote failure, keypad errors, or after a power outage. Regular maintenance (cleaning sensors, lubricating parts) can prevent the need for resets.
Can I Reset My Garage Door Opener Without The Manual?
Yes, but the process is easier with the manual. Most openers have a reset or “Learn” button. Press and hold this button, then reprogram your remotes and keypads. However, always check for model-specific instructions online if you don’t have the manual.
Is It Safe To Reset Garage Door Springs Myself?
No. Garage door springs are under high tension and can cause serious injury. Only trained professionals should reset or replace springs. If you suspect a spring problem, stop using the door and call a technician.
Why Does My Garage Door Opener Need To Be Reset After A Power Outage?
Power outages can erase the opener’s memory or disrupt settings. After power is restored, the opener may not recognize remotes or keypads. Resetting restores synchronization and ensures safe operation. Always check for firmware updates on smart systems after outages.
Resetting your garage door is a practical skill every homeowner should master. With clear steps, careful troubleshooting, and regular maintenance, you can keep your door working smoothly and safely. Remember, safety comes first—never take risks with heavy or high-tension parts.
If you ever feel unsure, trusted professionals are just a call away. By following this guide, you’ll save time, money, and avoid the frustration of a stuck garage door.


