Now Reading: How Do You Fix a Garage Door Cable: Step-by-Step Guide
- 01
How Do You Fix a Garage Door Cable: Step-by-Step Guide
A garage door is something we often take for granted—until it stops working. One of the most common problems homeowners face is a broken garage door cable. If your garage door suddenly feels heavy, moves unevenly, or won’t open at all, the cable could be at fault. Fixing a garage door cable might seem intimidating, but with patience, the right tools, and a clear plan, many people can handle it themselves. However, safety is critical; garage door springs hold a lot of tension and can cause injury if mishandled. This guide will walk you through every essential detail, from understanding how the cables work, to diagnosing problems, choosing replacement parts, and doing the repair step-by-step. You’ll also learn when it’s best to call a professional and how to keep your system working smoothly in the future.
Understanding Garage Door Cables
Before you start fixing anything, it’s important to know exactly what garage door cables do. These cables are tough, braided wires that help lift and lower your garage door. They work with the springs to balance the door’s weight, making it possible for you (or your opener) to lift a heavy door with little effort.
There are two main types of garage door cables:
- Lift cables: These connect from the bottom of the door to the drums above. They help raise and lower the door.
- Safety cables: Used mainly with extension spring systems, these run through the springs to keep them from flying apart if they break.
If a cable snaps or comes off its drum, the door may become crooked, jammed, or even dangerous to operate. Understanding the differences will help you identify which type you need to repair.
Signs Your Garage Door Cable Needs Repair
A garage door cable rarely breaks without warning. Pay attention to these signs:
1. Door Jerks Or Shakes
If your door moves unevenly or vibrates more than usual, a cable could be loose or fraying.
2. Visible Cable Damage
Look for kinks, rust, or broken strands in the cable.
3. Door Closes Crookedly
If one side of the door is lower than the other, a cable might have come off its drum.
4. Heavy Door
A suddenly heavy door means the cables aren’t helping the springs balance the weight.
5. Cable Hanging Loose
Sometimes you’ll see a cable dangling by the door’s side.
Catching these issues early can prevent a total failure and more costly damage.
Tools And Materials Needed
You don’t need a full workshop to fix a garage door cable, but having the right tools makes the job safer and faster. Here’s what you’ll need:
- Replacement garage door cable(s)
Make sure the length and type match your door.
- Winding bars
For safely adjusting torsion springs.
- Vice grips or locking pliers
- Socket wrench set
- Flathead and Phillips screwdrivers
- Tape measure
- Step ladder
- Safety glasses and gloves
- C-clamps
Having everything ready before you start will help avoid frustration and accidents.
Safety Precautions Before You Begin
Garage door repairs can be dangerous, especially when working with torsion springs. Here are safety steps you must follow:
- Disconnect power to your garage door opener.
- Never work on a door that is open or partially open.
- Use winding bars, not screwdrivers, to adjust springs.
- Release spring tension before removing cables on torsion systems.
- Wear safety gear to protect your eyes and hands.
- If you feel uncertain at any step, call a professional.
Many accidents happen because people underestimate the force inside a garage door system. Taking these precautions is essential.
How Garage Door Cables Work With Springs
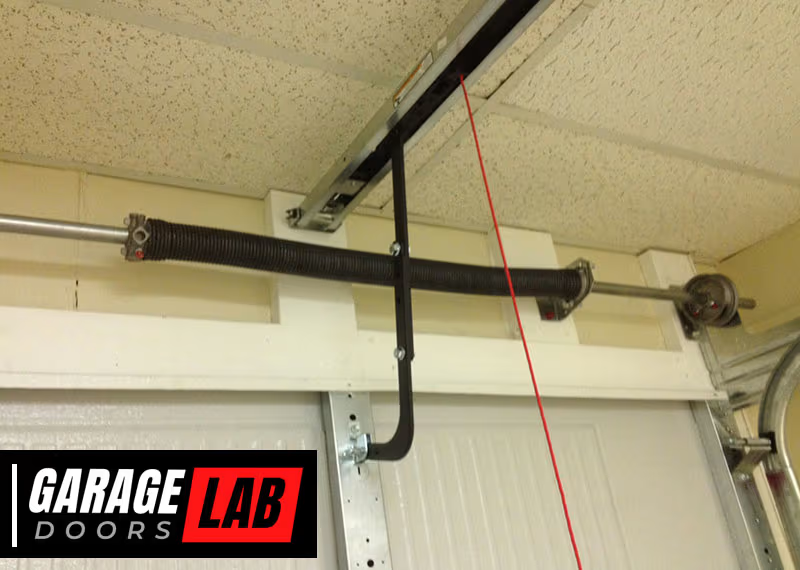
Garage doors use either torsion or extension springs, and the cable setup depends on the type.
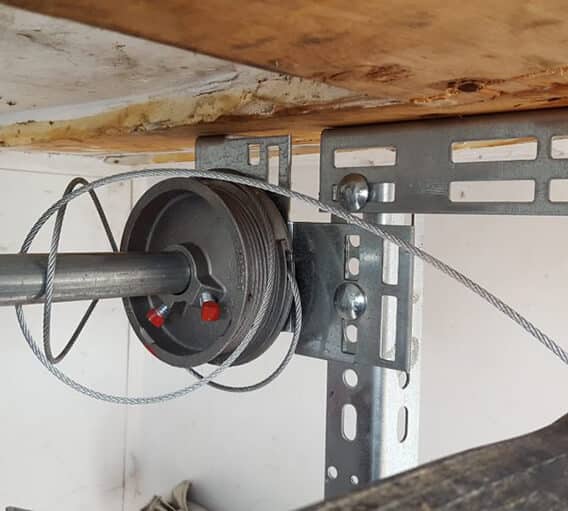
- Torsion spring systems: Springs are mounted above the door. Cables wind around drums at each end of the shaft.
- Extension spring systems: Springs run parallel to the tracks. Cables connect to pulleys and help stretch the springs as the door closes.
Here’s a simple comparison to help clarify:
| System Type | Location of Springs | Cable Path | Main Risk |
|---|---|---|---|
| Torsion | Above door | Winds on drum | High tension on shaft |
| Extension | Along tracks | Through pulley | Spring can fly if broken |
Knowing your system type will shape your repair approach.
Diagnosing The Problem
A successful fix starts with the right diagnosis. Follow these steps:
- Disconnect the opener by pulling the emergency release cord.
- Manually open and close the door a few inches. Listen and feel for resistance or grinding.
- Inspect both cables for damage. Compare both sides—if one cable is loose or off the drum, the door will likely be crooked.
- Check the springs and drums for any obvious issues.
Take a photo of the current setup before you start. This helps with reassembly and troubleshooting.
Choosing The Right Replacement Cable
Not all garage door cables are the same. Here’s what matters when choosing a replacement:
- Length: Measure your old cable or check your door’s manual.
- Diameter: Most residential doors use 1/8” or 3/32” cables.
- Material: Galvanized steel is standard for durability and rust resistance.
- End type: Some cables have loops, others have stops or hooks.
Here’s a quick guide for common door sizes and matching cable lengths:
| Door Height | Standard Cable Length | Cable Diameter |
|---|---|---|
| 7 ft | 8 ft 6 in | 1/8 in |
| 8 ft | 9 ft 6 in | 1/8 in |
| Custom/Other | Door height + ~18 in | Check manual |
If you’re not sure, bring your old cable to a hardware store for comparison.
Step-by-step Guide: Fixing A Garage Door Cable
Now let’s get into the details. These steps cover a standard torsion spring setup, which is the most common in modern homes.
1. Prepare Your Workspace
- Clear the area around the door.
- Place your ladder and tools nearby.
- Put on safety gear.
2. Release Tension From The Springs
- Close the garage door fully.
- Use vice grips to lock the door in place on the track.
- Insert winding bars into the winding cone on the spring.
- Carefully unwind the spring, one quarter turn at a time, until all tension is released.
- Repeat for both sides if you have two springs.
Never skip this step. Removing cables under tension can cause serious injury.
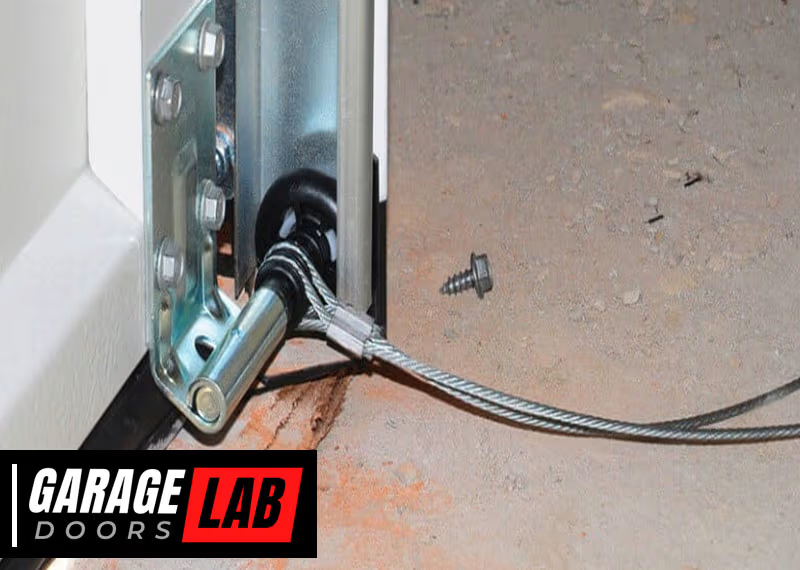
3. Remove The Old Cable
- Find where the cable attaches to the bottom bracket of the door.
- Use a socket wrench to loosen the set screw.
- Detach the cable from the bracket.
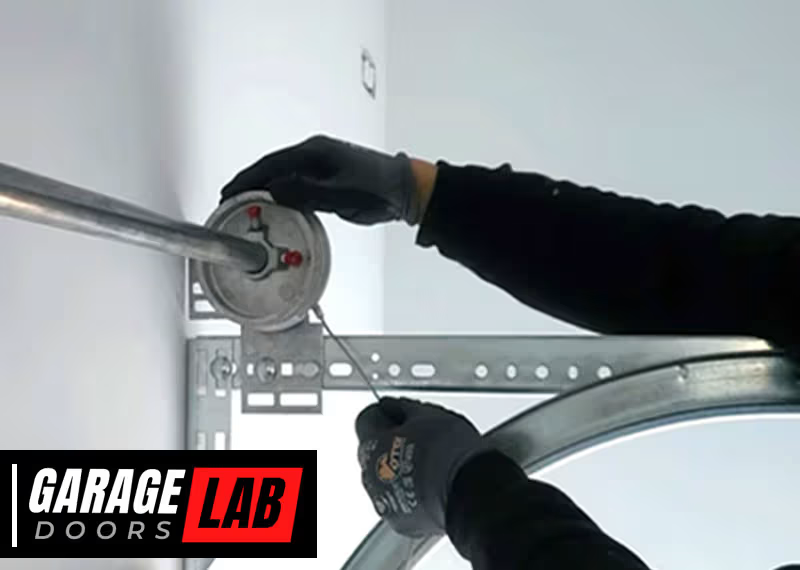
- Move to the drum above and unwind the cable from the drum.
- Remove the cable completely.
If your cable snapped, check for any pieces caught in the pulleys or tracks.
4. Install The New Cable
- Hook one end of the new cable to the bottom bracket.
- Run the cable up to the drum, keeping it as straight as possible.
- Insert the cable into the drum’s slot, following the same path as the old cable.
- Wind the cable tightly and evenly around the drum.
A tip that many beginners miss: Make sure the cable lays flat on the drum grooves. If it overlaps, it will bind and wear out quickly.
5. Secure The Cable And Drum
- Use vice grips to keep the shaft from turning while you tighten the drum set screws.
- Pull the cable taut before securing.
- Tighten the set screw, but do not over-torque—it can strip the drum.
Repeat for the other side. Check that both cables have equal tension.
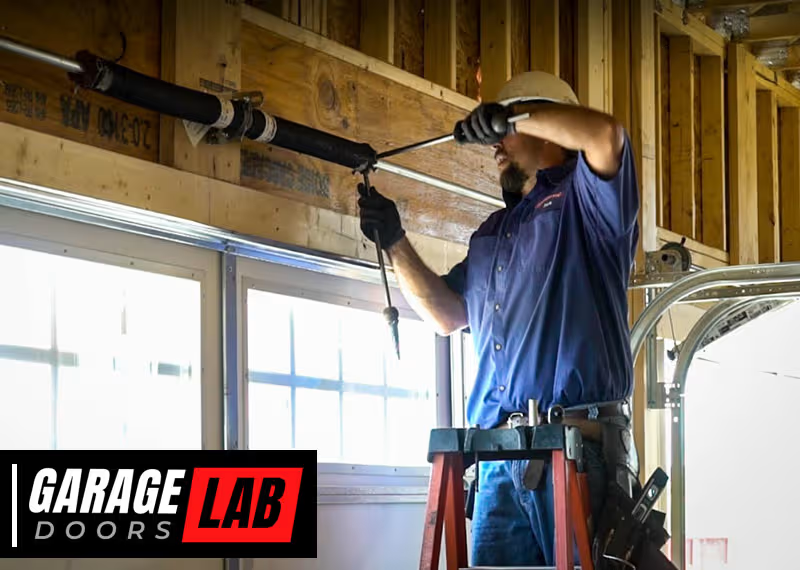
6. Reapply Tension To The Springs
- Carefully wind the springs back up using the winding bars.
- Follow your door manufacturer’s recommendations for the number of turns (usually 7.5 turns for a standard 7-foot door).
- Remove the vice grips from the shaft and track.
7. Test The Door
- Reconnect the opener.
- Open and close the door manually first. It should move smoothly and stay in place when half-open.
- If it slams shut or shoots up, the springs need adjustment.
- Finally, test with the opener.
If the door is not balanced, repeat the spring tensioning process. Small adjustments can make a big difference.
Special Steps For Extension Spring Systems
Extension spring systems use a different process. Here’s how to fix the cable if you have this setup:
- Open the door fully and secure it with C-clamps so there’s no spring tension.
- Disconnect the cable from the bottom bracket and pulleys.
- Thread the new cable through the pulley system, matching the old path.
- Attach the new cable to the bottom bracket.
- Remove clamps and test the door.
Unlike torsion systems, you don’t need winding bars. But be careful—extension springs can still snap with force if not handled right.
When To Call A Professional
Some repairs are best left to the pros. Call an expert if:
- The cable is deeply tangled or you can’t identify the problem.
- Your springs look worn, cracked, or have gaps.
- You’re uncomfortable releasing spring tension.
- The door is excessively heavy or slams shut.
- The opener malfunctions after repair.
Professional garage door technicians have experience and special tools. In fact, according to the International Door Association, improper DIY repairs cause thousands of injuries each year. If in doubt, safety should always come first.

Common Mistakes To Avoid
Many first-time DIYers make these errors:
- Forgetting to release spring tension: This can cause serious injury.
- Mismatching cable size: Using the wrong length or thickness leads to quick failure.
- Over-tightening set screws: This can damage the drum or strip the threads.
- Crossing cables on the drum: Cables must lay flat and neat.
- Ignoring spring wear: Sometimes both the cable and spring need replacement.
One non-obvious tip: Always check for frayed or damaged bottom brackets. Weak brackets can cause new cables to break quickly.
Maintenance Tips After Cable Replacement
Once your garage door is working again, keep it in top shape:
- Lubricate moving parts every 3-6 months. Use a garage door lubricant on springs, rollers, and hinges.
- Inspect cables and springs for rust, wear, or broken strands.
- Test door balance regularly. Disconnect the opener and lift the door halfway. If it moves, the springs need adjustment.
- Clean debris from tracks and brackets.
Regular maintenance can extend your door’s life by years and reduce future repair costs.
Cost Of Garage Door Cable Repair
Doing the repair yourself is much cheaper than calling a pro. Here’s a quick cost breakdown:
| Item | DIY Cost | Professional Cost |
|---|---|---|
| Replacement cable (pair) | $15 – $35 | Included |
| Tools (if needed) | $10 – $40 | Included |
| Labor | Free | $120 – $200 |
| Total | $25 – $75 | $120 – $200 |
If your springs also need replacement, the cost can rise significantly.
Garage Door Cable Lifespan And Replacement Frequency
A good-quality garage door cable can last 8–15 years, depending on:
- Door weight and size
- Frequency of use (homes with multiple cars wear out faster)
- Local climate (humidity and salt air speed up rust)
- Regular maintenance
If you notice rust, fraying, or stretching, replace the cables right away—even if they haven’t snapped yet. Replacing cables in pairs is wise, as they usually wear out at the same rate.
Preventing Garage Door Cable Problems
Prevention is easier and cheaper than repair. Here’s how to keep your cables healthy:
- Keep cables clean and dry. Wipe away dirt and moisture.
- Apply light lubricant every few months to reduce friction.
- Check for rust after wet or snowy weather.
- Replace worn weather stripping so water and grit don’t enter.
- Watch for pests—rodents sometimes chew cables.
One insight many homeowners miss: Never use WD-40 as a lubricant. It’s a degreaser, not a lubricant, and can attract dirt. Use a silicone or lithium-based spray instead.
Environmental Factors And Garage Door Cables
Your local environment can affect cable life. In coastal areas, salt air causes rust faster. In snowy regions, road salt tracked into the garage corrodes cables. If you live in these areas, check your cables every few months and consider cables with extra corrosion resistance.
Real-life Example: A Quick Homeowner Story
Let’s look at an example. Sarah, a homeowner in Ohio, noticed her garage door hung lower on one side and made loud squeaks when closing. Upon inspection, she found a frayed cable on the low side and rust on the other.
Instead of just fixing the frayed cable, she replaced both, lubricated the system, and installed weatherstripping. The door worked perfectly afterward—and she avoided a future emergency repair.
The Role Of Cables In Garage Door Opener Safety
Garage door cables are not just about lifting—they’re a key part of your door’s safety system. If a cable snaps, the opener may try to lift one side, causing the door to jam or bend. Modern openers may sense the imbalance and stop, but older models might not, risking more damage.
Always check cables if your opener “strains” or stops suddenly.
Helpful Resources For Further Learning
For more technical information and diagrams, the Wikipedia garage door page gives a detailed overview of door types and parts. This can help you identify your exact setup before starting repairs.
Frequently Asked Questions
How Long Does It Take To Replace A Garage Door Cable?
For most people, replacing a garage door cable takes 1 to 2 hours if you have the right tools and follow safety steps. First-timers should allow extra time to read instructions and double-check their work.
Can I Replace A Garage Door Cable Without Removing The Spring Tension?
No. Removing or installing cables with tensioned springs is extremely dangerous. Always release the tension first using proper winding bars to prevent injury.
What If My Garage Door Cable Keeps Coming Off The Drum?
This usually means the cable tension is uneven or the drum is loose. Rewind both cables, check for equal tension, and make sure the drums are tight. If the problem returns, the springs or drums might need replacement.
How Do I Know If I Need To Replace The Springs Too?
If your door feels heavy, slams shut, or the springs show gaps, rust, or cracks, replace them along with the cables. Springs and cables often wear out together.
Is It Safe To Use My Garage Door With A Broken Cable?
No, it’s unsafe. Using the door with a broken cable can bend the tracks, damage the opener, or cause the door to fall. Stop using the door and repair the cable before further operation.
A working garage door is part of a safe, convenient home. By learning how to fix and maintain your garage door cable, you not only save money but also keep your home secure and your family safe. Whether you choose to tackle the project yourself or call a pro, understanding the process makes you a more confident homeowner.