Now Reading: How Do You Adjust a Chamberlain Garage Door Opener Easily
- 01
How Do You Adjust a Chamberlain Garage Door Opener Easily
Adjusting a Chamberlain garage door opener can seem challenging if you haven’t done it before. Whether your door isn’t closing all the way, opens too quickly, or the safety sensors are acting up, knowing how to make the right adjustments keeps your door safe and reliable. The good news? Most adjustments are simple, require only basic tools, and can save you the cost and wait of calling a technician. This guide will walk you through every key adjustment step, from the basic to the advanced, with clear explanations and expert tips.
If you’re new to garage door openers, you’ll learn how to check your system, identify common problems, and make precise changes. For those with some experience, you’ll find insights on fine-tuning your setup and troubleshooting tricky issues that most people miss.
By the end, you’ll have the confidence and knowledge to adjust your Chamberlain garage door opener safely and effectively.
Understanding Your Chamberlain Garage Door Opener
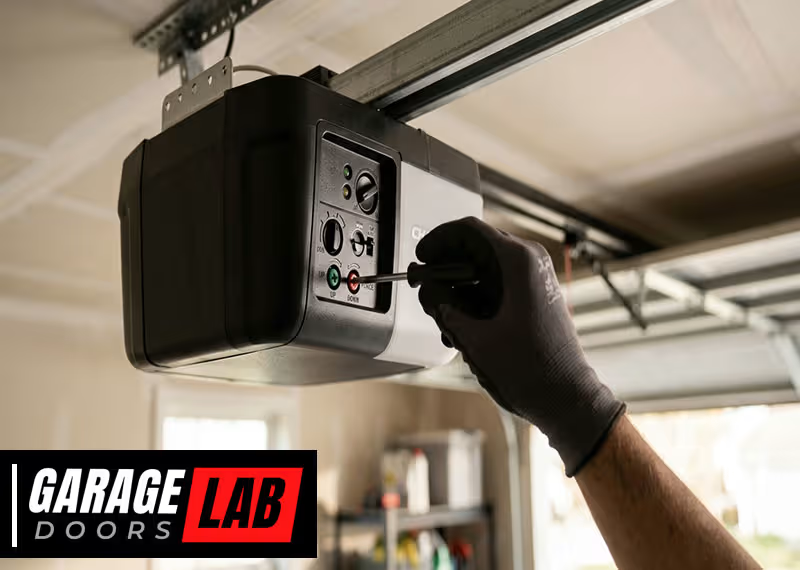
Before making any adjustments, it helps to know the main parts and how they work together. Chamberlain garage door openers are among the most popular in the US. They use a motor to lift and lower the door, along with safety features like sensors and force limits to prevent accidents.
Key Components
- Motor Unit: Powers the opener and is mounted on the ceiling.
- Rail and Trolley: The rail guides the door as it moves; the trolley connects the door to the motor.
- Limit Switches: Control how far the door opens or closes.
- Force Adjustment Dials: Set how much force is used to open or close the door.
- Safety Sensors: Placed near the floor on both sides of the door, these detect obstacles.
- Wall Control Panel and Remotes: Let you operate the opener from inside or outside.
Understanding these parts helps you know what to adjust and where to find the right controls.
Safety First: Preparation And Precautions
Working with a garage door opener involves electrical parts and heavy moving doors. Safety should always come first.
- Disconnect Power: Unplug the opener before making any manual adjustments.
- Manual Release: Use the red release cord to disconnect the door from the opener, so you can move it by hand.
- Wear Safety Gear: Gloves and safety glasses protect you from sharp edges and moving parts.
- Keep Children and Pets Away: During adjustments, keep the area clear.
Tip: Always check the door balance by lifting it halfway. If it stays in place, the springs are balanced. If not, the springs may need professional adjustment.
When And Why You Need To Adjust
Not all problems require a full reset or replacement. Here are common signs your Chamberlain garage door opener needs adjustment:
- The door doesn’t close or open fully.
- The door reverses before closing completely.
- The door doesn’t reverse when hitting an object.
- The opener motor runs but the door doesn’t move.
- The safety sensors show errors or lights blink.
Adjusting the right setting often solves these issues quickly.
Tools And Materials You’ll Need
Most adjustments require only a few basic tools:
- Flathead and Phillips screwdrivers
- Step ladder
- Pliers
- Flashlight
- Safety glasses
- Owner’s manual (for model-specific guidance)
Having these ready saves time and prevents accidents.
Step-by-step: Adjusting Limit Switches
Limit switches tell your opener how far to open or close the door. If your door stops too early or keeps running, adjust these switches.
How To Locate And Adjust Limit Screws
- Find the Adjustment Screws: On most Chamberlain models, these are on the side or back of the motor unit. They are usually labeled “up” (open) and “down” (close).
- Test Door Position: Use your remote or wall button to open and close the door. Note where it stops.
- Adjust the Limit Screw:
- If the door doesn’t close fully, turn the “down” screw clockwise (usually 1/4 turn at a time).
- If the door doesn’t open fully, turn the “up” screw clockwise.
Example: If your door stops 6 inches above the ground, turn the “down” screw clockwise and test again until the door closes completely.
Non-obvious insight: Many people turn the screws too much. Small adjustments (1/4 turn) are best. Over-adjusting can cause the door to slam or run against the floor.
Limit Adjustment Table
Here’s how different adjustments affect the door:
| Adjustment Screw | Turn Direction | Effect |
|---|---|---|
| Up (Open) | Clockwise | Door opens higher |
| Up (Open) | Counterclockwise | Door opens less |
| Down (Close) | Clockwise | Door closes lower |
| Down (Close) | Counterclockwise | Door closes higher (doesn’t reach floor) |
Tip: Always test the door after each adjustment. Repeat as needed until the door opens and closes at the right positions.
Adjusting Force Settings
Force settings control how much power the opener uses to move the door. Too little force and the door may not close; too much force and it could be unsafe.
Why Force Settings Matter
- Safety: Prevents the door from crushing objects or people.
- Performance: Ensures the opener works even with changes in weather or friction.
How To Adjust Force Controls
- Locate Force Adjustment Dials: These are usually found near the limit screws, marked as “up force” and “down force.”
- Test Door Operation: Run the door through a full open and close cycle.
- Make Small Adjustments:
- If the door stops before fully closing, increase the “down force” by turning the dial clockwise.
- If the door struggles to open, increase the “up force” slightly.
- If the door does not reverse when hitting an object, decrease the force.
Non-obvious insight: Adjust force only as much as needed. Too much force can hide bigger problems, such as a heavy or unbalanced door.
Force Setting Comparison
Below is a quick look at how force settings affect operation:
| Force Level | Result | Risk |
|---|---|---|
| Low | May not close or open fully | Door stuck, opener strain |
| Medium | Smooth operation | Low risk |
| High | Powers through resistance | May not reverse on obstacle (safety risk) |
Adjusting And Aligning Safety Sensors
Safety sensors are a critical part of your Chamberlain garage door opener. They prevent the door from closing if something is in the way.
Troubleshooting Sensor Problems
Common signs of sensor issues:
- Door won’t close, lights blink.
- Door reverses after starting to close.
- One or both sensor lights are off or blinking.
Realigning The Sensors
- Check Sensor Lights: Each sensor should show a solid light when aligned.
- Clean the Lenses: Dust and dirt can block the beam. Wipe with a soft cloth.
- Adjust Position: Gently move the sensor brackets until both lights are steady.
- Tighten Screws: Secure the sensors in place.
Non-obvious insight: Sunlight or reflective surfaces can interrupt the sensor beam. Try shading the sensors if issues persist.
Sensor Status Table
Here’s how to interpret sensor lights:
| Sensor Light | Status | Action Needed |
|---|---|---|
| Solid | Aligned and working | None |
| Blinking | Misaligned or dirty | Realign or clean |
| Off | No power or wiring issue | Check wires and power |
Adjusting Travel And Speed (if Applicable)
Some newer Chamberlain models allow you to adjust how fast the door moves or how far it travels.
Travel Adjustment
- Locate the Travel Adjustment Dial or Buttons: Usually found near the limit and force dials.
- Fine-Tune Travel Distance: Adjust in small steps and test after each change.
- Reset If Needed: Some models have a reset button to start over if adjustments go wrong.
Speed Adjustment
- Not all models allow speed adjustment. If yours does, follow the manual’s instructions.
- Only increase speed if the door moves too slowly and all other adjustments are correct.
Tip: A slow door can also mean lack of lubrication or worn rollers, not just a speed setting.
Resetting The Opener After Adjustments
After making changes, it’s important to reset the opener:
- Reconnect Power: Plug the opener back in.
- Re-engage the Door: Pull the emergency release cord toward the opener to reconnect.
- Test with Remotes and Wall Button: Make sure all controls work as expected.
- Test Safety Features: Place a block under the door and close it. The door should reverse when it touches the object.
If anything fails, double-check your adjustments and repeat testing.
Troubleshooting Common Adjustment Problems
Even after careful adjustments, you might face some stubborn issues. Here’s how to solve the most common ones:
Door Reverses Before Closing Completely
- Check for sensor misalignment.
- Reduce “down” limit if too high.
- Adjust “down” force if needed.
Door Won’t Open Fully
- Increase “up” limit.
- Check for door obstructions or heavy rollers.
- Lubricate moving parts.
Opener Runs But Door Doesn’t Move
- Make sure the trolley is connected to the door arm.
- Check the emergency release is engaged.
Remotes Or Keypad Don’t Work
- Replace batteries.
- Reprogram remotes if needed (see manual).
- Check for radio interference (LED bulbs, Wi-Fi routers).
Non-obvious insight: If you live in a cold climate, temperature changes can affect door travel and force needs. Seasonal checks are smart.
Advanced Adjustments: Smart Features And Connectivity
Modern Chamberlain openers often include Wi-Fi connectivity and smart home integration. Adjustments for these features are a bit different.
Connecting To Wi-fi
- Download the myQ app and follow instructions for your model.
- Place your Wi-Fi router near the garage for better signal.
- Update firmware if prompted.
Adjusting Alerts And Schedules
- Use the app to set open/close schedules or receive alerts.
- Check app permissions and notifications on your phone.
Tip: If your Wi-Fi signal is weak, consider using a Wi-Fi range extender.
Maintenance Tips After Adjustment
Regular maintenance helps your adjustments last longer and keeps your system safe.
- Lubricate Moving Parts: Use garage door lubricant on rollers, hinges, and springs every 6 months.
- Test Balance: Every few months, disconnect the opener and lift the door by hand. It should stay halfway open.
- Check Sensors: Wipe and realign if needed.
- Inspect Wires and Cables: Look for wear or fraying.
- Update Firmware: For smart models, check for app or firmware updates.
Tip: Write the date of your last adjustment on the opener or in your phone, so you remember when to check next.

When To Call A Professional
Some problems are not safe for DIY adjustment:
- Broken or stretched springs (high tension can cause injury)
- Frayed or broken cables
- Loud grinding noises or burning smells from the motor
- Door off its tracks
If you see these, call a trained technician. Attempting these repairs yourself can be dangerous.
Real-life Example: Homeowner Adjustment Experience
Let’s look at a real scenario. Maria, a homeowner in Texas, noticed her garage door wouldn’t close all the way. She followed these steps:
- Checked and cleaned the safety sensors — both lights were steady.
- Adjusted the “down” limit screw 1/4 turn clockwise.
- Tested the door — now it closed completely but reversed when it touched a 2×4 block (good! ).
- Reduced the “down force” just a bit, so the door reversed more easily.
By making small, careful adjustments and testing after each step, Maria fixed the problem without calling for help.

Comparing Chamberlain With Other Brands
How does Chamberlain stack up when it comes to adjustability and user-friendliness?
| Brand | Ease of Adjustment | Smart Features | Typical Issues |
|---|---|---|---|
| Chamberlain | Simple dials/screws | Wi-Fi, myQ app | Sensor misalignment |
| LiftMaster | Similar (same parent company) | Wi-Fi, myQ app | Force settings tricky |
| Genie | Push-button setup | Some models with app | Limit switch confusion |
| Craftsman | Manual dial | Limited smart features | Cable issues |
Chamberlain stands out for its balance of simple manual controls and advanced smart options.
Practical Tips For Smooth Adjustments
- Always make small changes — big adjustments can cause new problems.
- Write down your settings before you start, so you can return to them if needed.
- Keep the manual handy — models vary, and diagrams help.
- Test multiple times — don’t assume one test is enough.
- Watch for seasonal changes — doors can move differently in winter or summer.
Expert Insights Most People Miss
- Garage door balance affects everything: If your door is heavy or unbalanced, no amount of opener adjustment will fix the problem. Check the balance before adjusting limits or force.
- LED bulbs can cause remote issues: Many homeowners don’t realize that some LED lights interfere with remote controls. If your remotes stop working after adding new bulbs, try switching brands or types.
- Lubrication is key: Stiff rollers or hinges force the opener to work harder, leading to more frequent adjustments and possible motor strain. Always check for smooth door movement before adjusting the opener.
- Wi-Fi issues are often signal-related: If your smart opener loses connection, it’s often due to weak Wi-Fi rather than the opener itself.
Frequently Asked Questions
What Should I Do If My Chamberlain Garage Door Opener Keeps Reversing?
This usually means there’s a problem with the safety sensors or the “down” force/limit settings. First, check that both safety sensor lights are solid and aligned. Clean the lenses. If the door still reverses, reduce the “down” force or adjust the “down” limit slightly.
Test after every change to see if the problem is fixed.
How Often Should I Adjust My Garage Door Opener?
You should check and adjust your Chamberlain opener at least once a year or any time you notice changes in door movement, noise, or behavior. Seasonal changes can affect operation, so a quick check in spring and fall is smart.
Also, if you replace rollers, springs, or other parts, recheck your settings.
Can I Adjust My Chamberlain Opener Without The Manual?
While many adjustments are similar across models, it’s best to have your manual. The manual has diagrams and details for your specific unit. If you lost yours, you can download it from the Chamberlain support site using your model number.
Why Doesn’t My Remote Work After Adjustments?
This can be due to dead batteries, lost programming, or radio interference. Try reprogramming the remote, replacing the battery, and moving any new LED bulbs or Wi-Fi routers away from the opener. If nothing works, check the opener’s antenna wire for damage.
Is It Safe To Adjust The Springs Or Cables Myself?
No. Springs and cables are under high tension and can cause serious injury or death if handled wrong. Only adjust opener settings like limits, force, or sensors yourself. Leave spring and cable repairs to qualified professionals.
Adjusting your Chamberlain garage door opener is a practical way to keep your door working smoothly and safely. With a careful, step-by-step approach, most problems can be solved in minutes. Remember, small adjustments and regular maintenance make a big difference. If you ever feel unsure or run into complex issues, don’t hesitate to call a professional — your safety is worth it.


