
Setting up a garage door opener can feel like a big task, especially if you are doing it for the first time. But with the right steps and clear instructions, you can do it yourself without calling a professional. A garage door opener not only makes life easier but also adds an extra layer of security to your home.
This guide will walk you through every part of the process, from choosing the right opener to programming remotes, adjusting settings, and fixing common problems. You will learn tips and details that most first-time installers miss. Let’s make your garage more convenient and secure.
Understanding Garage Door Openers
Before you start the setup, it’s important to know what a garage door opener is and the different types available. This will help you choose the right one for your needs and understand the setup process better.
What Is A Garage Door Opener?
A garage door opener is a motorized device that opens and closes your garage door using a switch, remote, or even a smartphone app. The opener powers a track and trolley system, which lifts or lowers the door smoothly.
Types Of Garage Door Openers
There are several types, each with pros and cons:
| Type | Key Features | Noise Level | Best For |
|---|---|---|---|
| Chain Drive | Uses a metal chain, affordable, reliable | High | Detached garages |
| Belt Drive | Uses a rubber belt, quiet, smooth | Low | Attached garages, bedrooms above garage |
| Screw Drive | Simple, less maintenance, few moving parts | Medium | Moderate climates |
| Direct Drive | Motor moves along a rail, very quiet | Very Low | Any location, luxury homes |
| Jackshaft | Mounted beside the door, saves ceiling space | Low | Low ceilings, special doors |
What Makes A Good Garage Door Opener?
The best opener for you depends on:
- Garage location: Noise matters more for attached garages.
- Door size and weight: Heavy doors need more power (look for at least 1/2 horsepower).
- Features: Safety sensors, battery backup, smartphone control, and rolling code security are important.
- Budget: Chain drives are cheapest, direct drives cost more but are very quiet.
Tools And Materials You Need
Having the right tools ready will save time and reduce frustration. Here’s what you’ll typically need:
- Stepladder (tall enough for your garage ceiling)
- Power drill (with bits)
- Screwdrivers (flat and Phillips head)
- Adjustable wrench
- Socket set
- Pliers
- Measuring tape
- Level
- Pencil or marker
- Stud finder
- Wire stripper (if wiring is required)
- Safety glasses and gloves
Most garage door opener kits include the main parts: motor unit, rail, trolley, belt or chain, safety sensors, wall control, and remote controls. Always check the box for missing parts before you start.
Pre-installation Checks
Before you start mounting anything, make sure your garage is ready. Skipping this step is a common mistake.
- Check the door balance: Disconnect the garage door from the opener (if one exists) and lift it by hand. It should move smoothly and stay open at about 3–4 feet above the floor. If not, the springs may need adjustment by a professional.
- Measure clearance: You need enough space above the door for the opener rail and for the motor unit at the ceiling.
- Check power source: There must be a nearby outlet at the ceiling for the opener. Extension cords are not safe for permanent use.
- Look for obstructions: Remove anything that could block the opener or door path.
Step-by-step Installation Process
Setting up a garage door opener involves several steps. Each brand is a bit different, so always read your manual along with these steps.
1. Assemble The Opener Rail
Most rails come in several pieces. Connect them according to the instructions:
- Lay out all rail sections on the floor.
- Attach them using the provided hardware.
- Slide the trolley (the moving part) onto the rail before closing it with the end piece.
2. Attach The Rail To The Motor Unit
- Secure the assembled rail to the opener’s motor unit.
- Tighten the bolts but don’t over-tighten.
3. Mount The Header Bracket
- The header bracket attaches above the garage door at the wall.
- Use a stud finder to locate a solid piece of framing.
- Mark and drill holes, then install the bracket using heavy-duty screws.
4. Position And Secure The Opener
- Raise the opener and align the rail with the header bracket.
- Attach the rail to the bracket.
- Support the motor unit temporarily with a stepladder.
- Measure to ensure the opener is centered with the door.
- Use hanging straps or angle iron to secure the motor unit to the ceiling joists.
- Make sure the opener is perfectly level.
5. Connect The Door Arm
- Attach the door arm to the trolley and to the garage door.
- This usually requires drilling a hole in the door if one isn’t pre-drilled.
- Use the supplied fasteners for a secure connection.
6. Install Safety Sensors
Modern garage door openers require safety sensors to stop the door if anything is in the way.
- Mount the sensors on both sides of the door, 4–6 inches above the floor.
- Run the sensor wires along the wall and ceiling to the opener unit.
- Connect the wires to the terminals as shown in the manual.
- Make sure the sensors line up exactly; a misalignment can stop the door from closing.
7. Install Wall Control Panel
- Choose a spot near the garage entry door, out of reach of children.
- Run the low-voltage wire from the opener unit to the control panel.
- Connect the wires and mount the panel to the wall.
8. Plug In And Test
- Plug the opener into the ceiling outlet.
- Test the door’s movement using the wall control.
- The door should open and close smoothly. If not, check your assembly and wiring.
Setting Up Remotes And Keypads
Programming remotes and keypads is often the most confusing part for new users. Here’s how to do it right.
Programming A Remote Control
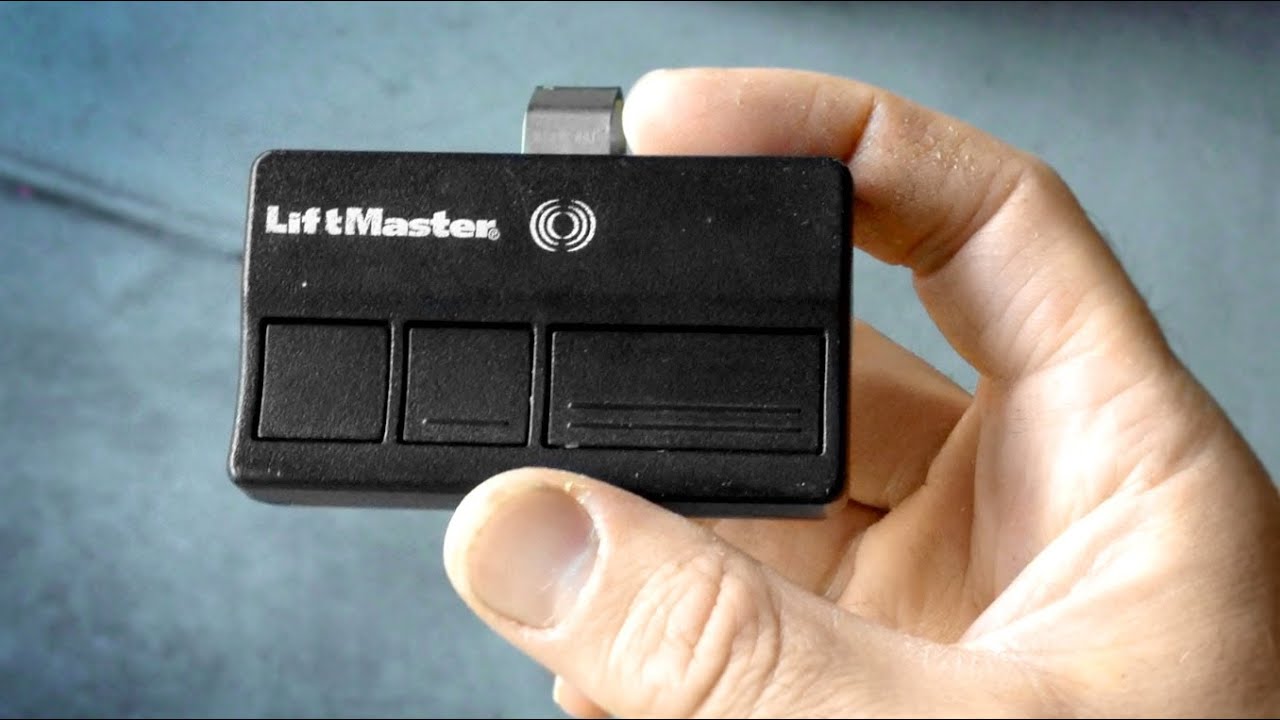
Most openers use a “learn” button for programming:
- Press and release the “learn” button on the motor unit (usually near the antenna wire).
- You have about 30 seconds—press the button on your remote.
- The opener’s light will flash or you’ll hear a click if programming was successful.
- Test the remote from outside and inside the garage.
Pro tip: Don’t program remotes near your neighbors’ garages. Their openers can sometimes pick up your signal if you’re too close.
Programming A Wireless Keypad
A keypad lets you open the garage with a PIN code.
- Press the “learn” button on the opener.
- Within 30 seconds, enter your chosen PIN on the keypad.
- Press the “Enter” button. The light on the opener should flash.
- Test the PIN to make sure it works.
Some keypads need you to enter the manufacturer’s code, so check the instructions.
Setting Up Smartphone Control
Many modern openers work with apps like myQ or Aladdin Connect.
- Download the app and create an account.
- Connect the opener to your Wi-Fi network (usually by pressing a button on the opener).
- Follow the app’s instructions to add your device.
Non-obvious insight: If your Wi-Fi signal is weak in the garage, use a Wi-Fi extender for reliable smartphone control.
Adjusting Force, Travel, And Limits
To keep your door running safely, adjust the travel (how far the door moves), force (how hard it pushes), and limits (where it stops).
Adjusting Travel Limits
There are usually two screws or knobs labeled “Up” and “Down” on the opener.
- Turn the “Up” screw to set how far the door opens.
- Turn the “Down” screw to set how far it closes.
- Adjust until the door opens fully and closes snugly without hitting the floor hard.
Adjusting Force Controls
Force controls set how much power the opener uses.
- If the door reverses when closing or won’t open fully, increase the force slightly.
- If the door does not reverse when blocked, decrease the force.
Important: Don’t set the force too high. The door must reverse if it hits something, to prevent injury or damage.
Testing The Safety Reverse
- Place a 2×4 piece of wood flat on the ground where the door closes.
- Close the door using the opener. It should hit the wood and immediately reverse.
- If it does not, adjust the force and test again.
Non-obvious insight: Safety reverse sensors can be affected by dirt, sunlight, or spider webs. Clean them regularly.

Common Problems And Solutions
Even after setup, you might face some common issues. Here’s how to troubleshoot them.
Door Won’t Open Or Close
- Check if the safety sensors are aligned and free from obstructions.
- Ensure the opener is plugged in and the circuit breaker is on.
- Try using both the wall control and remote.
Opener Makes Noise
- Lubricate moving parts with garage door lubricant, not WD-40.
- Tighten loose bolts and screws.
- Chain drives are naturally noisy. If noise bothers you, consider switching to a belt drive.
Remote Doesn’t Work
- Replace the remote battery.
- Reprogram the remote if it lost its memory.
- Check for interference from LED light bulbs near the opener.
Door Reverses Before Closing
- Clean and realign the safety sensors.
- Check for obstacles in the door path.
- Reduce the closing force setting.
Keypad Not Responding
- Change the battery.
- Reprogram the keypad code.
- If still not working, reset the opener and try again.
Maintenance Tips For Long Life
A garage door opener can last 10–15 years with proper care. Here’s how to keep it working well:
- Lubricate moving parts every 6 months (rollers, hinges, springs, chain or screw).
- Tighten hardware like bolts and screws once a year.
- Test the safety reverse monthly.
- Check the balance of the door yearly—if it’s heavy, get the springs checked.
- Clean the sensors with a soft cloth.
Pro tip: Keep the opener manual in a safe place. You’ll need it for troubleshooting and programming new remotes.
Comparing Top Garage Door Opener Brands
If you haven’t bought an opener yet, see how the most popular brands compare.
| Brand | Popular Models | Warranty | Notable Features |
|---|---|---|---|
| Chamberlain | B970, B550 | Lifetime motor, 1–5 years parts | myQ app, quiet operation |
| LiftMaster | 8500W, 8160W | Lifetime motor, 1–5 years parts | Battery backup, smartphone control |
| Genie | StealthDrive, ChainMax | Limited lifetime motor, 1–5 years parts | Aladdin app, quiet models |
| Craftsman | CMXEOCG471, 54985 | 6–10 years motor, 1–3 years parts | Strong build, compatible with myQ |
Pro tip: Always check for compatibility with your garage door (height, weight, type) before buying.
Safety And Security Features
Modern garage door openers offer more than just convenience. Here’s what to look for:
- Rolling code technology: Changes the remote code every time you use it, making it hard for thieves to copy.
- Vacation lock: Disables remote controls when you’re away for extended periods.
- Battery backup: Lets you open the door during a power outage.
- Auto-close timer: Closes the door automatically after a set time.
- Motion-detecting lights: Turn on when someone enters the garage.
Non-obvious insight: Some newer openers can send alerts to your phone if your door is left open for too long.
Professional Installation Vs. Diy
Is it better to install the opener yourself or hire a pro? Here’s a quick comparison.
| Aspect | DIY Installation | Professional Installation |
|---|---|---|
| Cost | Lower (just parts) | Higher (labor + parts) |
| Time | 4–6 hours for beginners | 1–2 hours |
| Tools Needed | Many | Provided by installer |
| Warranty | May be limited | Often includes labor warranty |
| Skill Level | Intermediate DIY | Professional |
If you’re comfortable with basic tools and following instructions, DIY is a good choice. If your door is heavy, damaged, or you’re not confident, hiring a pro is safer.
Smart Home Integration
Many garage door openers now work with smart home systems. You can control your garage from anywhere using a phone or voice assistant.
- Amazon Alexa and Google Assistant: Open or close your door with voice commands.
- IFTTT: Create custom routines, like turning on lights when you open the garage.
- Home security systems: Many openers can connect directly for extra protection.
Non-obvious insight: Make sure your smart home devices are on the same Wi-Fi network for best performance.

When To Call A Professional
Some problems require expert help:
- Broken or stretched springs (these are dangerous to replace yourself)
- Bent or damaged door panels
- Opener motor or circuit board problems
- Major wiring issues
If your door is off its track, don’t try to force it. Call a garage door technician to avoid injury.
Frequently Asked Questions
How Long Does It Take To Set Up A Garage Door Opener?
Most first-time installers spend 4 to 6 hours on the process. If you have experience with tools, you may finish in about 3 hours. Plan extra time for reading the manual, especially for programming remotes and sensors.
Can I Use My Old Garage Door With A New Opener?
Usually yes, as long as your door is balanced, undamaged, and compatible with the opener’s drive system. Check the weight and height limits in the opener’s manual. Some older wooden doors may be too heavy for modern openers.
What Should I Do If My Garage Door Opener Loses Power?
If your opener has a battery backup, it should work during a power outage. If not, most openers have a manual release cord (usually red) that lets you open the door by hand. Never use the opener if the springs are broken—call a pro.
Are Garage Door Openers Safe For Children And Pets?
Modern openers have safety sensors that stop the door if anything is in the way. Always install sensors 4–6 inches above the floor and test them monthly. Teach children not to play with remotes or wall controls.
Where Can I Find More Information On Garage Door Openers?
For technical details, safety standards, and troubleshooting, visit the Wikipedia page on Garage Door Openers. Manufacturer websites also provide manuals and support.
Setting up a garage door opener can seem complex, but by following each step with care, you’ll enjoy a smoother, safer, and smarter garage for years to come. Take your time, pay attention to safety, and soon you’ll be using your new opener with confidence.