Now Reading: How to Change Battery in Chamberlain Garage Door Opener Easily
- 01
How to Change Battery in Chamberlain Garage Door Opener Easily
How to Change Battery in Chamberlain Garage Door Opener Easily

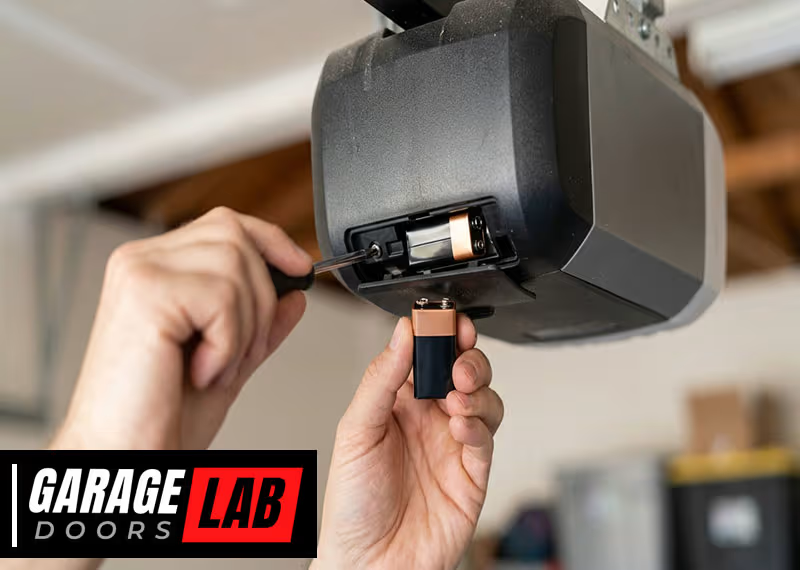
Changing the battery in your Chamberlain garage door opener might sound simple, but for many homeowners, it’s a task that can cause confusion and delay. You depend on your garage door opener every day, so when the remote stops working, it can be a real inconvenience. The good news: replacing the battery is a quick, low-cost fix that you can do yourself in just a few minutes if you know the right steps and avoid common mistakes.
This guide will walk you through everything you need to know about changing the battery in a Chamberlain garage door opener. You’ll discover how to identify the correct battery, open the remote safely, avoid damaging delicate parts, and even troubleshoot if things don’t work right after the swap.
Whether you’re a first-timer or you’ve changed batteries before, you’ll find practical tips and insider advice to make the process smooth and stress-free.
Understanding Chamberlain Garage Door Openers
Chamberlain is one of the most trusted brands in home garage door openers. They offer a variety of models, but most use a similar remote control system. The remote sends a signal to the opener unit, telling it to open or close the door.
This signal is powered by a small battery inside the remote.
Most Chamberlain remotes use coin cell batteries (such as CR2032 or CR2016), but some older or larger remotes may use AAA or 9V batteries. If your remote is not responding—or only works when you press the button very hard or stand close to the door—it’s usually a sign the battery is getting weak.
Some homeowners are surprised to learn that the wall-mounted control panel inside the garage usually does NOT have a battery, as it’s hardwired to your opener’s power supply. Only the portable remote and some keyless entry pads need battery changes.
Why Regular Battery Replacement Matters
A weak battery can cause your Chamberlain remote to behave unpredictably. You might notice delays, partial openings, or the door stopping halfway. Sometimes, the remote stops working suddenly, often at the worst time—like when you’re rushing to work.
Changing the battery regularly prevents these issues. Here are reasons you should never ignore a weak garage door remote battery:
- Safety: If the remote fails when you’re leaving or returning home at night, you might be exposed to unnecessary risks.
- Convenience: No one wants to be stuck outside in the rain or cold because of a dead remote.
- Door Opener Life: Trying to force a weak remote can sometimes confuse the opener’s logic board, causing more serious (and expensive) problems.
Most experts recommend replacing your garage door remote battery once every 1-2 years, even if it’s still working, to avoid surprises.
Tools And Materials Needed
You don’t need a workshop full of tools. For most Chamberlain remotes, you’ll only need:
- A small Phillips screwdriver (for most models)
- A flat-head screwdriver or coin (for prying open the remote)
- The correct replacement battery (check your remote or manual for type)
- A clean cloth (optional, to wipe any dust inside)
- Gloves (optional, to avoid fingerprint smudges on the battery)
Always have the new battery ready before you open the remote. That way, you minimize the time the circuit is exposed to air and dust.
Identifying Your Chamberlain Remote Model
Not all Chamberlain remotes are the same. Knowing your exact model helps you buy the right battery and understand how to open the remote safely.
Look for:
- Model number: Usually found on the back of the remote or inside the battery compartment.
- Color of the button(s): Some Chamberlain remotes are color-coded.
- Shape and size: Keychain remotes and visor-clip remotes may use different batteries.
Here’s a quick comparison of common Chamberlain remote models and their typical batteries:
| Remote Model | Button Color | Battery Type |
|---|---|---|
| 953EV/956EV | Gray/Blue | CR2032 |
| 940EV Keypad | Backlit | 9V |
| 950CB | Black | CR2016 |
| 940D | Keypad | 9V |
| 953CD | Blue | CR2032 |
If you’re not sure, check your owner’s manual or visit the Chamberlain website for support.
How To Buy The Right Battery
It’s easy to buy the wrong battery if you don’t double-check the model and type. Most Chamberlain remotes use CR2032 or CR2016 coin cells, which are available at any hardware store, supermarket, or online. Keypad units typically use a 9V battery.
Two practical tips beginners miss:
- Check the battery orientation before removing it from the remote. Take a photo if you’re unsure.
- Buy a brand-name battery (like Duracell or Energizer). Cheap, no-name batteries often don’t last as long and may leak.
If you need to buy online, make sure the website is reputable. Avoid batteries with an expired or missing “use by” date.
Step-by-step Guide: Changing The Battery In Your Chamberlain Remote
Follow these steps for a safe and successful battery change:
1. Gather Supplies
Before you start, make sure you have:
- The correct replacement battery
- Small screwdriver(s)
- Clean surface to work on
2. Open The Remote
Most Chamberlain remotes open in one of these ways:
- Sliding cover: Slide the back cover down to reveal the battery.
- Screw-secured back: Remove one or two small screws, then gently pry open.
- Snap-fit case: Use a coin or flat-head screwdriver to gently twist open at the seam.
Insider tip: Pry gently around the edges—don’t force it. Some cases have delicate clips that can break if you use too much pressure.
3. Remove The Old Battery
Take note of the battery’s orientation (which side faces up). Use a small screwdriver or your finger to pop the battery out. If there’s any dust or corrosion, wipe it away with a dry cloth.
4. Insert The New Battery
Place the new battery in the same orientation as the old one. The + (plus) side usually faces up, but always check your remote.
Common beginner mistake: Placing the battery upside down will cause the remote to not work at all.
5. Close The Remote
Snap the case back together or replace the screws. Make sure the cover is flush and secure. If the remote feels loose or rattles, reopen and check for any missed tabs or misalignment.
6. Test The Remote
Stand near your garage door and press the button. The door should respond immediately. If it doesn’t, try again closer to the opener. If it still doesn’t work, double-check battery orientation and that the battery is new.
Pro tip: Some Chamberlain remotes have an LED light that should glow when you press the button. No light usually means the battery is dead or installed incorrectly.
7. Dispose Of The Old Battery Responsibly
Do not throw coin cell batteries in regular trash—they can be hazardous to children, pets, and the environment. Take used batteries to a recycling center or a store with a battery drop-off.
Changing Battery In Chamberlain Keyless Entry Pads
Chamberlain keyless entry pads (the keypad mounted outside your garage) usually use a 9V battery. The process is a bit different from remotes.
- Open the keypad cover.
- Remove the keypad from the mounting plate. Slide it up and off the wall.
- Locate the battery compartment (on the back).
- Remove and replace the 9V battery.
- Reinstall the keypad on the wall.
- Test by entering your code.
Non-obvious insight: Some keypads require you to reprogram or reset after a battery change. Always check your manual.
Troubleshooting After Battery Replacement
What if your Chamberlain remote still doesn’t work after changing the battery? Here’s how to fix common issues:
- Check battery orientation. Most failures are due to the battery being upside down.
- Inspect battery contacts. Dirty or bent contacts can block the battery’s power. Clean gently with a cotton swab.
- Try a second new battery. Occasionally, even new batteries are duds.
- Reprogram the remote. Some remotes lose their programming if the battery is out too long. Consult your manual for reprogramming steps.
- Check the opener’s lock feature. If your wall control panel has a lock button, the remote will not work while the lock is active.
- Confirm the remote model. An incorrect battery type or wrong remote can cause problems.
If you’ve tried all these steps and the remote still fails, the issue may be with the opener’s receiver or circuit board. In this case, contact Chamberlain support or a professional technician.
How Long Do Chamberlain Remote Batteries Last?
Most Chamberlain garage door remote batteries last 1-2 years with normal use. Keypad batteries often last even longer—up to 3 years—since they’re used less often.
However, battery life can be shorter if:
- The remote is used very frequently (e.g., multiple family members)
- The remote is exposed to extreme temperatures (hot car interiors)
- The battery is a low-quality or expired type
To maximize battery life:
- Store remotes out of direct sunlight
- Remove the battery if you won’t use the opener for several months
- Use name-brand batteries
Comparing Common Chamberlain Batteries
For clarity, here’s a quick look at the most common batteries you’ll encounter:
| Battery Type | Voltage | Common Use | Average Lifespan |
|---|---|---|---|
| CR2032 | 3V | Most Chamberlain remotes | 1-2 years |
| CR2016 | 3V | Smaller remotes | 1 year |
| 9V | 9V | Keyless entry pads | 2-3 years |
| AAA | 1.5V | Rare, older models | 1 year |
Practical insight: Always check the battery’s “use by” date before installing. Old batteries—even if unused—can lose charge or leak, damaging your remote.
Avoiding Common Mistakes When Changing Batteries
Many homeowners make small mistakes that can cause big headaches. Here’s how to avoid them:
- Don’t mix old and new batteries in remotes that use more than one cell.
- Don’t touch the battery terminals with wet or greasy hands. Oils can cause poor contact.
- Don’t force the remote open with sharp tools. This can crack the case or break clips.
- Don’t skip cleaning: Dust or corrosion can block the battery’s power.
- Don’t delay testing: Always check the remote works before reinstalling or putting away your tools.
Safety Tips When Handling Batteries
Coin cell batteries are small but powerful. Handle them with care:
- Keep out of reach of children and pets—they can be a choking hazard and toxic if swallowed.
- Dispose of properly: Take used batteries to a recycling center.
- Avoid short-circuiting: Never let batteries touch metal objects like keys or coins in your pocket.
- Check for swelling or leaks: If you see any, discard the battery safely and clean the compartment before installing a new one.
Programming The Remote After Battery Change
Most Chamberlain remotes keep their programming even after a battery swap. However, in rare cases, especially with older models or if the battery was out for a long time, you may need to reprogram.
Typical steps:
- Press the “Learn” button on your garage door opener unit (usually on the back or side).
- Within 30 seconds, press the button on your remote.
- Wait for the light to blink or hear a click, confirming programming.
Consult your Chamberlain manual for exact steps. If you lost your manual, you can find guides online at the Chamberlain website.
When To Replace The Remote Instead Of The Battery
Sometimes, the problem is not the battery but the remote itself. Consider replacing your remote if:
- Buttons are sticky or unresponsive, even after cleaning
- The case is cracked or badly damaged
- The remote only works at very short range, even with a new battery
- The LED light does not glow with a new battery installed
Replacement remotes are available from Chamberlain or major retailers. Always check compatibility with your opener model.

Quick Reference: Battery Change Process
For future reference, here’s a summary you can print or save:
- Identify your Chamberlain remote model.
- Buy the correct replacement battery.
- Open the remote carefully.
- Remove the old battery, noting its orientation.
- Insert the new battery the same way.
- Close the remote securely.
- Test the remote at the garage door.
- Dispose of the old battery responsibly.
How To Know If The Issue Is Not The Battery
Even after replacing the battery, your remote may not work. Here are signs the problem may be somewhere else:
- Wall control works, but remote does not: Try reprogramming the remote.
- Neither remote nor wall control works: Check the opener’s power supply or circuit breaker.
- Multiple remotes fail at the same time: The opener’s receiver may be faulty.
- Remote works only very close to the door: Possible antenna or wiring issue.
For these cases, you may need professional help.
Other Maintenance Tips For Chamberlain Garage Door Openers
Battery replacement is just one part of keeping your garage door opener reliable. Here are a few extra tips:
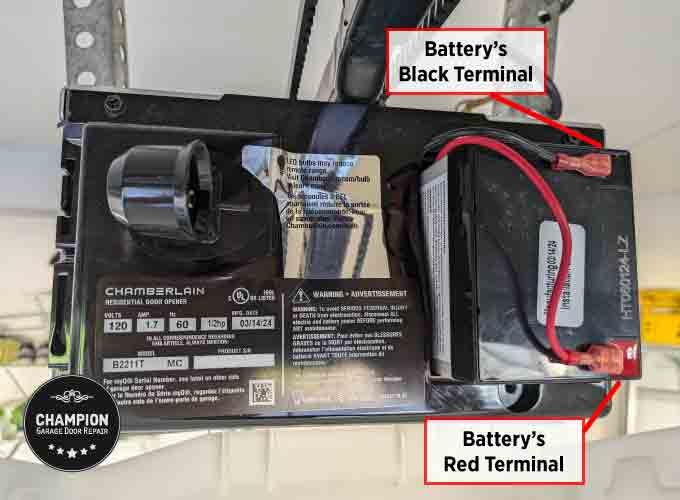
- Check and replace backup batteries in the opener unit (if your model has one).
- Lubricate door tracks and rollers every 6 months.
- Test the safety sensors by waving an object under the closing door; it should reverse.
- Inspect remote and keypad buttons for wear and tear.
Regular maintenance can extend the life of your entire garage door system.
Real-world Example: Battery Change Gone Wrong
Consider the case of a homeowner who changed the battery in their Chamberlain remote, but it still didn’t work. They tried three new batteries with no luck. The problem? A tiny piece of lint was blocking the battery contact. After cleaning with a cotton swab, the remote worked perfectly.
Lesson: Always inspect and clean the battery compartment!

Where To Get More Help
If you’re stuck, Chamberlain offers excellent online support, including manuals and video guides. Professional garage door technicians can also help with stubborn problems or if you’re not comfortable handling electronics.
For official resources, visit the Chamberlain Group Support website.
Comparing Diy Vs Professional Battery Replacement
Should you do it yourself, or call a pro? Here’s a quick comparison:
| DIY Replacement | Professional Service |
|---|---|
| Low cost (just price of battery) | Higher cost (service call fee) |
| Quick (5-10 minutes) | May need to schedule |
| Good for simple battery changes | Best for complex problems |
| Requires basic tools | No tools needed for you |
Most homeowners find DIY battery replacement easy and satisfying. But don’t hesitate to call for help if you’re unsure.
Frequently Asked Questions
How Do I Know Which Battery My Chamberlain Remote Uses?
Check the back of the remote or inside the battery compartment for a model number. Then look it up in your manual or online. Most use CR2032 or CR2016 coin cell batteries, but some keypads use 9V batteries.
Why Won’t My Remote Work Even After A New Battery?
Double-check the battery orientation and contacts for dirt or corrosion. Make sure the battery is brand new and not expired. If the remote still doesn’t work, try reprogramming it or consult your manual.
Do I Need To Reprogram My Chamberlain Remote After Changing The Battery?
Usually, you do not need to reprogram. However, some older remotes may lose their programming if the battery is out for too long. If your remote doesn’t work after a battery swap, follow the programming steps in your manual.
How Often Should I Change The Battery In My Garage Door Remote?
Most experts suggest every 1-2 years for remotes and 2-3 years for keypads, even if the remote is still working. This prevents getting stuck due to a sudden battery failure.
Can I Use Rechargeable Batteries In My Chamberlain Remote?
No, most Chamberlain remotes are designed for disposable coin cell batteries. Rechargeable batteries may not fit or provide the correct voltage. Always use the type specified in your manual.
Changing the battery in your Chamberlain garage door opener is a quick and easy task that saves time and money. With these detailed steps, tips, and troubleshooting advice, you can keep your garage door running smoothly—and avoid being locked out at the worst moment.