Now Reading: How to Change Chamberlain Garage Door Opener Easily and Safely
- 01
How to Change Chamberlain Garage Door Opener Easily and Safely
How to Change Chamberlain Garage Door Opener Easily and Safely

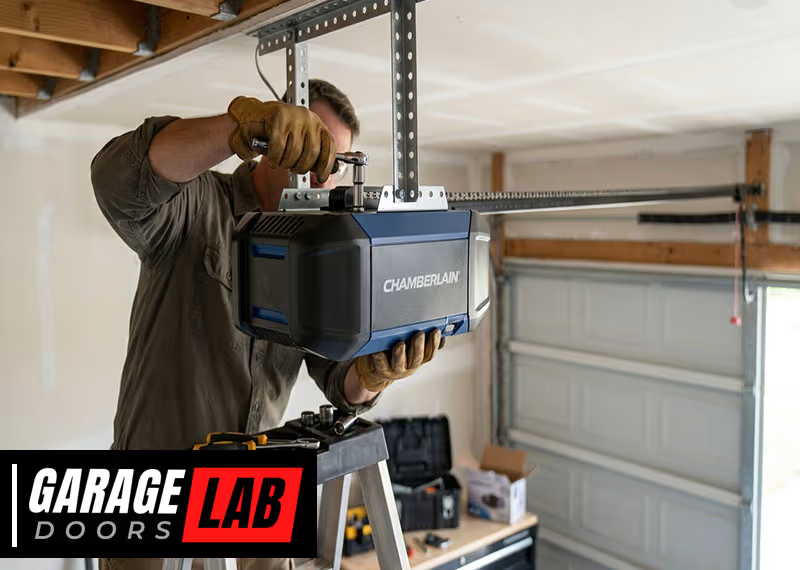
If you own a home, your garage door is probably something you use every day. When it works, you barely notice it. But when your Chamberlain garage door opener stops working, you realize just how important it is. Changing or replacing a Chamberlain garage door opener might seem like a big job, but with the right guidance, it’s a task many homeowners can tackle. This guide will take you through every step, explain important details, and help you avoid common mistakes.
Changing a garage door opener is more than just swapping out the old motor. It involves electrical safety, understanding how your door system works, and making smart choices about new technology. Whether your opener is old, broken, or you want to upgrade to smart features, this guide will help you finish the job confidently.
When Should You Change Your Chamberlain Garage Door Opener?
Many people keep their garage door openers until they completely break down. But waiting too long can lead to bigger problems, like being locked out or stuck inside your garage. Here are key signs that you should consider changing your Chamberlain garage door opener:
- Frequent Malfunctions: If your opener stops working randomly or needs frequent repairs, it’s a sign of deeper issues.
- Old Technology: Openers older than 15 years may lack safety sensors, rolling code security, or smart features.
- Excessive Noise: Grinding, squeaking, or rattling sounds usually mean mechanical parts are worn out.
- Slow or Jerky Movement: The door should move smoothly. If it shudders or hesitates, the opener may be failing.
- Security Risks: Older models are easier for thieves to hack or force open.
Replacing your opener before it completely fails gives you time to plan and choose the best upgrade for your needs.
Essential Tools And Materials
Before you start, gather the tools and materials you’ll need. Having everything ready will save you time and reduce stress during installation.
Required Tools:
- Screwdrivers (flathead and Phillips)
- Adjustable wrench
- Socket set
- Power drill with bits
- Step ladder (at least 6 feet)
- Tape measure
- Pliers
- Wire cutters/strippers
Materials:
- New Chamberlain garage door opener kit (with rail, trolley, sensors, and hardware)
- Mounting brackets (usually included with the kit)
- Safety glasses and gloves
- Light bulbs (if your new opener includes a light socket)
- Electrical tape
Pro tip: Double-check the box contents before starting. Missing parts can delay your project.
Choosing The Right Chamberlain Garage Door Opener
Not all openers are the same. Picking the right model for your home is important for safety, convenience, and long-term performance. Here are some factors to compare:
Drive Type Comparison
Different drive types affect noise, durability, and price. This table compares the main options for Chamberlain openers:
| Drive Type | Noise Level | Best For | Price Range |
|---|---|---|---|
| Chain Drive | Moderate-High | Detached garages, heavy doors | $150–$250 |
| Belt Drive | Low | Attached garages, quiet operation | $200–$350 |
| Screw Drive | Moderate | Simple, low-maintenance needs | $180–$300 |
| Direct Drive | Very Low | Luxury, ultra-quiet needs | $300–$500 |
Important insight: For most homes with bedrooms above the garage, a belt drive is the best mix of quiet and reliability.
Horsepower And Door Size
Choose the right horsepower (HP) for your door:
- 1/2 HP: Standard for single or double aluminum doors.
- 3/4 HP: Needed for heavier, insulated, or wooden doors.
- 1+ HP: For oversized or carriage-style doors.
Common mistake: Underpowered openers wear out quickly and may not lift the door in cold weather.
Must-have Features
Modern Chamberlain openers offer features that improve safety and convenience. Look for:
- MyQ Smart Technology: Lets you control the door with your phone.
- Battery Backup: Door works even during power outages.
- Rolling Code Security: Prevents code grabbing.
- Motion-activated light: Increases safety at night.
- Auto-close timer: Closes the door if you forget.
Extra tip: If you want smart home integration, check compatibility with Alexa, Google Assistant, or Apple HomeKit.
Removing The Old Garage Door Opener
Taking down your old opener is a careful process. Rushing can damage your door or even cause injury.
Step 1: Unplug The Power
Always unplug the opener from the outlet before touching anything. If it’s hardwired, turn off the circuit breaker.
Step 2: Disconnect The Door
Pull the emergency release cord (usually red) to disconnect the opener from the door. This lets you move the door by hand if needed.
Step 3: Remove Accessories
- Take down wall controls and safety sensors.
- Detach the opener’s light bulbs if present.
Step 4: Take Off The Opener
- Use a step ladder to reach the opener unit.
- Support the opener with one hand or a helper.
- Unbolt the unit from the ceiling brackets.
- Lower it carefully.
Step 5: Remove The Rail And Trolley
- Unbolt the rail from the wall above the garage door.
- Slide out the trolley and rail.
- Save any parts that are in good condition; you may be able to reuse some brackets.
Non-obvious insight: Label the wires as you remove them. Use tape and a marker. This helps when wiring the new opener.

Preparing For New Installation
Installing a new opener is smoother if you prepare your workspace and check for obstacles.
Clear The Area
- Move cars, tools, and bikes out of the way.
- Sweep the garage ceiling area for spiderwebs or debris.
Inspect The Door
- Test the garage door by hand. It should open and close smoothly.
- If the door is heavy or sticks, get it serviced before installing the new opener.
Check Power And Wiring
- Inspect the outlet or circuit where the old opener was connected.
- If you see frayed wires or loose connections, fix these before moving on.
Pro tip: Some newer Chamberlain openers require a grounded outlet. Upgrade if needed.
Installing The New Chamberlain Garage Door Opener
The main steps are similar for most Chamberlain models. Always follow the manual for your specific unit, but here’s a detailed walkthrough.
Step 1: Assemble The Rail
- Lay out all rail pieces in order.
- Connect them as shown in the manual; usually, they snap or bolt together.
- Slide the trolley onto the rail before attaching to the motor unit.
Step 2: Attach The Rail To The Opener
- Secure the assembled rail to the opener’s motor unit using the provided bolts.
- Tighten but do not overtighten.
Step 3: Secure The Header Bracket
- Find the center point above the garage door.
- Attach the header bracket to the wall or header beam, using lag screws.
- If there is no wood stud, use wall anchors.
Step 4: Mount The Opener
- Lift the opener and rail assembly onto your ladder or a helper’s shoulder.
- Attach the rail to the header bracket above the door.
- Secure the opener unit to the ceiling brackets. Use the supplied hanging straps or reuse old ones if in good shape.
Safety tip: The opener should be high enough to avoid hitting your car, but low enough for maintenance.
Step 5: Connect The Door Arm
- Attach the curved door arm to the trolley.
- Connect the straight arm to the garage door.
- Bolt the two arms together as shown in your manual.
Step 6: Install The Safety Sensors
- Place the safety sensors on each side of the garage door, about 6 inches above the ground.
- Use the brackets and wire provided.
- Run the wires along the wall to the opener, securing with clips or tape.
Step 7: Wire The Controls
- Connect the wall button (or control panel) to the opener unit.
- Follow the wiring diagram in your manual.
- Use wire nuts or terminal screws as directed.
Step 8: Plug In And Test
- Plug the opener into the outlet.
- Run a test cycle with the door disconnected.
- Watch for any abnormal sounds or movements.
Important detail: If the opener moves the wrong way, reverse the wires on the opener terminals.

Adjusting And Programming The New Opener
Once the opener is installed, you need to program limits, remotes, and safety features.
Setting Open And Close Limits
- Use the limit adjustment screws (usually on the opener unit) to set how far the door opens and closes.
- Turn the screw slightly, then test the door.
- Repeat until the door opens and closes fully without hitting the floor or ceiling.
Adjusting Force Settings
- Most Chamberlain openers have force adjustment dials.
- Start on the lowest setting.
- Increase only if the door won’t move completely. Too much force can be dangerous.
Programming Remote Controls
- Press the “Learn” button on the opener.
- Press the button on your remote control.
- Wait for the light to blink, then test the remote.
Connecting Myq Smart Features
- Download the MyQ app on your phone.
- Follow the instructions to connect the opener to your Wi-Fi network.
- Test opening and closing from your phone.
Non-obvious insight: Many owners skip programming the auto-close timer. This feature can prevent you from accidentally leaving the door open all night.
Final Safety Checks
Never skip safety tests. A poorly adjusted opener can crush objects or fail to stop for children or pets.
Photo Eye Test
- Place a cardboard box in the path of the door.
- Close the door with the remote.
- The door should reverse immediately when the beam is blocked.
Reversal Test
- Close the door on a solid object (like a 2×4 board).
- The door should reverse before applying excessive force.
Manual Release Test
- Pull the emergency release cord.
- Open and close the door by hand. It should move smoothly and stay up halfway.
Important tip: If any safety feature does not work, stop using the opener and fix the issue before regular use.
Common Problems And Troubleshooting
Sometimes, even after a careful installation, things don’t work perfectly. Here are common issues and how to solve them.
Opener Doesn’t Respond
- Check power supply and outlet.
- Make sure the “Lock” feature isn’t enabled on the wall button.
- Re-program remotes if needed.
Door Reverses Before Closing
- Clean the safety sensor lenses.
- Make sure sensors are facing each other and wires are secure.
- Adjust the close-force setting if the door sticks.
Loud Noises
- Tighten all bolts and screws.
- Lubricate the rail and chain/belt.
- Replace any worn rollers on the door.
Poor Wi-fi Connection
- Move your router closer to the garage if possible.
- Use a Wi-Fi extender if the signal is weak.
Maintenance Tips For Longer Life
A new garage door opener is a big investment. With regular care, your Chamberlain opener can last 15–20 years.
- Check Balance: Test the door balance every 6 months. An unbalanced door strains the opener.
- Lubricate Moving Parts: Use garage door lubricant on the rail, hinges, and rollers twice a year.
- Clean Sensors: Wipe photo-eye sensors with a soft cloth monthly.
- Test Safety Features: Run reversal and photo-eye tests every 3 months.
- Replace Batteries: Change remote and keypad batteries every 1–2 years.
Cost And Value Of Changing Your Opener
Many homeowners wonder if changing their opener is worth the cost. Here’s a look at what you can expect.
Typical Costs
| Expense | DIY Cost | Professional Cost |
|---|---|---|
| Chamberlain Opener Kit | $180–$400 | Included |
| Basic Tools | $0–$50 | Included |
| Installation Labor | $0 | $150–$300 |
| Total | $180–$450 | $330–$700 |
DIY is usually 40–60% cheaper than hiring a pro, but only if you’re comfortable with basic tools and ladders.
Value Added
- Better security: Modern openers use strong, encrypted codes.
- More convenience: Smart features let you open/close from anywhere.
- Higher home value: A new opener is a selling point for buyers.
Upgrading: When To Hire A Professional
Some installations are best left to experts. Consider hiring a pro if:
- Your opener is hardwired (no plug).
- The ceiling is very high or hard to reach.
- The garage door is unusually heavy or commercial-grade.
- You have no help lifting the opener.
Hidden danger: A misaligned opener can bend your garage door or break the springs, leading to expensive repairs.
Recycling And Safe Disposal
Don’t throw the old opener in the trash. Most Chamberlain openers contain metal, plastic, and electronics that can be recycled.
- Take the old unit to a local recycling center.
- Remove batteries or light bulbs before disposal.
- Some hardware stores offer recycling for small appliances.
For more on recycling electronics, see the EPA’s guide at EPA Electronics Donation and Recycling.
Real-world Example: What To Expect
Imagine a homeowner with a 20-year-old Chamberlain chain drive opener. It’s noisy, and the remotes are unreliable. She chooses a new belt drive Chamberlain model with MyQ smart features.
- Day 1: She shops online, compares drive types, and orders the opener.
- Day 2: She gathers tools and reads the manual.
- Day 3: She unplugs the old opener, labels wires, and removes the motor and rail.
- Day 4: She installs the new opener, programs the limits, and tests the door.
- Day 5: She connects MyQ to her phone and recycles the old unit.
Total time: About 4–6 hours (spread over two afternoons). Cost: $280 for the opener and $20 for a new step ladder. Now, her garage is quieter, safer, and she can close it from anywhere with her phone.
Frequently Asked Questions
How Long Does It Take To Change A Chamberlain Garage Door Opener?
Most people can change an opener in 4 to 8 hours. If you have experience with tools, it may go faster. If you need to repair the door or wiring, it may take longer.
Can I Reuse My Old Sensors And Rails With A New Chamberlain Opener?
Usually, it’s best to use the new sensors and rails included in your kit. Old rails may not fit, and old sensors may not be compatible with new safety standards.
What If My Garage Door Is Too Heavy For The New Opener?
If your door is heavy or hard to lift by hand, do not install a new opener until the door is serviced. A struggling opener will wear out quickly and can be unsafe.
Is It Safe To Install A Chamberlain Opener Myself?
For most homeowners, DIY installation is safe if you follow the manual and basic electrical safety. However, if you feel unsure, hire a professional.
Will A Smart Chamberlain Opener Work With My Phone?
Most new Chamberlain openers support MyQ smart technology. This lets you control your garage from your smartphone, as long as you have Wi-Fi.
Changing your Chamberlain garage door opener is a smart way to improve your home’s security, safety, and convenience. With careful planning, the right tools, and attention to detail, you can complete this project yourself and enjoy the benefits for years to come.