Now Reading: How To Change Light Bulb On Garage Door Opener: Easy Guide
- 01
How To Change Light Bulb On Garage Door Opener: Easy Guide

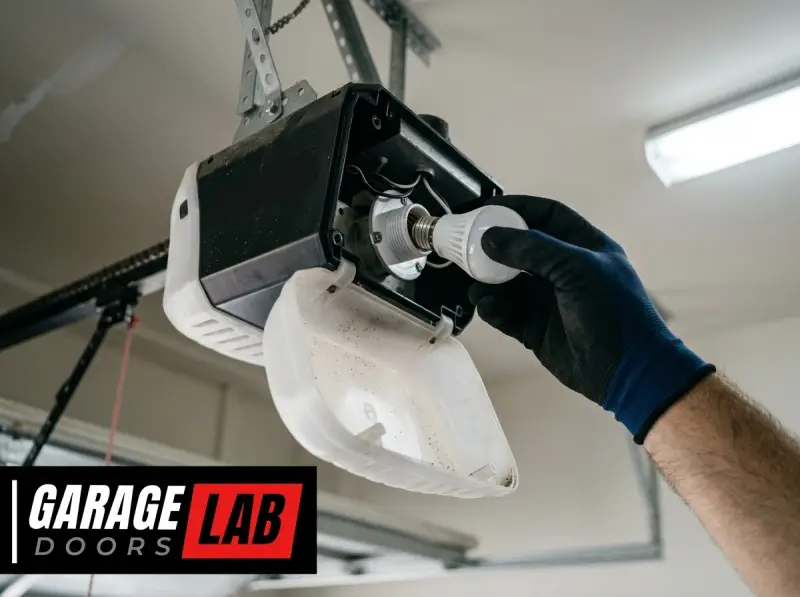
The dim glow of a failing light bulb in your garage door opener can be more than just an annoyance; it can signal a potential safety hazard and leave you fumbling in the dark. Fortunately, replacing this bulb is a straightforward DIY task that most homeowners can accomplish with a few basic tools and a bit of caution.
Understanding the process not only helps you maintain your garage door opener’s functionality but also ensures you can safely access your garage, especially during power outages or early morning/late evening hours.
This guide will walk you through the essential steps of changing the light bulb on your garage door opener, covering everything from identifying the correct bulb type to safely completing the replacement. We’ll discuss common issues, safety precautions, and tips to make the process as smooth as possible, empowering you to handle this common home maintenance task with confidence.
Key Takeaways
- Safety First: Always disconnect power to the garage door opener before attempting to change the light bulb.
- Identify the Bulb: Determine the correct bulb type (incandescent, LED, wattage, base type) by checking the opener’s manual or the existing bulb.
- Gather Tools: You’ll typically need a ladder, a new bulb, and potentially a screwdriver or pliers.
- Access the Bulb: Most openers have a lens or cover that needs to be removed to access the bulb socket.
- Replacement Process: Carefully unscrew the old bulb and screw in the new one, ensuring it’s snug but not overtightened.
- Test: Restore power and test the new bulb to ensure it works correctly.
- Troubleshooting: Address common issues like flickering bulbs or bulbs not turning on.

Credit: garagedoorguide.com
Understanding Your Garage Door Opener’s Lighting System
Garage door openers typically feature a built-in light to illuminate your garage when the door is activated or when you manually operate the opener. This light serves a dual purpose: convenience and safety. It helps you see what you’re doing when entering or exiting your garage in low-light conditions and can act as a deterrent to potential intruders. Over time, these bulbs burn out, much like any other light source, necessitating a replacement.
Types Of Bulbs Used In Garage Door Openers
The type of bulb used in your garage door opener can vary significantly depending on the model and manufacturer. Historically, most openers used standard incandescent bulbs. These are readily available and inexpensive but have a shorter lifespan and consume more energy. Modern openers, or those that have been updated, may utilize LED bulbs. LEDs are more energy-efficient, last significantly longer, and are available in various brightness levels and color temperatures.
When selecting a replacement bulb, it’s crucial to consider the following:
- Wattage: Most openers have a maximum wattage limit to prevent overheating and potential damage to the unit. Exceeding this limit is a significant safety risk. Always check the opener’s manual or any labels on the unit itself for the maximum recommended wattage. For incandescent bulbs, this is often around 60-100 watts.
- Base Type: The most common base type is the E26 (medium screw base), which is standard for most household bulbs in North America. However, some specialized openers might use different bases.
- Bulb Type (Incandescent vs. LED): While incandescent bulbs are common, many manufacturers now recommend or even require the use of LED bulbs specifically designed for garage door openers. These LEDs are often designed to overcome interference issues that can sometimes occur with standard LEDs and garage door opener radio frequencies. They also tend to be more durable.
- Specialty Bulbs: Some newer garage door openers feature integrated LED lights that are not designed to be replaced by the user. In such cases, if the light fails, the entire opener unit or the light module may need professional attention or replacement.
Why Bulbs Burn Out
Like any filament-based light bulb, incandescent bulbs burn out due to the evaporation of the tungsten filament over time. Electrical current heats the filament, causing it to glow. With repeated use, small amounts of filament material are deposited on the inside of the bulb, gradually thinning the filament until it eventually breaks.
Vibrations from the garage door’s operation can also contribute to the premature failure of incandescent bulbs by stressing the delicate filament. Power surges can also cause a bulb to fail instantly.
LED bulbs, on the other hand, do not have a filament and are far more durable. They typically fail due to the degradation of the electronic components within the bulb or the heat generated over extended periods, but their lifespan is measured in tens of thousands of hours, far exceeding that of incandescent bulbs.

Credit: www.youtube.com
Safety Precautions Before You Begin
Working with electrical appliances, even a simple light bulb replacement, requires adherence to safety protocols to prevent injury. The primary concern is electrical shock. Garage door openers are connected to your home’s electrical system, and while the voltage is typically standard household voltage (120V in North America), it’s still capable of causing harm.
Disconnecting Power
The most critical safety step is to disconnect the power to the garage door opener before attempting any work on it. There are two primary ways to do this:
- Unplug the Opener: Most garage door openers are plugged into a ceiling outlet. Locate the power cord and unplug it directly from the outlet. This is the simplest and most effective method.
- Turn Off the Circuit Breaker: If you cannot easily reach the outlet or prefer to be extra cautious, you can turn off the corresponding circuit breaker in your home’s electrical panel. Identify the breaker that controls your garage door opener (it might be labeled “Garage Door,” “Garage Lights,” or a general “Garage” circuit) and flip it to the “OFF” position.
Other Safety Considerations
- Stable Ladder: Use a sturdy, stable ladder that is appropriate for the height of your garage door opener. Ensure it is placed on a level surface and that you maintain three points of contact (two feet and one hand, or two hands and one foot) while climbing and working.
- Eye Protection: While not always necessary for a simple bulb change, wearing safety glasses can protect your eyes from any dust or debris that might fall from the opener unit.
- Cool Bulb: If the light has been on recently, allow the bulb to cool down completely before attempting to remove it. A hot bulb can cause burns.
- Avoid Over-Tightening: When installing the new bulb, screw it in until it is snug, but do not overtighten. Overtightening can crack the bulb or damage the socket.
- Check the Manual: Always refer to your specific garage door opener’s user manual for any model-specific safety instructions or warnings.
Step-by-step Guide To Changing The Light Bulb
Replacing a garage door opener light bulb is a relatively simple process. Follow these steps carefully to ensure a safe and successful replacement.
Step 1: Identify The Correct Replacement Bulb
Before you even reach for a ladder, you need to know what kind of bulb to buy.
- Check the Opener Manual: Your garage door opener’s manual is the best source of information. It will specify the maximum wattage, bulb type (incandescent, LED), and base type.
- Examine the Existing Bulb: If the manual is unavailable, carefully remove the old bulb (after disconnecting power and allowing it to cool) and read the specifications printed on it. Note the wattage, shape, and base type.
- Look for Labels on the Opener: Some openers have labels near the light socket that indicate the maximum wattage or recommended bulb type.
- Consider LED Replacements: If your opener uses an incandescent bulb and is compatible with LEDs, consider switching to an LED bulb. This will offer longer life and energy savings. Ensure the LED bulb is designed for garage door openers if specified by the manufacturer, as some standard LEDs can interfere with opener frequencies.
Step 2: Gather Your Tools And Supplies
You likely won’t need many tools, but having them ready will streamline the process.
- New Light Bulb: The correct replacement bulb identified in Step 1.
- Sturdy Ladder: To safely reach the opener unit.
- Safety Glasses (Optional): For eye protection.
- Clean Cloth or Paper Towel: To handle the new bulb (especially halogen bulbs, where oils from your skin can shorten their life, though this is less of a concern for standard garage door opener bulbs).
- Screwdriver or Pliers (Potentially): Some opener models may have a cover held in place by screws, or a cover that requires gentle prying.
Step 3: Disconnect Power
As emphasized in the safety section, this is the most important step.
- Unplug the garage door opener from the electrical outlet.
- Alternatively, turn off the corresponding circuit breaker at your home’s electrical panel.
Step 4: Access The Light Bulb
Most garage door openers have a protective lens or cover over the light bulb.
- Remove the Lens/Cover: This cover is usually made of plastic and is attached to the main housing of the opener. It might:
- Snap off: Gently pull down on the edges of the cover.
- Slide off: Some covers slide upwards or sideways.
- Be held by screws: Look for small screws, typically Phillips head, around the perimeter of the cover. Use the appropriate screwdriver to remove them. Keep the screws in a safe place.
- Locate the Bulb Socket: Once the cover is removed, you will see the light bulb screwed into a socket.
Step 5: Remove The Old Bulb
- Allow to Cool: Ensure the bulb is completely cool to the touch.
- Unscrew the Bulb: Grip the bulb firmly but gently and turn it counter-clockwise. If the bulb is stuck, try using a rubber glove or a rubber band to get a better grip. Do not force it, as you could break the glass. If it’s extremely stubborn, you might need to use a specialized bulb remover tool, but this is rarely necessary for garage door opener bulbs.
Step 6: Install The New Bulb
- Handle with Care: If you are installing an LED bulb, handle it by the base. If it’s an incandescent, handle it by the glass, avoiding touching the glass with bare fingers if it’s a halogen bulb.
- Screw in the New Bulb: Align the base of the new bulb with the socket and turn it clockwise. Screw it in until it feels snug. Do not overtighten, as this can damage the bulb or socket.
Step 7: Replace The Lens/cover
- If you removed screws, reattach the cover using the screws.
- If the cover snaps or slides into place, ensure it is securely fastened.
Step 8: Restore Power And Test
- Plug the garage door opener back into the electrical outlet, or turn the circuit breaker back on.
- Press the button on your remote control or the wall-mounted button to operate the garage door. The new light bulb should illuminate as the door moves or when the opener is activated.

Credit: www.youtube.com
Troubleshooting Common Garage Door Opener Light Issues
Even after replacing the bulb, you might encounter problems. Here are some common issues and their potential solutions:
The New Bulb Doesn’t Turn On
- Power is Not Restored: Double-check that the opener is plugged in or the circuit breaker is on.
- Incorrect Bulb: Ensure you used the correct type and wattage bulb as specified by the manufacturer. An LED bulb might not be compatible with older openers.
- Faulty Bulb: The new bulb itself could be defective. Try testing it in another lamp or replacing it with a different bulb.
- Loose Bulb: The bulb may not be screwed in tightly enough. Turn off the power again, and gently try to tighten the bulb a bit more.
- Damaged Socket: The socket might be damaged or corroded. Inspect it for any visible signs of damage. If you see corrosion, you can try carefully cleaning it with a small brush or contact cleaner (with power off).
- Opener Malfunction: The issue might not be the bulb but a problem with the opener’s internal wiring or logic board.
The Light Flickers
- Loose Bulb: A flickering light is often a sign of a loose connection. Turn off power and ensure the bulb is snug.
- Incompatible LED: If you’ve switched to an LED, it might be incompatible with your opener, causing flickering. Try a different brand or type of LED, or revert to an incandescent bulb. Some garage door opener LEDs are specifically designed to prevent radio frequency interference and flickering.
- Power Fluctuations: Inconsistent power supply can cause flickering. This is less common but could be related to your home’s electrical system.
- Faulty Bulb: Even new bulbs can be faulty. Try a different bulb.
The Light Stays On Constantly
- Opener Setting: Some openers have settings that allow the light to stay on for a specific duration (e.g., 1.5, 3, 5 minutes) or even indefinitely. Check your opener’s manual for instructions on how to adjust or disable this feature.
- Stuck Remote/Button: A remote control or wall button might be stuck, sending a continuous signal to the opener. Check your remotes for stuck buttons and ensure the wall button isn’t physically jammed.
- Internal Opener Issue: This could indicate a problem with the opener’s logic board.
Bulb Burns Out Frequently
- Exceeding Wattage Limit: You might be using a bulb with a wattage higher than the opener is designed for. This can cause the bulb to overheat and burn out prematurely, and it’s a fire hazard. Always adhere to the manufacturer’s maximum wattage recommendation.
- Vibrations: Excessive vibration from the opener or the garage door mechanism can shorten the life of incandescent bulbs. Consider using vibration-resistant bulbs or switching to LEDs, which are much more durable. You might also want to check if your garage door needs lubrication for smooth operation, as excessive friction can lead to more vibrations. You can learn more about this in our guide on How to Lube Garage Door Rollers for Smooth, Quiet Operation.
- Power Surges: While less common, power surges can damage bulbs. Using a surge protector for your garage door opener, if feasible, might help.
- Using Incorrect Bulb Type: Some standard LEDs can generate heat differently or emit frequencies that interfere with the opener’s electronics, potentially leading to premature failure.
Advanced Considerations And Alternatives
While replacing the bulb is usually straightforward, there are a few advanced points and alternatives to consider for your garage door opener’s lighting.
Led Compatibility And Interference
As mentioned, not all LED bulbs are created equal, especially when it comes to garage door openers. Standard household LEDs can sometimes emit radio frequencies that interfere with the signals between your opener’s motor unit and its remote control or external keypad.
This can lead to the remote not working or having a reduced range.
Many garage door opener manufacturers now offer specialized LED bulbs designed to avoid these interference issues. These bulbs are often advertised as “garage door opener LED compatible” or “non-interfering.” They are typically a bit more expensive than standard LEDs but offer a more reliable solution.
If you’re experiencing remote control issues after switching to an LED, try:
- Reverting to an Incandescent Bulb: If the remote works fine with an incandescent bulb, the LED was likely the cause of interference.
- Trying a Different Brand/Model of LED: Look for bulbs specifically marketed for garage door openers.
- Checking the Opener Manufacturer’s Recommendations: Some manufacturers have a list of approved bulbs for their models.
Opener Models With Integrated Led Lighting
Some modern garage door opener systems, particularly higher-end models, feature integrated LED lighting that is part of the main unit and not a replaceable bulb. These LEDs are designed to last for the lifetime of the opener and often offer features like brighter illumination, longer on-times, and even motion sensors.
If the integrated light on such a unit fails, it’s usually not a simple bulb replacement. You may need to:
- Consult the Manual: Check if there’s a specific troubleshooting procedure for the integrated light.
- Contact the Manufacturer: The manufacturer might offer replacement light modules or specific repair instructions.
- Professional Repair: In many cases, a failed integrated LED light might require professional service or even replacement of the entire opener unit, which can be a significant cost. This is a good time to consider the overall cost of a new opener versus repair, as detailed in our guide on How Much for a Garage Door: Costs, Factors, and Savings Tips.
Using A Different Type Of Bulb For Specific Needs
- Lower Wattage: If you find the bulb too bright for your preference or are concerned about energy use, you can opt for a lower wattage bulb, as long as it doesn’t fall below the minimum required for the opener to function correctly (though minimums are rare).
- Color Temperature: Incandescent bulbs typically produce a warm, yellowish light. LEDs are available in a range of color temperatures, from warm white to cool daylight. A cooler white light might make your garage feel brighter and more modern.
When To Call A Professional
While changing a light bulb is a DIY task, there are times when you should call a professional garage door technician:
- If the opener doesn’t work at all after changing the bulb: This suggests a more significant electrical issue.
- If you suspect wiring problems: Any signs of damaged wires, burning smells, or sparks should be addressed by a professional immediately.
- If the bulb socket is damaged: If the socket is cracked, corroded, or loose, it’s best to have it inspected and repaired by an expert.
- If you are uncomfortable with any part of the process: Safety is paramount. If you feel unsure or unsafe, it’s always better to call a professional.
Example: Replacing A Liftmaster Garage Door Opener Bulb
Let’s walk through a common scenario: replacing the bulb in a LiftMaster garage door opener. LiftMaster models, like the popular 1/2 HP series, often have a removable lens that covers the light bulb.
- Identify the Opener Model: Locate the model number on your LiftMaster opener (usually on a sticker on the motor unit). Consult its manual for specific bulb recommendations (e.g., max 100W incandescent or compatible LED).
- Disconnect Power: Unplug the opener from the ceiling outlet.
- Access the Light: On many LiftMaster models, the light cover is a plastic shield. You might need to gently pull down on the sides or front to release clips holding it in place. Some older models might have small screws.
- Remove Old Bulb: Once the cover is off, unscrew the old bulb counter-clockwise.
- Install New Bulb: Screw in the new, compatible bulb clockwise until snug. Ensure it’s the correct wattage and type. If using an LED, consider a LiftMaster-branded or recommended compatible LED to avoid interference issues.
- Replace Cover: Snap or screw the light cover back into place.
- Restore Power and Test: Plug the opener back in and test the light with the garage door opener remote.
For models where the remote control range is reduced after switching to an LED, LiftMaster often recommends their specific “Smart Light” LED bulbs, which are designed to prevent radio frequency interference. If you’re having trouble with your remote, you might also need to reset your LiftMaster garage door opener remote.
Comparison Of Bulb Types For Garage Door Openers
Choosing the right bulb type can impact longevity, energy consumption, and even the performance of your garage door opener’s remote. Here’s a comparison:
| Feature | Incandescent Bulbs | Standard LED Bulbs | Garage Door Opener Specific LED Bulbs |
|---|---|---|---|
| Lifespan | Short (approx. 1,000-2,000 hours) | Long (approx. 15,000-50,000 hours) | Very Long (approx. 25,000+ hours) |
| Energy Consumption | High | Low | Low |
| Heat Output | High | Low | Very Low |
| Vibration Resistance | Low | High | High |
| Initial Cost | Low | Moderate | Higher |
| Risk of Remote Interference | None | Moderate to High | Very Low to None |
| Availability | Very High | Very High | Moderate (specialty stores, online) |