Now Reading: How to Pair Genie Garage Door Opener: Easy Step-by-Step Guide
- 01
How to Pair Genie Garage Door Opener: Easy Step-by-Step Guide
How to Pair Genie Garage Door Opener: Easy Step-by-Step Guide
Pairing a Genie garage door opener can seem confusing if you’ve never done it before. Many people worry about pressing the wrong button or fear they’ll accidentally erase important settings. The truth is, Genie has made the process much simpler than it was years ago. Whether you’re pairing a new remote, connecting a wall console, or syncing your opener with your car’s HomeLink system, you can do it safely and confidently if you follow the right steps.
This article will walk you through everything you need to know about pairing your Genie garage door opener. You’ll learn how the system works, which tools you need, and how to avoid common mistakes that lead to wasted time and frustration.
You’ll also find clear steps for different Genie models, tips for troubleshooting, and some extra details that many guides skip. By the end, you’ll be able to handle both basic and advanced pairing tasks—no need for expensive technician visits.
Understanding Genie Garage Door Openers
Before starting, it helps to know what makes Genie openers different from other brands. Genie is known for its security features, easy programming, and compatibility with smart home systems. Most Genie openers use Intellicode technology, which changes the remote code every time you use it. This prevents others from copying your signal—a simple but effective security boost.
Genie models fall into a few main categories:
- Chain drive openers: Durable, often used in heavier garage doors.
- Belt drive openers: Quieter, ideal for attached garages.
- Screw drive openers: Require less maintenance, but are sensitive to temperature changes.
- Smart openers: Can connect to Wi-Fi and smart home apps.
Pairing methods are similar for all, but the exact buttons and indicators may look a little different. Always have your manual nearby for reference.
Tools And Preparation
You don’t need a box of tools, but a few things will make the job easier:
- A sturdy ladder for reaching the opener.
- A clean Genie remote (new battery is a plus).
- Your garage door opener manual.
- If pairing with a car, your vehicle’s manual.
- A smartphone if you’re setting up a smart model.
Clear the area around your garage door. Make sure the opener is plugged in and the door moves smoothly by hand. This prevents accidental jams or sensor issues during programming.
Safety First
Garage doors are heavy and powerful. Always:
- Keep children and pets clear of the area.
- Work with the door closed unless the manual says otherwise.
- Never stand directly under a moving door.
- Unplug the opener if you need to check wiring.
If you feel unsure at any point, stop and consult a professional. Safety should always come before speed.
How Genie Pairing Works
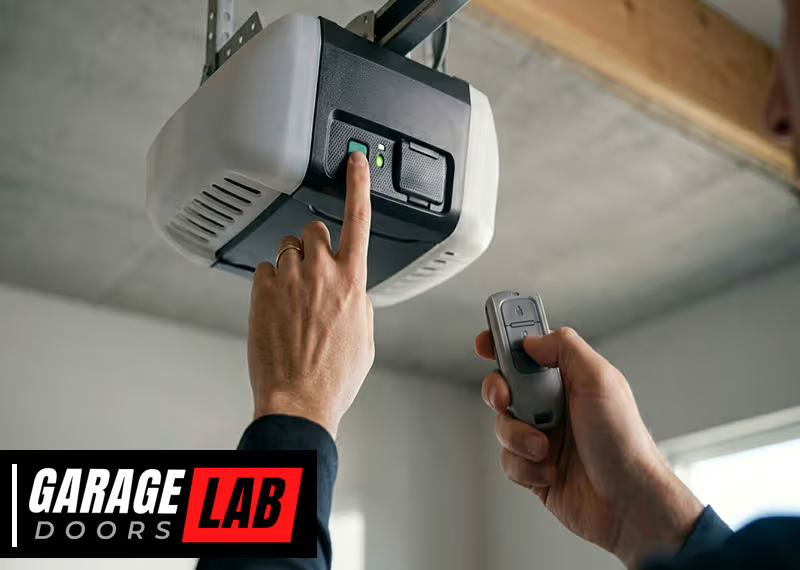
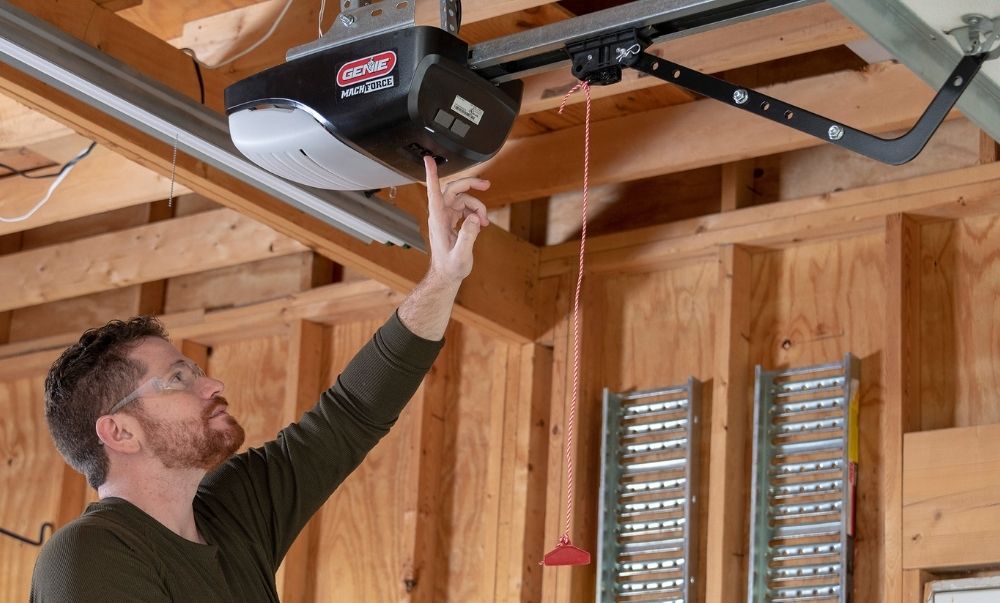
Genie openers use a “Learn” button to start pairing. This button puts the opener into a listening mode, ready to receive a new remote code or device. You press the Learn button, then send a signal from your remote or wall console. The opener flashes a light or makes a sound to confirm successful pairing.
Here’s a quick look at where you’ll usually find the Learn button:
- On the opener unit: Often under a light cover, near the antenna wire.
- Color-coded: May be black, red, purple, or yellow, depending on the model.
Some smart Genie models use a mobile app and Wi-Fi instead of a physical Learn button. Check your manual for details.
Step-by-step: Pairing A Genie Remote
Let’s get into the core process: syncing a Genie remote with your garage door opener. The steps below work for most Genie models from the past 20 years.
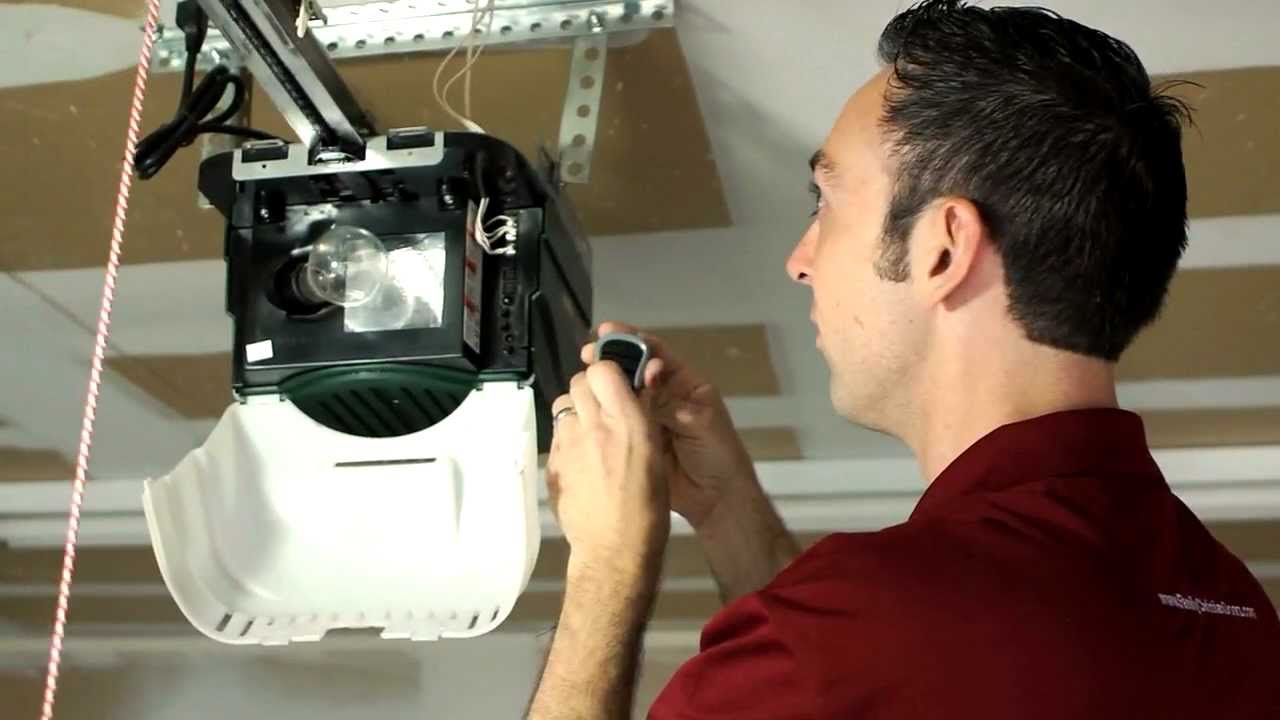
- Locate the Learn Button
- Use your ladder to reach the opener unit.
- Look for the Learn button. It may be labeled “Learn,” “Program,” or just show a small LED light.
- Prepare the Remote
- Make sure your Genie remote has a fresh battery.
- Stand within 5 feet of the opener for best signal.
- Enter Programming Mode
- Press and release the Learn button. An LED light will blink or stay on, depending on your model. This means the opener is ready.
- Sync the Remote
- Within 30 seconds, press the button on the remote you want to pair.
- Hold for a few seconds, then release.
- Confirm Success
- The opener’s light blinks, or you hear two clicks/beeps.
- Test the remote by pressing the button—your door should move.
If the remote doesn’t work, repeat the process. Sometimes, interference or a weak battery can cause failed pairing.
Pairing A Genie Wall Console Or Keypad
Genie wall consoles are the inside wall buttons that open the garage. Wireless keypads mount outside, letting you open the door with a PIN. The pairing is similar but has a few differences.
Wall Console
Most wired wall consoles don’t need “pairing”—they connect directly to the opener with wires. But newer wireless wall consoles follow these steps:
- Press the Learn button on the opener.
- On the wall console, press and hold the main button until the opener light blinks.
- Release and test.
Wireless Keypad
- Press the Learn button on the opener (usually once, quick tap).
- Within 30 seconds, enter your chosen PIN on the keypad.
- Press the “Up/Down” key (often the big center button) until the opener light blinks.
- Test the keypad by entering your PIN and pressing the key again.
Non-obvious tip: If your keypad is not pairing, check the battery compartment. Many Genie keypads have a small reset button inside—press it before starting the pairing process.
Pairing Genie Openers With Homelink (car Integration)
Many cars have HomeLink buttons built into the visor or dash. These can replace your remote, but pairing is a bit different. Here’s how to connect Genie openers with HomeLink:
- Turn the car ignition to “On,” but do not start the engine.
- Hold your remote 1–3 inches from the HomeLink button you want to program.
- Press and hold both the HomeLink button and the Genie remote button at the same time.
- Hold until the HomeLink indicator flashes slowly, then quickly.
- Return to the opener. Press the Learn button once.
- Within 30 seconds, press the HomeLink button in your car for 2 seconds, then release. Repeat this 2-3 times.
If the door moves, it’s paired. Some vehicles require you to repeat the process or use a “training” button. Always check your car’s manual if you run into issues.
Non-obvious insight: If your HomeLink won’t pair, clear its memory by holding the two outer buttons for 20 seconds. This often solves stubborn problems with older cars.
Pairing Genie Openers With Smart Home Systems
New Genie models can work with apps like Aladdin Connect, Alexa, and Google Assistant. The steps are more digital but follow the same idea: put the opener in pairing mode, then connect using your phone.
- Download your Genie-compatible app (e.g., Aladdin Connect).
- Create an account and log in.
- Choose “Add Device” in the app.
- Press and hold the Wi-Fi button on your opener until the LED flashes.
- Follow the app instructions to connect to Wi-Fi and name your garage.
This connection allows you to open or close your garage door from anywhere, set schedules, and get alerts if the door is left open.
Tip: Place your Wi-Fi router close to the garage for a stronger signal. Weak Wi-Fi is a common cause of failed pairing.
What To Do If Pairing Fails
Even if you follow instructions carefully, pairing sometimes fails. Here are the main reasons and how to fix them:
- Remote battery is weak or dead. Always use a new battery.
- Too far from the opener. Stand as close as possible during pairing.
- Interference from LED lights or other electronics. Try turning off nearby devices.
- Too many paired devices. Most Genie openers can store 7–10 remotes. If full, erase all remotes (hold the Learn button for 10 seconds) and start over.
- Obsolete remote or keypad. Check your device is compatible with your opener’s Intellicode version.
If nothing works, unplug the opener for 60 seconds and try again. This “resets” most electronic glitches.
Comparing Genie Pairing Methods
Some homeowners wonder if they should use a remote, keypad, or smart system. Here’s a quick comparison to help you choose:
| Pairing Method | Ease of Setup | Security Level | Best For |
|---|---|---|---|
| Remote Control | Very Easy | Good | Everyday Use |
| Wireless Keypad | Easy | Very Good (PIN) | Family/Guests |
| Wall Console | Easy (wired) | Good | Garage Entry |
| Smart Home App | Medium (Wi-Fi required) | Excellent | Remote Monitoring |
| HomeLink (Car) | Medium | Good | Car Integration |
As you can see, each method has its strengths. For most people, a remote and a keypad are enough. Smart integration is worth it if you travel often or want extra security.
Specific Steps For Popular Genie Models
Genie has released many opener models over the years. Some have unique pairing steps. Here are details for common models:
Genie Silentmax, Chainmax, And Powermax
- Learn button: Under the light cover, usually black or purple.
- Remote pairing: Same as standard steps—press Learn, then remote.
- Keypad pairing: After pressing Learn, enter your PIN, then press the Up/Down key 3–4 times.
Genie Aladdin Connect (smart Openers)
- Wi-Fi pairing button: Often next to the antenna.
- App setup: Use the app instructions, as above.
- LED indicators: Blue for ready, green for connected.
Genie Excelerator
- Learn button: Usually red.
- Pairing time: You have only 30 seconds to press the remote after Learn.
- Resetting: Hold Learn for 10 seconds to erase all devices.
Older Genie Models (1990s–early 2000s)
- No Intellicode: Fixed code remotes may need DIP switches set to match the opener.
- Pairing: Set the remote switches to the same ON/OFF pattern as the opener’s receiver.
Non-obvious insight: If you still use a DIP switch opener, consider upgrading. Fixed codes are less secure and easier to hack than Intellicode models.
How To Erase Paired Devices
Sometimes you need to erase all remotes or keypads—for example, if you lose a remote or move to a new home.
- Press and hold the Learn button on the opener for about 10 seconds.
- The indicator light will turn off, then back on.
- All paired devices are now erased. Re-pair only the devices you want to keep.
This simple reset is often missed by beginners and can solve many “mystery” garage door issues.
Setting Temporary Pins For Guests
Genie keypads allow you to set a temporary PIN for visitors or deliveries. This is safer than giving out your main code.
- Enter your main PIN, then press the Program button (often a small button on the keypad).
- Enter a new temporary PIN, then press the Up/Down key.
- The opener will blink to confirm.
- The temporary PIN usually works for 1–5 uses or a set time (check your model).
This feature keeps your main code private and is great for Airbnb hosts or house sitters.
Advanced: Pairing Multiple Doors And Devices
If you have more than one garage door or want to pair several remotes/keypads, Genie makes it easy:
- Most Genie remotes have 2–3 buttons. Each can control a different door.
- Pair each button to a different opener by repeating the pairing process for each door.
- Keypads can be set to open multiple doors using different PINs (check your model’s manual).
Tip: Label each remote or button with a sticker. When you have several doors, it’s easy to forget which button does what.
Genie Opener Security Features
Pairing isn’t just about convenience—it’s also about security. Genie openers use rolling code technology (Intellicode) to protect against hacking. Each time you use the remote, the code changes. This prevents “code grabbers” from copying your signal.
Some models include a vacation lock feature on the wall console. This disables all remotes while you’re away, adding another layer of security. Always activate vacation lock before long trips.
Troubleshooting Common Issues
Here are quick fixes for the most frequent Genie pairing problems:
- Remote works up close but not far away: Replace the battery or check for interference.
- Keypad won’t pair: Confirm it’s the right model and reset it.
- HomeLink won’t learn: Clear HomeLink memory and try again.
- Opener flashes but doesn’t move the door: Check safety sensors and door tracks.
If your opener still refuses to pair, check for firmware updates on the Genie website. Some smart models require an update before pairing with certain remotes or apps.
Genie Vs. Other Brands: Pairing Process
How does Genie compare with other popular garage door opener brands like Chamberlain or LiftMaster?
| Brand | Main Pairing Method | Max Remotes Supported | Smart Features | Ease for Beginners |
|---|---|---|---|---|
| Genie | Learn Button | 7–10 | Yes (Aladdin Connect) | Easy |
| Chamberlain/LiftMaster | Learn Button (Color-Coded) | 8–12 | Yes (myQ) | Medium |
| Craftsman | Learn Button | 7–10 | Some Models | Medium |
| Linear | DIP Switch/Smart | 8–10 | Limited | Medium |
Genie’s pairing process is one of the simplest, especially for beginners. The clear Learn button system and easy-to-read manuals make it hard to go wrong.
Maintenance Tips After Pairing
Once your Genie opener is paired and working, keep it in top shape:
- Check remote and keypad batteries every 6–12 months.
- Wipe remotes and keypads clean—dirt can block signals.
- Test the safety sensors (auto-reverse) monthly.
- Lubricate door tracks twice a year.
- Update smart system firmware when prompted.
These small tasks prevent most common garage door opener problems and extend the life of your equipment.
Genie Opener Accessories That Enhance Pairing
You can expand your Genie system with accessories for even more convenience:
- Genie Universal Remote: Controls multiple brands and doors.
- Wireless wall console: Pairs just like a keypad for more locations.
- Aladdin Connect kit: Adds smart features to non-smart Genie openers.
- Garage door monitor: Alerts you if the door is left open.
Each accessory uses the same simple pairing method, making upgrades easy.
Real-world Example: Pairing A Genie Opener After Moving
Imagine you’ve just bought a home with an existing Genie opener. The remotes are missing, and you want to ensure no old remotes work.
- Hold the Learn button for 10 seconds to erase all paired remotes.
- Pair your new Genie remote using the steps above.
- Add a wireless keypad if needed.
- Test everything and set a new PIN.
This process keeps your garage secure and ensures only your devices can control the door.
Common Mistakes To Avoid
Many pairing problems come from simple errors:
- Pressing the Learn button too long (erases all devices).
- Waiting too long between steps (the opener times out).
- Using an old or incompatible remote.
- Overlooking low batteries.
- Trying to pair in freezing or very hot weather (affects electronics).
Take your time, follow the order, and check your model for differences. Most issues are easy to fix with a careful approach.
Genie Support And Resources
If you’re stuck, Genie offers detailed support through:
- The official Genie website’s support section
- Instructional videos on YouTube
- Customer service phone and chat
You can find more technical details and model-specific guides at the official Genie Support Center.
Frequently Asked Questions
How Many Remotes Can I Pair With My Genie Garage Door Opener?
Most modern Genie openers support up to 7–10 remotes or keypads at once. Some older models support fewer devices. If you reach the limit, you’ll need to erase all remotes and start over.
Why Won’t My Genie Remote Pair With The Opener?
The most common reasons are a dead battery, being too far from the unit during pairing, or using an incompatible remote. Try a fresh battery, stand close, and check that your remote matches the opener’s Intellicode version.
Can I Pair My Genie Opener With My Smartphone?
Yes. Genie’s Aladdin Connect and some newer openers allow you to control your garage with your phone. Download the app, follow the pairing instructions, and connect to Wi-Fi for remote access.
How Do I Clear All Paired Remotes And Keypads?
Hold the Learn button on your opener for 10 seconds. The indicator will turn off and back on. All remotes and keypads are now erased—you’ll need to re-pair the devices you want.
Is Pairing Different For Genie Openers Made Before 1997?
Yes. Older Genie models use DIP switches for pairing instead of Intellicode. Match the remote’s switches to the opener’s receiver. These systems are less secure; consider upgrading for better safety.
Pairing your Genie garage door opener is much simpler than it seems. With the right steps, a little patience, and attention to detail, you can connect remotes, keypads, cars, and smart devices without stress. Genie’s design puts safety and convenience first, so you can enjoy secure, reliable garage access for years to come.