Now Reading: How to Reprogram Homelink Garage Door Opener in Minutes
- 01
How to Reprogram Homelink Garage Door Opener in Minutes
Getting locked out of your garage can be frustrating, especially when your Homelink garage door opener suddenly stops working. Maybe you bought a new car, replaced your garage door opener, or simply lost your remote. The good news: you don’t need to be a tech wizard to fix it. Reprogramming your Homelink system is straightforward once you know the steps, but missing a detail can keep you stuck outside. With the right guidance, you can reconnect Homelink to your garage door opener in less than 30 minutes, saving money on service calls and regaining control over your garage access.
This guide walks you through everything: understanding Homelink, preparing for programming, step-by-step instructions for all major brands, troubleshooting, and answers to common questions. You’ll find tables comparing Homelink generations, quick reference charts for error codes, and practical tips you won’t see in your car’s manual. Let’s make sure you never get locked out again.
What Is Homelink? A Quick Overview
Homelink is a wireless control system built into many cars, allowing you to open garage doors, gates, and even home lighting with just a button. It replaces traditional remote controls, making life simpler and your car less cluttered.
Homelink’s popularity comes from its convenience. Instead of carrying separate remotes, you press a button inside your car’s interior—often on the sun visor, ceiling, or rearview mirror. Most modern cars from brands like Toyota, Ford, Honda, BMW, and others now include Homelink as a standard or optional feature.
How Homelink Works
Homelink uses radio frequency (RF) signals to communicate with your garage door opener. Once programmed, it sends the same signal as your original remote. Some newer systems use rolling codes for better security, so the signal changes each time you use it. Homelink supports both fixed and rolling code openers, but setup can differ slightly.
Why Reprogram Homelink?
There are several reasons you might need to reprogram:
- You bought a new car or moved homes.
- The garage door opener was replaced or upgraded.
- You lost your original remote.
- The system stopped working after a battery change or power outage.
- Security reasons (e.g., someone else has a remote).
Knowing how to reset and reprogram Homelink gives you flexibility and peace of mind.
Homelink Generations: What’s In Your Car?
Not all Homelink systems are the same. Over the years, Homelink has released several versions, each with different features and compatibility. Understanding your version helps avoid frustration during programming.
| Homelink Generation | Years | Main Features | Compatible Openers |
|---|---|---|---|
| Gen 1 | 1997–2001 | Fixed codes, basic RF | Older openers only |
| Gen 2 | 2002–2012 | Rolling codes, better range | Most openers, rolling code support |
| Gen 3 | 2013–present | Expanded compatibility, faster programming | All major brands, smart home support |
Tip: Check your vehicle’s manual or the Homelink website to confirm your generation if you’re unsure. Most cars made after 2013 use Gen 3.
Before You Start: Preparation Checklist
Good preparation makes programming smoother. Here’s what you need before starting:
- Your vehicle with Homelink buttons (usually 3 buttons).
- Garage door remote (the handheld remote that currently works with your opener).
- Access to the garage door motor (the opener unit on the ceiling).
- A step ladder (if your opener’s “Learn” button isn’t easily reachable).
- Your car’s ignition key (most cars require the ignition to be ON or in ACC mode).
- Owner’s manuals for your car and garage door opener (for troubleshooting).
- A pen and paper (optional, for notes or writing down codes).
Insight: Some luxury cars require the driver’s door to be closed during programming to power the Homelink system. Check your manual for model-specific tips.
Homelink Programming: Step-by-step Guide
While the general process is similar, the details can vary by car, Homelink generation, and garage door opener brand. Below is a complete, clear walkthrough for reprogramming Homelink with most garage door openers. If you get stuck, use the troubleshooting section later in this article.
Step 1: Clear Previous Codes (optional But Recommended)
If you’re reprogramming Homelink, it’s wise to erase old codes. This avoids accidental activation of another door or gate.
- Turn your vehicle’s ignition ON (engine off or running).
- Press and hold the two outer Homelink buttons (usually the 1st and 3rd) at the same time.
- Hold both buttons for 10–20 seconds until the indicator light begins to flash rapidly.
- Release both buttons. All stored codes are now erased.
Note: This step clears all Homelink buttons. If you only want to reprogram one button, you can skip this, but old codes can sometimes interfere.
Step 2: Train Homelink With Your Remote
This step “teaches” Homelink the signal from your existing remote.
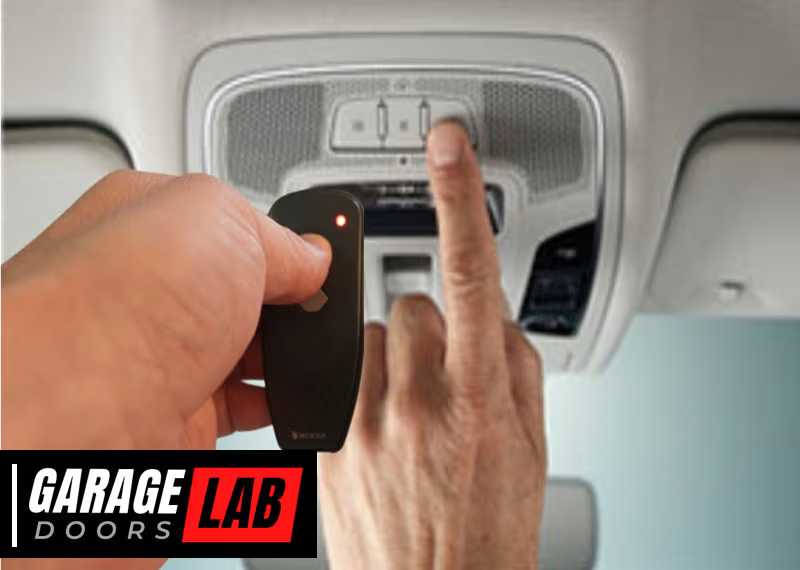
- Hold your garage door remote 1–3 inches from the Homelink buttons in your car (check your owner’s manual for the exact location).
- Press and hold the remote’s button and the desired Homelink button at the same time.
- Continue holding both buttons. Watch the Homelink indicator light:
- Slow flash, then rapid flash: Homelink has learned the signal.
- No rapid flash: Move the remote closer or farther away and try again.
- Release both buttons. The Homelink button is now trained.
Non-obvious tip: Some remotes require new batteries for strong signals. If programming fails, try replacing the remote battery.
Step 3: Connect Homelink To Your Garage Door Opener (learn Button)
For most modern openers (rolling code), you need to sync Homelink directly with the garage door motor.
- Locate the “Learn” or “Smart” button on your garage door opener unit (often behind a light cover or on the back panel).
- Press and release the “Learn” button. An indicator light will usually turn on or blink (you have 30 seconds to complete the next step).
- Return to your car. Press and hold the programmed Homelink button for 2 seconds, then release. Repeat this press/hold cycle up to 3 times.
- The garage door should move (open or close) if programming is successful.
Important: Do not hold the “Learn” button too long (over 6 seconds) or you may erase all existing remotes.
Step 4: Test The System
Press the Homelink button you just programmed. The garage door should open or close smoothly. If it doesn’t, repeat the steps or see the troubleshooting section.
Example: You bought a used Honda Accord with Homelink. After following these steps, your Genie opener now opens from the car, just like the original remote.

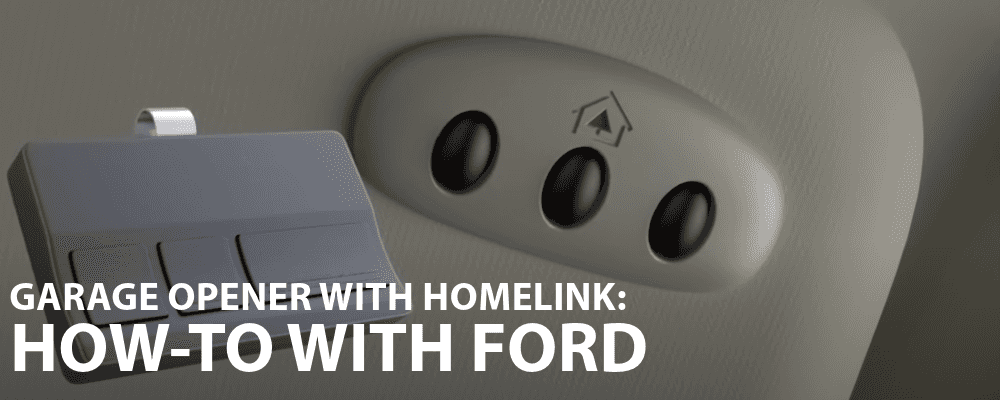
Brand-specific Programming: Chamberlain, Liftmaster, Genie, Craftsman, And More
Different opener brands have unique programming quirks. Here’s how to handle the most popular ones:
Chamberlain & Liftmaster
- “Learn” button is usually yellow, purple, red, or green.
- Rolling code models require you to sync Homelink with the “Learn” button.
- Older models (before 1996) may only need remote training.
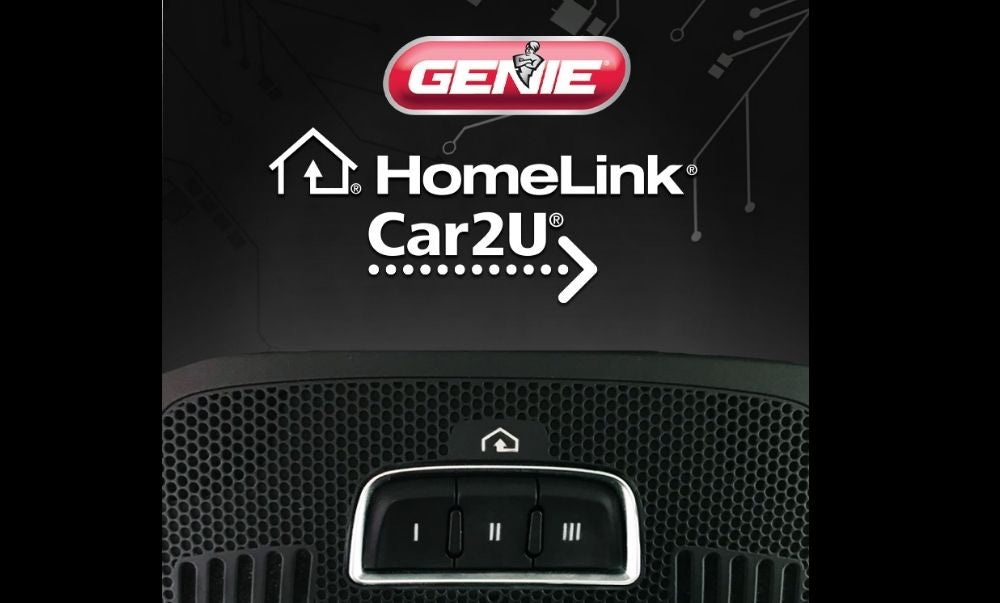
Genie
- “Learn” button may be labeled “Program” or “Learn Code.”
- Some Genie openers require you to press the Homelink button within 30 seconds of pressing the opener’s “Learn” button.
- For Genie Intellicode, repeat the press/hold cycle up to 4 times.
Craftsman
- Same process as Chamberlain/LiftMaster (often made by the same company).
- “Learn” button colors indicate compatibility.
Other Brands (marantec, Overhead Door, Etc.)
- Marantec: May require a special programming connector (see manual).
- Overhead Door: Similar to Genie, as they share technology.
Insight: Some imported cars (like BMW or Mercedes) use “rolling code adapters” for certain openers. Check Homelink’s compatibility chart online.
Homelink Programming For Multiple Garage Doors
If you have more than one garage door, you can program each Homelink button to a different opener.
- Repeat the training process for each button and garage door remote.
- Label each button on a sticky note (temporarily) to avoid confusion.
- Some Homelink systems support up to 3 devices (garage doors, gates, or lights).
Tip: If you have three garage doors, assign the left button to the left door, the middle to the center, and the right to the right door for easy recall.
Troubleshooting Homelink Programming Problems
Even with good instructions, things can go wrong. Here’s how to solve common problems:
Homelink Light Doesn’t Blink Or Respond
- Check car ignition (must be ON for Homelink to work).
- Replace the remote’s battery.
- Try a different Homelink button.
- Move the remote closer/farther during training.
Garage Door Doesn’t Move After Programming
- Confirm the opener uses rolling code (most after 1996 do).
- Make sure you pressed the garage opener’s “Learn” button.
- Repeat the press/hold cycle on the Homelink button 2–3 times.
- Ensure the garage door opener’s antenna wire is hanging down (not tucked inside).
Homelink Works Only Sometimes
- Weak car battery or electrical interference can cause issues.
- Try reprogramming when parked outside the garage, not inside.
- Check for metal objects blocking the car’s Homelink signal.
Opener Has Security+ 2.0 (yellow Learn Button)
- Some new Chamberlain/LiftMaster models need a Homelink repeater kit (about $30–$50).
- Check compatibility at Homelink Official Site.
Error Codes And Their Meanings
Here’s a quick reference for Homelink indicator lights:
| Indicator Light | What It Means | Action |
|---|---|---|
| Solid | Ready to program | Begin training |
| Slow blink | Programming in progress | Hold buttons until rapid flash |
| Rapid flash | Programming successful | Proceed to Learn button step |
| No light | No power/signal issue | Check ignition or wiring |
Safety Precautions During Programming
When working with garage doors and openers, safety comes first.
- Never stand under a moving garage door during testing.
- Keep children and pets away from the opener while programming.
- Use a sturdy ladder and have someone spot you if needed.
- Unplug the garage door opener before touching any internal wiring.
- If your garage door does not reverse when it touches an object, have it serviced before using Homelink.
Pro Tip: Test the manual release feature of your garage door before programming. This ensures you can open the door if something goes wrong.
Resetting Homelink: When And How To Start Fresh
Sometimes, you need to completely reset Homelink—especially if you bought a used car or moved into a new house.
- Press and hold the two outer Homelink buttons for 20 seconds until the indicator flashes.
- This wipes all previous programming.
- Reprogram each button as needed.
- If you sell your car, always reset Homelink to prevent the new owner from accessing your garage.
Non-obvious insight: If your car battery was disconnected, Homelink codes usually remain. But after some repairs, codes can be lost—so always test after service.
Homelink Vs. Other Garage Door Opener Systems
How does Homelink compare with other built-in and aftermarket systems? Here’s a side-by-side look:
| Feature | Homelink | Aftermarket Remote | MyQ/Smartphone Apps |
|---|---|---|---|
| Integration | Built-in to car | Separate device | Phone-based |
| Number of Doors | Up to 3 | Varies | Multiple doors |
| Setup | Manual programming | Manual programming | Wi-Fi, app install |
| Cost | Free (if equipped) | $20–$50 | $40–$100+ |
| Security | Rolling code | Varies | High (with alerts) |
Conclusion: Homelink is the most convenient if your car has it. If not, consider an aftermarket remote or smart opener for remote access.
Common Mistakes To Avoid
Even with clear instructions, beginners often make these errors:
- Not clearing old codes before programming, causing confusion.
- Using weak remote batteries, leading to failed training.
- Holding the “Learn” button too long, erasing all remotes.
- Programming with the car OFF, which disables Homelink power.
- Standing inside the garage while testing, risking injury.
- Not checking compatibility (especially with very new or old openers).
- Assuming all buttons are the same—label them for clarity.
Practical tip: If you keep failing, try programming outside the garage. Sometimes, metal garage doors block the RF signal.
Advanced Programming: Smart Home Integration
Some Homelink Gen 3 systems can connect to smart home platforms. This allows you to operate the garage door using voice commands or smartphone apps.
- Check if your car supports Homelink Connect (usually in luxury brands).
- Connect your Homelink system to Amazon Alexa, Google Assistant, or Apple HomeKit for remote control.
- For smart openers (e.g., MyQ), you may not need Homelink at all—just use the app.
Note: Always check for software updates in your car’s infotainment system for the latest compatibility.
When To Call A Professional
If you’ve tried all steps and Homelink still refuses to work, consider:
- Your opener may be too old or too new (some models need adapters).
- Wiring issues in your car or opener can block signals.
- Security settings (like “lockout” mode) may prevent pairing.
Professional garage door technicians can diagnose these issues. Most charge $75–$150 for a service visit, but this is rarely needed.
Maintenance Tips For Long-term Reliability
Keep your Homelink system and garage door opener running smoothly with these habits:
- Test Homelink every few months.
- Clean garage door sensors and opener antenna.
- Replace Homelink button covers if they become sticky or worn.
- Change opener remote batteries yearly.
- Lubricate garage door tracks and rollers.
Insight: If your garage opener gets noisy or unreliable, fix it before blaming Homelink. Mechanical problems can mimic programming failures.
Frequently Asked Questions
How Do I Know If My Car Has Homelink?
Look for three small buttons, often with a house icon, on your sun visor, rearview mirror, or overhead console. Your car’s owner’s manual will list Homelink as a feature if equipped.
My Homelink Worked Before, But Now It Doesn’t. What Should I Do?
First, check your car’s battery and the opener remote’s battery. Power outages or opener resets can erase codes. Try reprogramming Homelink using the steps above.
What If My Garage Door Opener Is Too New For Homelink?
Some very new openers (especially Chamberlain/LiftMaster with Security+ 2.0) require a Homelink Compatibility Bridge (repeater kit). Check the opener’s “Learn” button color, and visit the Homelink Compatibility Page for solutions.
Can I Erase Only One Homelink Button, Not All?
Yes. To erase just one button, hold that button until the indicator light starts blinking slowly, then rapidly (about 20 seconds). This clears only that button.
Is Homelink Secure Against Hacking?
Yes, modern Homelink uses rolling code technology, which is very secure. Each press sends a unique code, making it almost impossible to duplicate or hack.
Reprogramming your Homelink garage door opener isn’t hard when you follow the right steps. With a little patience, you can restore the convenience and security of one-touch garage access. Whether you’re syncing a new car, adding a second door, or fixing a stubborn system, this guide gives you the knowledge and confidence to handle it yourself. If you run into trouble, remember: patience and clear steps solve most problems. Happy programming!


