Now Reading: How to Reset a Clicker Garage Door Opener: Quick & Easy Steps
- 01
How to Reset a Clicker Garage Door Opener: Quick & Easy Steps
How to Reset a Clicker Garage Door Opener: Quick & Easy Steps
Resetting a garage door opener can feel confusing, especially if you’ve never done it before. Many people use a Clicker garage door opener for its convenience and universal compatibility. But what happens when your remote stops working, gets lost, or you want to clear old codes? Knowing how to reset your Clicker device is important for both safety and everyday use. This article will walk you through the complete process, explain why resets matter, and answer all the common questions—so you can handle your garage door opener confidently, even if you’re not a technical expert.
Why You Might Need To Reset A Clicker Garage Door Opener
People often wonder why resetting is necessary. Sometimes, it’s about security—maybe you lost a remote or moved into a new house. Other times, you might need to fix a remote that stopped working or simply want to add a new device. Here are the most common reasons:
- Lost or stolen remote: If someone finds your remote, they could access your garage. Resetting erases the old codes.
- Malfunctioning remote: Sometimes a remote stops communicating with the opener. Resetting can fix this.
- Buying a new home: It’s important to clear old codes so only your remotes can open the door.
- Adding new remotes: You usually need to reset or reprogram the opener when adding devices.
- Interference issues: If another device interferes, resetting can help restore normal operation.
Resetting doesn’t just solve problems—it also helps you keep control over who can access your garage.
Understanding How Clicker Garage Door Openers Work
Before you reset your Clicker, it’s helpful to know how the system operates. The Clicker universal remote is designed to work with many brands, including Chamberlain, LiftMaster, Genie, and Craftsman. It sends a coded signal to your garage door opener, which is mounted inside your garage.
Each opener has a Learn button (sometimes called a Program or Smart button). This button allows the opener to “learn” new remote signals or erase old ones. The process you follow depends on your opener’s brand and model, but the basic principles are similar.
For most modern openers, the memory stores several remotes. Resetting clears this memory, which means you’ll need to reprogram all remotes you want to use.
Tools And Preparation Before You Start
You don’t need advanced tools, but some preparation makes the process smoother.
- A ladder: Most garage door opener units are installed on the ceiling.
- Your Clicker remote(s): Have all remotes you want to reprogram.
- New batteries: Weak batteries can cause problems; replace them if you’re not sure.
- A flashlight: Garages can be dim, and buttons are often small.
- Pen and paper: Helpful for writing down steps or new codes.
Safety Tip: If you’re not comfortable working on a ladder or with electrical devices, ask for help. Never touch live wires.
Different Types Of Clicker Garage Door Openers
The Clicker brand has several models, but most share common features. Here’s a quick comparison to help you identify your device:
| Model | Type | Compatibility | Reset Method |
|---|---|---|---|
| KLIK1U | Universal Remote | Major brands (Chamberlain, Genie, etc.) | Learn button |
| KLIK3U | Universal Remote | Major brands, newer models | Learn button |
| Wireless Keypad | Wall-mount | Most brands | PIN reset & Learn button |
If you’re unsure about your model, check the back of the remote or the original packaging. Knowing your model helps you follow the right instructions.
Step-by-step: How To Reset A Clicker Garage Door Opener
Resetting your Clicker remote usually involves two main actions:
- Clearing the opener’s memory
- Reprogramming the remote(s)
Let’s break down each step. While the process is similar for most brands, always check your opener’s manual for any unique steps.
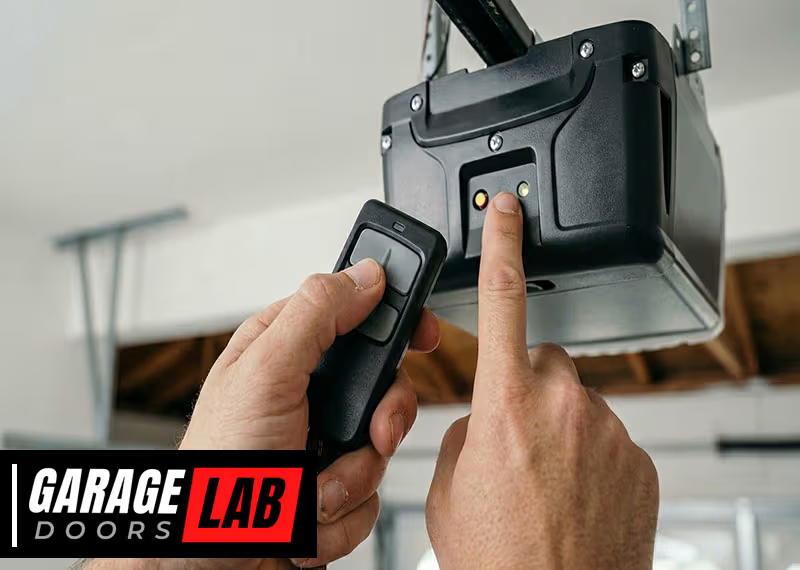
1. Locate The Learn Button
The Learn button is the key to resetting your garage door opener. Here’s how to find it:
- Look at the main opener unit on your garage ceiling.
- The Learn button is often near the antenna wire (a thin, hanging wire).
- It may be behind a light cover. Slide or snap off the cover if needed.
- The button is usually colored (yellow, red, orange, or purple) and may be labeled “Learn,” “Program,” or “Smart.”
Pro Tip: Take a photo of the unit before you start. This helps you remember wire positions or covers.
2. Clear The Opener’s Memory
To erase all previously programmed remotes:
- Press and hold the Learn button for 6-10 seconds.
- The indicator light will usually turn on steadily, then go out.
- When the light goes out, all remote codes have been erased.
Some models beep or flash lights to confirm. If you have multiple doors, repeat this process for each opener.
Important: This step removes ALL remotes from memory. You will need to reprogram every remote you want to use.
3. Reprogram The Clicker Remote
After resetting, you must program your Clicker again. Here’s how to do it for most models:
- Press the Learn button on your opener. The indicator light will start blinking.
- Within 30 seconds, press and hold the button on your Clicker remote that you want to program.
- Release the button when the garage door opener light blinks or you hear a click. This means the remote is programmed.
- Test the remote to make sure it works.
You can usually program multiple remotes by repeating steps 2-4.
Non-obvious tip: If your opener doesn’t respond, wait a few minutes and try again. Some units have a short “lockout” period after too many failed attempts.
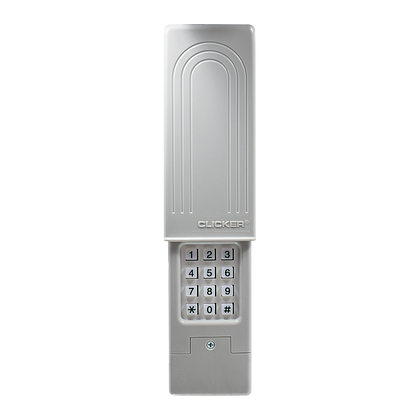
4. Resetting A Wireless Keypad
Many homes use a Clicker wireless keypad instead of, or in addition to, a handheld remote. The process is similar but includes setting a new PIN:
- Press and hold the Learn button on the opener until the indicator light turns on.
- Within 30 seconds, enter your desired four-digit PIN on the keypad, then press and hold the ENTER button.
- Release the ENTER button when the opener lights blink.
- Test the keypad by entering your PIN and pressing ENTER.
If you want to change your PIN later, you usually need to repeat the process.
5. Testing And Troubleshooting
After resetting and reprogramming, always check that everything works:
- Stand inside and outside your garage to test range.
- Try all remotes and keypads.
- Make sure the door opens and closes smoothly.
If something doesn’t work:
- Recheck the battery in your remote.
- Confirm you pressed the right buttons in sequence.
- Make sure you didn’t exceed the 30-second window after pressing Learn.
Special Cases: Older Garage Door Openers
Not all garage door openers are the same. Older units (pre-1993) may not have a Learn button. Instead, they use DIP switches—a row of small switches inside the remote and opener unit.
For these openers:
- Open the remote and the opener casing.
- Set the DIP switches in the remote to match those inside the opener.
- There is no “reset”—to change codes, you must move the switches to a new pattern.
Note: These systems are less secure. If you have an old opener, consider upgrading for better safety.
Common Mistakes When Resetting Clicker Garage Door Openers
Many people get stuck or frustrated during the reset process. Here’s what to watch out for:
- Not holding the Learn button long enough: If you release too soon, codes might not clear.
- Missing the 30-second window: Most openers give you a short time to program a remote after pressing Learn.
- Low batteries: Weak batteries can cause remotes to fail during programming.
- Wrong remote type: Not all remotes are compatible with all openers.
- Forgetting to reprogram all remotes: Resetting clears everything, so remember to add every device you want to use.
- Ignoring the manual: Some brands have unique steps or button sequences.
Non-obvious insight: If you have a home security system linked to the garage, resetting the opener can break that connection. You may need to re-sync your home automation or alarm system.
Security Considerations After Resetting
Resetting your Clicker garage door opener isn’t just about fixing problems. It’s also a key part of home security. Here’s why:
- Lost or stolen remotes: After a reset, old remotes will not work.
- Previous owners: If you moved into a new house, always reset the opener so only your remotes are active.
- Neighbors’ remotes: Rarely, nearby houses can have overlapping codes. Resetting and reprogramming can prevent accidental access.
If you ever think someone else could control your garage, a full reset is the best step.

What To Do If Resetting Doesn’t Work
Sometimes, you follow every step but the opener still doesn’t respond. Here’s a troubleshooting checklist:
- Check the power: Is the opener plugged in and getting power?
- Inspect the antenna: Make sure the hanging wire isn’t broken or disconnected.
- Try another remote: If you have more than one, see if they all fail.
- Replace batteries: Even new remotes can have weak batteries.
- Look for interference: Devices like LED lights or Wi-Fi routers nearby can block signals.
- Factory reset: Some openers have a deeper factory reset—check your manual.
If nothing works, you may have a faulty opener or a remote that isn’t compatible. In rare cases, the logic board inside the opener needs replacement.
Comparing Clicker Reset To Other Brands
People often ask if resetting a Clicker remote is the same as for other brands. In most cases, the process is similar, but there are differences. Here’s a quick comparison:
| Brand | Reset Method | Programming Steps | Special Notes |
|---|---|---|---|
| Clicker | Learn button | Press Learn, then remote | Universal, works with most brands |
| Genie | Learn/Program button | Similar to Clicker | May need to clear memory |
| LiftMaster | Learn button | Press Learn, then remote | Usually color-coded buttons |
| Craftsman | Learn button | Same as above | Often compatible with Clicker |
| Older models | DIP switches | Manual matching | Less secure, no reset button |
Pro tip: The Clicker universal remote is popular because it works with so many brands. But always confirm compatibility before buying a new remote.
Tips For Smooth Operation After Resetting
Once you’ve reset and reprogrammed your opener, a few extra steps can help you avoid future problems:
- Label your remotes: Write the date of reset or the remote location (car, house) on each device.
- Keep spare batteries: Weak batteries are the most common cause of remote failure.
- Test range: Some remotes work better from certain angles or distances.
- Update your home inventory: If you have a smart home system, update the device list after resetting.
- Store the manual: Keep the opener’s manual in a safe place for next time.
When To Call A Professional
Most resets are simple, but sometimes you need expert help. Call a garage door professional if:
- The opener doesn’t respond after several reset attempts.
- You see sparks, smell burning, or hear loud noises from the unit.
- The door doesn’t open or close smoothly.
- You’re uncomfortable using a ladder or working with electrical devices.
A technician can diagnose deeper problems, replace faulty parts, or upgrade your system for better security and performance.
Upgrading Your Garage Door Opener
If you’re having repeated problems, it might be time to consider a new opener. Modern openers offer better security, smartphone control, and quieter operation.
Some features to look for:
- Rolling code technology: Changes the code each time you use the remote, making hacking almost impossible.
- Wi-Fi connectivity: Control your garage from your phone.
- Battery backup: Keeps your door working during power outages.
- Quiet DC motors: Less noise, especially in attached garages.
The investment in a new opener can add value and safety to your home. For more information on the latest garage door opener technology, see the Garage Door Opener Wikipedia page.
Frequently Asked Questions
What If I Lose My Clicker Remote?
If you lose a remote, always reset your opener to erase the old codes. This prevents anyone who finds the remote from accessing your garage. Then, reprogram your new or backup remotes following the steps above.
How Many Remotes Can I Program To My Clicker Opener?
Most modern openers allow 5–8 remotes or keypads. Check your opener’s manual for the exact number. If you exceed the limit, the oldest code may be erased automatically when you add a new device.
Why Does My Clicker Remote Stop Working After Resetting?
Common reasons include weak batteries, programming errors, or trying to use the wrong remote model for your opener. Always use fresh batteries and follow the reset steps closely. If problems continue, the remote may be faulty.
Is Resetting My Clicker Opener Safe For My Garage Door?
Yes. Resetting only affects the remote codes, not the mechanical parts of your door. If your door moves unexpectedly or behaves oddly after resetting, check for obstructions or ask a professional to inspect the system.
Do I Need To Reset My Opener If I Move To A New House?
Absolutely. Always reset the garage door opener when you move into a new home. This ensures only your remotes can open the door and removes any access from previous owners.
Resetting a Clicker garage door opener is a straightforward process once you know the steps. By understanding how your system works and following the detailed instructions in this guide, you can keep your garage secure and avoid common frustrations. With a little preparation and attention to detail, you’ll have your opener working smoothly again—and gain peace of mind knowing your home is protected.