
Setting up a garage door opener can feel like a big task, especially if you have never done it before. Many homeowners want to save money by installing it themselves, but worry they will make mistakes or miss important steps. The good news is, with careful planning and clear instructions, you can install and set your garage door opener safely and correctly. In this guide, you will learn every detail you need to know, from choosing the right opener to programming remotes and troubleshooting common issues. This article is designed for beginners and non-experts, using simple language and step-by-step advice, so you finish with a fully working, safe garage door opener.
Understanding Garage Door Openers
Before you begin, it helps to know what a garage door opener actually does and the different types available. A garage door opener is an electric device that opens and closes your garage door with a press of a button. It works with a motor, a rail, a chain or belt, and sensors for safety.
The most common types of garage door openers are:
- Chain-drive openers: Use a metal chain to move the door. They are strong and affordable, but can be noisy.
- Belt-drive openers: Use a rubber belt. They are quiet and smooth, but cost a little more.
- Screw-drive openers: Use a threaded steel rod. They need less maintenance, but can be noisy in cold weather.
- Direct-drive openers: The motor moves along the rail with the door, making them very quiet and durable, but more expensive.
Each type has its pros and cons. For example, if your garage is under a bedroom, a belt-drive or direct-drive is better because it is quieter. For heavy doors, a chain-drive or screw-drive may be stronger.
Choosing The Right Garage Door Opener
Picking the right opener is important for safety, convenience, and long-term use. Here are the key things to consider:
Power And Door Size
- 1/2 horsepower (HP): Works for single-car, lightweight doors.
- 3/4 HP: Good for heavier, two-car doors or solid wood.
- 1 HP: Needed for oversized or very heavy doors.
If your door is older or solid wood, pick a stronger motor. Underpowered openers may break quickly.
Noise Levels
- Chain-drive openers are loud but affordable.
- Belt-drive and direct-drive are much quieter—good for garages near bedrooms.
Security Features
Modern openers come with rolling-code technology to prevent code theft. Some have battery backup, smartphone controls, and motion-activated lights.
Safety Features
Look for safety sensors that stop the door if something is in the way. This protects children, pets, and cars.
Brand And Warranty
Trusted brands like Chamberlain, LiftMaster, and Genie offer good warranties (often 3–5 years for motor, 1 year for parts).
Price Range
Most openers cost between $150 and $400, depending on features and power.
Comparing Popular Garage Door Openers
Here’s a comparison of three popular openers:
| Model | Type | Power | Noise Level | Price (approx.) | Smart Features |
|---|---|---|---|---|---|
| Chamberlain B970 | Belt-drive | 1.25 HP | Very Quiet | $250 | Yes |
| Genie ChainMax 1000 | Chain-drive | 3/4 HP | Loud | $190 | No |
| LiftMaster 8500W | Direct-drive | DC Motor | Ultra Quiet | $400 | Yes |
Tools And Materials You Need
Before starting, gather all the tools and materials. Missing tools can slow you down or cause mistakes.
Basic Tools
- Power drill with bits
- Screwdrivers (flat and Phillips)
- Stepladder (at least 6 feet)
- Adjustable wrench and pliers
- Level (2–4 feet)
- Tape measure
- Hammer
Materials
- The garage door opener kit (motor, rail, sensors, remotes)
- Mounting brackets and hardware (included in kit)
- Safety glasses and gloves
- Light bulbs for the opener (if not included)
- Wire staples or zip ties
- Extra wires (if your garage is large)
Safety Equipment
- Eye protection
- Work gloves
- Dust mask (if drilling in old wood or drywall)
Pro tip: Always read the opener’s manual before you start. Some brands need special tools or extra parts.
Preparing For Installation
A smooth installation starts with good preparation. Here’s what to do:
- Clear the workspace: Remove cars, bikes, or storage items near the garage door.
- Check the garage door: The door must move easily by hand. If it’s heavy or sticks, fix or lubricate the springs and rollers first.
- Test the balance: Disconnect the opener (if there is one). Lift the door halfway. If it stays, the springs are good. If not, call a pro—do not adjust springs yourself.
- Measure the space: You need at least 2.5 inches above the door for the opener, and enough backspace for the rail.
- Locate a power source: The opener needs a nearby outlet (usually on the ceiling). If not, hire an electrician.
If you skip these steps, you may have to redo work or damage the opener.
Step-by-step Garage Door Opener Installation
Let’s move to the main part: setting up your garage door opener. These steps work for most modern openers, but always check your manual for special instructions.
1. Assemble The Opener Rail
Most kits come with a rail in sections. Lay them flat and connect them as shown in the manual. Slide in the trolley (the part that pulls the door) and attach the chain or belt.
- Tip: Keep all bolts finger-tight until the full rail is built. Tighten at the end.
2. Attach The Rail To The Opener
Connect the rail to the motor unit. Usually, you need to line up holes and secure with bolts. Make sure the rail is straight.
3. Install The Header Bracket
The header bracket goes above the garage door, at the center. Use a level to mark the spot. Drill holes and attach the bracket with lag screws.
- If your wall is concrete or brick, use special anchors.
4. Mount The Power Unit
Lift the opener motor and rest it on a ladder about 7 feet from the floor. Attach the rail to the header bracket. The motor should be at least 2 inches above the garage.
- Non-obvious insight: Use a second person for this step. The opener is heavy and awkward to hold alone.
5. Secure The Opener To The Ceiling
Use the mounting straps in the kit to hang the opener from the ceiling joists. The unit must be level and stable.
- Measure to make sure the opener is centered with the door.
- Do not use drywall anchors; screw directly into wood.
6. Connect The Door Arm
Attach the curved door arm to the trolley and the straight arm to the garage door. Join them with the supplied pins and bolts.
- The arm should be straight when the door is closed.
7. Install The Safety Sensors
Modern openers need safety sensors about 6 inches above the ground, one on each side of the door.
- Run the wires neatly along the wall.
- Sensors must face each other directly or the door will not close.
8. Wire The Controls
Connect the wall control (button or keypad) by running the low-voltage wire from the opener to a spot inside the garage. Use staples or zip ties to keep wires neat.
- Do not run wires near metal objects, which can cause interference.
9. Plug In And Test
Plug the opener into the outlet. The lights should come on. Test the door with the wall button.
- If the door doesn’t move, recheck all connections and wiring.
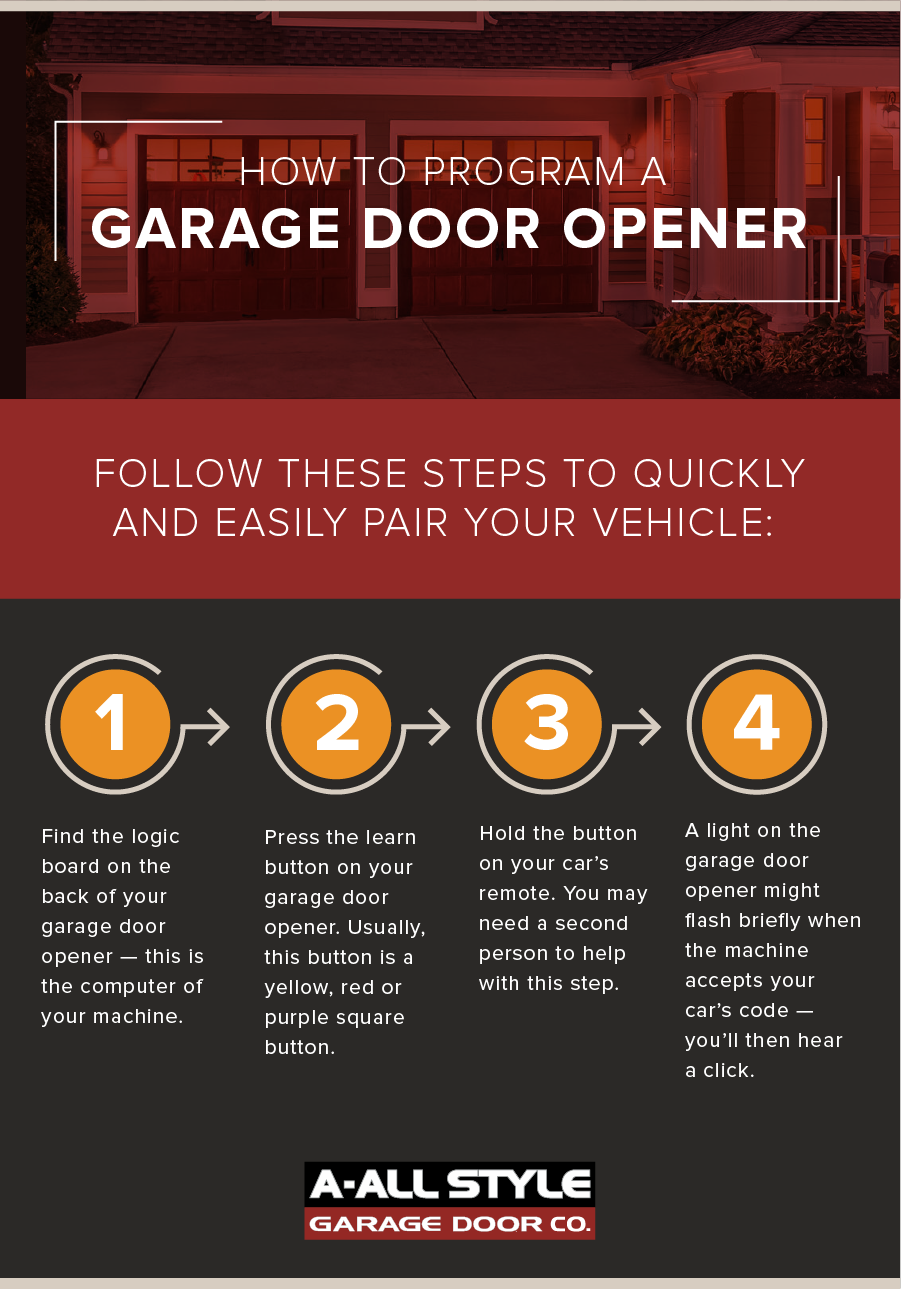
10. Program The Remote Controls
Most remotes need you to press a learn button on the opener, then press the remote button. Some openers have smart features for programming via app.
- Test from outside the garage to make sure the range is good.
11. Set The Limits
Limit switches tell the opener when to stop. Use the adjustment screws or buttons on the motor unit.
- Open the door fully, then adjust the “up” limit until the door stops just above the opening.
- Close the door, then adjust the “down” limit so the door seals to the floor but does not crush it.
12. Set The Force Adjustment
Force controls let you set how much power is used to open and close the door. Too much force is dangerous; too little may stop the door.
- Adjust so the door reverses easily if you block it with a 2×4 piece of wood.
13. Test The Safety Features
- Block the sensors with your foot—the door should not close.
- Put a 2×4 on the floor under the door. When closing, the door should reverse after touching the wood.
14. Install Light Bulbs And Covers
Add bulbs (usually 60–100 watts, check your manual) for visibility. Replace the light covers.
- Use LED bulbs if possible; they last longer and do not interfere with remotes.
15. Clean Up And Final Check
Clear all tools, check for leftover parts, and test the door several times. Listen for strange noises.
- Tighten any loose bolts.
- Lubricate the rail and chain/belt with opener lubricant.
Programming Remotes And Keypads
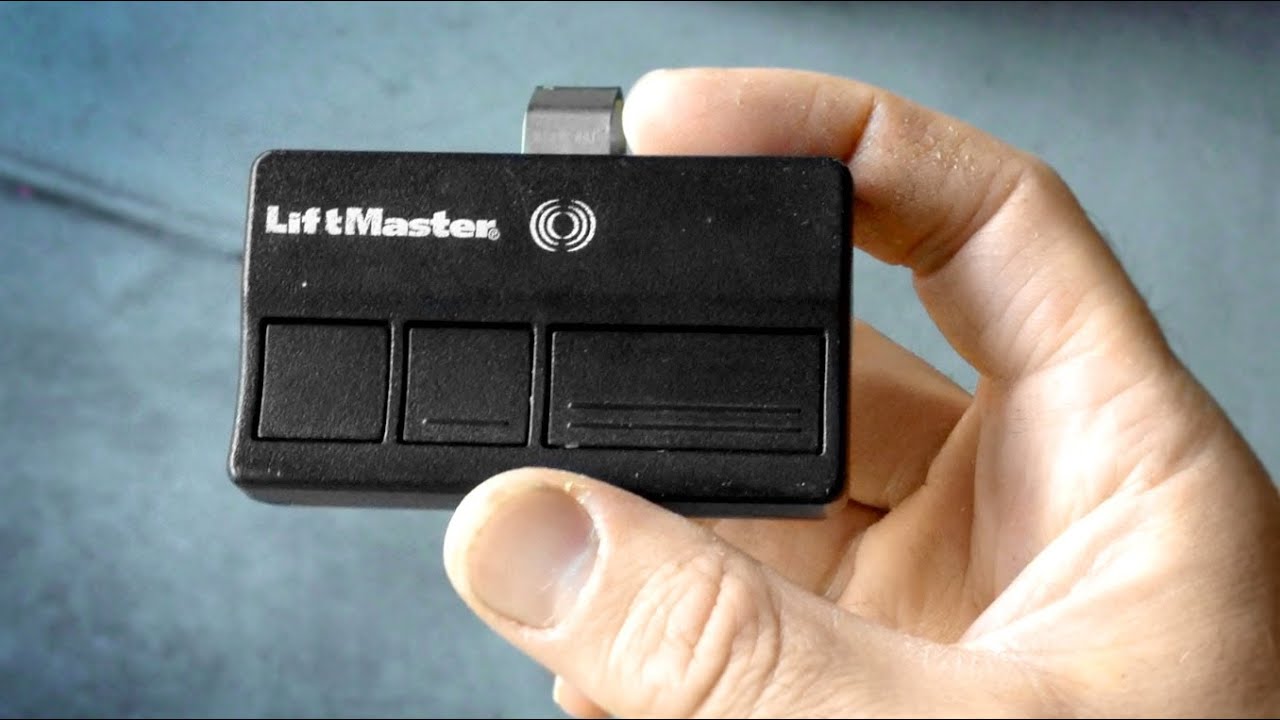
Programming remotes and wireless keypads is an important part of setting up your garage door opener. Each brand has a slightly different process, but the basics are similar.
Programming A Remote
- Find the learn button (often yellow, purple, or red) on the opener motor.
- Press and release the learn button. An indicator light will come on.
- Within 30 seconds, press the button on the remote. The light blinks or turns off to confirm.
- Test the remote. If it doesn’t work, try again or replace the remote battery.
Programming A Keypad
- Press the learn button on the opener.
- Enter your chosen 4-digit code on the keypad, then press the enter button.
- The opener light will blink. Test the code.
- Non-obvious insight: For homes with rental units or guest access, some openers let you program temporary codes that expire after use.
Smartphone And Smart Home Integration
Many new openers support Wi-Fi and smartphone controls. Download the app (like myQ for Chamberlain), follow the setup steps, and link your opener to your home network.
- This lets you open or close your garage from anywhere and get alerts if the door is left open.
Adjusting And Maintaining Your Opener
A well-maintained opener lasts longer and is much safer. Here’s how to keep it in top shape:
Regular Maintenance Steps
- Lubricate moving parts every 6 months (use only garage door lubricant, not WD-40).
- Check the safety sensors monthly—clean the lenses and make sure the lights are on.
- Test the balance every few months by lifting the door halfway by hand.
- Replace remote batteries if the range drops.
Common Issues And Solutions
Some problems are easy to fix without calling a repair service:
- Door won’t close: Check the safety sensors. If the lights blink, realign the sensors.
- Remote doesn’t work: Try new batteries or reprogram.
- Opener is noisy: Lubricate the rail, chain, or belt.
- Door reverses before closing: Adjust the down limit or force settings.
Safety Reminders
- Never adjust the garage door springs yourself—they are under high tension and can cause injury.
- Always unplug the opener before working on electrical connections.
Troubleshooting Common Problems
Not every installation goes perfectly. Here are practical solutions to the most frequent problems:
Door Will Not Move
- Check power: Make sure the opener is plugged in and the outlet works.
- Inspect all wiring for loose connections.
- Look for error codes or blinking lights on the motor unit.
Door Only Opens Or Closes Part Way
- Adjust the travel limits so the door opens and closes fully.
- Check for obstructions or bent tracks.
Opener Makes Noise But Door Does Not Move
- The trolley may not be connected to the door arm—re-engage it.
- Check the chain or belt for broken parts.
Remote Range Is Poor
- Try a new battery.
- Move or replace LED bulbs if they cause interference.
Safety Sensors Flash
- Realign the sensors until both lights are solid.
- Clean the sensor lenses.
Comparison Of Common Troubleshooting Steps
Here’s a quick look at fixes for typical problems:
| Problem | Possible Cause | Solution |
|---|---|---|
| Door won’t close | Sensor misaligned | Realign sensors |
| Remote not working | Dead battery | Replace battery |
| Door reverses on closing | Obstruction or force set too low | Remove obstruction, adjust force |
Upgrading Or Replacing An Old Garage Door Opener
If you have an old opener (more than 15 years), it may lack modern safety and security features. Here’s why you might upgrade:
- Safety: Old openers may not have auto-reverse or safety sensors.
- Security: New openers use rolling codes to stop hackers.
- Convenience: Many allow smartphone and smart home integration.
- Noise: Newer models are much quieter.
When replacing, follow the same installation steps. Remove the old opener first, and check the door balance before installing the new one.
When To Call A Professional
Some jobs are too risky or complex for DIY. Call a pro if:
- The garage door springs need repair or adjustment.
- The door is very heavy, won’t move by hand, or is off its tracks.
- You see broken cables or bent tracks.
- There is no power outlet near the opener location.
Professional installation usually costs $150–$350, but saves time and risk, especially for difficult installations.
Tips For A Safe And Reliable Garage Door Opener
For long-lasting performance, remember:
- Always keep the emergency release cord (usually red) accessible. Teach family how to use it in case of power outage.
- Do not let children play with remotes or wall controls.
- Inspect the door and opener monthly for loose parts or strange sounds.
- Use only original parts for repairs or upgrades—off-brand parts can cause problems.
- If you travel, unplug the opener or use “vacation mode” for extra security.
Garage Door Opener Myths And Misunderstandings
Many homeowners believe myths that can lead to mistakes. Here are the facts:
- Myth: “All openers fit all doors.” In reality, heavy or oversized doors need stronger openers.
- Myth: “Smart openers are unsafe.” Most modern smart openers use encryption and are as safe as manual controls.
- Myth: “Maintenance isn’t needed.” Even new openers require regular lubrication and sensor checks.
Real-life Example: Setting Up A Garage Door Opener
Let’s look at a real homeowner story:
Amanda bought a new house with a detached garage. She chose a belt-drive opener for quiet operation and installed it over a weekend. She made two common mistakes: she did not check the balance of her door first (it was too heavy, so the opener strained), and she forgot to align the safety sensors, so the door would not close. After reading the manual and adjusting the springs with a professional, Amanda finished the job and now opens her garage with her smartphone.
Key lesson: Good planning and careful setup save time and frustration.
Advanced Features You Might Want
Some high-end openers offer extra features:
- Battery backup: Lets the opener work during power outages (now required by law in California).
- Camera integration: Lets you watch your garage from your phone.
- Automatic close timers: Closes the garage after a set time if left open.
- Motion-activated lights: Turn on when you enter the garage.
These add cost but improve safety and convenience.
Environmental Factors To Consider
Your garage’s environment affects your opener’s life:
- Humidity: Can rust metal parts. Use stainless hardware if you live near the ocean.
- Cold weather: Screw-drive openers can stiffen in winter. Use a belt or direct drive in cold climates.
- Dust: Keep sensors and rails clean for best performance.
Garage Door Opener Safety Standards
In the US, all openers since 1993 must have auto-reverse and safety sensors. Check your opener’s label for compliance with UL 325 standards. If your opener is older, replace it.
For more on safety rules, visit the U.S. Consumer Product Safety Commission.
Frequently Asked Questions
How Long Does It Take To Set Up A Garage Door Opener?
Most installations take 4 to 6 hours for a beginner. If you have help or have done it before, it may take less time. Complicated situations (like adding a new outlet) can add time.
Can I Use My Old Remote With A New Garage Door Opener?
Usually, no. Most new openers use different security codes. Some universal remotes work, but check compatibility in your manual or buy a matching remote.
What Should I Do If My Garage Door Opener Is Beeping?
Beeping usually means a battery backup needs replacing, a power issue, or a programming error. Check your opener’s manual for the meaning of the beep pattern.
How Often Should I Service My Garage Door Opener?
Check and lubricate your opener every 6 months. Test the safety sensors monthly, and call a professional for major repairs every few years.
Are Smart Garage Door Openers Safe?
Yes, if you use a strong password for your account and keep the opener’s software updated. Smart openers use encryption to keep your garage secure.
Setting up a garage door opener is a smart investment in your home’s safety and convenience. With the right preparation, tools, and attention to detail, even beginners can complete the installation and enjoy years of smooth, reliable service. If you ever feel unsure, don’t hesitate to ask for help or call a professional—it’s better to be safe than sorry.