Now Reading: How to Reset Garage Door Keypad Chamberlain: Easy Steps Guide
- 01
How to Reset Garage Door Keypad Chamberlain: Easy Steps Guide
Resetting your Chamberlain garage door keypad can feel tricky, especially if you’ve never done it before. Maybe you lost the old code, bought a new house, or just want to boost your security. No matter the reason, learning how to reset your keypad will help you keep your garage—and your home—safe. In this guide, you’ll discover not just the simple reset process, but also the little details that often confuse people. You’ll also get advice on how to avoid common mistakes and how to handle different Chamberlain models. With clear steps, practical tips, and easy-to-understand examples, you’ll soon feel confident about handling your garage door keypad.
Understanding Your Chamberlain Garage Door Keypad
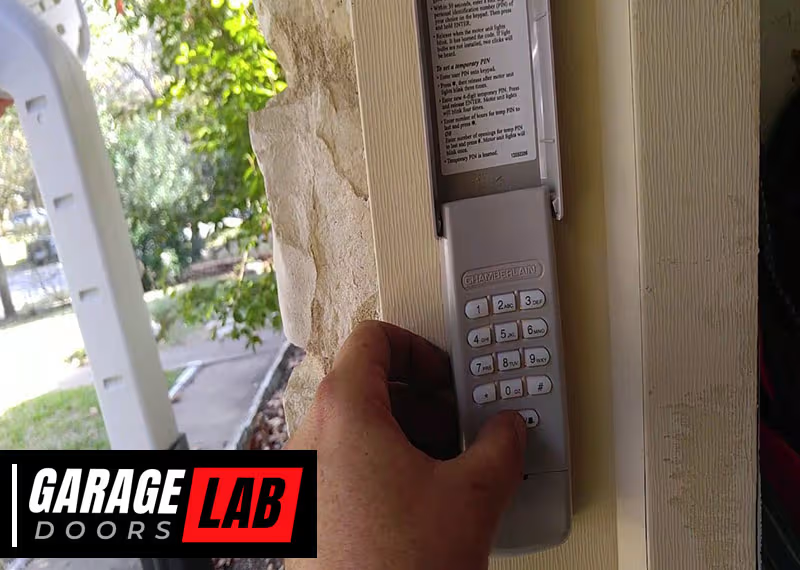
Before jumping into the reset steps, it’s important to know what a garage door keypad is and how it works. A Chamberlain keypad is a small, weatherproof device mounted outside your garage. It lets you open or close the door by typing a code, so you don’t always need a remote or key.
Chamberlain keypads work with a receiver inside your garage door opener. When you enter your code, the keypad sends a wireless signal to the opener. If the code matches, the door opens or closes. Most keypads use a 4-digit PIN, though some newer models allow more numbers.
Why Reset The Keypad?
People reset their keypads for several reasons:
- Forgotten PIN: It’s easy to forget a code, especially if you rarely use it.
- New Home: If you just moved in, you should set your own code.
- Security Concerns: Changing codes regularly helps prevent unauthorized access.
- Malfunction: Sometimes, the keypad stops working due to interference or battery problems.
Knowing why you need to reset can help you choose the right method and avoid future problems.
Types Of Chamberlain Garage Door Keypads
Chamberlain has released several keypad models over the years. While the basic reset process is similar, small differences matter. Here are the main types:
- Wireless Keyless Entry Keypads (e.g., Chamberlain 940EV, 940ESTD)
- Wired Keypads (older models, rare today)
- Universal Keypads (work with multiple brands, including Chamberlain)
Most homes today use wireless keypads. These are easy to mount and use, but the process may vary depending on your opener’s technology.
Opener Types And Compatibility
Chamberlain openers use different learn button colors to indicate their wireless technology:
- Yellow: Security+ 2.0 (most common in recent models)
- Purple: Security+ (2005–2011)
- Red/Orange: Security+ (1997–2005)
- Green: Older openers (pre-1997)
The learn button is usually on the back or side of the opener unit, near the antenna wire. Identifying the color helps you follow the correct reset steps.

Safety First: Preparing To Reset Your Keypad
Resetting your garage keypad is generally safe, but following a few simple steps will protect you and your property:
- Check Your Manual: Each model is a bit different. If you have the manual, keep it handy.
- Find a Ladder: You may need to reach the opener unit on the ceiling.
- Keep the Door Closed: Prevent accidents by closing the garage door before you start.
- Have a New Code Ready: Think of a number that’s easy for you but hard for others to guess. Avoid obvious codes like 1234 or your birth year.
- Replace the Battery: If your keypad is old or unresponsive, put in a fresh battery first.
Many people skip these steps, but they save time and prevent frustration.
Step-by-step Guide: How To Reset Chamberlain Garage Door Keypad
Resetting your keypad is straightforward if you follow each step. Here’s a clear guide:
Step 1: Locate The Learn Button
Most Chamberlain openers have a learn button on the back or side of the unit. You might need to remove a light cover to see it.
- The button is usually square and about the size of a small coin.
- The color (yellow, purple, red/orange, green) tells you the technology.
Step 2: Clear Old Codes (optional But Recommended)
If you want to erase all old codes and remotes:
- Press and hold the learn button for about 6–10 seconds.
- The LED light next to the button will turn off or blink.
- Release the button. All remotes and keypads are now erased.
This step is especially important if you bought a used house. It stops any old remotes from working.
Step 3: Enter Programming Mode
- Press and release the learn button once. The LED will light up (usually for 30 seconds).
- Walk to your keypad outside the garage.
Step 4: Enter New Code On The Keypad
- On the keypad, enter your chosen 4-digit code.
- Press the Enter button within 30 seconds.
- The opener unit’s light will blink or you’ll hear a click. This means the code was accepted.
If your keypad is older (pre-2006), you may need to press Enter again or follow a slightly different process. Always check your model’s instructions.
Step 5: Test Your New Code
- Wait a few seconds for the system to reset.
- Enter your new code on the keypad and press Enter.
- The garage door should move.
If it doesn’t work, repeat the steps carefully. Sometimes, you must enter the code more slowly or stand closer to the keypad.
Step 6: Program Additional Features (optional)
Some Chamberlain keypads let you:
- Set a temporary PIN for guests or deliveries
- Control more than one door (multi-door keypads)
- Adjust backlight or sound settings
Check your manual for these advanced features.
Reset Process Differences By Model And Year
Not all Chamberlain keypads reset the same way. Here’s a comparison of key differences:
| Model/Type | Learn Button Color | Reset Method | Special Notes |
|---|---|---|---|
| 940EV/940ESTD | Yellow (Security+ 2.0) | Press Learn, then new code + Enter | Supports temporary PINs |
| 977LM/977MAX | Purple/Red/Orange | Learn, code, Enter | Older openers may need extra step |
| Universal Keypad | Any | See manual; usually Learn, code, Enter | Works with multiple brands |
Always check your keypad’s model number (usually printed on the back or inside the battery cover). This helps you follow the right instructions and avoid confusion.
Resetting A Chamberlain Keypad Without The Learn Button
Some users can’t reach the opener or don’t see a learn button. Can you still reset the keypad?
- Wired Keypads: Older, wired models sometimes have a reset button inside the keypad. You’ll need to open it with a screwdriver.
- Universal Keypads: These may allow PIN change without the opener, but you often need to know the old code.
- No Learn Button: If your opener has no visible learn button, check under the light cover or inside the unit. If it’s missing, your unit may be too old for wireless keypads.
If you can’t find the button, try looking up your opener’s manual online using the model number.
Resetting When You Forgot The Old Code
Many people worry: “What if I forgot my old PIN?” The good news is, most Chamberlain systems let you set a new code without knowing the old one, as long as you have access to the learn button on the opener. This is a security feature, so only someone with physical access to the garage can change the code.
For universal keypads, you may need the old code to change to a new one without the opener. If you can’t remember it and can’t access the learn button, you may need to reset the entire opener or replace the keypad.
Troubleshooting Common Problems
Even after following all the steps, you might face problems. Here’s how to fix the most common issues:
Keypad Not Lighting Up
- Check the battery: Most keypads use a 9V battery. Replace it if the keypad is dead or buttons are hard to press.
- Clean the contacts: Dirt or corrosion inside can block power.
Code Not Working
- Check the distance: Stand close to the keypad.
- Re-enter programming mode: If you waited too long, the opener exits learn mode. Start over.
- Avoid simple codes: Some openers block codes like 0000 or 1234 for security.
Opener Blinks But Door Doesn’t Move
- Check safety sensors: If the door won’t close, sensors may be blocked or dirty.
- Power cycle: Unplug the opener for 30 seconds, then plug back in.
Keypad Works Intermittently
- Wireless interference: Nearby Wi-Fi or devices can block signals. Try changing the code.
- Weather damage: If the keypad gets wet or icy, it may need to dry out or be replaced.

Advanced Features: Temporary Pins And Multi-door Control
Some Chamberlain keypads offer more than basic open/close:
Setting A Temporary Pin
- Enter your main code and press Enter
- Press and hold Enter until the light blinks
- Enter a temporary 4-digit code, then Enter
- This PIN works for a limited time or number of uses
This is useful for guests, cleaners, or deliveries.
Controlling Multiple Garage Doors
If you have more than one opener, your keypad may control both:
- Program the first door as usual.
- For the second door, repeat the learn process but use a different code.
- Check your keypad’s manual for the button sequence.
Not all keypads support this, so check before you try.
How To Reset A Chamberlain Keypad: Step-by-step For Popular Models
Let’s break down the reset process for the most common models:
Chamberlain 940ev And 940estd (yellow Learn Button)
- Press and release the learn button on the opener.
- Within 30 seconds, enter your new 4-digit code on the keypad.
- Press Enter.
- The light blinks to confirm.
Chamberlain 977lm/977max (purple, Red, Or Orange Button)
- Press and release the learn button.
- Enter your new code.
- Press Enter.
For some older openers, you may need to press Enter a second time.
Chamberlain Universal Keypad
- Press and hold the program button on the keypad until it lights up.
- Enter your opener’s brand code (see manual).
- Enter your new PIN.
- Press Enter.
This process varies, so always check the instructions.
Preventing Future Problems
Resetting your keypad is only part of garage security. Here’s how to keep things running smoothly:
- Change codes regularly: Update your code every 6–12 months.
- Avoid obvious codes: Don’t use birthdays, street numbers, or simple patterns.
- Teach family members: Make sure everyone knows the new code and how to use the keypad.
- Keep the manual: Store it somewhere easy to find for the next reset.
- Check for updates: Chamberlain sometimes releases firmware or safety updates.
Comparing Chamberlain Keypad Features
To choose the right keypad or understand your current one, here’s a handy feature comparison:
| Feature | Basic Keypad | Universal Keypad | Premium Keypad |
|---|---|---|---|
| Works with multiple brands | No | Yes | Yes |
| Temporary PIN support | No | Yes | Yes |
| Backlight | Sometimes | Yes | Yes |
| Multi-door control | No | Yes | Yes |
| Weatherproofing | Standard | High | High |
This comparison helps you decide if an upgrade might be worth it for extra features.
Real-world Example: Resetting After Moving In
Imagine you just bought a house and don’t know the old garage code. Here’s what to do:
- Check the opener for a learn button.
- Press and hold the button for 10 seconds to erase all old codes.
- Program your own code as described above.
- Give temporary codes to family or contractors if needed.
- Replace the keypad battery if it’s old.
This process keeps your garage secure and puts you in control.
Non-obvious Insights Most People Miss
- Clearing codes erases ALL remotes: If you press and hold the learn button, all remotes and keypads stop working. Be ready to reprogram every device, not just the keypad.
- Keypad placement affects signal: If the keypad is too far from the opener or behind metal, the signal may be weak. Place it within clear line of sight to the opener for best results.
- Weather can affect performance: Extreme cold, heat, or water can cause keypads to fail or act up. If your keypad stops working after a storm, let it dry out or consider a weatherproof cover.
- Multiple users can cause confusion: If many people try to reset codes at the same time, it can cause conflicts. Always coordinate resets with family members.
When To Replace Your Keypad
Sometimes, a reset won’t fix your problem. Signs you might need a new keypad:
- Buttons are sticky or unresponsive, even after cleaning
- The backlight doesn’t work after a new battery
- The plastic is cracked or damaged
- Codes won’t program even after following all steps
A replacement is a small cost compared to the safety and convenience it provides.
Alternatives To Keypad Entry
If you’re having ongoing trouble, consider other options:
- Wireless remotes: These can be kept in your car or pocket.
- Smartphone controls: Many Chamberlain openers now work with MyQ, letting you open and close your garage from your phone.
- Manual keys: Some openers support traditional key switches for extra backup.
Each method has pros and cons, so pick the one that fits your lifestyle.
How To Keep Your Keypad Secure
Garage door keypads can be targeted by thieves if not set up safely. Here’s how to protect yourself:
- Change codes often: Don’t keep the same PIN for years.
- Shield the keypad: Install it where it’s hard to see from the street.
- Don’t share codes widely: Only give out temporary PINs to guests.
- Check for tampering: If the keypad looks scratched or loose, reset the code and inspect for damage.
Maintenance Tips For Long-term Performance
A little care goes a long way:
- Clean the keypad: Dust, dirt, and insects can build up. Wipe it down gently every few months.
- Test the battery: Replace it once a year, even if it seems fine.
- Check the seal: Make sure the keypad’s cover closes tightly to keep out water.
- Inspect wiring (if applicable): For older wired keypads, check that wires aren’t frayed or loose.
Following these steps helps you avoid most problems before they start.
Chamberlain Keypad Reset: At-a-glance Steps
For quick reference, here’s a summary:
| Step | Action | What to Watch For |
|---|---|---|
| 1 | Find the learn button | Check color and location |
| 2 | Clear old codes (optional) | All remotes will be erased |
| 3 | Enter programming mode | LED should light up |
| 4 | Type new code + Enter | Watch for light blink/click |
| 5 | Test the new code | Door should move |
Keep this table handy for future resets.
Getting Help When You’re Stuck
If you’ve tried everything and your keypad still won’t reset, it may be time to call a professional. Most garage door companies can help, or you can contact Chamberlain support. Be ready to give your opener and keypad model numbers.
You can also find helpful guides and videos on the official Chamberlain website or on trusted sites like Family Handyman.

Frequently Asked Questions
How Do I Find My Chamberlain Keypad’s Model Number?
Look on the back of the keypad or inside the battery compartment. The model number is usually printed on a sticker.
What If My Keypad Won’t Program After Several Tries?
Replace the battery and try again. If it still fails, clear all codes from the opener, then reprogram the keypad. Check for wireless interference.
Can I Reset My Chamberlain Keypad Without The Learn Button?
Most wireless keypads need the learn button. Some universal or wired models let you change the code if you know the old one, but not if you don’t.
How Often Should I Change My Garage Door Code?
For security, update your code every 6–12 months or after any security concern (like moving in or losing a remote).
Is It Safe To Let Guests Use A Temporary Code?
Yes, as long as you delete the temporary PIN afterward. Most keypads let you set codes that expire after a few uses or a certain time.
Resetting your Chamberlain garage door keypad puts you in control of your garage’s safety. By following the right steps, preparing properly, and keeping up with basic maintenance, you’ll enjoy peace of mind and smooth daily access to your home. Whether you’re a new homeowner or just need to update your PIN, you now have the knowledge to handle your keypad with confidence.


