Now Reading: How to Change Garage Door Remote Code Easily and Securely
- 01
How to Change Garage Door Remote Code Easily and Securely

Changing your garage door remote code is one of those tasks that seems technical, but with the right guidance, it’s surprisingly manageable. Whether your main concern is security, you’ve lost a remote, or you just bought a new house, updating the code helps keep your property safe. Many homeowners leave their remotes unchanged for years, but that small oversight can make your garage an easy target for break-ins.
If you’re new to garage door systems, you might wonder if you need a professional or if this is a DIY project. The good news is: most people can handle this themselves. However, every garage door opener model is a bit different, and missing a key step can leave your system unprotected. This article breaks down every part of the process, from understanding how remotes work to troubleshooting issues, in clear, simple language. You’ll also find tables comparing remote types and opener brands, practical tips that save time, and answers to common questions at the end. Let’s make your garage—and your peace of mind—more secure.
Why Change Your Garage Door Remote Code?
Changing your code is not just about convenience—it’s about security and control. Here are the main reasons homeowners decide to update their garage door remotes:
- Lost or stolen remotes: If your remote disappears, someone else could access your garage.
- Purchased a new house: Old codes may still work for previous owners or their contacts.
- Break-ins in your area: Updating your code makes it harder for thieves to use universal remotes.
- Routine maintenance: Regularly changing codes is a good practice, much like updating other passwords.
Many people overlook the fact that older remote codes are easier for hackers or thieves to copy. Modern systems use rolling codes for extra security, but only if you keep your remotes up to date.
How Garage Door Remote Codes Work
To change your code, it helps to know what you’re working with. Garage door remotes communicate with the opener using radio signals—basically, a wireless code that tells the opener to activate. The technology behind these signals has evolved:
- Fixed codes: Older systems use a set code, often set with tiny switches inside the remote.
- Rolling codes: Newer systems generate a new code each time you press the button, making them harder to hack.
Fixed Code Vs. Rolling Code: A Quick Comparison
Here’s a simple comparison of the two main types of garage door remote systems:
| Type | How It Works | Security Level | How to Change Code |
|---|---|---|---|
| Fixed Code | Uses DIP switches to set a fixed pattern | Low | Manually set switches inside remote & opener |
| Rolling Code | Generates a new code each use | High | Press “Learn” button, sync remote |
If you have a system from the 1990s or earlier, it probably uses fixed codes. Most modern systems (since the late 1990s) use rolling codes.
Tools And Materials You’ll Need
Before you start, gather these items. Having everything ready avoids frustration later:
- New remote (if replacing or adding one)
- Screwdriver (for fixed code systems)
- Ladder (to reach the opener unit)
- Flashlight (garages can be dark)
- Owner’s manual (if available)
- Pen and paper (for writing down switch positions, if needed)
Tip: Always unplug or turn off your garage door opener before opening the cover or working inside.
Identifying Your Garage Door Opener Type
The process for changing your code depends on your opener and remote type. Here’s how to quickly identify what you have:
- Look for DIP switches: Open the battery cover on your remote. If you see small toggle switches, you have a fixed code system.
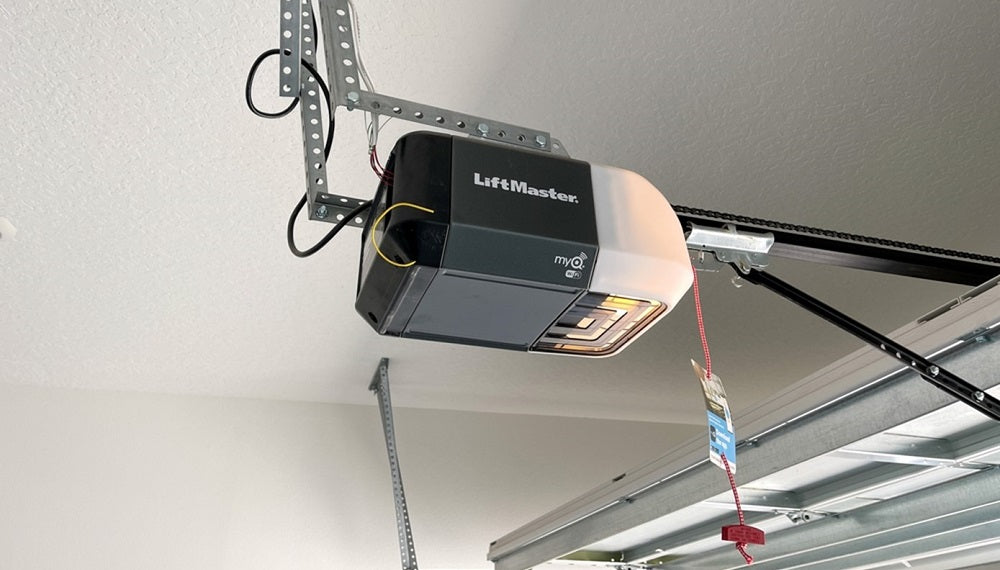
- Check for a “Learn” button: On the motor unit (usually on the ceiling), look for a button labeled “Learn,” “Smart,” or “Program.” This means you have a rolling code system.
- Read the brand and model number: This info is usually on a sticker on the opener unit. It can help you find the right instructions or videos online.
If you’re still unsure, the owner’s manual or a quick search of your model number can give you the answer.
Step-by-step: How To Change Garage Door Remote Code
Changing the code differs slightly for fixed code and rolling code systems. Let’s break down both methods.
Changing Code On Fixed Code Systems
Older garage door openers use DIP switches to set the code. Here’s how to change it:
- Open the remote: Remove the battery cover and find the row of tiny switches.
- Locate the switches on the opener: Use your ladder to reach the opener unit. There should be a matching set of DIP switches inside the unit, usually under a small panel.
- Set a new code: Use a pen or small screwdriver to move the switches into a new pattern. Make sure the remote and the opener switches match exactly.
- Test the remote: Close the covers, plug in the opener, and test your remote.
- Update all remotes: If you have more than one, set all remotes to the same new pattern.
Insight: Many people only update the remote and forget the opener, which means the change won’t work. Always update both.
Changing Code On Rolling Code Systems
Most newer openers use rolling codes for better security. The process is simpler:
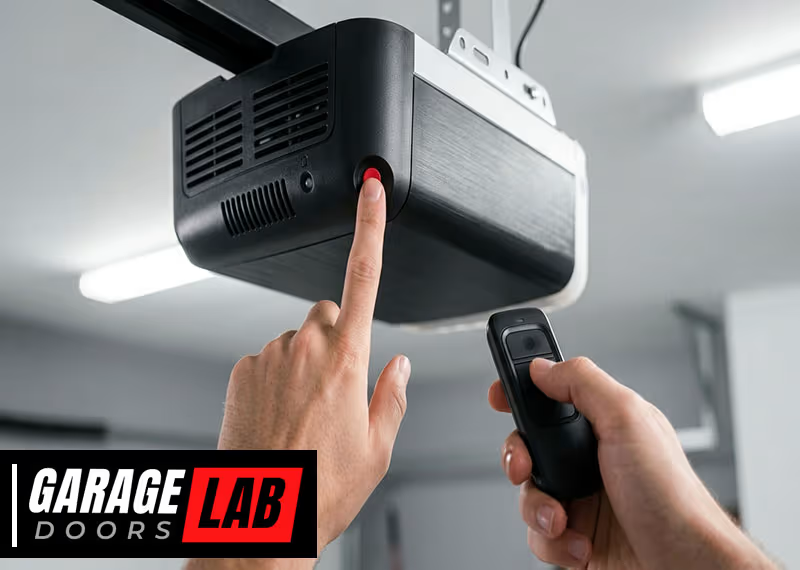
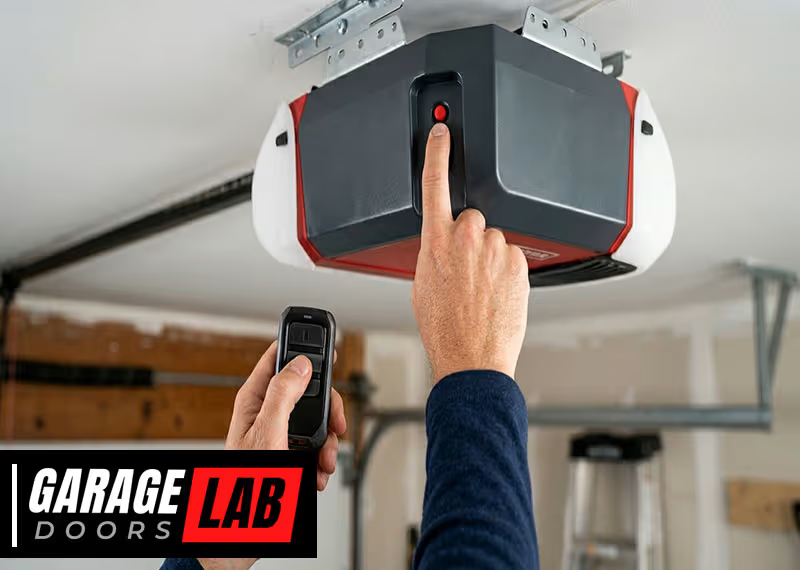
- Find the “Learn” button: On the main opener unit, usually near the light or antenna.
- Press and hold “Learn”: Hold for 2-5 seconds until the indicator light turns on.
- Press the remote button: Within 30 seconds, press the button on the remote you want to program. The opener light usually blinks to confirm.
- Test the remote: Wait 10 seconds, then press the remote again to check.
- Repeat for other remotes: If you have more remotes, repeat steps 2–4 for each.
Insight: Some rolling code openers have a short programming window (30 seconds or less). Have your remote ready before pressing “Learn.”
Erasing Old Codes (when Needed)
If you lost a remote or want to start fresh, erase all old codes:
- Hold the “Learn” button: Press and hold for 10+ seconds (on most models) until the light goes out.
- Test remotes: None should work now.
- Reprogram only the remotes you want: Follow the rolling code steps above.
Warning: Erasing codes will disconnect ALL remotes, even your car’s built-in opener.
How To Change The Code On Popular Opener Brands
Every brand has its own small quirks. Here’s a comparison of the most common garage door opener brands and how they handle code changes:
| Brand | Code Type | Learn Button Location | Special Notes |
|---|---|---|---|
| Chamberlain/LiftMaster | Rolling Code | Back or side of the motor unit (often yellow, red, or purple) | Some remotes need to be within 2 feet during programming |
| Genie | Rolling Code | Under the light cover or near wire terminals | May require pressing remote twice to sync |
| Craftsman | Rolling Code | Similar to Chamberlain | Follows Chamberlain process |
| Linear | Fixed or Rolling | Near terminal strip | Check model number for code type |
| Overhead Door | Rolling Code | Near wire terminals | Instructions often inside manual panel |
Always check your manual or the manufacturer’s website for your specific model’s steps. If you can’t find it, search your model number plus “program remote. ”
Replacing An Old Remote Or Adding A New Remote
Sometimes, you need to add a new remote or replace a lost one. The process is nearly the same as changing the code:
- Get a compatible remote: Check your opener’s brand and model to buy the right remote.
- Program using “Learn” button: For rolling code, follow the same steps as above.
- Set DIP switches: For fixed code, match the new remote’s switches to your opener.
Tip: Universal remotes work with most brands, but always double-check compatibility before buying.
Changing Keypad Entry Codes
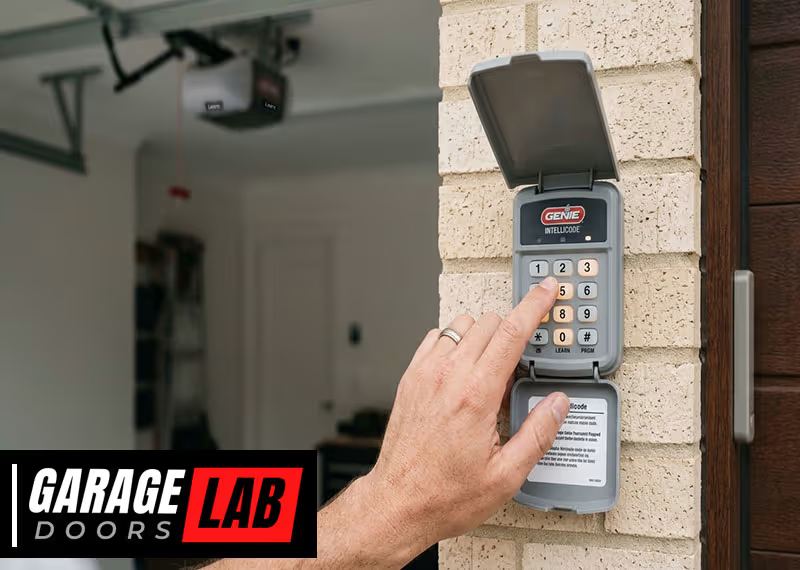
Many garages have a keypad outside for keyless entry. These are programmed separately from remotes:
- Find the “Learn” button: Same as with the remote.
- Press “Learn,” then enter new PIN: Press and release “Learn,” then enter your new 4-digit PIN on the keypad. Usually, you press ENTER or SEND to finish.
- Test the keypad: Make sure the door opens and closes with the new code.
- Repeat if needed: If you have trouble, reset by holding the “Learn” button for 10 seconds, then try again.
Non-obvious tip: Some keypads have their own batteries. If programming doesn’t work, check the battery first.
Common Problems And How To Solve Them
Changing your garage door remote code isn’t always smooth. Here’s how to solve the most frequent issues:
Remote Doesn’t Work After Programming
- Batteries low or dead: Replace batteries and try again.
- Out of range: Get closer to the opener during programming.
- Wrong remote type: Make sure the remote is compatible with your opener.
- Didn’t erase old codes: For used homes, erase all codes and start over.
Opener Light Doesn’t Blink
- Learn button not pressed long enough: Try holding it a bit longer.
- Remote button pressed too late: Press within 30 seconds of “Learn.”
- Wiring issues: Inspect for loose wires or damaged antenna.
Keypad Won’t Program
- Old batteries: Replace keypad battery.
- Wrong PIN format: Double-check the manual for correct steps.
- Too many failed attempts: Wait a few minutes before trying again.
Pro tip: If you’re stuck, unplug the opener for 60 seconds, then retry.
Safety And Security Tips
Keeping your garage secure is about more than just changing the code. Follow these tips for extra safety:
- Change codes after moving in: Always reset remotes and keypads in a new home.
- Don’t share your code: Only give your code to trusted people.
- Update codes regularly: Every 6–12 months, just like digital passwords.
- Use rolling code remotes: If your system is very old, upgrade for better security.
- Keep remotes out of sight: Don’t leave them in your car, especially if parked outside.
When To Call A Professional
Most people can change their garage door remote code themselves. However, call a pro if:
- The opener is very old, and you can’t find instructions
- You suspect wiring or electrical problems
- The opener doesn’t respond at all after many tries
- You want to upgrade to a new, more secure system
A professional can also check the entire system for other issues that might affect safety.
Upgrading Your Garage Door Opener For Better Security
If your opener is more than 20 years old or still uses fixed codes, it’s worth considering an upgrade. New openers have features like:
- Rolling code technology: Harder for thieves to copy.
- Smartphone control: Open and close your garage from anywhere.
- Battery backup: Keeps working during power outages.
- Motion sensors and lights: Better safety at night.
While this is an investment, it’s one of the best ways to protect your home. For more details, see the Consumer Reports Garage Door Opener Buying Guide.
Real-world Example: Changing Code After Buying A House
Sarah moved into her new home and realized the garage remote from the previous owner still worked. She wanted to be sure only her family had access. She found the “Learn” button on her Chamberlain opener, held it down to erase all codes, then quickly programmed her new remotes.
She also changed the keypad entry PIN. In less than 20 minutes, her garage was secure, and all old remotes were useless.
Key takeaway: Always reset codes when you move into a new place.
Garage Door Remote Code Myths
There’s a lot of confusion about remote codes. Let’s clear up a few myths:
- Myth: Remotes are all the same.
Fact: Remotes and openers must be compatible. Not all remotes work with all brands.
- Myth: Changing the remote code is enough.
Fact: If you don’t erase old codes from the opener, lost or stolen remotes may still work.
- Myth: Universal remotes always work.
Fact: Universal remotes work with most, but not all, systems. Always check compatibility.
Understanding these points saves time and keeps your garage more secure.
How Often Should You Change Your Garage Door Remote Code?
There’s no strict rule, but best practices are:
- After moving into a new home
- If you lose a remote
- After a break-in or attempted break-in
- Every 6–12 months as routine maintenance
For keypads, change the code as often as you’d change a password. This keeps you one step ahead of potential security risks.
Comparison: Diy Vs. Professional Code Change
Many homeowners wonder if they should do this themselves or hire someone. Here’s a quick side-by-side comparison:
| Option | Pros | Cons | Typical Cost |
|---|---|---|---|
| DIY | Low cost, quick, satisfying, flexible timing | Learning curve, possible mistakes | $0 (if you have all tools) |
| Professional | Fast, expert diagnosis, full inspection | Service fee, must schedule | $50–$100+ |
Non-obvious insight: Even if you call a pro, watch what they do. You’ll learn for next time.
Environmental Impact: Old Remotes And Batteries
Don’t just toss old remotes or batteries in the trash. Most contain materials harmful to the environment.
- Recycle batteries: Many hardware stores accept old batteries.
- E-waste centers: Take old remotes to an electronics recycling center.
- Remove batteries before disposing: Prevents leaks and chemical contamination.
A little effort here helps keep your home and the planet safe.
Frequently Asked Questions
How Do I Know If My Garage Door Opener Uses A Rolling Code?
Most openers made after 1996 use rolling code technology. Look for a “Learn” or “Smart” button on the opener unit, or check the manual. If your remote has DIP switches, it’s probably a fixed code. You can also search your opener’s model number online for details.
Can I Change The Code On My Garage Door Remote Without The Original Remote?
Yes, you can erase all old codes from the opener unit using the “Learn” button, then program a new compatible remote. However, you need at least one remote to operate the door. If you’ve lost all remotes, you’ll need to buy a new one to reprogram.
What Should I Do If I Lose My Garage Door Remote?
Immediately erase all codes from your opener unit and reprogram only the remotes you still have. This stops anyone with the lost remote from accessing your garage. Consider updating your keypad entry code as well.
How Many Remotes Can I Program To My Garage Door Opener?
Most openers support 2 to 5 remotes. Check your owner’s manual for the exact number. If you try to program more than the limit, the oldest remote may be removed from memory.
Is It Safe To Program My Garage Door Remote Myself?
Yes, DIY programming is safe if you follow instructions and unplug the opener before opening any panels. If you feel unsure or have a very old system, contact a professional for help.
Changing your garage door remote code is one of the easiest and most effective ways to protect your home. With a little preparation and careful attention to the steps, you can improve your garage’s security in less than an hour.
Remember to keep your remotes safe, update your codes regularly, and enjoy the peace of mind that comes with a secure home.