
Reprogramming a garage door keypad might seem like a small task, but it plays a big role in your home’s security and convenience. Whether you’ve just moved in, lost a remote, or feel your code is no longer safe, learning how to reprogram your keypad can give you control and peace of mind.
Many homeowners are surprised that this process is straightforward and doesn’t always require a professional. With a bit of guidance, you can do it yourself and avoid unnecessary service calls.
In this guide, you’ll find step-by-step instructions, practical examples, and solutions for common problems. We’ll look at the main keypad types, what tools you need, how to reset and reprogram, and how to test your work. You’ll also find tips that most beginners miss, like the importance of battery health and what to do if your keypad is old or unresponsive.
By the end, you’ll be able to handle almost any garage keypad situation confidently.
Understanding Garage Door Keypads
Garage door keypads are small devices, usually mounted outside the garage, that allow you to open and close the door using a numeric code. They use wireless signals to communicate with the opener mechanism inside your garage.
Why Reprogram Your Garage Door Keypad?
- Security: If you suspect someone else knows your code, changing it helps keep your home safe.
- Lost or Stolen Remotes: If a remote is lost, reprogramming prevents unauthorized access.
- Moving In/Out: Always reset the keypad when moving into a new home.
- Malfunctioning Keypad: Sometimes, reprogramming fixes glitches or unresponsive buttons.
- Adding Users: You may want to update or add codes for new family members or guests.
Types Of Garage Door Keypads
Garage door keypads usually fall into these categories:
- Wired keypads: Connected directly to the opener. Less common today.
- Wireless keypads: Battery-operated and communicate via radio signals. Most modern systems use these.
Keypad compatibility depends on your garage door opener’s brand and model. The most popular brands include LiftMaster, Chamberlain, Genie, Craftsman, and Overhead Door.
Tools And Preparation
Before starting, make sure you have the following:
- A ladder: Most openers are installed on the garage ceiling.
- The garage door opener manual: If you don’t have the manual, you can often find it online using the opener’s model number.
- A fresh 9V or AA battery: For wireless keypads, a weak battery can cause programming to fail.
- A pen and notepad: To record your new code and any important steps.
- A flashlight: Useful if your garage is dimly lit.
Safety First
- Make sure the garage door area is clear.
- Unplug the opener if you need to work on internal wiring.
- If you use a ladder, place it on stable ground.
Finding Your Opener’s Learn/program Button
Most garage door openers have a Learn or Program button. This button is crucial for reprogramming the keypad, as it puts the opener into a mode where it can accept new codes.
Where To Find The Learn Button
- Look on the back or side of the garage door opener unit.
- You may need to open a small panel or light cover.
- The button is often red, yellow, purple, or green.
Example
On a Chamberlain opener, the Learn button is usually next to the wiring terminals and the light bulb.
What The Colors Mean
Different colors can indicate different programming methods or compatibility with remotes and keypads.
| Learn Button Color | Approximate Year Range | Frequency | Notes |
|---|---|---|---|
| Yellow | 2011–present | Security+ 2.0 (315 MHz/390 MHz) | Most modern remotes/keypads |
| Purple | 2005–2011 | 315 MHz | Some newer keypads may not be compatible |
| Red/Orange | 1997–2005 | 390 MHz | Older models |
| Green | 1993–1997 | 390 MHz | Original rolling code systems |
Tip: Take a photo of the Learn button area for reference while you’re on the ground.
How To Reset Your Garage Door Keypad
Resetting erases the old code and prepares the keypad for a new one. The process may vary by brand and model, but these are the general steps.
Step-by-step Reset Process
- Locate the Learn Button: Use your ladder to find the Learn button on the opener.
- Press and Hold: Press and hold the Learn button for about 6–10 seconds. Most units have a small indicator light that will turn off when codes are erased.
- Release the Button: After the light goes out, release the button. All remote controls and keypads are now erased.
- Wait for 30 seconds: This gives the system time to reset.
Caution: Erasing all codes means you’ll need to reprogram all remotes and keypads.
Special Case: Keypads With A Reset Button
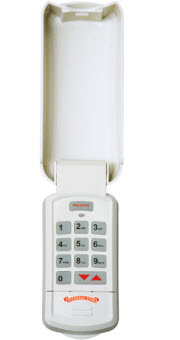
Some keypads, especially standalone ones, have a dedicated Reset button inside the cover. Use a paperclip or pen tip to press it for a few seconds.
Reprogramming The Keypad: Step-by-step Guide
Once you’ve reset the keypad, you can enter a new code.
General Programming Steps
- Access Programming Mode: Press the Learn button on the opener. An indicator light will blink or stay steady, depending on the model.
- Enter Desired Code: Go to the keypad (usually outside the garage). Enter your new 4-digit code.
- Press the Program Button or Key: Most keypads have a “Program”, “Enter”, or “Send” button. Press this after entering your code.
- Test the Code: Wait a few seconds, then enter your new code again. The garage door should open or close.
Example: Chamberlain/liftmaster/ Craftsman
- Press and release the Learn button (indicator light comes on).
- Within 30 seconds, enter your 4-digit code on the keypad.
- Press and hold the Enter button until the opener light blinks.
- Release the Enter button. Code is set.
Example: Genie
- Press and hold the Program button on the opener until the small LED blinks.
- Enter your chosen code on the keypad.
- Press the Up/Down arrow or “Program” key.
- The opener will click or the light will flash. Code is set.
Brand Comparison Table
Here’s a quick look at how the programming process differs between popular brands.
| Brand | Learn Button Location | Keypad Programming Key | Time Limit for Programming |
|---|---|---|---|
| Chamberlain / LiftMaster | Back or side of main unit | Enter | 30 seconds |
| Genie | Near antenna wire | Up/Down or Program | 30 seconds |
| Craftsman | Back panel | Enter | 30 seconds |
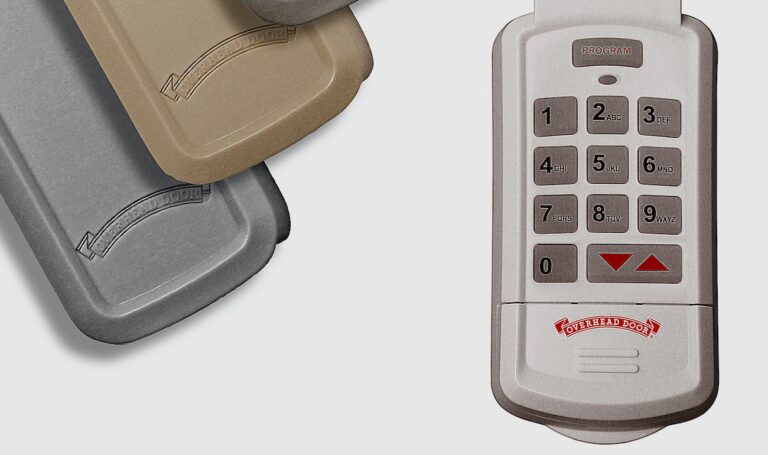
| Overhead Door | Side panel | Program | 30 seconds |
Non-obvious insight: Each model has a limited “listening” window (usually 30 seconds) after pressing the Learn button. If you wait too long, you’ll need to restart the process.
Setting Temporary Or Guest Codes
Many modern keypads let you add temporary codes for guests or deliveries.
How To Add A Temporary Code
- Enter your main code and press the Program or Enter button.
- Press the or # button (check your manual).
- Enter the temporary code (often 4 digits).
- Press Enter to confirm.
Temporary codes usually expire after a set number of uses or time (like 24 hours).
Example: If you have a delivery while on vacation, set a temporary code. The code will stop working after the delivery or after 24 hours.
Testing Your Keypad
After programming, always test to make sure everything works.
Testing Steps
- Wait for 1–2 minutes to let the system “settle.”
- Enter the new code on the keypad.
- Watch the garage door. It should move smoothly.
- Try the code multiple times.
- Test at different times of day.
Tip: If the keypad only works sometimes, check the battery or signal strength.
Troubleshooting Common Issues
Even when you follow all steps, sometimes things don’t work as expected. Here’s how to solve common problems.
Keypad Not Responding
- Check the battery. A weak battery is a common cause of failure.
- Make sure the keypad is clean and free from dirt.
- If it’s old, consider replacing it.
Code Not Accepted
- Double-check the opener’s Learn button color and compatibility.
- Make sure you pressed Enter/Program within the time window.
- Try a different 4-digit code (avoid repeating digits like 1111).
Door Opens Randomly
- Someone else’s remote may be interfering. Reprogram all remotes and keypads.
- Make sure the code is not too simple.
Keypad Works, But Remotes Don’t
- After a full reset, all devices must be reprogrammed.
- Re-sync each remote using the Learn button.
When To Replace The Keypad
If your keypad is more than 10 years old or exposed to harsh weather, it may fail even after reprogramming. Signs you need a new keypad:
- Buttons are sticky or unresponsive.
- The backlight doesn’t turn on.
- The keypad cover is cracked.
Modern universal keypads work with most openers, but always check compatibility before buying.
Advanced Programming: Multi-door And Rolling Codes
Some homes have more than one garage door. Or, you may have a system with rolling codes for extra security.
Programming For Multiple Doors
Many keypads let you control two or even three doors. The process usually involves:
- Assigning a unique code for each door.
- Selecting the door number before entering the code.
- Programming the opener for each door separately.
Check your keypad manual for specific instructions.
Rolling Code Technology
Rolling codes change the code every time you use the keypad or remote. This makes it much harder for thieves to intercept your code.
- Most openers made after 1996 use rolling code technology.
- Programming is the same, but codes are encrypted and more secure.
Non-obvious insight: If you have a very old keypad, it may not support rolling codes. Upgrading your keypad can improve security.
Real-world Examples
Let’s look at a couple of practical scenarios:
Example 1: Reprogramming A Liftmaster Keypad
Sarah just moved into a new house with a LiftMaster opener. She wants to change the code for safety.
- She finds the yellow Learn button on her opener.
- She presses and releases the button, then quickly goes to the keypad.
- She enters her new 4-digit code and presses Enter.
- The opener light blinks. She tests the code—success!
Example 2: Troubleshooting A Genie Keypad
Mike’s Genie keypad stopped working after a storm.
- He checks the battery and replaces it.
- He presses the Program button on the opener until the LED blinks.
- He enters his code and presses the Up/Down arrow.
- The garage door works again.
Example 3: Setting A Temporary Code
Linda expects a package while she’s out.
- She enters her main code, presses Program, then enters a temporary 4-digit code.
- She presses Enter.
- She tells the delivery person the temporary code, which expires after one use.
Keypad Maintenance Tips
Keeping your garage door keypad in good condition ensures long-term reliability.
- Replace batteries every year or as soon as you notice weak performance.
- Clean the keypad with a soft, dry cloth. Avoid harsh chemicals.
- Check for cracks or weather damage, especially if the keypad is exposed.
- Test the code monthly to make sure it’s still working.
- Update codes if you suspect someone else knows your combination.
Environmental Considerations
- In cold climates, battery performance drops. Use lithium batteries for better reliability.
- Sunlight can fade key labels. Use a keypad cover if possible.
Security Best Practices
Your garage is a key entry point to your home. Take steps to keep it secure.
- Use a unique code (not your birth year or street number).
- Change your code every 6–12 months.
- Do not share your code except with trusted people.
- For maximum safety, use keypads and remotes with rolling code technology.
Tip: If you lose a remote or suspect someone knows your code, reset and reprogram all devices immediately.
Common Mistakes To Avoid
- Not resetting all devices: When you erase codes, reprogram all remotes and keypads.
- Waiting too long to enter the new code: Learn mode times out quickly.
- Using weak batteries: Always start with a fresh battery.
- Forgetting to test: Always test your new code several times.
- Storing the code in obvious places: Don’t write the code on or near the keypad.
Comparison Of Universal Vs. Brand-specific Keypads
Many homeowners consider switching to a universal keypad. Here’s what you need to know.
| Feature | Universal Keypad | Brand-Specific Keypad |
|---|---|---|
| Compatibility | Works with many brands | Designed for one brand |
| Programming Steps | May require extra steps | Simpler process |
| Price | Usually less expensive | Often higher |
| Features | Basic, covers most needs | May have advanced options |
| Support | General instructions | Better customer support |
If your opener is old or rare, a universal keypad may be your best option—but always check compatibility.
When To Call A Professional
Most keypad issues can be solved at home. But if you experience any of these, consider calling a pro:
- Reprogramming doesn’t work after several tries.
- The opener makes strange noises or doesn’t respond at all.
- Wires are damaged or there’s evidence of electrical problems.
- You’re uncomfortable working on a ladder or around electronics.
A qualified technician can quickly diagnose and fix complex problems.
Helpful Resources
If you need more help, check out the manufacturer’s website or download manuals. For more information about garage door openers and home security, visit the official Wikipedia page on garage door openers.
Frequently Asked Questions
How Often Should I Change My Garage Door Keypad Code?
It’s a good idea to change your code every 6–12 months, or anytime you think someone else knows it. Also, always change it after moving into a new home.
What Should I Do If My Keypad Still Doesn’t Work After Reprogramming?
Check the battery first, then make sure you followed the programming steps exactly. If the keypad is old or damaged, replacement may be necessary.
Can I Use The Same Code For Multiple Garage Doors?
Some keypads support multiple doors with different codes. Check your keypad’s manual. Using unique codes for each door increases security.
Is It Safe To Share My Keypad Code With Neighbors?
Only share your code with people you trust completely. For short-term access, use a temporary code if your keypad supports it.
How Do I Find Out If My Keypad Is Compatible With My Opener?
Check the opener’s brand, model, and Learn button color. Most modern universal keypads cover popular brands, but always confirm compatibility in the manual or on the manufacturer’s website.
Reprogramming your garage door keypad is one of the simplest and most effective ways to boost your home’s security. With the right information and a little patience, you can handle the entire process yourself. Whether you’re updating for peace of mind or fixing a problem, these steps will keep your garage—and your home—safe and convenient.