Now Reading: How to Sync Garage Door Remote Easily in Minutes
- 01
How to Sync Garage Door Remote Easily in Minutes

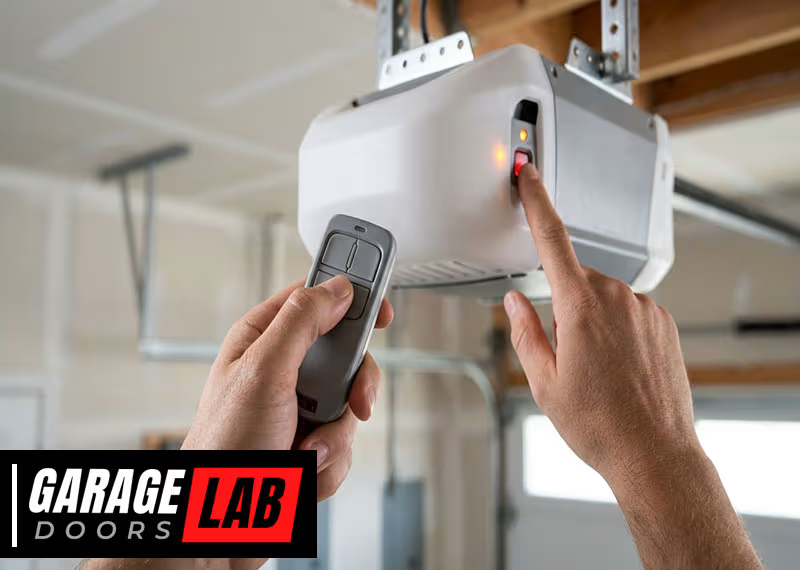
Syncing a garage door remote can feel confusing, especially if you’ve never done it before or if you just moved into a new home. Many people worry about getting it wrong and being locked out—or having the door open on its own.
The truth is, learning how to sync your garage door remote is easier than you think, and you don’t need to be a tech expert. With a little patience and the right steps, you can connect your remote quickly and safely.
Garage door openers have become smarter and more secure over the years. Today’s systems use rolling codes and wireless technology to prevent unwanted access. While this adds security, it also means the syncing process is a bit different compared to the old days.
Whether you’ve just bought a replacement remote, need to reset all remotes for security, or want to add an extra one for family members, you’ll find all the answers here.
This article will guide you step by step through syncing most major garage door remotes, including helpful tips for popular brands like LiftMaster, Chamberlain, Genie, and more. You’ll learn how to handle common problems, understand the technology, and avoid mistakes that could waste time or cause frustration. Let’s get started and help you take control of your garage door system with confidence.
Understanding Garage Door Remote Systems
Before you start syncing, it helps to know how garage door remotes work. Most modern remotes use radio signals to talk to the garage door opener. When you press the button, the remote sends a coded signal. The opener’s receiver checks if the code matches, and if it does, it triggers the door to open or close.
There are two main types of systems:
- Fixed code remotes: Older models use a static code. This means the code never changes. These are less secure because someone could copy the code.
- Rolling code remotes: Newer systems (most since the mid-1990s) change the code every time you use the remote. This makes it very hard for someone to hack or copy.
Most homes today use rolling code technology. The syncing process is different depending on your system, so it’s important to know which one you have. Check your opener’s manual or look for a label with the model and manufacturing date.
When Should You Sync A Garage Door Remote?
You may need to sync your remote in several situations:
- After buying a replacement remote: New remotes need to learn the correct code.
- When adding an extra remote: For new drivers, guests, or family members.
- After replacing the opener: Any time you install a new motor unit.
- Security reasons: If you lose a remote or want to reset access.
- Remote not working: Sometimes, remotes lose sync due to battery changes or electrical problems.
Syncing is also called “programming” or “pairing. ” It’s a useful skill for any homeowner.
Tools And Preparation
Before you begin, gather what you’ll need:
- The garage door remote (new or existing)
- A sturdy ladder (for reaching the opener unit)
- A flashlight (if your garage is dim)
- The opener’s manual (optional, but helpful)
- A pen and paper (if you want to write down model numbers or steps)
- Safety glasses (if the area above your opener is dusty)
Make sure your garage is well-lit and your car is parked outside, just in case the door opens or closes unexpectedly.
How To Sync Garage Door Remote: Step-by-step Guide
Syncing a remote can vary by brand, but most systems use a similar process. Here’s a universal guide that works for LiftMaster, Chamberlain, Genie, and other popular brands.
Step 1: Locate The Learn Button
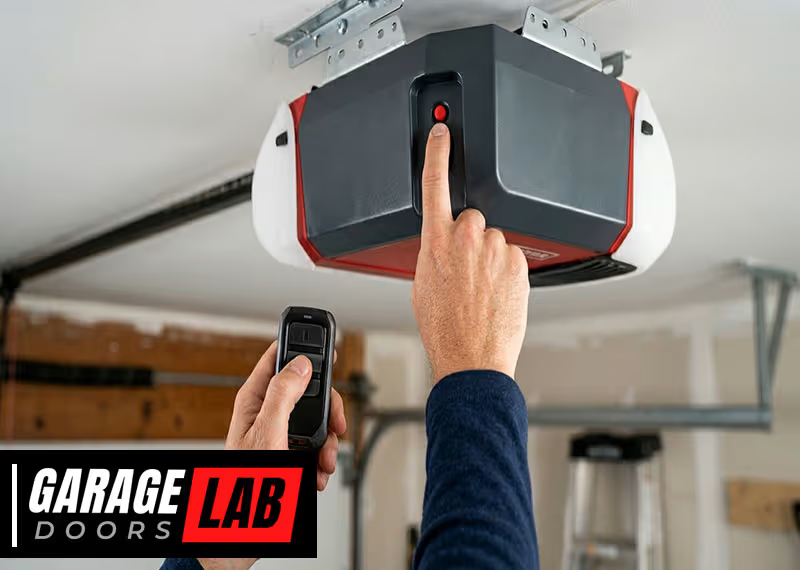
The Learn button is the key to syncing your remote. It’s usually found on the back or side of the opener motor unit (the box on your garage ceiling). You may need to remove a light cover or panel. The button might be labeled “Learn,” “Set,” or “Program.” It’s often yellow, red, purple, or green.
Tip: Take a photo of the opener’s control panel before you start, so you remember where everything is.
Step 2: Prepare The Remote
Make sure your remote has fresh batteries. Weak batteries can cause syncing to fail. If your remote has several buttons, decide which one you want to program.
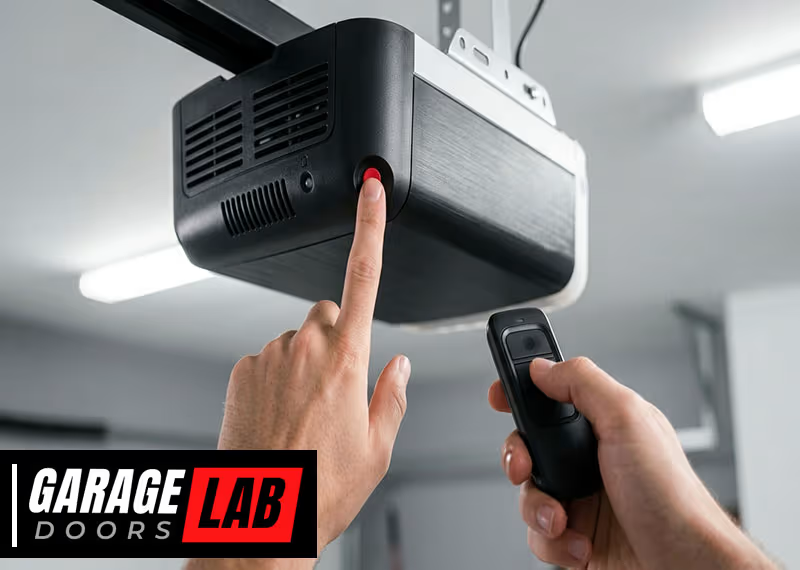
Step 3: Press The Learn Button
- Stand on your ladder and press the Learn button once. Do not hold it down for more than 2-3 seconds.
- You’ll see an indicator light turn on or blink. This means the opener is in “learning mode.”
- You usually have 30 seconds to finish the next step.
Step 4: Program The Remote
- While the opener’s light is on, press and hold the button on your garage door remote that you want to use.
- Hold it until you see the opener’s lights flash or hear a click. This usually takes 2-5 seconds.
- If the opener light blinks or you hear a beep, the remote is synced.
Step 5: Test The Remote
- Get down from the ladder and stand clear of the door.
- Press the remote button you just programmed.
- The door should open or close smoothly.
- If it works, you’re done! If not, repeat the steps, making sure you press the buttons in the right order.
Step 6: Repeat For Additional Remotes
If you have more than one remote to program, repeat steps 3 and 4 for each remote. Most openers can handle up to 5-7 remotes.
Practical insight: If you hold the Learn button too long (more than 6-10 seconds), it may erase all remotes. Only press it once, briefly, to avoid losing all synced remotes.
Brand-specific Syncing Tips
While the above method works for most brands, some companies use unique steps. Here’s what to know about the main brands:
Liftmaster And Chamberlain
These brands are owned by the same parent company, so their remotes and openers are often very similar.
- Learn button colors (yellow, red, orange, green, or purple) usually indicate the opener’s technology.
- For newer “MyQ” models, you may need to use the MyQ app or follow a special sequence. Always check the manual for smart features.
- If you’re adding a remote to a wall-mounted opener, the Learn button is often on the side or under a cover.
Genie
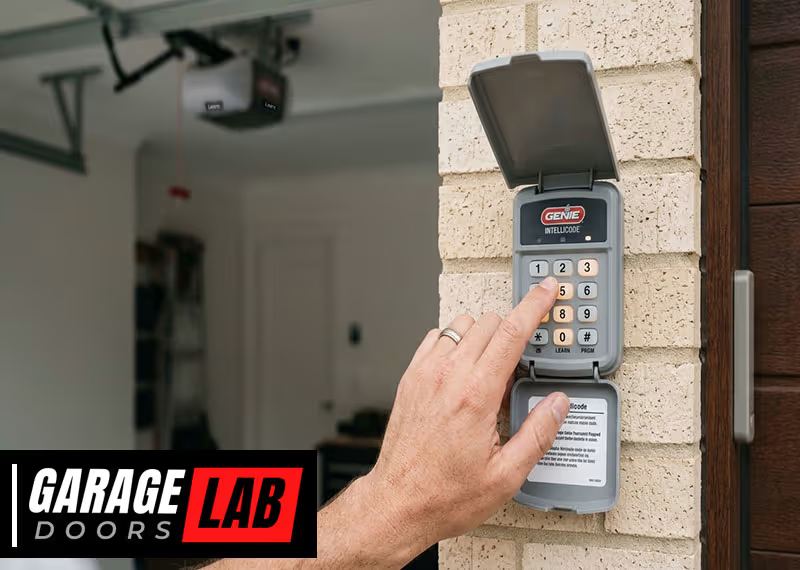
- Genie openers use a “Learn” or “Program” button, sometimes labeled “Intellicode.”
- For some models, you must press the remote button twice within 30 seconds.
- Genie often uses a small LED indicator next to the Learn button.
Craftsman
- Most Craftsman openers are compatible with LiftMaster/Chamberlain remotes and use the same syncing steps.
- Look for a “Learn” or “SRT” button.
Overhead Door
- Overhead Door openers use a “Learn Code” button.
- For CodeDodger systems, press the Learn Code button, then press the remote button three times, waiting for the opener light to flash.
Linear, Marantec, And Others
- Some brands use a special “program” switch or require you to use a separate “programming transmitter.”
- Always check the manual for unique instructions.
If you’re unsure about your opener brand or model, search for the manual online by typing “[Brand] garage door opener manual” and the model number.
Syncing A Universal Garage Door Remote
Universal remotes work with many brands, but they require extra steps. Here’s how to program a universal remote:
- Identify your opener brand and frequency. This info is usually on a label on the opener unit or in the manual.
- Set the remote switch (if your universal remote has DIP switches or selector buttons, match them to your opener type).
- Put the opener in learn mode (as above).
- Press the remote’s program button (sometimes you must use a pen tip to reach it).
- Press the main remote button several times (some remotes need up to 5 presses to sync).
- Test the remote as before.
Extra insight: Not all universal remotes work with every opener. Very old or very new openers may not be compatible. Always check the packaging or website for compatibility lists.
Syncing A Car’s Built-in Garage Door Button (homelink)
Many cars have a built-in garage door opener system, usually called Homelink. Syncing Homelink is slightly different:
- Clear the Homelink memory if the car is used. Hold the two outside Homelink buttons until the indicator light blinks rapidly (about 20 seconds).
- Choose the button you want to use.
- Hold your garage remote close to the Homelink panel (just a few inches away).
- Press and hold the Homelink button and your remote button at the same time. The Homelink light will change from slow to fast blinking when it’s programmed.
- Press the Learn button on your opener (in your garage).
- Within 30 seconds, press the Homelink button in your car. The opener light should blink, showing it’s synced.
- Test from outside to make sure the door opens or closes.
Common mistake: People often forget to do the “Learn button” step in the garage, so the car’s Homelink can’t complete the sync.
Common Problems And Solutions
Even with clear steps, syncing sometimes fails. Here’s how to solve the most frequent issues:
The Remote Won’t Sync
- Check the batteries. Weak or old batteries are the top cause.
- Make sure you’re pressing the right buttons. Review the steps carefully.
- Confirm the opener is in learning mode. The indicator light should be on.
- Too many remotes already synced. Many openers only allow a set number. If you’ve reached the limit, erase an old remote.
- Remote not compatible. Not all remotes work with all openers. Check the remote’s package or website.
The Door Opens But Won’t Close
- Safety sensors may be blocked. Clean or adjust the sensors near the floor at the door’s sides.
- Remote range is too short. Try syncing closer to the opener or replace the batteries.
Remotes All Stopped Working
- Power outage or surge may have reset the opener.
- Learn button was held too long, erasing all remotes. Just re-sync each remote.
The Remote Works Intermittently
- Signal interference from wireless devices nearby can cause problems.
- Antenna wire on opener is damaged or folded up. Make sure the antenna wire is hanging straight down.
Pro tip: If you live near an airport or radio tower, interference can be strong. Try a remote with a different frequency or talk to your opener’s customer support.
Safety Tips When Syncing Garage Door Remotes
Garage doors are heavy and use strong springs. Never stand under the door or put your hands near moving parts while syncing or testing the remote. Always make sure:
- Children and pets are clear of the door area.
- The ladder is stable and someone is nearby if you need help.
- You wear safety glasses if there’s dust or loose insulation above the opener.
Non-obvious insight: If your opener is more than 15-20 years old, consider upgrading for improved safety and security features. Modern systems offer battery backup and advanced motion sensors.
Advanced Features: Smart Garage Door Openers
Many new garage door openers connect to your smartphone or smart home system. If you have a smart opener:
- Download the manufacturer’s app (like MyQ for Chamberlain/LiftMaster, Aladdin Connect for Genie).
- Follow the app’s instructions to pair your phone, set up notifications, and control the door remotely.
- Some smart openers still require syncing physical remotes using the Learn button process.
Extra tip: Smart openers let you check if the door is open or closed from anywhere. This is handy if you travel or want to give temporary access to others.
For more about smart garage technology, check the Wikipedia article on garage door openers.

Data Comparison: Popular Garage Door Remote Brands
Below is a quick comparison of major brands and their syncing features.
| Brand | Learn Button Location | Sync Time Limit | Rolling Code | Smartphone Compatible |
|---|---|---|---|---|
| LiftMaster | Back/Side of Motor | 30 seconds | Yes | Yes (MyQ) |
| Genie | Back of Motor | 30 seconds | Yes | Yes (Aladdin Connect) |
| Chamberlain | Back/Side of Motor | 30 seconds | Yes | Yes (MyQ) |
| Craftsman | Back of Motor | 30 seconds | Yes | No |
| Overhead Door | Side/Back of Motor | 30 seconds | Yes | Optional |
How To Erase All Synced Remotes
Sometimes you need to erase all remotes, such as after moving into a new home or for security. Here’s how:
- Find the Learn button on your opener.
- Press and hold the Learn button for 6-10 seconds until the indicator light turns off (or blinks rapidly).
- Release the button. All remotes are now erased.
- Sync only the remotes you want to keep.
Warning: This will erase all synced remotes, including car Homelink systems. Only do this if you want a full reset.
Table: Signs Your Remote Needs Syncing
Here are some common symptoms that your garage door remote may need to be re-synced.
| Symptom | Possible Cause | Action |
|---|---|---|
| Remote doesn’t work at all | Lost sync, dead battery | Replace battery, re-sync |
| Remote only works from close range | Weak battery, interference | Replace battery, check for interference |
| Remote stopped after power outage | Lost memory | Re-sync remote |
| New remote doesn’t work | Needs syncing | Follow syncing steps |
Choosing The Right Garage Door Remote
If you’re buying a new or replacement remote, consider these important factors:
- Compatibility: Check your garage door opener’s model number and year. Not all remotes work with all openers.
- Brand: Using the same brand as your opener usually makes syncing easier.
- Rolling code support: For security, choose remotes with rolling code technology.
- Range: Standard range is 50-100 feet, but some premium remotes reach further.
- Features: Some remotes have multiple buttons for controlling more than one door or smart features.
- Build quality: A sturdy remote lasts longer, especially if it’s kept on a keychain.
Non-obvious insight: Universal remotes are convenient, but can be less reliable than official brand remotes, especially with newer or more advanced openers.
Table: Rolling Code Vs Fixed Code Remotes
Understanding the difference can help you make a safer choice.
| Feature | Rolling Code | Fixed Code |
|---|---|---|
| Security | Very secure | Low security |
| Easy to clone | No | Yes |
| Used since | Mid-1990s | Pre-1995 |
| Compatibility | Modern openers | Older openers only |
How To Maintain Your Garage Door Remote
Keeping your remote in good working order reduces the need for frequent syncing. Here’s how:
- Change the battery every 1-2 years. Weak batteries can cause syncing errors.
- Keep the remote clean. Dirt can block the buttons.
- Don’t drop or get it wet. Remotes are not waterproof.
- Store spares in a safe place. If you lose a remote, erase all and re-sync for security.
- Test all remotes every few months. This prevents surprises when you need them most.
Upgrading Your Garage Door Opener
If you have an older opener, syncing may be difficult or impossible with new remotes. Consider upgrading if:
- Your opener is more than 20 years old.
- You want smartphone control or battery backup.
- Your current remote uses fixed code technology.
New openers are more secure and reliable. Plus, they offer features like auto-close timers, quiet operation, and LED lighting.
Frequently Asked Questions
How Many Remotes Can I Sync With My Garage Door Opener?
Most openers allow you to sync 5-7 remotes, including car Homelink systems. Check your opener’s manual for the exact number. If you reach the limit, you may need to erase an old remote before adding a new one.
My Remote Stopped Working After A Power Outage. Do I Need To Re-sync?
Yes, sometimes a power outage or surge can erase the opener’s memory. Try re-syncing the remote using the steps above. Also, check for blown fuses or tripped circuit breakers.
Can I Use A Universal Remote With My Garage Door Opener?
Many universal remotes work with major brands, but not all models are compatible. Always check the remote’s packaging or website for a compatibility list before buying.
Is It Safe To Sync My Garage Door Remote Myself?
Yes, syncing a remote is safe if you follow basic precautions. Use a steady ladder, keep children away from the door, and avoid standing under the door when testing.
How Do I Erase A Lost Or Stolen Garage Door Remote?
Hold the Learn button on the opener for 6-10 seconds to erase all synced remotes, then re-sync only the remotes you still have. This prevents lost remotes from being used to open your door.
Syncing your garage door remote puts you in control and keeps your home secure. With the right steps, a little patience, and good maintenance, you’ll enjoy smooth, reliable operation for years to come. If you ever have trouble, your opener’s manual or the manufacturer’s support line can provide extra help.