Now Reading: How to Reprogram Garage Door Remote: Quick and Easy Steps
- 01
How to Reprogram Garage Door Remote: Quick and Easy Steps
When your garage door remote stops working or you get a new one, you might feel lost. But you don’t need to call a technician every time. Reprogramming a garage door remote can be a simple task if you follow the right steps.
Most people don’t realize how easy it is once you understand the basics. In this guide, you’ll learn how to reprogram your garage door remote, what tools you need, and how to avoid common mistakes. Whether you have a modern rolling code system or an older fixed code remote, you’ll find everything you need to get your door working smoothly again.
Understanding How Garage Door Remotes Work
Before you start, it helps to know how garage door remotes communicate with the opener. Most modern remotes use a rolling code system. This means each time you press the remote, it sends a new code to the opener. This keeps your home safer because thieves can’t easily copy your code. Older remotes use a fixed code, which is less secure but easier to program.
Inside your garage door opener, there is a circuit board with a “learn” button. This button tells the opener to listen for a new remote. When you press the button, it puts the opener in programming mode for a short time. Your goal is to press your remote button while the opener is ready to listen.
Some systems use DIP switches instead. These are tiny switches inside both the remote and the opener, and they must match exactly for the remote to work. Knowing which system you have will help you choose the right method.
Safety Precautions Before You Begin
Working with a garage door opener isn’t dangerous, but you should always be careful. Here are a few safety tips:
- Unplug the garage door opener before opening its cover or working near wiring.
- Make sure children and pets are away from the door.
- Use a step stool or ladder safely if you need to reach the opener.
- Avoid pressing the remote while someone is under the door.
For extra safety, check the manual for your specific opener brand. Some openers have unique safety features you should understand before starting.
What You’ll Need
To reprogram a garage door remote, you usually don’t need many tools. Here’s a quick list:
- The remote you want to program (with fresh batteries)
- Access to the garage door opener unit (usually on the ceiling)
- A step stool or ladder
- The owner’s manual (if you have it)
- A small screwdriver (for remotes with DIP switches)
Having these items ready will save you time and reduce frustration.
Identifying Your Garage Door Opener Type
Not all garage door openers are the same. The programming process depends on the type you have. Here are the most common types:
- Rolling Code Openers (1993 and newer): Brands like LiftMaster, Chamberlain, and Craftsman mostly use rolling codes.
- Fixed Code Openers (before 1993): Many older Genie, Stanley, and Sears models use DIP switches.
- Smart Openers: Some modern systems connect to Wi-Fi and use an app.
Look for a label on your opener. It usually tells you the brand and model number. If you’re unsure, search for your model online to find out which system it uses.
Step-by-step Guide: How To Reprogram Garage Door Remote
The steps below cover the two most common systems: rolling code and fixed code. Follow the path for your opener type.
For Rolling Code Garage Door Openers
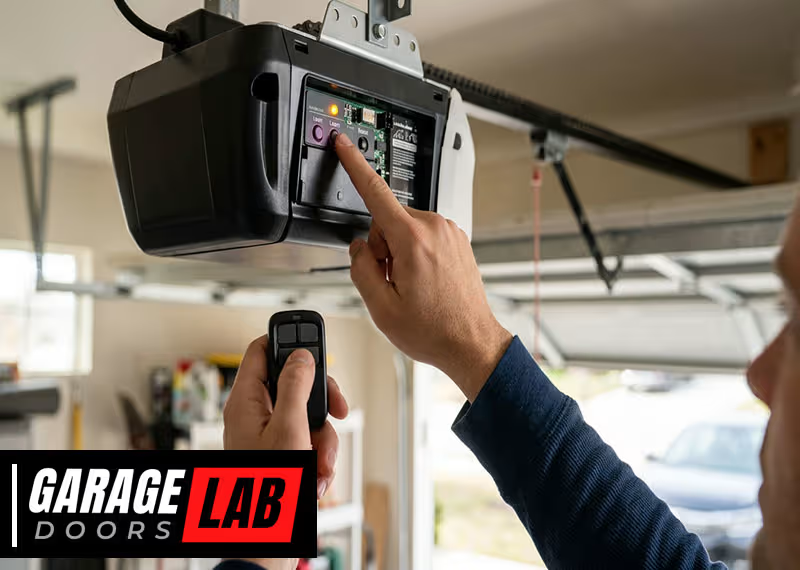
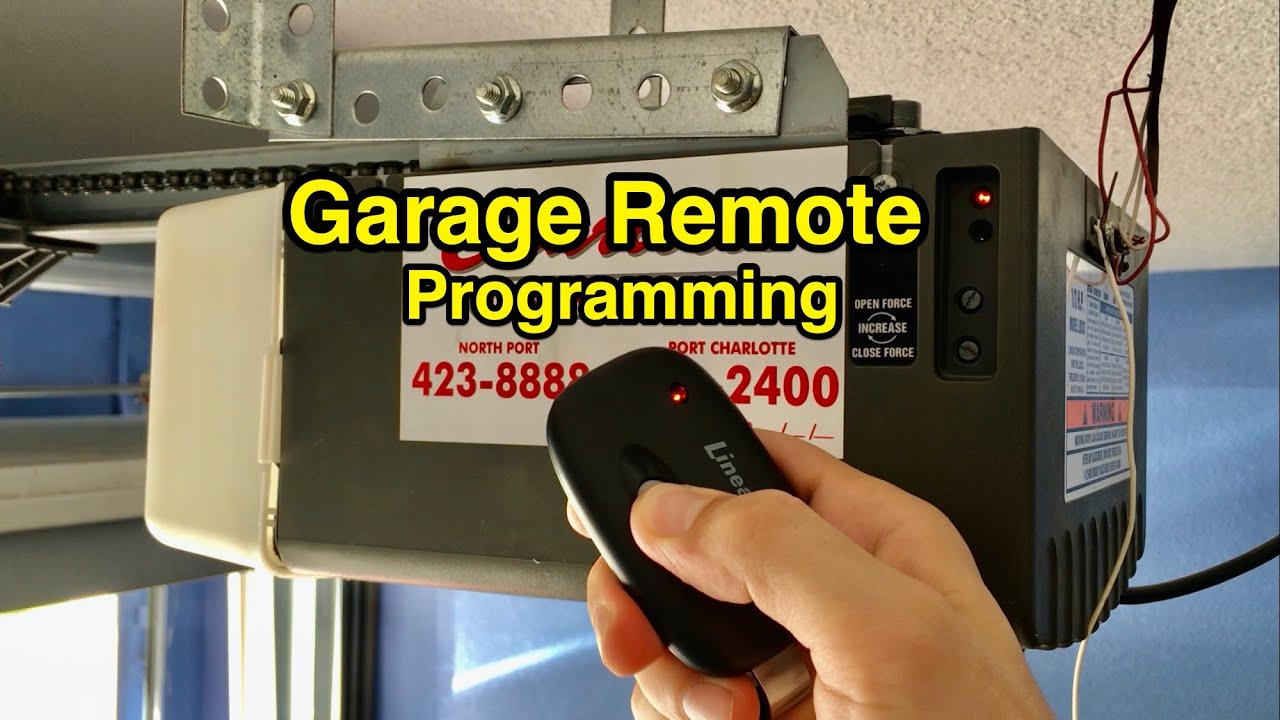
- Find the Learn Button
- Climb your ladder or step stool and look at the opener unit on the ceiling. The learn button is usually near the light bulb or behind a small panel.
- The button might be yellow, red, orange, purple, or green, depending on your brand.
- Press the Learn Button
- Press and release the learn button. Most units have an LED light next to the button that will turn on or start blinking. This means the opener is ready to learn a new remote.
- You have about 30 seconds to complete the next step.
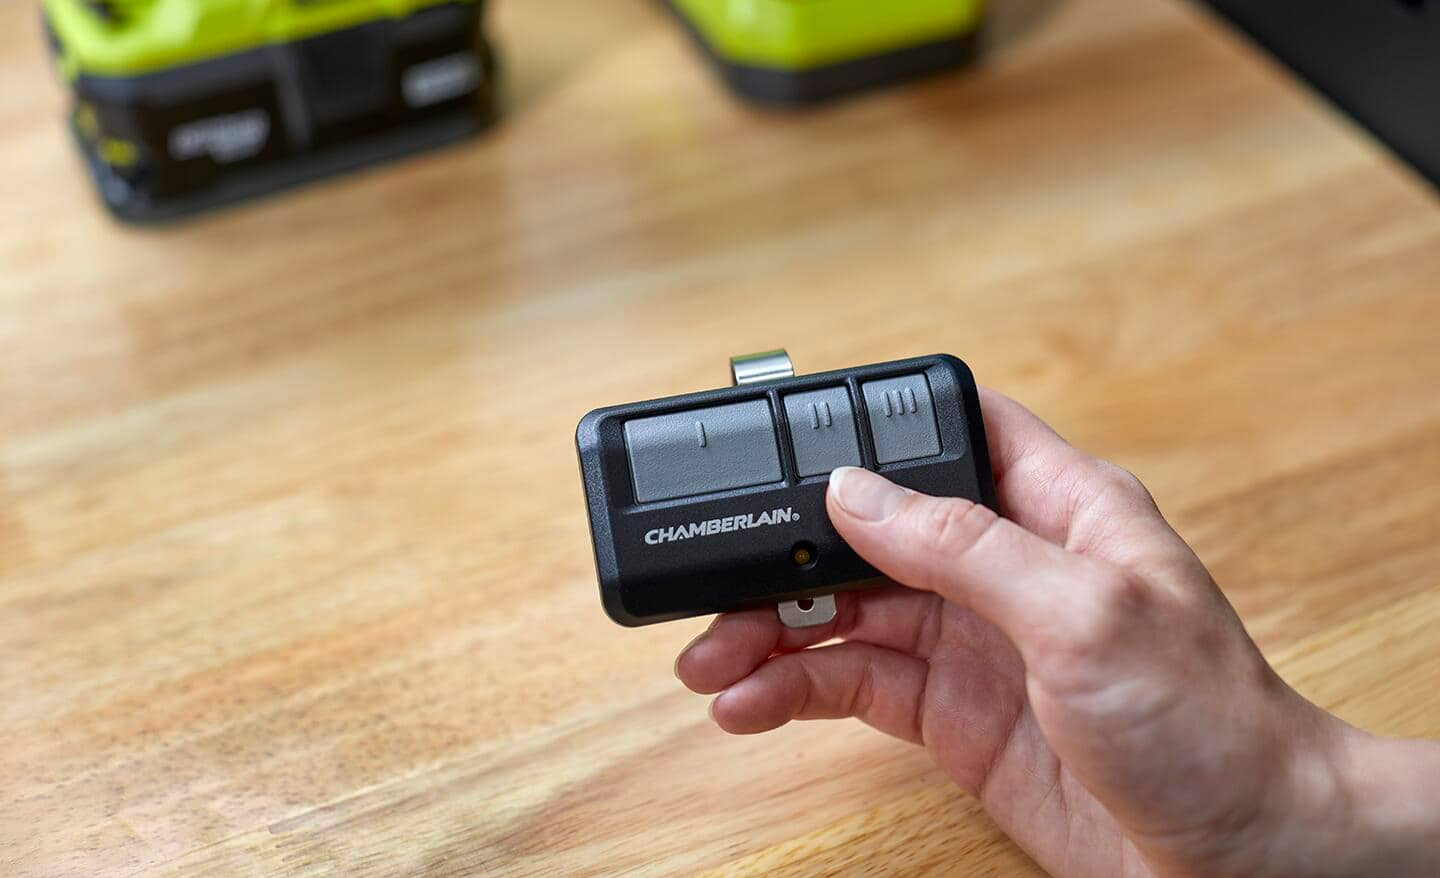
- Press the Remote Button
- While the LED is lit or blinking, press and hold the button on your remote you want to program.
- Hold it for 2-3 seconds, then release.
- Wait for Confirmation
- The opener’s light may blink, or you may hear a click. This means the remote has been programmed.
- Some remotes require you to press the button twice.
- Test the Remote
- Step down and stand clear of the door. Press the remote button to see if the door opens or closes.
Practical Tip:
If you have more than one remote, you can program them one after another while the opener is still in learn mode. If you wait too long, you’ll need to press the learn button again.
For Fixed Code (dip Switch) Garage Door Openers
- Open the Remote Case
- Use a small screwdriver to open your remote.
- You’ll see a row of small switches (usually 8-12).
- Locate the Opener’s DIP Switches
- Open the panel on your opener unit to find the matching set of switches.
- Set the Switches to Match
- Move each DIP switch in your remote to the same up/down (on/off) position as the switches in the opener.
- Close the Remote and Test
- Snap the remote back together.
- Press the button to check if the door responds.
Practical Tip:
Take a photo of the switch settings on your opener. This makes it easier to match new remotes in the future.
For Smart Or Wi-fi Enabled Garage Door Openers
Some modern openers use smartphone apps instead of traditional remotes. To reprogram:
- Download the manufacturer’s app (like myQ for Chamberlain/LiftMaster).
- Follow in-app instructions to connect the new remote or smartphone.
- Usually, you press a button on the opener to sync with your app or device.
Example: If you use myQ, you’ll press the “+” in the app, choose your device, and follow the prompts.
Clearing Old Remotes
Sometimes you want to erase all remotes from your opener, for example, if you lose one or move into a new house. Here’s how:
- Press and hold the learn button for about 6-10 seconds until the LED goes out.
- This erases all programmed remotes.
- Reprogram your remaining remotes as needed.
Non-obvious insight: Clearing all remotes is a smart security move if you’re not sure who has access.
Table: Common Garage Door Opener Brands And Their Learn Button Colors
To help you identify your system quickly, here’s a reference:
| Brand | Learn Button Color | System Type | Frequency (MHz) |
|---|---|---|---|
| LiftMaster | Yellow, Red, Purple, Green | Rolling Code | 315/390 |
| Chamberlain | Yellow, Purple, Red | Rolling Code | 310/315/390 |
| Genie (Modern) | Black, Purple | Rolling Code | 315/390 |
| Genie (Old) | N/A | Fixed Code (DIP) | 390 |
| Sears Craftsman | Red, Purple | Rolling Code | 315/390 |
Troubleshooting: Why Won’t My Remote Program?
Even after following the steps, sometimes the remote doesn’t work. Here are some common reasons:
- Dead Batteries: Always use fresh batteries in your remote.
- Wrong Remote Type: Not all remotes work with every opener. Check compatibility before buying.
- Out of Range: Stand closer to the opener when programming.
- Too Many Remotes: Some openers have a limit (often 5). Remove old remotes if needed.
- LED Not Flashing: If the learn button LED doesn’t light up, unplug the opener for 30 seconds and try again.
- Interference: Wireless routers or LED lights can sometimes cause signal problems.
Example: Compatibility Mistake
If you buy a universal remote, make sure it supports your opener’s frequency (e. g. , 315 MHz or 390 MHz). This information is usually on your opener’s label.
Table: Rolling Code Vs Fixed Code Comparison
Understanding the difference between rolling code and fixed code remotes can help you choose the right method and remote.
| Feature | Rolling Code | Fixed Code (DIP Switch) |
|---|---|---|
| Security | High (code changes every use) | Low (same code always used) |
| Programming Method | Learn button sync | Match DIP switches |
| Year Introduced | 1993 and newer | Before 1993 |
| Compatibility | Must match opener brand/model | Any opener with same switch pattern |
Tips For Programming Multiple Remotes
You might want to program extra remotes for family members or a spare. Here’s how to make it easier:
- Program all remotes in one session. After you press the learn button, quickly program each remote.
- Label your remotes, especially if you have more than one garage door.
- Keep a written record of which remotes are programmed to which doors.
Non-obvious insight: Some openers allow you to program up to 10 remotes, but check your manual for the actual limit.
What To Do If You Lose A Remote
Losing a garage door remote is not just inconvenient—it’s a security risk. Someone could find and use it. Here’s what to do:
- Go to your opener and press and hold the learn button until the LED goes off. This erases all remotes.
- Program your remaining remotes again.
- Consider upgrading to a rolling code opener if you’re still using an older fixed code system.
When Should You Call A Professional?
Most people can reprogram a remote by themselves. But you should call a pro if:
- The learn button is broken or stuck.
- The opener’s circuit board is damaged.
- You see sparks or burn marks inside the opener.
- The door opener is more than 20 years old and you’re unsure how to proceed.
A professional will have the tools and experience to fix electrical issues safely.
Table: Common Garage Door Remote Programming Steps (summary)
Here’s a quick reference for the steps discussed above:
| Step | Rolling Code | Fixed Code | Smart Opener |
|---|---|---|---|
| Access Opener Unit | Yes | Yes | Yes |
| Find Learn Button or DIP Switches | Learn Button | DIP Switches | Learn Button/Wi-Fi Button |
| Press Button/Set Switches | Press Learn, Then Remote | Match Switches | Follow App Instructions |
| Confirmation | Light Blink/Click | Door Moves | App Confirms |
| Test Remote | Yes | Yes | Yes |
How To Maintain Your Garage Door Remote
Programming is just the beginning. Here’s how to keep your remote working well for years:
- Change batteries every 1-2 years. Weak batteries cause intermittent problems.
- Keep remotes dry and clean. Water and dirt can damage the circuit board.
- If you drop your remote often, consider a protective case.
- Store a spare remote in a safe place, like your car’s glove box.
Common Mistakes To Avoid
Even confident DIYers can make mistakes. Here are ones to watch out for:
- Holding the learn button too long: This can erase all remotes.
- Not matching DIP switches exactly: One wrong switch and the remote won’t work.
- Programming in direct sunlight: Sometimes strong sunlight interferes with the signal. Try programming at dusk or with the door closed.
- Forgetting about keypad entry systems: If you have a keypad on your garage, you may need to reprogram it too after clearing remotes.
- Buying a remote without checking compatibility: Always check your opener’s brand, frequency, and model.
Upgrading To A Universal Remote
If you have several garage door brands, a universal remote can control them all. Before buying:
- Check which brands and frequencies the universal remote supports.
- Make sure your opener is listed.
- Follow the universal remote’s instructions, which usually involve selecting a code for your brand.
Example: A Genie universal remote can often be programmed to work with LiftMaster, Chamberlain, and other brands.
Reprogramming Keypad Entry Systems
Many garages have a keypad on the wall outside. Here’s a general process:
- Press and hold the learn button until the LED lights.
- Enter your chosen PIN on the keypad and press the enter button.
- The opener will confirm with a blink or click.
Some keypads require you to enter a code from the manual. Always check your keypad’s instructions.
How To Add A New Car’s Built-in Remote
Many cars today have HomeLink or similar systems built in. Here’s how to pair your garage opener with your car:
- Turn the car ignition on but do not start the engine.
- Hold the two outer HomeLink buttons until the light flashes (to clear old codes).
- Press and hold the button you want to program and your garage remote at the same time until the light changes.
- Go to your opener, press the learn button.
- Within 30 seconds, return to your car and press the programmed button three times.
It may take a few tries, but once done, your car can open the garage without an extra remote.
Real-life Example: Moving Into A New Home
When you move into a new house, you might not know how many remotes are out there. The best thing you can do is:
- Erase all existing remotes by holding the learn button.
- Program only your own remotes and keypad.
- If your opener is very old, consider replacing it with a modern, more secure unit.
For more details on garage door opener security, see this Garage Door Opener overview.
Frequently Asked Questions
How Do I Know If My Garage Door Remote Uses Rolling Code Or Fixed Code?
Check the year of your opener. If it was made after 1993, it likely uses rolling code technology. Also, look for a “learn” button on the opener unit—this usually means rolling code. If your remote and opener have matching DIP switches, it’s a fixed code system.
Can I Program A Universal Remote To Work With Any Garage Door Opener?
No, universal remotes only work with certain brands and models. Always check the compatibility list on the remote’s packaging or manual. Make sure the frequency matches your opener (commonly 315 or 390 MHz).
How Many Remotes Can I Program To My Opener?
Most modern openers support 5-10 remotes, but older ones may support fewer. Check your manual for the exact limit. If you reach the maximum, you must erase old remotes before adding new ones.
Why Does My Garage Door Open With The Wall Button But Not The Remote?
This usually means your remote is not programmed correctly, the batteries are dead, or the remote is not compatible with your opener. Reprogram the remote following the steps above and try again.
What Should I Do If My Opener’s Learn Button Doesn’t Work?
If the learn button doesn’t respond, try unplugging the opener for 30 seconds and plugging it back in. If it still doesn’t work, the button or circuit board may be damaged. In this case, contact a professional repair service.
Reprogramming your garage door remote is a simple way to keep your home secure and your garage convenient. Now that you know the steps, tools, and tips, you can handle almost any situation—saving time, money, and stress. If you ever feel stuck, remember: your opener’s manual and reputable online sources are always there to help. Enjoy the convenience and peace of mind that come with a fully functioning garage door system.


