Now Reading: How Do You Change a Garage Door Keypad Code Easily and Safely
- 01
How Do You Change a Garage Door Keypad Code Easily and Safely
Changing the code on your garage door keypad may sound complicated, but it’s a practical task every homeowner should know. If you’ve just moved into a new house, lost track of who knows your code, or simply want better security, updating your keypad code is a smart move.
Today’s garage door systems are designed for quick, DIY code changes. Still, there are key steps, safety tips, and small details that can trip up even experienced users. This guide will walk you through everything you need—from understanding how your keypad works to solving problems and avoiding mistakes.
By the end, you’ll feel confident and secure every time you enter your garage.
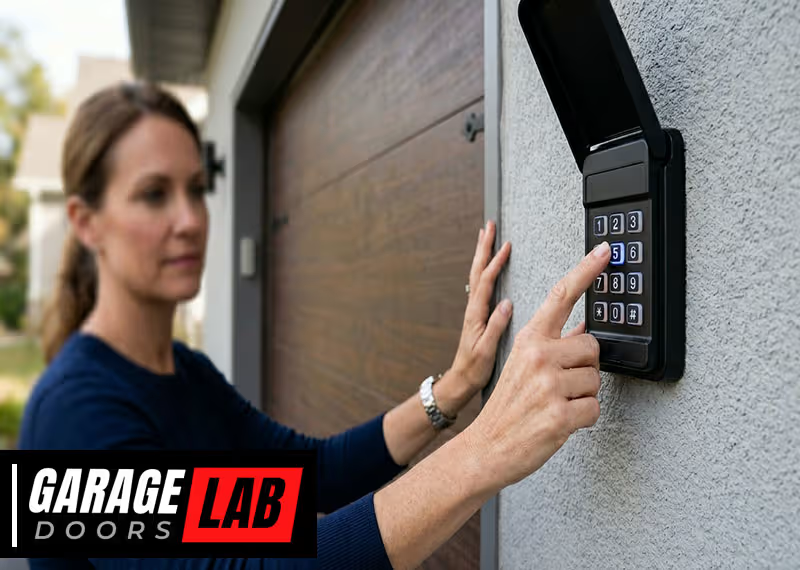
Understanding Garage Door Keypads
A garage door keypad is a small device installed outside your garage. It usually sits near the door frame and lets you enter a numeric code to open the garage door, without needing a remote or key. Most keypads work wirelessly, using a radio signal to talk to the garage door opener inside your garage.
Keypads come in two main types:
- Wired keypads connect directly to your opener unit with a small cable.
- Wireless keypads use batteries and send a signal over the air.
Most keypads installed after 1993 use a “rolling code” system. This means the keypad and opener change their shared code every time you use the keypad, making it harder for someone to “grab” your code and break in.
Why Change The Keypad Code?
There are several good reasons to update your garage door keypad code:
- Moved into a new home: You never know who might know the old code.
- Lost or stolen remote: If a remote is missing, it’s safer to change the keypad too.
- Security breach: If you suspect someone else knows your code.
- Regular maintenance: Changing codes every 6-12 months increases safety.
- Forgotten code: Sometimes you just need a fresh start.
Common Brands And Models
The way you change your code depends on the brand and sometimes the model of your keypad. Major brands include:
- LiftMaster (often used by Chamberlain and Craftsman)
- Genie
- Linear
- Overhead Door
- Stanley
Older keypads may use dip switches or physical pins, while newer models rely on programming buttons. Always check your user manual or look up your model online if you’re unsure.
Tools And Preparation
Before you start, take a few minutes to prepare. Having the right tools and information makes the process smooth and safe.
What You Need
- Ladder: Most opener units are mounted on the ceiling.
- Flashlight: Garages can be dim; extra light helps.
- User manual: If you have it, keep it handy for model-specific tips.
- New code: Choose a code that’s easy for you but hard for others to guess (don’t use birthdays or simple sequences).
- Pen and paper: Write your code down until you memorize it.
- Small screwdriver: Some keypads need you to open a cover or battery compartment.
Safety Precautions
- Make sure the garage door area is clear before you begin.
- Stand on a stable ladder if you need to reach the opener unit.
- Avoid changing the code when the weather is bad or the garage is wet—moisture and electronics don’t mix.
- If you have an older system (before 1993), consider upgrading for better safety features.
How To Change A Garage Door Keypad Code: Step-by-step Guide
Let’s dive into the main event. While steps can vary by brand, most modern systems follow a similar pattern. We’ll cover the basic process, then highlight special instructions for popular brands.
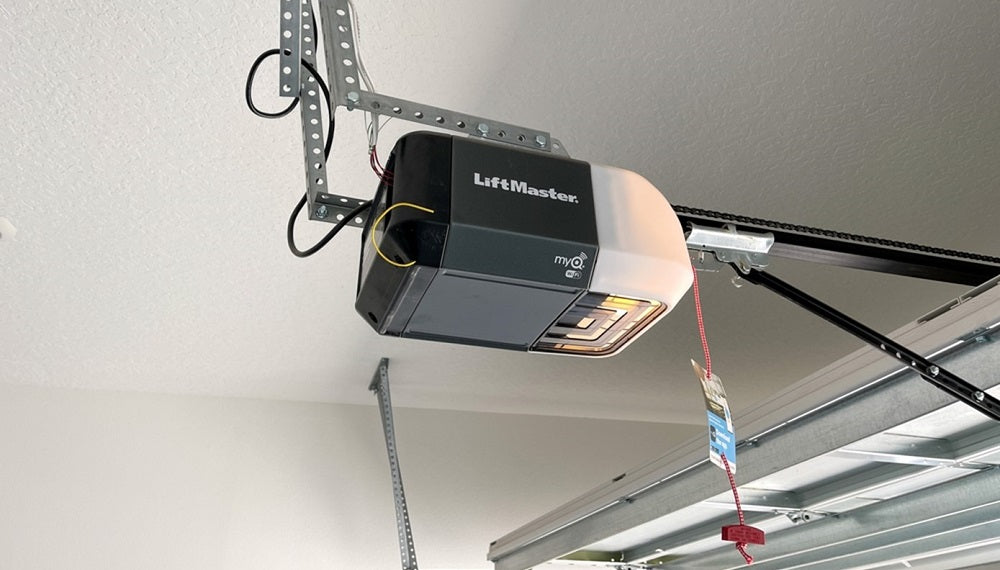
Step 1: Locate The Learn/program Button
The Learn or Program button is usually found on the garage door opener unit, which hangs from your garage ceiling. This button helps you sync remotes and keypads. It’s often:
- Red, yellow, purple, or green
- Under a light cover or on the back/side of the unit
Look for a label or color that stands out. If you can’t find it, check your user manual for diagrams.
Step 2: Clear The Old Code (if Needed)
Some systems require you to clear or reset the old code before entering a new one. This stops old remotes or codes from working. To do this:
- Press and hold the Learn button until the indicator light turns off (about 6-10 seconds).
- Release the button. All codes are now wiped.
This step is critical if you want to remove old users or remotes.
Step 3: Enter Programming Mode
With most keypads, you’ll need to set them into a “programming” state. This usually involves:
- Entering your current code (if you remember it), then pressing a button like # or Enter
- Pressing and holding the Program button on the keypad itself (for some brands)
- Or, pressing the Learn button on the opener, then quickly entering a new code on the keypad
Read your keypad instructions carefully, as the sequence can be brand-specific.
Step 4: Enter The New Code
When you’re in programming mode, type your new code into the keypad. Most keypads use 4 digits, but some allow 3-6 digits. Press Enter, #, or another confirm button to save the new code.
Tips for a strong code:
- Don’t use simple patterns (1234, 1111, etc.)
- Avoid birthdays or house numbers
- Mix numbers in a way you’ll remember but others can’t guess
Step 5: Test The New Code
Step back from the keypad and enter your new code. The door should open or close. If not, repeat the process carefully—one missed step can cause issues.
Test the code several times. Also, test any remote controls to make sure they still work. Most systems will keep remote codes even after a keypad code change, but double-check for peace of mind.
Step 6: Reattach Covers And Clean Up
If you removed a light cover or opened a battery compartment, put everything back. Make sure the keypad is secure and protected from rain. Write down your new code and keep it somewhere safe (not in the garage! ).
Brand-specific Instructions
Different brands have unique steps or quirks. Here’s what you need to know for the most popular garage door keypads.
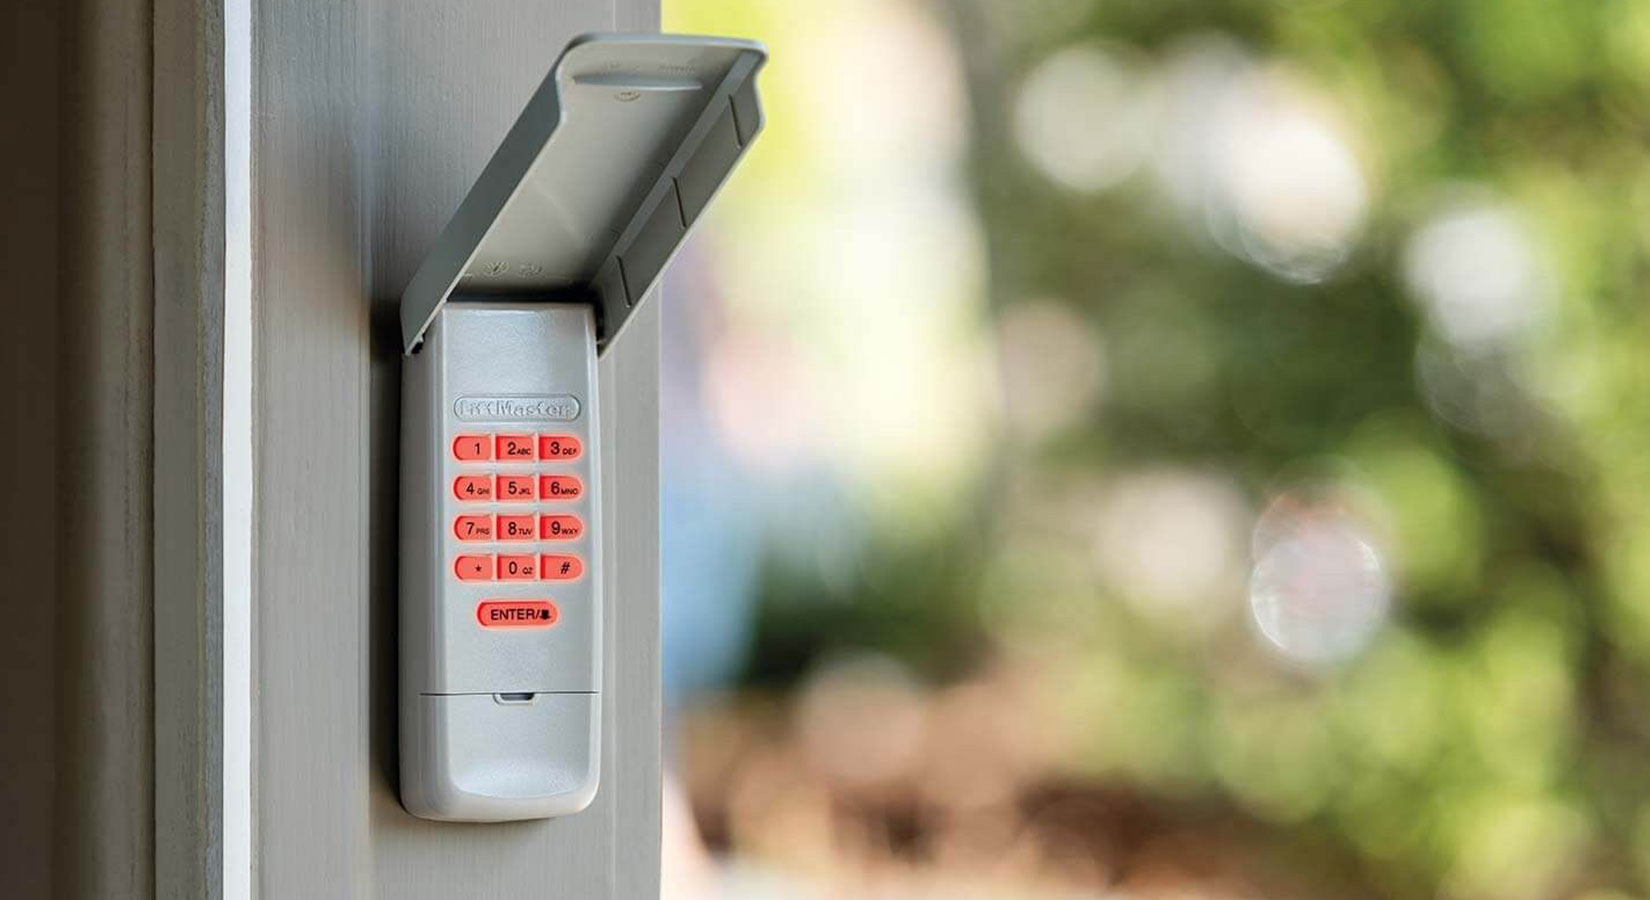
Liftmaster, Chamberlain, And Craftsman Keypads
These brands use similar systems. Most units since the late 1990s have a Learn button.
- Press and release the Learn button on the opener unit.
- Within 30 seconds, enter a new 4-digit code on the keypad.
- Press and hold the Enter button until the opener light blinks or you hear a click.
- Release and test your new code.
Tip: If your keypad has a “Program” or “Learn” button under the cover, press it before entering the new code.
Genie Keypads
Genie keypads often use a “Program” button on the keypad itself.
- Slide the keypad cover open.
- Press and hold the Program button until the indicator light blinks.
- Enter your new code (3-4 digits), then press Program again.
- Test the new code.
Some Genie models require you to sync with the opener unit—check your model’s instructions.
Linear And Multi-code Keypads
Older Linear models may use physical dip switches inside the keypad. To change the code:
- Open the keypad case.
- Flip the switches to match a new sequence (and update the opener unit to match).
- Close the case and test.
Newer Linear models use a programming button, similar to Genie.
Overhead Door And Other Brands
These usually follow the LiftMaster process: press the Learn button, enter a new code, and test.
Non-obvious insight: Some keypads allow you to program multiple codes for different family members or one-time use. Check your manual for “temporary codes.”
Troubleshooting And Common Mistakes
Changing a garage door keypad code is usually quick, but a few things can go wrong. Here’s how to fix them.
The New Code Doesn’t Work
- Double-check that you pressed all buttons in the right order.
- Make sure you didn’t take too long—most systems give you 30 seconds to complete programming.
- Confirm the Learn button was pressed (not held) if the directions say so.
- Check for dead batteries in the keypad.
Keypad Buttons Are Sticking
- Clean the keypad gently with a soft cloth and a little rubbing alcohol.
- Avoid using sharp objects to press buttons—they can get jammed.
Remote Controls Stopped Working
- If you cleared all codes during reset, you’ll need to re-sync your remotes.
- Press the Learn button, then press the button on your remote until the opener blinks.
Forgotten Old Code
If you don’t know the old code, most systems let you reset everything using the Learn button on the opener unit. This wipes out all codes, so you’ll need to add remotes again.
Security Lockout
Some openers will lock out the keypad after too many wrong attempts. Wait 10–15 minutes, then try programming again.
Advanced Features And Modern Keypads
Today’s garage door keypads come with extra features for safety and convenience.
Temporary Or Guest Codes
Some systems let you create a temporary code for guests, pet sitters, or deliveries. These codes expire after a set time or number of uses.
- Check for a “Temporary Code” or “Guest Code” button in your manual.
- Set and test the code, then remove it when you’re done.
Backlit Keypads
Many keypads have backlit buttons for easier use at night. If yours doesn’t light up, it might need new batteries.
Wireless Keypad Upgrades
If your garage keypad is old or has exposed wires, consider upgrading to a new wireless model. They’re more secure and weather-resistant.
Battery Replacement
Most wireless keypads run on a 9-volt battery. If your keypad is slow, dim, or unresponsive, replace the battery before reprogramming.
- Open the keypad case (usually a small screw or clip).
- Swap the battery and reattach the cover.
- Test the old code before changing it.
Comparing Garage Door Keypad Features
Not all keypads are the same. Here’s a look at key features across major brands:
| Brand | Wireless | Rolling Code | Temporary Codes | Backlit | Weatherproof |
|---|---|---|---|---|---|
| LiftMaster | Yes | Yes | Yes | Yes | Yes |
| Genie | Yes | Yes | Some models | Yes | Yes |
| Linear | Yes | Yes (new models) | No | No | Yes |
| Overhead Door | Yes | Yes | Some models | Yes | Yes |
Non-obvious insight: If your keypad doesn’t have rolling code, it’s easier for intruders to “sniff” or guess your code. Upgrade if possible.
Security Tips For Garage Door Keypads
A keypad is only as safe as your habits. Here’s how to keep your garage secure:
- Change the code often: Every 6-12 months, or after any security concern.
- Choose a strong code: Avoid birthdays, addresses, or repeating numbers.
- Don’t share widely: Only give the code to people you trust.
- Use temporary codes: For service workers or one-time visitors.
- Check for tampering: Look for scratches, dirt, or forced entry marks.
- Upgrade old units: Modern keypads and openers are much safer.
Comparing Code Change Steps By Brand
Programming steps can differ slightly depending on the manufacturer. Here’s a summary comparison:
| Brand | Main Steps | Typical Time | Tools Needed |
|---|---|---|---|
| LiftMaster | Press Learn, enter new code | 2 minutes | Ladder, pen, paper |
| Genie | Press Program, enter new code | 2-3 minutes | Small screwdriver |
| Linear | Open case, set switches | 5 minutes | Screwdriver |
| Overhead Door | Press Learn, enter new code | 2 minutes | Ladder |
When To Call A Professional
Most code changes are DIY-friendly, but some situations need expert help:
- The keypad or opener is damaged or not responding.
- You have an old system with exposed wires or rust.
- The opener is installed in a hard-to-reach place.
- You want to upgrade to a smart garage door system.
A professional can handle repairs, upgrades, or even install a new opener that works with your smartphone.

How Changing The Code Improves Home Security
Many break-ins happen through the garage, so changing your keypad code makes a real difference. Consider these facts:
- Around 9% of burglars enter through the garage.
- Thieves sometimes use “universal remotes” or guess easy codes.
- Updating your code stops old users or lost remotes from working.
Pro tip: After changing your code, do a “security check.” Try opening the door with the old code, and make sure only your new code works. This step is often skipped but confirms your garage is safe.
Smart Keypads And Modern Upgrades
Newer garage systems can connect to your Wi-Fi, letting you change codes or control the door from your phone. Features include:
- App-based code changes
- Alerts if the door is open too long
- Remote locking and unlocking
If your keypad is more than 10 years old, consider a smart upgrade for better security and convenience.
For more about advanced garage door security, check out this Consumer Reports guide.
Frequently Asked Questions
How Often Should I Change My Garage Door Keypad Code?
It’s a good idea to change your code every 6–12 months, or any time you think someone else may know it. If you lose a remote, move into a new house, or have repairs done, change the code right away.
Can I Set More Than One Code On My Keypad?
Many modern keypads allow for multiple codes. You can set a main code and temporary codes for guests. Check your keypad’s manual—some brands call these “guest” or “temporary” codes.
What Do I Do If I Forget My Garage Keypad Code?
If you forget your code, you can usually reset the keypad by pressing the Learn button on the opener unit and following the programming steps for a new code. You’ll need to reprogram remotes too.
Will Changing My Keypad Code Affect My Remote Controls?
Normally, changing the keypad code does not erase your remote controls. But if you clear all codes (by holding the Learn button), you’ll need to re-sync your remotes.
Why Won’t My New Code Work?
Double-check your programming steps and make sure you entered the code within 30 seconds of pressing the Learn button. Also, make sure the keypad has good batteries and the opener unit is getting power.
Changing your garage door keypad code is a smart, simple way to protect your home. With the right steps, you can do it yourself in just a few minutes. Always choose a strong code, keep it private, and update it regularly for the best security.
If your system is outdated or causing trouble, don’t hesitate to upgrade or call a pro. Your garage is a gateway to your home—keep it safe and secure.