Now Reading: How to Change Garage Door Keypad: Step-by-Step Guide
- 01
How to Change Garage Door Keypad: Step-by-Step Guide
Changing the code on your garage door keypad can seem tricky if you’ve never done it before. But learning how to change a garage door keypad is easier than most people think. In fact, with the right steps and a little patience, you can do it in less than 15 minutes.
This guide will walk you through everything you need to know. You’ll discover why changing your keypad code matters, when you should do it, and how to handle different keypad types. Along the way, you’ll learn some useful tips that make the process smoother, even if you’re a total beginner.
Most people use their garage as the main entrance to their house. That means your garage door keypad is a key part of your home’s security. If you’ve shared the code with someone in the past, or if you think someone else might know it, it’s time to change it.
Maybe you bought a new house, had a service technician, or even just want a code that’s easier for your family to remember. Whatever your reason, updating your garage door keypad is a simple but powerful way to protect your home.
This article goes deep into the whole process. You’ll get step-by-step instructions, see common mistakes people make, and find answers to questions you might not even think to ask. No matter your experience level, by the end, you’ll feel confident about changing your garage door keypad.
Why Change Your Garage Door Keypad?
Many homeowners don’t realize how important their garage door keypad is. It’s not just a convenience. It’s part of your home’s security. Here are the main reasons to change your keypad code:
- Security concerns: If you’ve shared your code with babysitters, neighbors, or contractors, you can’t be sure who else knows it.
- After buying a new home: You never know if the previous owners, or even their friends, still know the code.
- Lost or stolen remotes: If someone steals your remote, they might try the keypad too.
- Forgotten codes: Sometimes, you just need a code you can remember.
- Routine updates: Like changing other passwords, regular code changes keep your security fresh.
These reasons show that the keypad isn’t just about convenience. It’s a real part of your home’s defense.
Types Of Garage Door Keypads
Not all keypads are the same. Understanding your keypad type helps you follow the right steps.
Wired Keypads
Older garages often have wired keypads. These are connected directly to the garage door opener with wires. They usually last longer and are less likely to have battery issues.
Wireless Keypads
Most modern homes use wireless keypads. These keypads use radio signals to talk to your garage door opener. They run on batteries and can be mounted almost anywhere outside your garage.
Universal Keypads
Universal keypads work with many brands. If you’ve replaced your opener or have a keypad that isn’t the same brand, it could be universal. These keypads often have special programming steps.
Smart Keypads
Some newer systems have smart keypads that work with home automation apps or Wi-Fi. Changing codes on these might require a phone app or computer.
Brand-specific Keypads
Major brands like LiftMaster, Chamberlain, and Genie have unique programming styles. Knowing your brand helps you find the right instructions.
Here’s a quick comparison of these keypad types:
| Keypad Type | Power Source | Programming Method | Common Brands |
|---|---|---|---|
| Wired | Wired to opener | Manual button sequence | Older Genie, Craftsman |
| Wireless | Batteries (usually 9V) | Learn button or dip switches | LiftMaster, Chamberlain |
| Universal | Batteries | Special programming code | Genie, Overhead Door |
| Smart | Batteries or wired | App-based or manual | myQ, Aladdin Connect |
Tools And Materials You’ll Need
Before starting, gather these items. Having everything ready makes the process easier:
- Step ladder (if your opener is mounted high)
- Small screwdriver (for battery covers or panel access)
- Flashlight (if your garage is dark)
- New batteries (usually 9V, but check your keypad)
- Pen and paper (to write down your new code)
- Owner’s manual (optional, but helpful)
Some keypads need batteries to work, so check this first. If your keypad is dead, you won’t be able to program a new code until you replace the battery.
How Garage Door Keypads Work
A garage door keypad is a small device that sends a code to your garage door opener. When you enter the correct code, the opener receives a signal and opens or closes the door. Most keypads use wireless signals, but some older ones are connected with wires. Here’s what happens:
- You enter a code on the keypad.
- The keypad sends a signal to the opener.
- The opener checks if the code is correct.
- If correct, the opener activates the door motor.
Newer models use rolling codes for better security. This means the code changes every time you use it, making it very hard for anyone to “hack” your garage.
Step-by-step Guide: How To Change Garage Door Keypad
The steps can vary based on brand and type. This guide covers the most common methods. Always check your owner’s manual if you’re unsure.
Step 1: Identify Your Keypad And Opener Brand
Look for the brand name and model number on the keypad or inside the battery compartment. If you can’t find it, check your opener unit in the garage ceiling.
Step 2: Check The Battery
If your keypad is wireless, open the battery compartment and insert a fresh battery. A weak battery can cause programming errors.
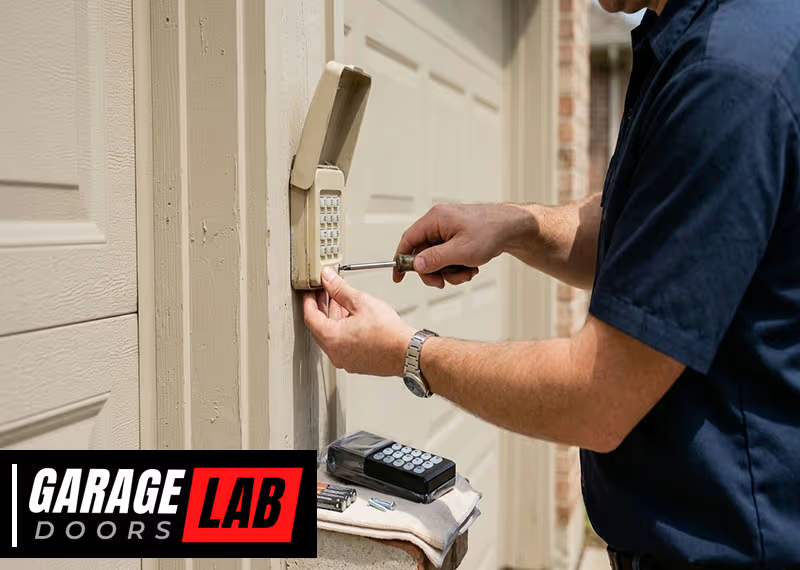
Step 3: Locate The “learn” Button
Most garage door openers have a “Learn” button. It’s usually on the back or side of the main opener unit (the motor box on your garage ceiling). You may need to remove a light cover to see it. The button is often colored (red, yellow, purple, or green).
Here’s a quick way to find it:
- Use your step ladder for safety.
- Look for a small button labeled “Learn” or “Program.”
- On older models, you may see a series of dip switches instead.
Step 4: Clear The Old Code (if Needed)
Some systems require you to clear the old code before setting a new one. This step is especially important for universal or smart keypads.
- Hold the “Learn” button for 6–10 seconds until the indicator light goes out. This removes old codes from the opener’s memory.
Step 5: Program The New Code
Follow these general instructions. If your model is different, check the manual.
- Press the “Learn” button on the opener. The indicator light will turn on.
- Within 30 seconds, go to your keypad.
- Enter your new 4-digit code (choose something easy to remember but not obvious).
- Press the Enter button on the keypad.
- The opener light will blink or click, confirming the code is accepted.
If your system has dip switches, set the new code using the same sequence on both the opener and the keypad.
Step 6: Test The New Code
Go outside and enter your new code on the keypad. The garage door should open or close. If it doesn’t work, repeat the programming steps or check the battery.
Step 7: Write Down Your New Code
Don’t rely on memory alone. Write down your code and keep it in a safe place. Never tape it to the keypad or leave it in your car.
How To Change Codes On Popular Keypad Brands
Different brands have unique programming steps. Here are instructions for some popular brands.
Liftmaster & Chamberlain
- Press and release the Learn button (yellow or purple) on the opener.
- Within 30 seconds, enter your new code on the keypad.
- Press and hold the Enter button until the opener light blinks.
- Test the code.
Genie
- Press and hold the Program button on the keypad until the indicator light blinks.
- Enter your new code and press Enter.
- Go to the opener, press the Learn button.
- Within 30 seconds, enter your new code on the keypad and press Enter again.
- The light blinks, confirming the code.
Craftsman
- Press the Learn button on the opener.
- Within 30 seconds, enter your new code on the keypad.
- Press Enter.
- Wait for the opener light to blink.
Universal Keypads
- Press and hold the Program button.
- Enter the brand-specific code (often in the manual).
- Enter your new code and confirm with Enter.
- Sync with the opener using the Learn button.
Smart Keypads
Some smart keypads require you to use an app or a web portal. Log in to your account, find the keypad settings, and follow the prompts to change the code.
Here’s a summary table for quick reference:
| Brand | Key Programming Steps | Special Notes |
|---|---|---|
| LiftMaster / Chamberlain | Learn button, enter code, press Enter | Indicator blinks on success |
| Genie | Program button, enter code, Learn button sync | Some models need two steps |
| Craftsman | Learn button, enter code, press Enter | Very similar to LiftMaster |
| Universal | Program button, brand code, enter code | Check manual for brand code |
| Smart Keypads | App or web portal | Follow in-app prompts |
Common Problems And Solutions
Changing a garage door keypad code isn’t always smooth. Here are some problems people face and how to fix them.
The New Code Doesn’t Work
- Check the battery: A weak or dead battery is a common cause.
- Repeat the process: Missed a step? Try programming again.
- Stay within 30 seconds: Most openers give you a short window to enter the code.
- Check for lockout mode: Some keypads lock for a few minutes after several wrong attempts.
Keypad Buttons Are Sticking
- Clean the keypad with a dry cloth. Avoid water, which can damage electronics.
- Check for insects: Sometimes spiders or bugs get inside, causing issues.
Can’t Find The Learn Button
- Look for a colored button (red, yellow, green, or purple) on the opener unit.
- Check behind the light cover: You might need to remove a plastic panel.
- Read the manual: The location varies by brand and model.
Keypad Won’t Light Up
- Replace the battery: Most keypads use a 9V battery.
- Check for corrosion: Old batteries can leak and damage contacts. Clean gently if needed.
Opener Won’t Respond
- Check opener power: Make sure the opener is plugged in and the breaker isn’t tripped.
- Try the remote: If the remote works but the keypad doesn’t, the problem is with the keypad.
Code Is Forgotten
- Reset the keypad: Most keypads have a reset procedure (check your manual).
- Set a new code: Follow the steps above using the Learn button.
Interference Issues
- Wireless signals can be affected by metal objects or other electronics. Make sure the keypad is mounted in a clear location.
Safety Tips When Changing Your Keypad
Changing your keypad code is usually safe, but it’s good to follow these tips:
- Use a sturdy ladder: Don’t stand on chairs or unstable surfaces.
- Keep children and pets away: The garage door can move unexpectedly during testing.
- Don’t rush: Going too fast can cause mistakes. Take your time.
- Wear gloves if your opener is dusty or has sharp edges.
- Avoid wet hands: Never handle electronics with wet hands.
When To Replace The Keypad Instead Of Changing The Code
Sometimes, changing the code isn’t enough. Here’s when you should consider replacing the whole keypad:
- Keypad is cracked or broken: Physical damage can make it unsafe or unreliable.
- Buttons don’t work: If cleaning doesn’t help, the keypad may be worn out.
- Battery contacts are corroded: Severe corrosion can prevent proper operation.
- Keypad is more than 10 years old: Technology improves, and old keypads may lack modern security features.
- Frequent code failures: If you keep having to reprogram the code, it’s a sign of failure.
Replacing the keypad is often easy and only takes a few minutes. Universal keypads are widely available and work with most openers.
How To Choose A New Garage Door Keypad
If you need a new keypad, consider these factors:
Compatibility
Make sure the keypad is compatible with your opener brand and model. Most universal keypads cover major brands, but it’s always good to check.
Security Features
Look for rolling code technology or “Security+” features. These make it much harder for someone to copy your code.
Weather Resistance
If your keypad is mounted outside, make sure it’s rated for outdoor use. Look for water-resistant or weatherproof models.
Ease Of Installation
Some keypads are easier to install than others. Read reviews or check the manual before buying.
Price
Garage door keypads range from $20 to $60. More expensive models often have better features or longer warranties.
Here’s a quick comparison of keypad features:
| Feature | Basic Keypad | Advanced Keypad |
|---|---|---|
| Rolling code security | No | Yes |
| Weather resistance | Some | Yes |
| Backlit keys | No | Yes |
| Smart integration | No | Yes |
| Price range | $20-$30 | $40-$60 |

Advanced Security Tips
Changing your keypad code is a good start. For even better protection:
- Change your code every 6–12 months.
- Don’t use codes like “1234” or your address.
- Use a unique code, different from your ATM or phone PIN.
- If your opener supports it, activate vacation or lock mode when gone for long periods.
- Don’t tell many people your code. If you must, change it after they no longer need access.
Many burglaries happen because thieves guess or learn simple codes. Treat your garage keypad like any other password.
Key Insights Most Beginners Miss
- Programming window is short: Most openers give you only 30 seconds to enter the code after hitting the Learn button. Move quickly and have your code ready.
- Multiple codes possible: Some newer keypads let you program more than one code. This is useful if you want temporary access for guests or workers.
- Door must be closed: Programming works best when the garage door is fully closed. Some systems won’t let you change codes if the door is open.
- Factory reset option: If things go wrong, many keypads have a hidden reset button or sequence. Check your manual or look online for your model.

Real-world Example
Let’s say you just bought a house. The previous owner left their garage door keypad instructions, but you don’t know the code. Here’s what you’d do:
- Replace the keypad battery.
- Find the opener’s Learn button.
- Hold the Learn button for 10 seconds to erase old codes.
- Press the Learn button again, enter your new code, and press Enter.
- Test the new code and write it down.
This process gives you total control over your garage access.
When To Call A Professional
Most homeowners can handle changing a keypad code. But call a pro if:
- The keypad or opener is damaged.
- You can’t access the opener (high ceiling, blocked by shelves).
- You’re not comfortable with electrical parts.
- You’ve tried several times and nothing works.
A garage door technician can change the code, install a new keypad, or check for bigger problems in less than an hour.
How Often Should You Change Your Keypad Code?
Experts recommend updating your code every 6–12 months. Change it sooner if:
- You’ve given the code to someone for temporary access.
- You suspect someone else knows the code.
- There’s been a break-in or suspicious activity in your neighborhood.
Keeping your code fresh is an easy way to stay ahead of potential problems.
Environmental Concerns
Used batteries from your keypad shouldn’t be tossed in the trash. Take them to a local recycling center. Some hardware stores accept used batteries for recycling.
Also, if replacing the keypad, dispose of the old one properly. Electronics recycling centers can handle these safely.
Additional Resources
If you need more help, your garage door opener’s website often has manuals and video guides. For example, LiftMaster, Genie, and Chamberlain have excellent support sections. You can also check the Family Handyman guide for hands-on tips.
Frequently Asked Questions
How Do I Find Out What Brand My Garage Door Keypad Is?
Most keypads have the brand name on the front or inside the battery cover. If not, check your garage door opener for a label with brand and model information.
What Should I Do If I Forget My Garage Door Keypad Code?
You’ll need to reset the keypad. This usually means pressing the Learn button on the opener and following the programming steps for a new code. Check your manual for model-specific instructions.
Can I Have More Than One Code On My Garage Door Keypad?
Many modern keypads allow multiple codes. This is useful for guests or family members who need temporary access. Check your keypad’s manual to see if this feature is available.
What If My Keypad Still Doesn’t Work After Changing The Code?
Try replacing the battery, cleaning the keypad, and repeating the programming steps. If it still doesn’t work, the keypad may need replacing or there may be an issue with the opener.
Is It Safe To Share My Garage Door Code With Others?
Only share your code with trusted people, and change it as soon as they no longer need access. Treat your garage code like any password—keep it private for best security.
Taking charge of your garage door keypad isn’t just about convenience; it’s about keeping your home safe. With the steps and tips in this guide, you can update your code quickly, avoid common mistakes, and enjoy peace of mind—knowing your garage is secure. Whether you’re a new homeowner or just want to boost your security, changing your garage keypad is a smart move anyone can do.