Now Reading: How To Program Chamberlain Garage Door Opener With Dip Switches
- 01
How To Program Chamberlain Garage Door Opener With Dip Switches

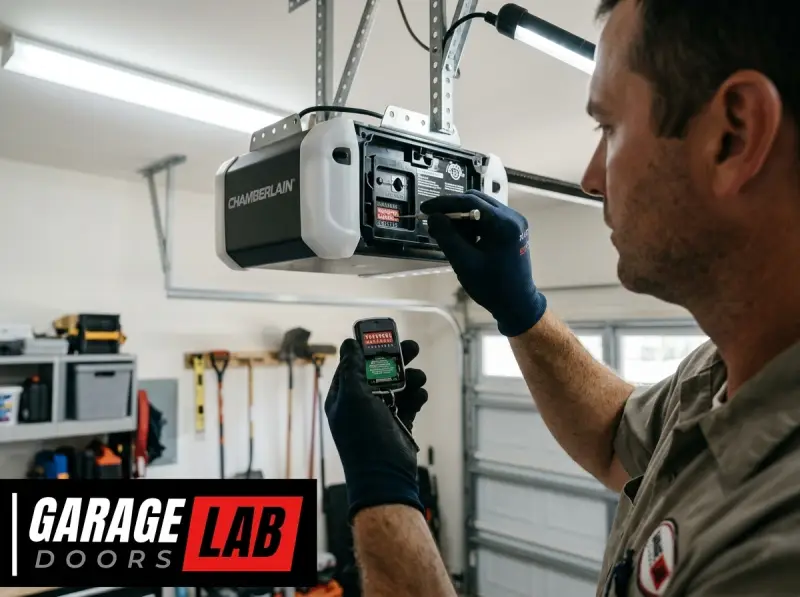
Understanding how to program a Chamberlain garage door opener with dip switches is a valuable skill for homeowners seeking to maintain or troubleshoot their garage door system. Dip switches, while a more traditional method of programming, are still found on many older and some newer Chamberlain models.
They offer a direct, mechanical way to set the opener’s rolling code, ensuring a unique signal is transmitted to your garage door, enhancing security. This process involves carefully setting a series of small switches on both the garage door opener motor unit and the remote control to match a specific pattern.
While modern openers often feature advanced programming interfaces, the simplicity and reliability of dip switch programming make it a method worth understanding. It’s a straightforward process that, when followed correctly, can save you the cost of a service call or a new remote.
This guide will walk you through the entire procedure, from identifying the dip switches to confirming successful programming, ensuring your Chamberlain garage door opener operates smoothly and securely.
Key Takeaways
- Dip Switches: These are small, often numbered, switches located on the garage door opener motor unit and the remote control.
- Matching Patterns: The core of dip switch programming is ensuring the pattern of “on” and “off” (or up and down) positions of the dip switches on the remote precisely matches those on the motor unit.
- Security: Dip switches set a specific code. If they don’t match, the remote won’t operate the door. This is a form of rolling code technology that changes the code each time the remote is used, enhancing security.
- Tools Needed: Typically, only a small flathead screwdriver or a pen is required to flip the switches.
- Safety First: Always disconnect power to the garage door opener before attempting any internal adjustments.
- Troubleshooting: If programming fails, double-check that all switches are in the exact same position on both devices and that the power is correctly connected.
- Obsolete Systems: Be aware that some very old dip switch systems may be less secure than modern rolling code technology and could be susceptible to code grabbing.

Credit: www.youtube.com
Understanding Chamberlain Garage Door Opener Dip Switches
Chamberlain garage door openers, particularly older models, utilize dip switches as a primary method for programming remote controls. These switches are small, usually numbered, levers or sliders found inside the motor unit that controls your garage door and on the back of your remote control. They are designed to be set in a specific configuration, creating a unique code that allows the remote to communicate with the opener.
The concept behind dip switch programming is relatively simple. Each switch can be in one of two positions: “on” or “off” (often represented as “up” or “down,” or sometimes labeled with 0 and 1). By setting a particular sequence of these switches, you are essentially creating a unique binary code. When you press the button on your remote, it transmits this code. If the code transmitted by the remote matches the code set on the motor unit, the garage door opener will activate. This method was a significant advancement in garage door security when it was introduced, moving away from fixed codes that could be more easily duplicated.
The Role Of Dip Switches In Garage Door Security
In the early days of garage door openers, many used fixed codes. This meant the dip switches were set once and never changed. The problem with fixed codes is that a determined individual could potentially capture the signal from your remote and use a duplicator to open your garage door. The introduction of dip switch programming for rolling codes was a major security upgrade.
With rolling code technology, the code changes every time you use the remote. The opener and the remote “agree” on a sequence of codes. When you press the remote button, it sends the current code in the sequence. The opener recognizes this code and then advances to the next code in the sequence for the next operation. This makes it incredibly difficult for someone to capture and reuse your remote’s signal because the code they might capture would only work once. Chamberlain’s use of dip switches for this purpose was a robust implementation of this security feature.
Common Chamberlain Models Using Dip Switches
While Chamberlain has evolved its technology over the years, dip switches are a hallmark of several generations of their openers. You’re likely to find them on models from the 1980s, 1990s, and even into the early 2000s. Identifying whether your model uses dip switches usually involves a visual inspection of the motor unit and the remote.
Some common series that might employ dip switches include:
- Chamberlain LiftMaster (many models within this brand, which is owned by Chamberlain)
- Chamberlain Craftsman (many models sold under the Craftsman brand were manufactured by Chamberlain)
- Older Chamberlain branded openers
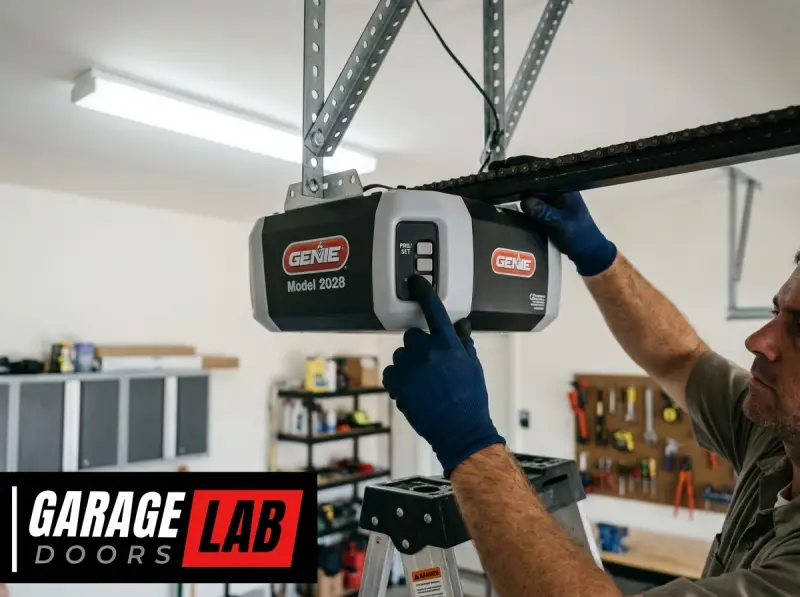
If your remote is a simple, often rectangular device with a few buttons and no digital display, and your motor unit has a removable cover revealing a panel of small switches, it’s highly probable you’re dealing with a dip switch system. Older Genie models also used dip switches, but the programming process can differ slightly. For how to reprogram Genie garage door keypad, you might find similar principles but specific switch locations and counts can vary.
Locating The Dip Switches
Before you can begin programming, you need to accurately locate the dip switches on both your garage door opener motor unit and your remote control. This step is crucial, as mistaking other components for dip switches can lead to confusion or damage.
On The Garage Door Opener Motor Unit
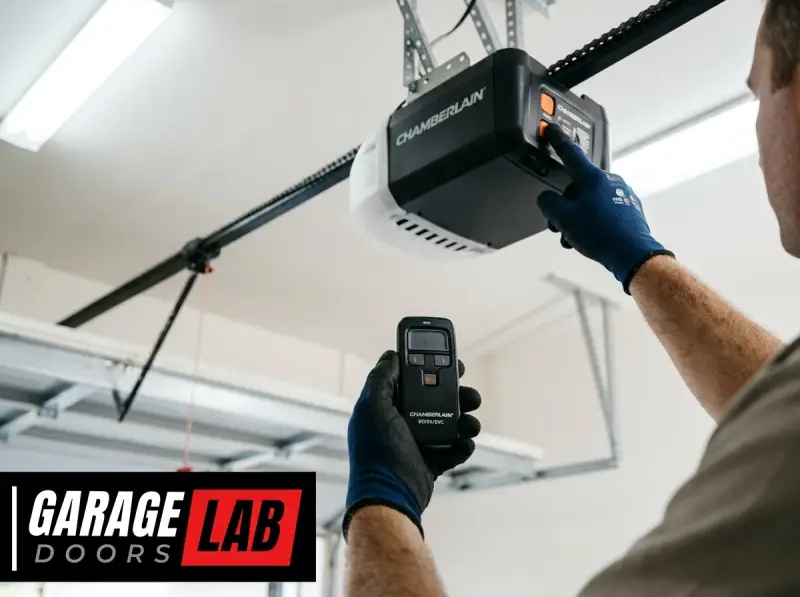
The motor unit is the main box that hangs from the ceiling in your garage, connected to the opener rail. To access the dip switches on the motor unit, you’ll typically need to remove its outer casing.
- Disconnect Power: Crucially, unplug the garage door opener from the electrical outlet. Safety is paramount when working with electrical components.
- Locate the Cover: The motor unit usually has a removable cover, often secured by screws or clips. These are typically located on the bottom or side of the unit.
- Remove the Cover: Carefully remove the screws or disengage the clips to take off the casing.
- Identify the Dip Switches: Once the cover is off, you’ll see the internal components. Look for a small panel containing a series of small switches, usually numbered 1 through 9, 10, or 12. They are often arranged in a single row or two rows. These are your dip switches. They will likely be labeled “ON/OFF,” “UP/DOWN,” or “1/0.”
Pro Tip: Take a clear photo of the dip switch configuration on the motor unit *before* you touch anything. This serves as your reference point and ensures you can easily return to the original setting if needed.
On The Remote Control
The dip switches on the remote control are usually located on the back of the unit.
- Examine the Remote: Look at the back of your Chamberlain remote. You might see a small seam indicating a battery compartment cover.
- Open the Battery Compartment: Most remotes require you to slide or pry open the battery compartment cover. Often, the batteries are held in place by a small screw, or the cover simply snaps off.
- Locate the Dip Switches: Once the battery compartment is open, you should see another set of dip switches, mirroring the configuration on the motor unit. These switches will also be labeled “ON/OFF” or similar.
If you cannot find dip switches on your remote, it’s possible your remote is not compatible with a dip switch programming system, or it might be designed for a different type of programming (like a learn button).

Credit: www.youtube.com
The Programming Process: Step-by-step
Programming a Chamberlain garage door opener with dip switches is a process of synchronization. The goal is to make the pattern of switches on your remote *exactly* match the pattern on your motor unit.
Step 1: Prepare The Motor Unit Switches
- Ensure Power is OFF: Double-check that the garage door opener motor unit is unplugged from the power outlet.
- Set the Motor Unit Switches: Using a small flathead screwdriver, a pen tip, or even a paperclip, carefully set each dip switch on the motor unit to your desired position. This is the code you want your remote to use. You can choose any combination of “on” and “off.”
- Recommendation: For initial setup or if you’re unsure, it’s often easiest to replicate the original factory setting if you have it documented or photographed. If you are replacing a lost remote or troubleshooting, you will want to match the *existing* code on the motor unit.
- Security Consideration: If you are concerned about older, potentially less secure codes, you can choose to set a new, unique pattern. However, ensure this new pattern is meticulously recorded.
Step 2: Prepare The Remote Control Switches
- Access Remote Switches: Ensure the battery is installed correctly in your remote control. If you had to remove the battery to access the switches, put it back in now.
- Set the Remote Switches: Using the same tool as before, carefully adjust the dip switches on the remote control to match the *exact* “on” and “off” positions you set on the motor unit. Every single switch must be in the identical position on both the motor unit and the remote.
Example: If your motor unit switches are set as follows (from left to right, 1 to 10):
ON – OFF – ON – ON – OFF – OFF – ON – OFF – ON – OFF
Then your remote control switches must be set in precisely the same pattern:
ON – OFF – ON – ON – OFF – OFF – ON – OFF – ON – OFF
Step 3: Test The Remote
- Restore Power to Motor Unit: Plug the garage door opener motor unit back into the electrical outlet.
- Press the Remote Button: Stand at a reasonable distance from your garage door (not too close, but not so far that the signal might be weak) and press the button on your remote control that you intend to use for opening and closing the door.
If the dip switches were set correctly and match perfectly, the garage door should now operate. If it doesn’t, do not panic. This is a common occurrence, and the troubleshooting steps below will help.

Credit: www.youtube.com
Troubleshooting Common Dip Switch Programming Issues
Even with careful attention, programming dip switches can sometimes present challenges. The most frequent culprit is a slight mismatch in the switch positions.
Issue 1: The Remote Doesn’t Work After Programming
This is the most common problem. The first thing to check is the exact configuration of the dip switches.
- Double-Check Switch Positions:
- Unplug the motor unit again for safety.
- Carefully re-examine the dip switches on both the motor unit and the remote. Even one switch being flipped incorrectly can prevent the system from working.
- Ensure that the “ON” and “OFF” positions are correctly interpreted. Sometimes, “up” is ON and “down” is OFF, but this can vary. Refer to any labels on the switches themselves or the circuit board.
- If you took a photo before, compare your current setup to the photo meticulously.
- Battery Strength: Ensure the battery in your remote is fresh and installed correctly. A weak battery can sometimes cause intermittent signal issues or prevent the remote from transmitting the code properly.
- Remote Compatibility: Verify that the remote control is indeed compatible with your specific Chamberlain garage door opener model. If you’re using a universal remote, ensure it’s programmed for the correct Chamberlain frequency and code type.
Issue 2: The Remote Works Intermittently
Intermittent operation can be frustrating and often points to a slightly loose connection or a weak signal.
- Loose Switches: Check if any of the dip switches feel loose or wobbly. Sometimes, a switch might not be making proper contact. You might need to gently clean the contacts with a small amount of electrical contact cleaner.
- Antenna Issues: The motor unit has an antenna that hangs down, usually a thin wire. Ensure this antenna is not damaged, cut, or obstructed. A damaged antenna will significantly reduce the range and reliability of the signal. Sometimes, simply extending the antenna can improve performance.
- Environmental Interference: Strong radio frequency (RF) interference from other devices (like certain security systems, wireless routers, or even neighboring garage door openers) can sometimes disrupt the signal. Try operating the remote when there’s less activity in the vicinity.
Issue 3: Multiple Remotes Don’t Work
If you’ve programmed one remote successfully and another one fails, or if multiple remotes fail simultaneously:
- Master Code Mismatch: If your system uses a learn button on the motor unit in conjunction with dip switches (less common for pure dip switch systems, but possible on hybrid models), ensure the learn button process was completed correctly for each remote.
- Power Cycle: Sometimes, a simple power cycle can resolve communication glitches. Unplug the motor unit, wait 30 seconds, and plug it back in. Then, try reprogramming the remotes.
- Remote Malfunction: It’s possible that the remote itself is faulty. If you have another remote that works, and a new one fails to program, the new remote might be defective.
Issue 4: Accidental Code Change
If your garage door suddenly stopped responding to your remote, and you haven’t intentionally reprogrammed it, it’s possible the dip switches were accidentally bumped or shifted.
- Inspect for Physical Tampering: Check if anything could have physically moved the switches. This is rare but possible if the motor unit cover wasn’t securely fastened.
- Return to Original Settings: If you have a record or photo of the original dip switch settings, revert them back. This is especially important if you’re unsure when the problem started.
Replacing And Adding Remotes
When it comes to dip switch programming, adding or replacing remote controls follows the same fundamental principle: the dip switches on the new remote must match the dip switches on the motor unit.
Replacing A Lost Or Broken Remote
If your original remote is lost, damaged, or no longer working, you’ll need to purchase a compatible replacement remote.
- Identify Your Opener Model: Knowing your specific Chamberlain opener model number is crucial. This is usually found on the motor unit.
- Purchase a Compatible Remote: Search for Chamberlain remotes that are specifically designed for dip switch systems and compatible with your opener’s frequency (often 310 MHz, 315 MHz, or 390 MHz). You can often find this information in your opener’s manual or on Chamberlain’s support website.
- Program the New Remote: Once you have the new remote, follow the exact same dip switch setting procedure described earlier: set the motor unit switches (or note their current setting), and then meticulously match those settings on the new remote’s dip switches.
Adding A New Remote
If you want to add an additional remote control (e. g. , for a second driver or a family member), the process is identical to replacing a remote.
- Obtain a Compatible Remote: Purchase a new remote that is confirmed to work with your specific Chamberlain dip switch opener model.
- Match Dip Switch Settings: Access the dip switches on the motor unit and note their current configuration. Then, set the dip switches on the new remote to match this configuration precisely.
- Test: Plug the motor unit back in and test the new remote.
Important Note on Dip Switch Systems: Unlike systems with a “learn” button, dip switch systems generally do not require you to press a button on the motor unit to “learn” the new remote. The match of the dip switch codes is the programming itself. If your opener *does* have a learn button and dip switches, consult your manual, as it might be a hybrid system requiring a learn button press after setting the switches. For most older Chamberlain dip switch systems, the code match is all that’s needed.
Understanding Different Dip Switch Configurations And Frequencies
Chamberlain has used various dip switch configurations and frequencies over the years. Understanding these differences is key to ensuring compatibility when purchasing new remotes or troubleshooting.
Number Of Switches And Patterns
The number of dip switches can vary, commonly ranging from 8 to 12 switches.
- 8-Switch Systems: These systems offer 2^8 = 256 possible unique codes.
- 9-Switch Systems: These offer 2^9 = 512 possible unique codes.
- 10-Switch Systems: These offer 2^10 = 1024 possible unique codes.
- 12-Switch Systems: These offer 2^12 = 4096 possible unique codes.
The more switches a system has, the greater the number of unique codes it can generate, which was an improvement in security over time. When purchasing a replacement remote, ensure it has the same number of dip switches and is designed for the same type of programming (i.
e. , dip switch matching).
Radio Frequencies
Garage door openers operate on specific radio frequencies. Chamberlain has used several over the years:
- 310 MHz: Common in many older Chamberlain and Craftsman openers.
- 315 MHz: Also widely used by Chamberlain and LiftMaster.
- 390 MHz: Another frequency frequently employed.
It is critical that your remote control operates on the same frequency as your garage door opener motor unit. A remote designed for 315 MHz will not work with an opener that operates on 310 MHz or 390 MHz, regardless of how accurately you set the dip switches.
This information is usually found in your opener’s manual or sometimes on a sticker on the motor unit itself.
Fixed Code Vs. Rolling Code (dip Switch Era)
While dip switches were a step up from earlier fixed code systems, the dip switch era itself saw the transition to rolling code technology.
- Fixed Code Dip Switches: In the very earliest systems, the dip switches were set once and never changed. This was essentially a fixed code system, albeit implemented with dip switches. These are the least secure.
- Rolling Code Dip Switches: Most Chamberlain dip switch systems from the late 1980s and onwards utilized dip switches to set the *initial* code or a specific sequence within a rolling code system. As mentioned, the remote transmits a code, the opener recognizes it, and both advance to the next code in the sequence. The dip switches on the opener and remote are still used to synchronize this initial code or a specific set of codes.
If you have a very old system with fixed code dip switches, you might consider upgrading to a newer system for enhanced security. The cost of a new garage door opener is a factor to consider, with pricing varying significantly based on features and brand, as detailed in How Much for a Garage Door: Costs, Factors, and Savings Tips.
When To Consider Upgrading Your System
While dip switch programming is effective for compatible openers, there comes a time when upgrading your entire garage door opener system might be a more sensible and secure solution.
Security Concerns With Older Systems
As technology advances, so do methods for bypassing older security systems. Fixed code systems, and even some early rolling code systems, can be vulnerable to code grabbing or code brute-forcing by sophisticated devices. If your system relies on older dip switch technology, especially if it’s a fixed code system, the security it offers may be insufficient by modern standards.
A study by the Center for Automotive Research highlighted the increasing sophistication of vehicle-related cyber threats, which can extend to home access systems like garage doors. While specific statistics on dip switch vulnerabilities are scarce, the general principle is that older, simpler encoding methods are inherently less secure.
Lack Of Modern Features
Older garage door openers with dip switches often lack the convenience and advanced features found in modern units:
- Smart Home Integration: Newer openers can often be controlled via smartphone apps, integrated with smart home ecosystems (like Alexa or Google Home), and offer remote access from anywhere.
- Battery Backup: Many modern openers include a battery backup system, ensuring your garage door can still be operated during a power outage.
- Enhanced Safety Features: Newer openers often have more sensitive obstruction sensors and quieter, more efficient motor designs.
- Wi-Fi Connectivity: Allows for status monitoring, remote operation, and notifications.
Compatibility Issues With New Remotes
As Chamberlain and other manufacturers phase out older technologies, finding compatible replacement remotes for dip switch systems can become increasingly difficult and expensive. You might spend considerable time and money searching for a compatible remote, only to face programming challenges.
In such scenarios, investing in a new garage door opener system that uses modern rolling code technology with simpler programming methods (like a learn button) or even smartphone control might be a more cost-effective and secure long-term solution. Many modern openers offer straightforward programming, often as simple as pressing a button on the motor unit and then on the remote. For instance, How to Reset Liftmaster Garage Door Opener Remote Easily details a common modern reset process.
Frequently Asked Questions
What If I Lose My Original Dip Switch Settings?
If you’ve lost the original dip switch settings for your Chamberlain opener and remote, you have a few options. The most common approach is to purchase a new remote designed for your specific opener model and then set a completely new, unique code using the dip switches on both the motor unit and the new remote.
Document this new code carefully. Alternatively, you might be able to find documentation for your specific Chamberlain opener model online that lists the factory default dip switch settings. If all else fails, and you are unable to identify or set the correct dip switches, it