Now Reading: How Do I Change My Garage Door Code: Easy Step-by-Step Guide
- 01
How Do I Change My Garage Door Code: Easy Step-by-Step Guide
Changing your garage door code is an important part of keeping your home safe. Many people use wireless keypads or remote controls for their garage doors, but they often forget to update the code regularly. If you’ve just moved into a new house, lost a remote, or simply want to improve your security, learning how to change your garage door code is essential. This process is not as complex as it may seem, and it can usually be done with a few simple steps and tools. By understanding the details, you’ll not only protect your home but also gain peace of mind.
Why You Should Change Your Garage Door Code
Most homeowners don’t realize how easy it is for old codes to fall into the wrong hands. If you’ve ever given your code to a neighbor, house sitter, or contractor, they could still access your garage. Even if you trust them, you can’t control what happens to the code after that. Default codes that come with new openers are well-known and can be found online. That’s why it’s important to change your code, especially if you buy a new house or lose a remote.
A survey by the National Crime Prevention Council found that 9% of burglars entered homes through an unlocked garage door. Garage doors are a common target, and an old or easy-to-guess code makes you more vulnerable. By updating your code, you make it much harder for anyone to break in.
Another often-overlooked reason: Some garage door openers can be hacked if they use older, fixed codes. Modern openers use rolling code technology, which changes the code every time you use your remote. But if you have an older system, it’s even more important to update your code regularly.
Types Of Garage Door Keypads And Openers
Before you start, it helps to know which type of garage door opener or keypad you have. Not all systems are the same, and steps can vary a bit.
Basic Types
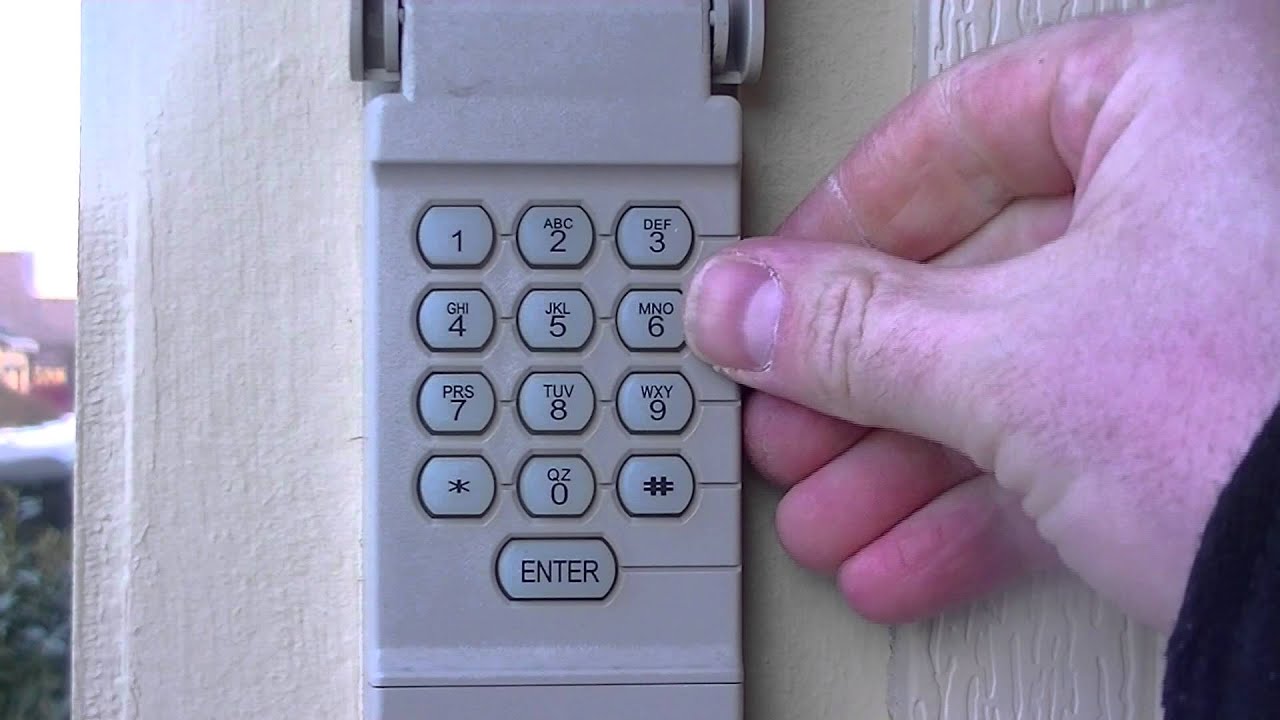
- Keypad Entry Systems
- Mounted outside your garage
- Enter a code to open/close the door
- Remote Controls
- Handheld devices, often kept in cars
- Usually have a button or two
- Wall-Mounted Consoles
- Inside your garage, near the door to your house
- Smart Garage Openers
- Controlled by smartphone apps
- May use Wi-Fi or Bluetooth
Older models often use DIP switches (small toggles inside the remote and opener), while newer ones use a “learn” button for programming.
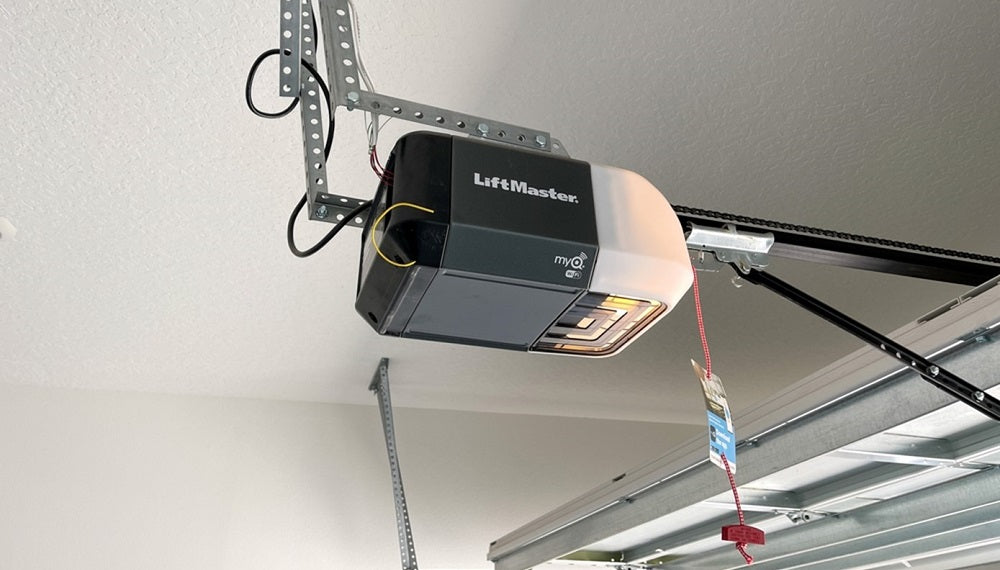
How To Identify Your System
Look for the brand and model number, usually found on the back or side of the motor unit (mounted on the garage ceiling) or on the keypad. Popular brands include LiftMaster, Chamberlain, Genie, Craftsman, and Overhead Door. If you’re not sure, check your user manual or look up the opener online.
Tools And Supplies You’ll Need
Most garage door code changes require only a few basic tools:
- A ladder (to reach the motor unit if needed)
- The garage door remote or keypad
- The owner’s manual (optional but helpful)
- A pen and paper (to write down your new code)
For older units using DIP switches, you may need a small screwdriver.
Keep in mind: Safety first. Unplug the garage door opener before working near wiring or circuit boards.
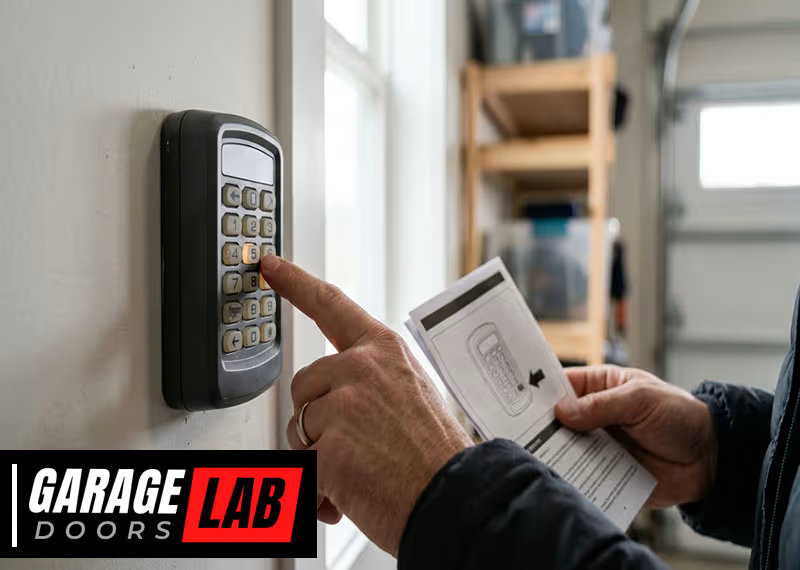
How To Change The Code On A Keypad Entry System
Keypad systems are common and easy to update. Here’s a step-by-step process:
Step 1: Locate The Learn Button
Find the learn button on your garage door opener. This is usually found on the back or side of the main motor unit, often under a small light cover. The button may be red, yellow, purple, or green, depending on the brand.
Step 2: Clear The Old Code
Press and hold the learn button for about 6-10 seconds until the indicator light goes off. This erases all current codes, including remotes and keypads. You may need to press the button with a pen or screwdriver if it’s small.
Step 3: Set The New Code
- Enter your new code (usually 4 digits) on the keypad.
- Press the enter button on the keypad.
- Within 30 seconds, press and release the learn button on the motor unit.
- Go back to the keypad and press the enter button again.
The garage door should move, indicating the new code is set.
Step 4: Test The Code
Try your new code to make sure it works. If not, repeat the steps. Some systems allow you to program multiple codes or temporary guest codes.
Common Mistakes To Avoid
- Not pressing the learn button within the required time (usually 30 seconds)
- Choosing an easy code (like 1234 or 0000)
- Forgetting to erase old codes first
How To Change The Code On A Remote Control
Remotes are programmed in a similar way to keypads, but with some differences.
Step 1: Erase Old Codes
Hold the learn button on the opener until the light goes out. This removes all linked remotes.
Step 2: Program The Remote
- Press and release the learn button (don’t hold it this time).
- Within 30 seconds, press the button on your remote you want to use.
- The light on the opener may blink, or you may hear a click.
Step 3: Test The Remote
Stand a few feet away and press the button. If the door opens, the new code is set.
Note
Some remotes have a row of small DIP switches. In this case, open the remote and the opener, set the switches to match, and close both units. These are less secure than rolling code remotes and should be upgraded if possible.
How To Change The Code On Wall-mounted Consoles
Wall consoles usually use the same process as remotes. Some allow you to set a personal PIN for added security.
- Follow the instructions for your brand.
- Press the “program” or “learn” button, enter the new code, and confirm.
If the console has a screen or menu, navigate to the settings and look for code or PIN options.
Changing The Code On Smart Garage Door Openers
Smart openers add convenience but require their own method.
Step 1: Open Your App
Log in to the mobile app connected to your garage door opener.
Step 2: Access The Settings
Find the section for codes, PINs, or users.
Step 3: Update Or Add A Code
- Delete old codes or users you no longer want.
- Add a new code or user by following the prompts.
Step 4: Test The System
Try opening the door with your phone or keypad to make sure the new code works.
Practical Tip
Always update your app and device firmware. Outdated software can have security holes.
Special Cases: Dip Switch Garage Door Openers
Some very old openers (from the 1980s and early 1990s) use DIP switches instead of electronic codes. Here’s how to change these:
Step 1: Open The Remote And Motor Unit
Use a screwdriver to open the battery compartment of your remote. Locate the row of tiny switches (usually 8-12).
Step 2: Match The Switches
Inside the garage motor unit, you’ll find another row of DIP switches. Set the switches in the remote to exactly match the motor unit.
Step 3: Test The Remote
Press the button. If the door opens, the code is updated.
Important: These systems are easy to hack with scanners. If you have one, consider upgrading for better security.
Resetting All Codes After Moving Or Security Breach
If you moved into a new home or suspect someone else knows your code, you should erase all codes and start fresh.
Steps:
- Hold the learn button until the indicator light turns off (6-10 seconds).
- Program each keypad and remote as described above.
- Check that old remotes and codes no longer work.
This process ensures only you and trusted people can access your garage.
Table: Common Garage Door Opener Brands And Code Reset Methods
Here’s a quick comparison for popular brands:
| Brand | Learn Button Color | Reset Method |
|---|---|---|
| LiftMaster | Yellow, Purple, Red, Green | Press and hold learn button, reprogram remotes/keypads |
| Chamberlain | Yellow, Purple, Red, Green | Same as LiftMaster (same company) |
| Genie | Black, Red | Press and hold learn button, or use DIP switches for old models |
| Craftsman | Yellow, Purple, Red, Green | Similar to LiftMaster/Chamberlain |
| Overhead Door | Red, Black | Learn button or DIP switches |
If you don’t see your brand, check the manual or the manufacturer’s website.
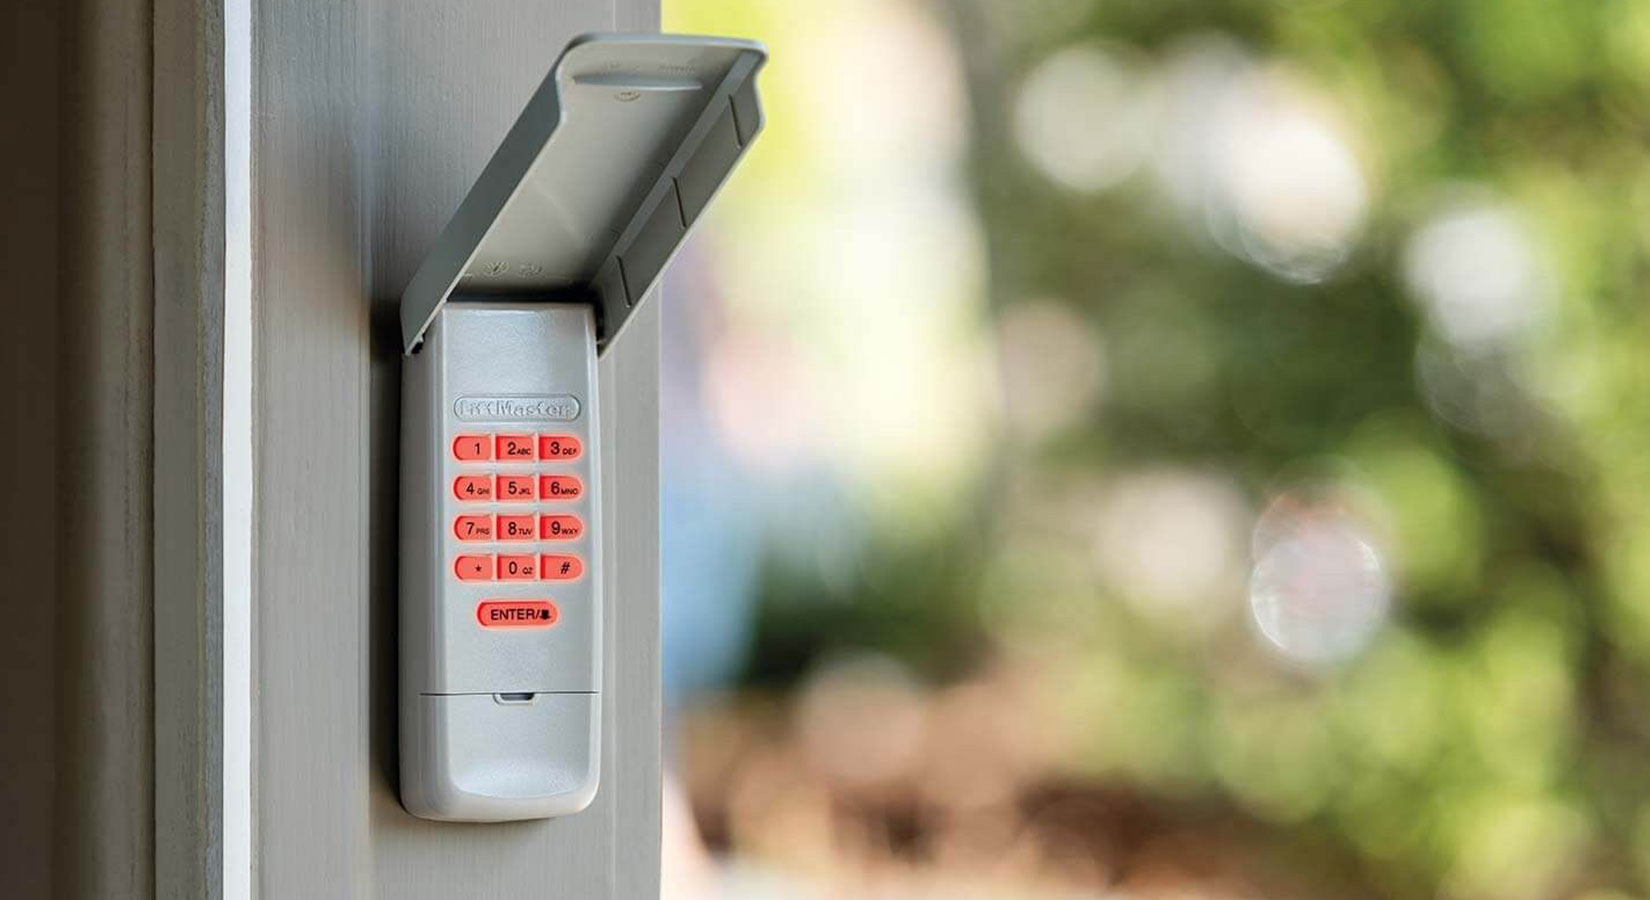
Step-by-step Example: Changing A Liftmaster Keypad Code
Let’s walk through a real example. Suppose you have a LiftMaster keypad.
- Locate the learn button on the opener (usually yellow or purple).
- Press and hold it until the light goes out. This clears all codes.
- Enter a new 4-digit code on the keypad.
- Press and release the learn button.
- Within 30 seconds, press and hold the enter button on the keypad.
- The opener light will blink, indicating success.
- Test the code.
This process works for most Chamberlain and Craftsman models too.
Table: Rolling Code Vs. Fixed Code Openers
Understanding your system’s security level is important. Here’s how the two main types compare:
| Feature | Rolling Code | Fixed Code (DIP Switch) |
|---|---|---|
| Security | High (code changes every use) | Low (code stays the same) |
| Hacking Risk | Very hard to hack | Easy to hack with scanners |
| Year Introduced | Mid-1990s and later | Before mid-1990s |
| Upgrade Needed? | No | Recommended |
If you have a fixed code unit, upgrading adds real peace of mind.
Safety And Security Tips
Changing your code is just one part of garage security. Here are some expert tips to keep your garage (and home) safer:
- Don’t use obvious codes like your address, birthday, or “1234.”
- Change your code every 6–12 months, especially after moving or giving it to someone.
- Hide your remote or keypad from plain view in your car. Thieves often break in just to grab garage remotes.
- Use strong, unique codes that mix numbers and, if possible, letters.
- For smart garage openers, set up two-factor authentication for your app.
- Keep the garage door closed, even during the day.
- Add a security camera or motion light near the door for extra protection.
- If your keypad has a cover, keep it closed to prevent weather or vandalism.
A 2019 FBI report noted that homes with visible security features had a 60% lower risk of break-in. Combining code changes with other simple steps makes a real difference.
What To Do If You Forget Your Garage Door Code
It happens to everyone: You forget your code. Don’t panic—there are solutions.
- Check your manual or the opener for a reset process.
- Erase all codes using the learn button.
- Program a new code, as described earlier.
- If you’re locked out completely, contact the manufacturer’s customer support.
For smart openers, use your app or reset your account online.
When You Should Call A Professional
While most people can change their garage door code themselves, there are times when calling a pro makes sense:
- Your system is very old, damaged, or has no clear buttons.
- You see exposed wiring or suspect electrical problems.
- The opener doesn’t respond after several reset attempts.
- You want to upgrade to a more secure or smart system.
A professional can also advise you on the best security features for your home.
Table: Diy Vs. Professional Garage Code Change
Here’s how doing it yourself compares to hiring a pro:
| Factor | DIY | Professional |
|---|---|---|
| Cost | Free (if you have tools) | $75–$200 (service call) |
| Time | 15–30 minutes | Same, plus scheduling |
| Expertise Needed | Basic DIY skills | None (they handle it) |
| Security Advice | Online research needed | Can recommend upgrades |
Most homeowners can handle the task, but if you’re unsure or want an upgrade, a pro can help.
Two Non-obvious Insights For Beginners
- Clearing the memory removes all remotes and keypads—not just one. If you reprogram your code, every remote and keypad must be re-added. Many people accidentally lock out family members by forgetting this step.
- Smart openers can keep a log of door activity. Some apps show who opened or closed the door and when. Reviewing this log can help you spot unauthorized access or see if you need to change the code again.
Maintenance After Changing Your Code
Once you’ve changed your code, don’t forget about regular maintenance:
- Replace remote batteries every 1–2 years.
- Check keypad buttons for wear (they can stick or stop working).
- Test the door’s auto-reverse safety feature.
- Clean the keypad and remote to prevent dirt buildup.
A little upkeep ensures your system works reliably and stays secure.
Troubleshooting Common Problems
If your code change doesn’t work, try these steps:
- Double-check the brand and instructions—small details matter.
- Make sure you pressed the learn button the correct amount of time.
- Try moving closer to the opener—remotes and keypads sometimes have weak signals.
- Replace batteries in remotes or keypads.
- Check for interference (LED lights, Wi-Fi routers, or other electronics nearby).
If problems continue, consult your owner’s manual or the manufacturer’s website for support.
Upgrading Your Garage Door Opener For Better Security
If your opener is more than 20 years old or uses DIP switches, upgrading can greatly improve your security and convenience. Modern openers:
- Use rolling codes to prevent hacking
- Often include battery backup for power outages
- Can connect to your smartphone for remote access
- Support multiple remotes and guest codes
Brands like LiftMaster, Chamberlain, and Genie offer models with these features. Installation can be DIY or done by a professional.
For more on modern opener security, check out this detailed guide from the Consumer Reports.
Frequently Asked Questions
How Often Should I Change My Garage Door Code?
It’s wise to change your garage door code every 6 to 12 months, or immediately if you’ve given the code to someone outside your family, lost a remote, or moved into a new home. Regular updates keep your security strong.
Can Someone Hack My Garage Door Opener?
Older openers with DIP switches are vulnerable to code grabbers and scanners. Modern rolling code openers are much harder to hack. For even more security, consider a smart opener with app-based controls and two-factor authentication.
What Should I Do If My Garage Door Keypad Stops Working After Changing The Code?
First, check the battery in the keypad. If the keypad still doesn’t work, clear all codes from the opener and reprogram both the keypad and your remotes. Make sure you follow the correct sequence for your brand.
Is It Possible To Set A Temporary Code For Guests?
Many modern garage door keypads allow you to set a temporary code for visitors or service people. Check your manual or app for instructions. Remember to delete the code after it’s no longer needed.
Do I Need A Professional To Change My Garage Door Code?
Most code changes are easy and can be done in about 15 minutes. However, if you have an older system, run into problems, or want to upgrade your opener, a professional can help ensure everything is secure and working properly.
Changing your garage door code is a simple but powerful way to protect your home. With a few careful steps, you’ll keep your family safe, your property secure, and your mind at ease.


