Now Reading: How Do You Change the Code on a Garage Door: Easy Steps
- 01
How Do You Change the Code on a Garage Door: Easy Steps

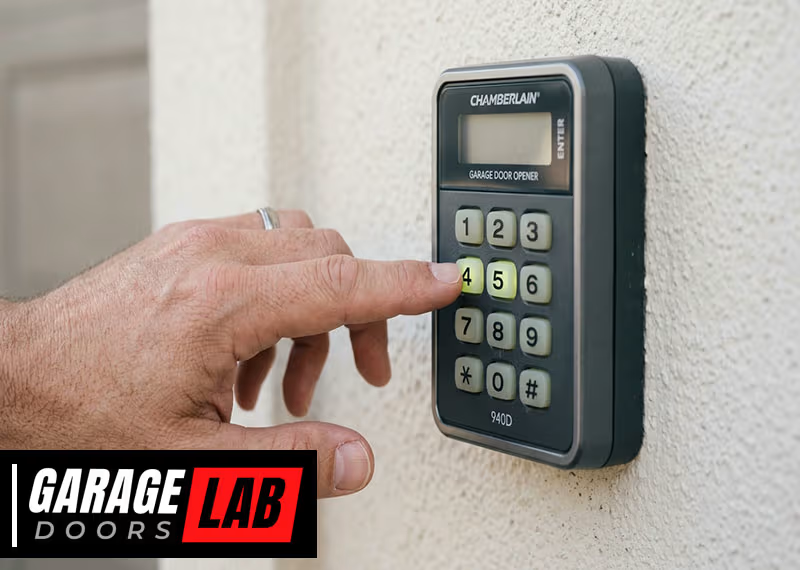
Changing the code on a garage door opener might sound technical, but it’s a practical task every homeowner should know. Whether you want better security, have just moved in, or need to reset after sharing your code, updating your garage door code is an essential part of home maintenance.
The process is surprisingly straightforward once you know what to do, and it can save you from headaches down the road.
Garage door openers have evolved from simple manual locks to sophisticated electronic systems. Today, most homes use keypads, remote controls, or smart openers. Each type has its own way of setting or changing the code. Understanding these differences and the step-by-step methods will help you handle most situations confidently.
This guide walks you through everything you need to know about changing your garage door code, covers common mistakes to avoid, and even explains what to do if things don’t go as planned.
You’ll also find practical tips, examples, and answers to the most common questions. Whether you’re a first-time homeowner or just want to update your knowledge, this article gives you the clear instructions and background details you need.
Why Change Your Garage Door Code?
Changing your garage door code is more than just a routine task. It directly affects your home’s security and peace of mind. Here’s why it matters:
- Security Risks: If someone else knows your code, they could enter your garage and even your house.
- After Moving: You never know who the previous owners shared the code with—service people, neighbors, or friends.
- Lost Remotes: If you lose a remote, someone could find it and access your garage.
- Regular Maintenance: Just like changing your passwords, updating your code every 6-12 months keeps things secure.
- Break-Ins or Suspicious Activity: If you suspect someone tried to enter, change the code immediately.
Ignoring code changes can leave your property vulnerable. One non-obvious risk: If you use the same code as your neighbor or leave the default factory code unchanged, your opener could accidentally respond to another remote.
Types Of Garage Door Openers And Codes
Not all garage doors use the same kind of opener or code system. Understanding what you have is the first step.
Remote Controls
Most garage doors come with remote controls that use rolling or fixed codes. Rolling codes change every time you use the remote, making them more secure. Fixed codes stay the same until you manually change them.
Keypad Entry Systems
Keypad systems let you enter a numeric code on a pad outside your garage. These are common on newer homes and allow for code changes without extra tools.
Smart Garage Door Openers
Modern systems connect to your smartphone or home network, letting you manage codes and access through an app. These are the most flexible but require a different setup process.
Manual Switch (dip Switch) Models
Older openers use DIP switches (small toggle switches inside the remote and the opener) to set a code. Changing the pattern changes your code.
Table: Common Garage Opener Types And Code Methods
| Opener Type | Code System | How to Change Code | Security Level |
|---|---|---|---|
| Remote Control | Rolling/Frequency Code | Reset remotes, sync with opener | High (Rolling), Medium (Fixed) |
| Keypad | PIN Code | Enter programming mode, set new PIN | High |
| Smart Opener | App-based Access | Change via app/settings | Very High |
| DIP Switch | Physical Switch Code | Change switch positions | Low |
Knowing your system type helps you follow the right steps. If you’re not sure, check your owner’s manual or look at the back of your opener for brand/model information.

What You Need Before You Start
Preparation makes the process smooth and avoids frustration. Here’s a quick checklist:
- Garage Door Opener Brand and Model: Find this on the unit, remote, or in the manual.
- Ladder: Most openers are mounted high on the garage ceiling.
- New Code: Choose a code that’s hard to guess (not birthdays or “1234”).
- Screwdriver: For opening covers or accessing DIP switches (if needed).
- Smartphone: For smart openers or taking photos as you go.
- Pen and Paper: Write down the new code for reference.
Pro tip: Take a picture of the old settings before you change anything. If you make a mistake, you can easily reset to the original.
How To Change The Code: Step-by-step Instructions
The following sections explain how to change the code for the main types of garage door openers. Each method is a little different, so pick the one that matches your system.
For Keypad Entry Systems
Keypad systems are popular and easy to update. The process usually takes less than 10 minutes.
Step 1: Locate The Learn/program Button
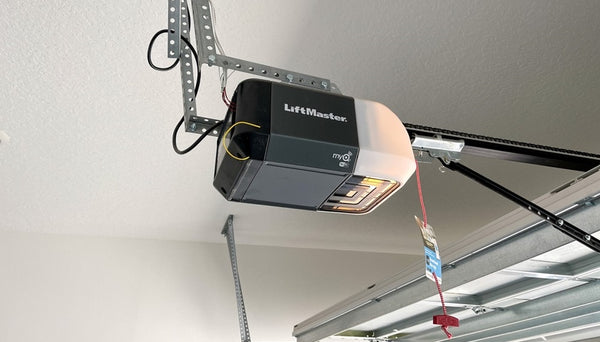
Most keypads connect wirelessly to your garage door opener. Look for a “Learn” or “Program” button on the motor unit (often on the back or side). You may need to remove a light cover.
Step 2: Clear The Old Code
Press and hold the Learn button until the indicator light goes out (usually 6–10 seconds). This erases all old codes and remotes. Don’t skip this if you want to fully reset access.
Step 3: Set The New Code
- Press the Learn button once (the light will come on).
- On your keypad, enter your new 4-digit code.
- Press the Enter key (or whatever key your system uses to confirm).
- The opener should respond with a light flash or a click.
Step 4: Test The Code
Wait 30 seconds, then enter the new code on the keypad. The door should open or close. If it doesn’t, repeat the steps carefully.
Example: Changing A Chamberlain Keypad Code
For a Chamberlain opener:
- Press and release the Learn button.
- Enter your new PIN on the keypad.
- Press Enter.
- The light blinks to confirm.
Insight: Some keypads require you to enter the old code first before you can change it. Check your brand’s manual if your first attempt fails.
For Remote Controls (rolling And Fixed Code)
Step 1: Reset The Opener
Find the Learn button on the opener. Hold it until the LED turns off. This removes all paired remotes.
Step 2: Pair The Remote
- Press and release the Learn button (the LED comes on).
- Within 30 seconds, press the button on your remote.
- The opener light should blink.
Step 3: Test The Remote
Stand a few feet away and press the remote button. If the door moves, the new code is set.
Non-obvious Tip
If you have multiple remotes, you must reprogram each one after a reset. Skipping this step leaves old remotes disconnected.
For Dip Switch (manual Switch) Openers
Step 1: Open The Remote And Opener Panel
Use a screwdriver to open the remote and the opener’s cover. Inside, you’ll see a row of small switches (usually 8–12).
Step 2: Set A New Pattern
Flip the switches to your new code. The pattern must match exactly on both the remote and the opener unit.
Step 3: Close Up And Test
Snap the covers back on and try the remote. The door should respond instantly.
Example: Setting A Dip Switch Pattern
If your remote has 9 switches, you might set the pattern as Up, Down, Down, Up, Up, Down, Up, Down, Up. Copy this exactly to the opener.
Insight: Don’t use an obvious pattern like all switches up or down. These are easy for intruders to guess.
For Smart Garage Door Openers
Smart openers let you change codes using an app or web interface.
Step 1: Open The Manufacturer’s App
Log in to the app that controls your garage opener (e. g. , MyQ, Genie Aladdin, or similar).
Step 2: Navigate To Access Settings
Find the “Users,” “PIN Codes,” or “Access” section.
Step 3: Add Or Change The Code
- Select the keypad or access device.
- Enter a new code (often 4–6 digits).
- Save or confirm your changes.
Step 4: Test The New Code
Enter it on your keypad or in the app to make sure it works. Some apps let you set temporary codes for guests or deliveries.
Pro Insight: Always log out after making changes. If your phone is lost or stolen, someone could access your garage.
Table: Step Comparison For Each Code Change Method
| System Type | Reset Required? | Tools Needed | Main Steps |
|---|---|---|---|
| Keypad | Usually | Ladder | Learn button, enter code, confirm |
| Remote (Rolling) | Yes | Ladder | Learn button, press remote |
| DIP Switch | No | Screwdriver | Match switch pattern |
| Smart Opener | No | Smartphone | Edit in app, test |
Important Safety Tips
Working with garage door systems involves some risks. Here’s how to stay safe and avoid accidents:
- Unplug the opener if you’re opening the main unit or working near wiring.
- Use a stable ladder and have someone nearby if possible.
- Never force the door or opener if it’s stuck—check for mechanical issues.
- If the opener uses batteries, remove them before opening the remote.
- Keep small parts (like DIP switches) away from children and pets.
One common mistake: Rushing through the process and forgetting to secure the opener back in place. Loose covers or unsecured panels can cause malfunctions or injury.
Troubleshooting: When The New Code Doesn’t Work
Sometimes, the new code doesn’t work on the first try. Here are some common reasons and solutions:
Wrong Learn Button
Garage openers can have multiple buttons. Make sure you’re pressing the actual Learn button, not a light or lock button.
Out-of-range Keypad
If your keypad is too far from the opener or has a weak battery, the code won’t program. Try changing the battery or moving closer.
Code Not Saved
Some systems require you to press Enter or another key to save the new code. If you skip this, the new code won’t register.
Remotes Or Keypads Not Synced
After a reset, all remotes and keypads must be reprogrammed. If you forget one, it won’t work until you re-sync.
Interference
Nearby electronics (Wi-Fi routers, security cameras) can cause signal problems. Move these devices if your opener is unreliable.
Special Cases: Multi-door Garages And Shared Access
If you have more than one garage door or want to share access, there are some extra steps.
Multi-door Keypads
Some keypads let you control two or more doors. Make sure you’re changing the code for the correct door. Follow the manual for assigning codes to each door.
Temporary Codes
Many modern systems let you set a temporary code for guests or deliveries. These expire after a set time or number of uses. This is safer than sharing your main code.
Table: Main Code Vs. Temporary Code
| Feature | Main Code | Temporary Code |
|---|---|---|
| Who uses it? | Homeowners, family | Guests, service people |
| How long valid? | Until you change it | Set time/uses |
| Security risk | Medium (if shared) | Low (auto-expires) |
| How to set? | Regular programming | Via keypad/app |
Tip: Always delete temporary codes after they’re no longer needed.
Security Best Practices After Changing Your Code
Just changing your code isn’t enough if you want the best protection. Here’s how to keep your garage secure:
- Change the code regularly—at least once a year or after any security concern.
- Avoid using easy-to-guess numbers (like house numbers, 0000, 1234, or birthdays).
- Never share your code by text or email.
- If you use a smart system, enable two-factor authentication and set strong passwords.
- Keep your remote controls in a safe place—never in an unlocked car.
- Disable old remotes if they’re lost or stolen.
- If you move to a new house, change the code and clear all old remotes immediately.
One detail many people miss: Some garage openers let you lock out all remotes temporarily (vacation mode). Use this feature if you’re away for a long time.
Common Mistakes And How To Avoid Them
- Forgetting to reprogram all devices: After a full reset, every remote and keypad needs to be paired again.
- Not confirming the change: Always test the new code several times before considering the job done.
- Using simple codes: Hackers or thieves can guess basic codes quickly.
- Ignoring manuals: Each brand has its own quirks. If something doesn’t work, check the manual or manufacturer website.
- Losing the new code: Write it down and keep it in a secure place—not taped to the opener or keypad.
Real-world example: A homeowner changed their code, but didn’t reprogram their spouse’s remote. The spouse was locked out until they realized both devices needed updating.
When To Call A Professional
Most people can change their garage door code themselves. However, you should call a pro if:
- The system is very old and you can’t find instructions.
- The opener doesn’t respond to any code changes.
- You see frayed wires or electrical problems.
- The door opens or closes unexpectedly during programming.
- You’re not comfortable working with ladders or electronics.
A professional can also upgrade your system if you have an outdated or unsafe model. Upgrading to a rolling-code or smart opener greatly improves security.
Keeping Track: How To Remember Your Code
Choosing a secure code is important, but you also need to remember it. Here are some tips:
- Use a memorable pattern (but not an obvious one). For example, use numbers from a favorite song’s lyrics.
- Store codes in a password manager app for easy access.
- If you write the code down, keep it in a locked drawer or safe.
- Never write the code on or near the garage door itself.
Insight: Some smart openers let you view or reset the code from your phone if you forget.
How Often Should You Change Your Garage Door Code?
Experts recommend changing your code at least once a year. You should also change it any time:
- You lose a remote or keypad.
- Someone moves out or stops needing access.
- You notice strange activity around your garage.
- You buy a used home.
Frequent changes may seem inconvenient, but they’re one of the best ways to protect your home.
Additional Resources And Support
If you run into trouble, check the manufacturer’s website for detailed guides or videos. Many brands have customer support lines and downloadable manuals. For more advanced troubleshooting, you can find useful information at Wikipedia.
Frequently Asked Questions
How Do I Know Which Code System My Garage Door Opener Uses?
Look for your opener’s brand and model on the unit or remote. Check for a keypad, DIP switches, or “Learn” button. The owner’s manual or manufacturer’s website will list the code system.
Can Someone Hack My Garage Door If I Don’t Change The Code?
Yes, especially if you use an old fixed code or DIP switch system. Modern rolling code and smart openers are much safer, but regular code changes prevent unauthorized access.
What Should I Do If I Forget My New Code?
You can reset the system using the Learn/Program button and set a new code. For smart openers, use the app to recover or reset your code. Keep the code written down in a secure place.
Why Won’t My Keypad Or Remote Work After Changing The Code?
This usually means the device wasn’t programmed correctly or is out of sync. Try reprogramming following the steps above. Check batteries and make sure you followed the correct sequence.
Is It Okay To Use The Same Code For My Garage And Front Door?
No, using the same code for multiple doors or locks is risky. If one code is compromised, all your entry points are vulnerable. Use unique codes for each.
Changing your garage door code takes a little time, but the security and peace of mind are worth the effort. With the right steps and regular updates, you can keep your home safe from unwanted visitors, protect your family, and avoid costly mistakes.