Now Reading: How Tight Should a Garage Door Chain Be for Optimal Performance
- 01
How Tight Should a Garage Door Chain Be for Optimal Performance
Your garage door works hard every day, opening and closing to keep your car and belongings safe. But if you hear strange noises, see the door moving unevenly, or feel resistance, there could be a problem with the garage door chain. Many people wonder, “How tight should a garage door chain be?” This small detail makes a big difference. A chain that’s too loose can make the door jump or rattle. Too tight, and you risk damaging the opener or other parts.
Getting the right chain tension is not just about smooth movement. It also affects how long your garage door opener lasts. This guide explains everything you need to know about the right garage door chain tightness, why it matters, and how to adjust it.
Whether you’re a homeowner, a DIY fan, or just want to keep your home safe, you’ll find clear steps and practical advice here.
Why Garage Door Chain Tension Matters
Most people don’t think about their garage door opener chain until something goes wrong. But the tension of this chain directly affects how your entire garage door system works. If you ignore it, you might face problems that cost money and time to fix.
A properly adjusted chain ensures:
- Smooth movement: The door opens and closes evenly, without jerks or noise.
- Longer lifespan: Less stress on the motor and other moving parts means your opener lasts longer.
- Safety: The risk of the chain slipping off or breaking is reduced.
- Quieter operation: You won’t hear loud rattles or clunks every time you use the garage.
An overly loose chain can slap against the rail, creating noise and even jumping off the sprocket. On the other hand, a chain that’s too tight puts strain on the opener, causing premature wear or even bending parts inside.
Understanding The Garage Door Chain System
Before making adjustments, it helps to know how a garage door chain drive works. Most residential openers use one of three systems: chain drive, belt drive, or screw drive. Chain drive systems are common because they are reliable and affordable.
The chain runs along a metal rail, connecting the garage door to the opener’s trolley. When you press your remote, the motor turns a gear, moving the chain and lifting or lowering the door. Tension is controlled by an adjustment bolt or nut, often found at the end of the rail near the motor.
Key Parts Involved
- Chain: The main moving part, usually made of steel.
- Trolley: Moves along the rail, attached to the door arm.
- Sprocket: Gear that pulls the chain.
- Adjustment Bolt/Nut: Lets you tighten or loosen the chain.
Understanding these parts helps you see why correct tension is so important. If one part is under too much stress, the whole system can fail.
How Tight Should A Garage Door Chain Be?
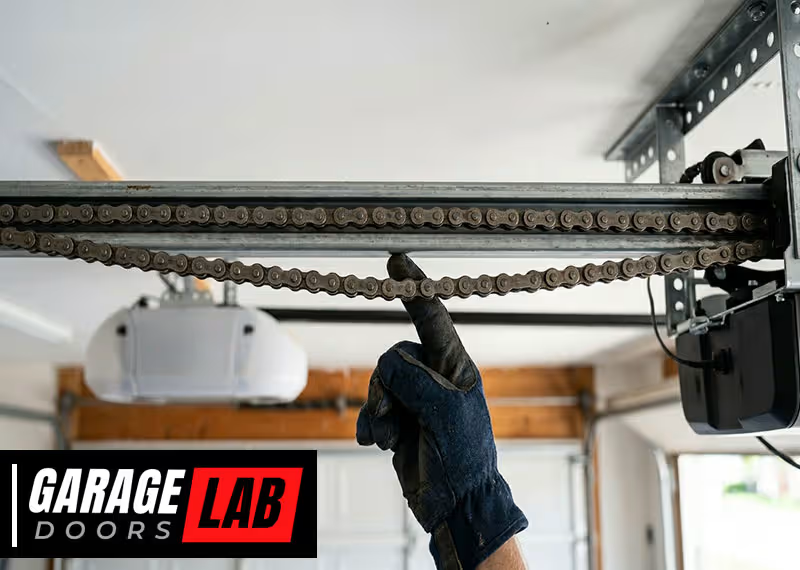
There’s no one-size-fits-all answer, but garage door experts generally agree on a simple rule. The chain should have a small amount of slack, but not so much that it sags or touches the rail. If you press on the chain with your finger at the midpoint between the sprocket and trolley, it should move about 1/2 inch (12–13 mm) up or down.
The following table shows the typical recommendation for chain slack:
| Chain Drive Type | Recommended Slack | Notes |
|---|---|---|
| Standard Chain Drive | 1/2 inch (12–13 mm) | Measured at midpoint |
| Heavy-Duty Chain | 1/4 to 3/8 inch (6–9 mm) | For larger/heavier doors |
| Belt Drive (for comparison) | 1/4 inch (6 mm) | Belt, not chain, but similar principle |
Too much slack: The chain hangs, slaps the rail, or jumps when the opener moves.
Too tight: The chain is straight as a line, with no give. You feel resistance or hear straining noises when operating.
Just right: Slight sag, but the chain never touches the rail during operation. The door moves smoothly, and the opener sounds normal.
Signs Your Garage Door Chain Needs Adjustment
Most homeowners notice something is off before they realize the chain is the issue. Here are some common warning signs:
- Unusual noise – Loud clanking, rattling, or slapping sounds.
- Door jerks or shakes – The door doesn’t move smoothly.
- Chain touches the rail – Visible sag in the middle of the chain.
- Chain jumps or slips – Chain comes off the sprocket or skips.
- Opener strains – Motor sounds louder, or you notice slow movement.
- Door fails to close/open fully – Stops before reaching the floor or ceiling.
Ignoring these signs can lead to bigger problems, such as damaged gears, worn sprockets, or even a broken chain. Regular checks can help you fix small issues before they become expensive repairs.
Tools And Safety Precautions
Before adjusting the chain, gather the right tools and take safety steps. Working with garage doors can be dangerous if you’re not careful.
You’ll need:
- Wrench or socket set (usually 7/16″ or 10 mm)
- Screwdriver (for some models)
- Ladder (to reach the opener)
- Work gloves (to protect your hands)
- Safety glasses (recommended)
Safety tips:
- Unplug the opener before starting. This prevents accidental activation.
- Don’t force parts. If something feels stuck, double-check the manual or call a professional.
- Keep children and pets away from the area while you work.
- Wear gloves to protect against sharp edges.
Some homeowners forget to unplug the opener, which can lead to sudden movement. Always double-check that the power is off.
How To Check Garage Door Chain Tightness
Checking the chain is simple and only takes a few minutes.
- Close the garage door and unplug the opener.
- Locate the chain: Look for the metal rail running from the motor to the wall.
- Find the midpoint: This is halfway between the motor and the door.
- Press on the chain: Use your finger to push up or down gently.
- Measure movement: It should move about 1/2 inch. If it sags more, it’s too loose. If it barely moves, it’s too tight.
Some openers have a “before and after” sticker showing the correct slack. If yours does, use it as a guide.

Step-by-step Guide To Adjusting A Garage Door Chain
If you find your chain is too loose or too tight, follow these steps to adjust it safely.
1. Unplug The Garage Door Opener
Safety first. Remove power to avoid accidental starts.
2. Locate The Adjustment Bolt
Find the adjustment bolt or nut. It’s usually at the end of the opener’s rail, near the motor. Some models have two nuts—a locking nut and an adjusting nut.
3. Loosen The Lock Nut
If your model has a locking nut, use your wrench to loosen it. This allows you to turn the adjusting nut.
4. Adjust The Chain
- To tighten: Turn the adjusting nut clockwise. This pulls the chain tighter.
- To loosen: Turn the adjusting nut counterclockwise. This adds slack.
Make small adjustments—about one turn at a time. Check the slack after each adjustment.
5. Check Chain Slack
After each adjustment, press the chain at the midpoint again. You want about 1/2 inch of movement.
6. Re-tighten The Lock Nut
Once you have the right tension, hold the adjusting nut in place and tighten the lock nut to secure everything.
7. Plug In And Test
Restore power and run the door through a full open-and-close cycle. Watch and listen for smooth, quiet movement. If needed, unplug and adjust again.
Quick Reference Table: Adjustment Steps
| Step | Action | Key Details |
|---|---|---|
| 1 | Unplug Opener | Always do this first for safety. |
| 2 | Find Adjustment Bolt | Usually near the opener motor. |
| 3 | Loosen Lock Nut | If your model has one. |
| 4 | Adjust Chain | Small turns; check slack often. |
| 5 | Check Slack | Look for about 1/2 inch movement. |
| 6 | Re-tighten Lock Nut | Secures your adjustment. |
| 7 | Plug In & Test | Cycle door and observe operation. |
Common Mistakes When Adjusting Garage Door Chains
Even careful homeowners make mistakes. Being aware can help you avoid problems.
- Over-tightening the chain
- This is the most common issue. A chain that is too tight can bend the opener rail or damage the motor gear. Always leave a little slack.
- Not securing the lock nut
- If you forget to tighten the lock nut after adjusting, the chain can slip out of adjustment quickly.
- Ignoring noise
- Some people adjust the chain to stop noise, but if the noise continues, the problem may be somewhere else—like worn rollers, dry hinges, or a misaligned rail.
- Adjusting with power on
- Always unplug the opener before working. Power tools near moving parts are dangerous.
- Skipping regular checks
- Chains can stretch over time. Check tension every 6–12 months.
Non-obvious insight: Some chains stretch more in the first year. If your opener is new, check tension after a few months, not just once a year.
When To Call A Professional
Most chain tension adjustments are simple. But some situations need expert help:
- The chain keeps slipping after adjustment.
- The opener makes grinding noises or stops mid-cycle.
- The door is very heavy or off-balance.
- You see bent or broken parts.
A technician can spot bigger problems, like a failing motor or worn sprocket. If in doubt, get an inspection to avoid bigger repairs later.
How Chain Tension Affects Other Parts
Many people focus on the chain but forget about the other moving parts. Improper chain tension can cause issues with:
- Sprocket: Too tight = more wear and possible breakage.
- Trolley: Can bind or wear out faster.
- Rail: May bend if the chain is too tight.
- Door balance: If the door is off-balance, the chain works harder.
A chain that’s too loose can also damage the emergency release or cause the door to stop unexpectedly.
Pro tip: If your garage door is hard to lift by hand (with the opener disconnected), have the springs checked. Chain tension won’t solve a heavy, unbalanced door.

Differences Between Chain, Belt, And Screw Drive Openers
You might wonder if these tips apply to all garage door openers. Chain drive systems are the most common, but there are also belt and screw drive models. Each has its own tension needs.
| Drive Type | Typical Maintenance | Noise Level | Best For |
|---|---|---|---|
| Chain Drive | Check/adjust chain tension every 6-12 months | Louder | Durability, heavy doors |
| Belt Drive | Check belt tension, less frequent adjustment | Quieter | Attached garages, noise-sensitive homes |
| Screw Drive | Lubricate screw, check tightness | Medium | Moderate climates |
Non-obvious insight: Some newer chain drive openers use a combination chain-and-cable system. These may need different tension settings, so always check your manual.
Maintenance Tips To Keep Your Garage Door Chain Healthy
A well-maintained chain lasts longer and keeps your door moving smoothly. Here’s how to extend its life:
- Check tension twice a year: Especially in the first year after installation.
- Lubricate the chain: Use garage door lubricant, not WD-40. Lubricate every 6 months.
- Inspect for rust or damage: Replace the chain if you see broken links or rust.
- Clean the rail: Dirt and debris can cause the chain to wear faster.
- Tighten loose bolts: Vibrations can loosen hardware over time.
Practical tip: If your garage is humid or near the sea, rust is more common. Check your chain more often.
How Climate And Usage Affect Chain Tension
Not all homes are the same. Weather, temperature, and how often you use the door can change how often you need to adjust the chain.
- Cold weather: Metal contracts, sometimes making the chain tighter. Check in winter.
- Hot weather: Metal expands, which can make the chain looser.
- High usage: If you open and close your door many times daily, the chain will stretch faster.
Example: A busy family opening the door 8–10 times a day should check the chain every 3–4 months.
Cost Of Garage Door Chain Problems
Ignoring chain tension can lead to bigger expenses. Here’s an overview of possible costs:
- Chain replacement: $30–$70 for the part, plus labor if you hire a pro.
- Opener gear repair: $50–$100 for parts, more for labor.
- Complete opener replacement: $200–$500 or more.
Routine checks and quick adjustments can save you hundreds of dollars.
Manufacturer Recommendations
Always check your garage door opener manual. Most major brands like LiftMaster, Chamberlain, and Craftsman recommend similar chain slack—about 1/2 inch. Some have special adjustment tools or built-in tension indicators.
If you’ve lost your manual, many are available on the manufacturer’s website or through trusted sources like Wikipedia.
Upgrading To A Quieter Or Low-maintenance System
If you find yourself adjusting the chain often, or you want a quieter garage, consider upgrading to a belt drive or direct drive opener. These systems need less maintenance and make less noise.
- Belt drive: Uses a reinforced rubber belt instead of a chain. Quieter, with similar strength.
- Direct drive: The motor moves along the rail. Very quiet, fewer moving parts.
Upgrades cost more up front but save time and noise in the long run.

Frequently Asked Questions
How Often Should I Check My Garage Door Chain Tension?
Check your chain tension every 6 to 12 months. If your opener is new, check after the first 3 months. If you use the garage door many times a day, check more often. Regular checks prevent sudden problems and extend the life of your opener.
What Happens If My Garage Door Chain Is Too Tight?
A chain that’s too tight can damage the opener motor, bend the rail, or wear out the sprocket. You may also hear straining noises or see the door move slowly. Always leave a small amount of slack (about 1/2 inch).
Can I Use Any Lubricant For My Garage Door Chain?
No. Use a garage door-specific lubricant or white lithium grease. Avoid WD-40, which can strip away needed grease and attract dirt. Proper lubrication reduces wear and keeps the chain quiet.
Is Adjusting The Chain A Diy Job, Or Should I Call A Pro?
Most homeowners can adjust the chain safely with basic tools. But if you’re unsure, or if the chain keeps slipping, call a professional technician. It’s better to be safe, especially if the door is heavy or the opener makes grinding noises.
Does The Same Rule Apply To Belt Drive Openers?
Belt drive openers use the same idea—slight slack, not too tight—but the exact amount may be less (about 1/4 inch). Always check your manual for the right tension. Belt drives are quieter but still need occasional checks.
Your garage door opener works best when the chain is adjusted just right—not too tight, not too loose. Taking a few minutes every year to check and adjust the chain can prevent noise, damage, and expensive repairs. With the steps and tips in this guide, you can keep your garage door running smoothly and safely for years to come.


