
Building a garage door is a big project, but it’s possible for many homeowners to handle with some planning, the right tools, and a clear understanding of the steps. Whether you want to save money, enjoy a hands-on challenge, or customize your garage, making your own garage door can be rewarding.
This guide walks you through the process, from choosing materials and measuring your opening to hanging the panels and finishing the details. Even if you’re not a professional, with patience and careful attention, you can achieve a sturdy, good-looking garage door that works for years.
Understanding Garage Door Types
Before you start, it’s important to know your options. Garage doors come in different styles, each with its own construction method and benefits.
Sectional Doors
Sectional doors are made of several horizontal panels hinged together. They move up and down along tracks, rolling under the garage ceiling. These are the most popular in the US because they’re reliable and space-saving.
Swing-out Doors
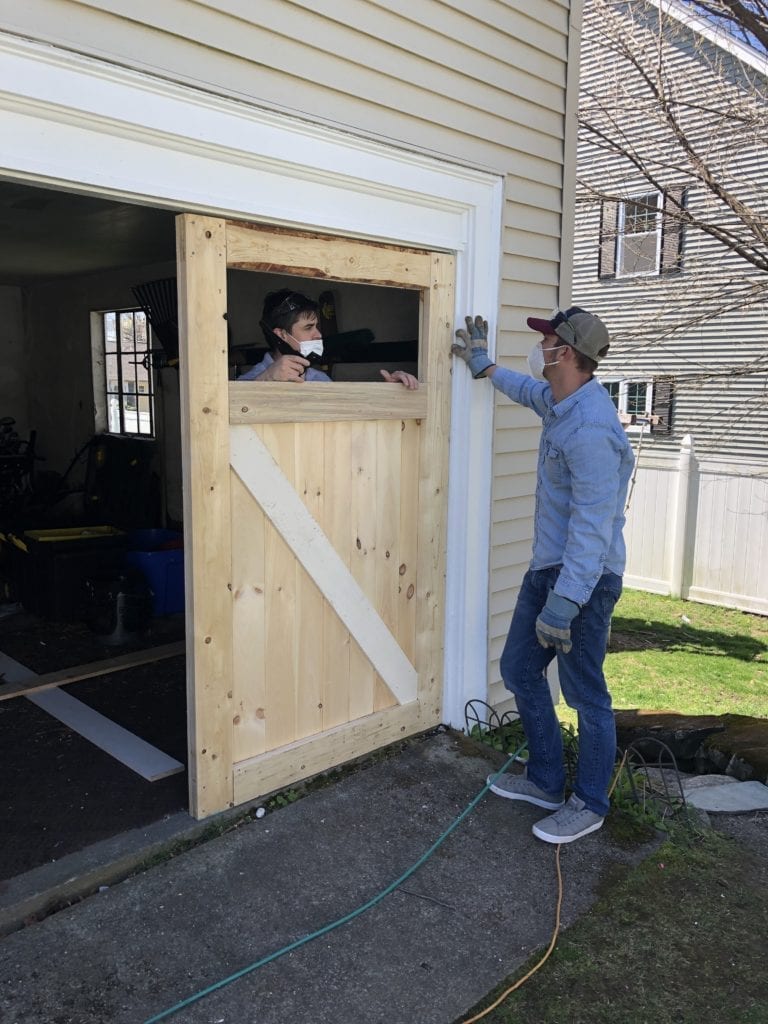
Swing-out (or carriage-style) doors open outward from the center, like old barn doors. They offer a classic look but need space in front of the garage to open fully.
Sliding Doors
Sliding doors move to the side along a track. This style is less common but can work well for garages with limited headroom.
Roll-up Doors
Roll-up doors are made of narrow steel slats that coil above the opening. They’re often used in commercial spaces but are available for homes too. They’re very durable but more complex to build.
For most DIY projects, a sectional or swing-out wooden door is best. This guide focuses on those, but the principles also help with other types.
Planning And Preparation
A successful garage door build starts with careful planning. Skipping this step leads to mistakes that are hard to fix later.
Measuring Your Garage Opening
Measure the width and height of your garage opening. Also, measure the space above the opening (headroom), the space on the sides (side room), and the depth of your garage. Write these numbers down. Even small mistakes here can cause big problems later.
Choosing Materials
The most common materials for DIY garage doors are:
- Wood: Traditional and easy to work with. Heavier and needs maintenance.
- Steel: Strong but harder to cut and weld at home.
- Aluminum: Lighter than steel, but less strong.
- Composite: Modern, low-maintenance, but can be expensive.
For most homeowners, wood is the easiest material to handle with basic tools. Plywood, pine, or cedar are common choices.
Tools And Supplies Needed
Here’s a basic list:
- Circular saw or table saw
- Power drill
- Screwdriver set
- Tape measure
- Level
- Hammer
- Wrenches and sockets
- Wood glue and construction adhesive
- Hinges and handles
- Rollers and tracks (for sectional doors)
- Paint or stain
- Safety gear (gloves, goggles)
You may need additional items for insulation or windows.
Permits And Safety
Check with your local building authority to see if you need a permit. Never skip safety gear—accidents are common with power tools and heavy materials. Always wear eye and ear protection.

Designing Your Garage Door
A good design means your door will look right and work smoothly. Don’t rush this part.
Door Size And Weight
The size of your door must match the opening. Also, plan for the weight—a very heavy door needs stronger hardware and a better counterbalance system.
Example:
A 16-foot wide, 7-foot high double garage door in wood can weigh over 200 pounds. You’ll need strong hinges and possibly help from a friend to lift the panels.
Style And Appearance
Think about how you want your door to look. Do you want windows? Decorative trim? Raised panels? Sketch your ideas on paper. Visit neighbors’ garages or look at photos online for inspiration.
Insulation
If you live in a cold or hot area, add insulation. Rigid foam panels between layers of plywood or aluminum-faced foam board can help keep your garage comfortable.
Hardware Selection
Good hardware is essential for safety and durability. For sectional doors, you’ll need:
- Heavy-duty hinges (at least 10-gauge steel)
- Rollers (nylon or steel)
- Tracks (galvanized steel)
- Lift cables and springs (for counterbalancing)
For swing-out doors:
- Strap hinges or pintle hinges
- Slide bolts or center latches
Don’t use cheap hardware—it often fails and is hard to replace later.
Building The Door Panels
Most garage doors are made of several panels. If you build a swing-out door, you’ll make two vertical panels; for sectional doors, several horizontal ones.
Cutting The Frame
- Measure and mark your wood carefully. Use a straightedge for accuracy.
- Cut the pieces for the outside frame (stiles and rails). Dry-fit them first.
- Join corners with wood glue and screws. Reinforce with metal brackets if needed.
Adding The Inner Structure
- For extra strength, add cross braces or a “Z” pattern inside each panel.
- If you want insulation, cut foam to fit between the braces.
Skinning The Door
- Attach plywood or tongue-and-groove boards to the outside of the frame.
- Secure with exterior wood glue and finish nails or screws.
- Make sure all edges are flush and smooth. Sand rough spots.
Adding Windows
If you want windows, cut openings before attaching the outer skin. Use clear acrylic or glass panes set in wood frames. Seal edges with weatherproof caulk.
Primer And Paint
Prime all wood surfaces with exterior primer. Then paint or stain as desired. Allow to dry fully before moving to the next step.
Assembling And Installing Hardware
Now it’s time to attach the hinges, handles, and other hardware to your panels.
Hinges
- For sectional doors, place hinges at the ends of each panel. Use heavier hinges on the bottom panels, as they hold more weight.
- For swing-out doors, attach strap hinges to the vertical side that will swing.
Handles And Locks
Install a sturdy handle and a lock on the outside. For extra security, use a deadbolt or slide bolt.
Rollers And Tracks (sectional Only)
- Insert rollers into the hinges.
- Attach vertical and horizontal tracks to the garage framing, using lag bolts.
Springs And Counterbalance
For sectional doors, springs help lift the heavy panels. There are two main types:
- Torsion springs: Mount above the door; wind up as the door closes.
- Extension springs: Attach to the side and stretch as the door closes.
Installing springs is dangerous—if you are unsure, hire a pro for this step.
Weatherstripping
Attach weatherstripping along the bottom and sides of the door. This keeps out drafts, water, and dust.
Mounting The Door Panels
This step requires patience and sometimes a helper.
Sectional Doors
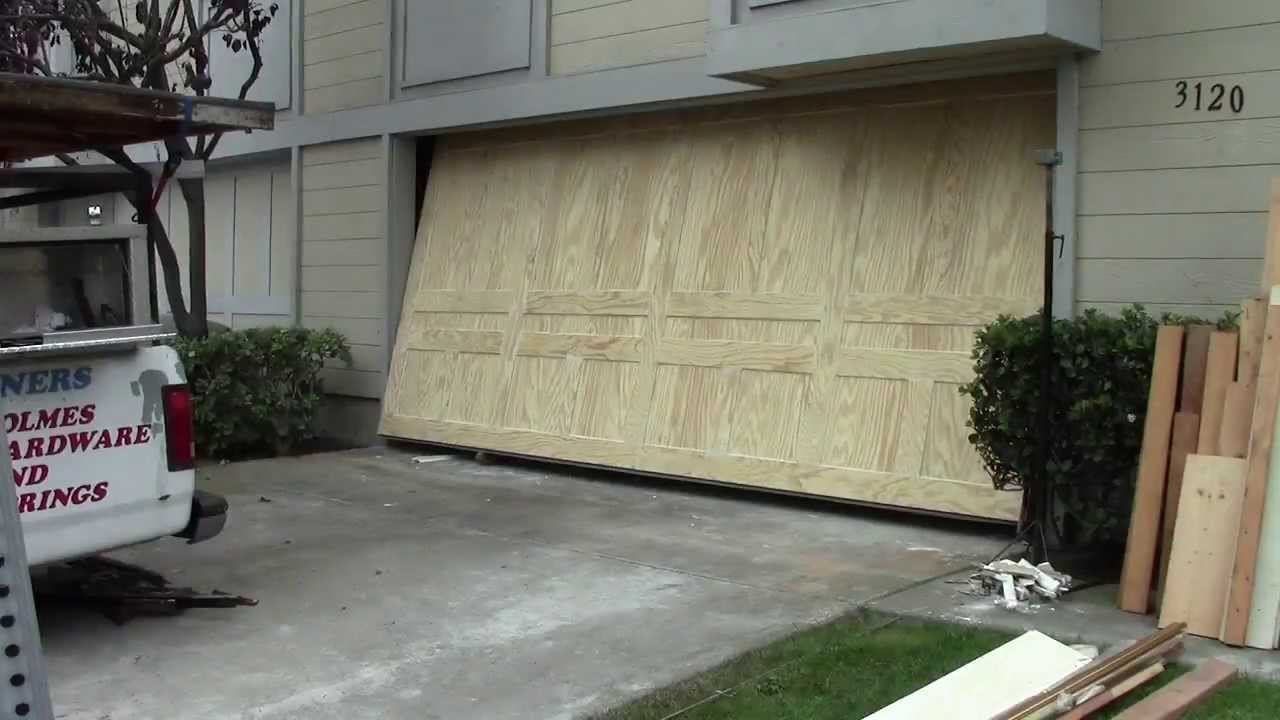
- Place the bottom panel in the opening.
- Secure it with temporary nails or blocks.
- Add the next panel above it, connecting with hinges.
- Repeat until all panels are stacked.
- Insert rollers into the tracks as you go.
- Check that the panels are level and move smoothly.
Swing-out Doors
- Hold the first panel in the opening.
- Shim it so it’s level and plumb.
- Attach hinges to the frame.
- Repeat for the other side.
Check that doors open and close without rubbing or sticking.
Balancing And Testing The Door
Proper balance makes your door easy to open and keeps hardware from wearing out.
Testing Sectional Doors
- With the opener disconnected, lift the door by hand.
- If it’s balanced, the door should stay in place when halfway open.
- If it slams shut or shoots up, adjust the springs.
Testing Swing-out Doors
- Open and close each door.
- If they sag or drag, check the hinges and adjust as needed.
Common Issues
- Door binds in tracks: Tracks may be out of alignment.
- Door too heavy: Springs may need adjustment or hardware may be too weak.
Finishing Touches
Now your door works, but finishing details matter.
Painting And Sealing
Apply a second coat of paint or sealant for weather protection. Use a high-quality exterior finish.
Adding Decorative Features
Install windows, trim, or hardware for a custom look. Carriage-style handles and hinges add charm.
Installing An Automatic Opener
Most modern garages use automatic openers. Install according to the manufacturer’s instructions. Make sure the door is well-balanced first; openers are not meant to lift unbalanced doors.
Maintenance Tips
- Inspect hinges, rollers, and springs every 6 months.
- Lubricate moving parts with garage door lubricant, not WD-40.
- Touch up paint or sealant as needed.
Common Mistakes To Avoid
Even experienced DIYers can run into problems. Here are some mistakes to watch for:
- Poor measurements: Double-check everything before cutting.
- Weak hardware: Use heavy-duty parts for safety and long life.
- Skipping insulation: If your garage is attached, insulation saves energy.
- Improper spring installation: Spring tension is dangerous; get help if unsure.
- Ignoring weatherstripping: This small step keeps water and pests out.
- Not allowing for clearance: Make sure the door doesn’t hit cars, lights, or storage when opening.
Cost Comparison: Diy Vs Professional Installation
To help you plan, here’s a comparison of rough costs for building your own garage door versus hiring a pro.
| Item | DIY Cost (USD) | Professional Installation (USD) |
|---|---|---|
| Materials | $300 – $700 | Included in total |
| Hardware | $100 – $300 | Included in total |
| Labor | Free (your time) | $500 – $1200 |
| Tools (if needed) | $100 – $250 | Included in total |
| Total | $500 – $1250 | $1200 – $2500 |
DIY saves money, but takes time and effort. Factor in your skill level and the value of your time.
Comparing Garage Door Materials
Choosing the right material is key for durability, maintenance, and cost. Here’s a quick comparison:
| Material | Pros | Cons | Average Lifespan |
|---|---|---|---|
| Wood | Custom look, easy to work with | Needs maintenance, can warp | 15-20 years |
| Steel | Strong, low maintenance | Heavy, can rust if scratched | 20-30 years |
| Aluminum | Lightweight, rust-proof | Dents easily | 20-30 years |
| Composite | Low maintenance, resists rot | Expensive, less DIY-friendly | 25-35 years |
Practical Tips And Non-obvious Insights
Get Help When Lifting
Garage doors—especially wood—can be heavy and awkward to move alone. A helper prevents damage and injury, especially during panel installation and spring setup.
Pre-drill Holes
When attaching hardware to wood, pre-drill holes. This avoids splitting the wood, which is a common mistake that weakens the frame.
Check Local Codes
Some cities require wind-rated or fire-rated doors, especially in hurricane or wildfire zones. Always check before buying materials.
Plan For Power Outages
If you install an automatic opener, make sure you can open the door manually if the power goes out. Most openers have a manual release—test it before you need it.
Keep Spare Parts
Save a few extra screws, hinges, and a small piece of your panel material. If you ever need a quick repair, you’ll have matching parts ready.
Watch For Settling
Newly installed garage doors may shift slightly as your house settles. Adjust hinges and tracks as needed in the first month.
When To Call A Professional
Some steps—like installing torsion springs—can be dangerous. If you feel unsure, hire a pro for part or all of the job. The cost is worth your safety.
Also, if your garage has a unique shape, is very old, or you want a fancy finish, a professional’s experience may be necessary. It’s okay to ask for help even if you do most of the work yourself.
Step-by-step Recap
If you want a quick checklist, here’s a summary of the main steps:
- Measure your opening and choose your style.
- Plan materials, hardware, and tools.
- Design your panels with insulation and windows if desired.
- Build the panel frames and attach the skins.
- Prime and paint all surfaces.
- Attach hinges, handles, and other hardware.
- Install tracks and rollers (sectional), or hinges (swing-out).
- Mount panels in the opening.
- Add springs, balance the door, and test for smooth operation.
- Finish with weatherstripping, touch-up paint, and regular maintenance.
If you follow these steps carefully, your new garage door will be strong, safe, and attractive.
Frequently Asked Questions
How Long Does It Take To Build A Garage Door?
Building a garage door from scratch usually takes two to four days for most homeowners, not counting drying time for paint or stain. If you have help and all materials ready, it can go faster.
What Is The Best Wood For A Garage Door?
Cedar and redwood are great for their weather resistance and stability, but they are expensive. Pine or fir are common and more affordable but need good sealing and maintenance to prevent rot.
Can I Add Insulation To My Garage Door Later?
Yes, you can add foam board or reflective insulation to most wood or steel doors after installation. Use adhesive and secure the edges to prevent sagging.
Is Installing Garage Door Springs Dangerous?
Yes, installing or adjusting springs—especially torsion springs—is risky. The tension can cause serious injury. If you are not experienced, hire a professional for this part.
Where Can I Find More Detailed Plans Or Local Building Codes?
Visit your local government’s building department or their website. For detailed plans, many hardware stores offer free guides, and online resources like Wikipedia provide useful overviews.
Building a garage door is a big project, but with the right preparation and attention to detail, you can achieve a great result. Take your time, use quality materials, and don’t hesitate to ask for help when needed. Your effort will pay off every time you open your new, custom-made garage door.