Now Reading: How to Change the Code on the Garage Door Easily and Safely
- 01
How to Change the Code on the Garage Door Easily and Safely
Changing the code on your garage door opener is one of those home maintenance tasks that many people overlook—until it’s urgent. Maybe you’ve just moved into a new home, lost a remote, or want better security for your family. Whatever the reason, updating the access code can give you peace of mind and help prevent unwanted entry.
Yet, for many homeowners, the steps can be confusing, especially with the variety of garage door openers on the market. This guide will walk you through the process in simple, clear English, making sure you have everything you need to safely and confidently update your garage door code.
Along the way, you’ll find expert tips, real-life examples, and answers to the most common questions—even the ones beginners don’t know to ask.
Why Change Your Garage Door Code?
You might wonder, “Is it really necessary to change the garage door code?” The answer is almost always yes—especially if:
- You’ve recently moved into a new home and don’t know who else might have the old code.
- You’ve lost a remote or keypad, or it’s been stolen.
- You want to upgrade your security after a break-in or suspicious activity.
- You share access codes with service people and want to update them regularly.
Think of your garage as a main entrance to your home. In many cases, it’s the biggest door in your house and can give access to storage, cars, or even a door leading straight inside. Sticking with a default or old code is a risk you don’t need to take.
Understanding How Garage Door Codes Work
Before you get started, it helps to know what you’re dealing with. Garage door openers come in several types, and how you change the code depends on the system you have.
Types Of Garage Door Openers
There are three main types:
- Dip Switch Systems (older models): These use a series of tiny switches that you flip up or down to set a unique code.
- Rolling Code Systems (modern): These generate a new code every time you use the remote, making them more secure.
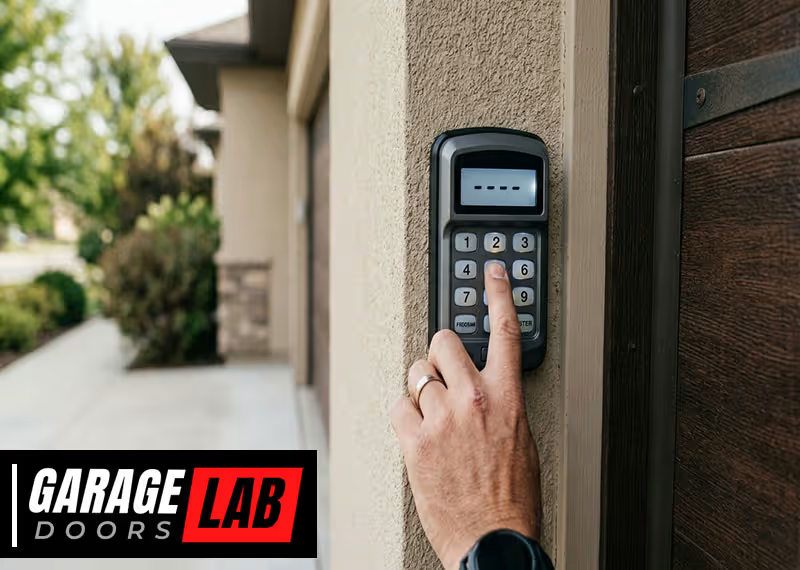
- Keypad Entry Systems: Mounted outside your garage, these allow you to enter a PIN to open the door.
Each system has its own method for changing the code. If you’re not sure which one you have, check the opener unit in your garage or look up the model number online.
Security Risks Of Not Updating Codes
Older systems with fixed codes are especially vulnerable. Thieves can use devices to capture or guess your code. Even with newer rolling code systems, lost or stolen remotes can still be a risk. Regularly updating your code and knowing how your system works can help prevent these problems.

Tools And Materials You’ll Need
For most garage door openers, you won’t need many tools. Still, having these ready can make the job easier:
- A ladder to reach the opener unit
- A flashlight (garage ceilings are often dark)
- Small screwdriver (for dip switch covers)
- Owner’s manual (or a smartphone to look up instructions)
- Paper and pen (to record your new code)
- New batteries for remotes or keypads (if needed)
It’s a good idea to gather everything before you start. If you lose your place or forget a step, having the manual or quick notes can save a lot of time.
How To Change The Code: Step-by-step Instructions
The steps you follow depend on your specific system. Here’s a practical guide for each common type.
For Dip Switch Garage Door Openers
These older openers use physical switches to set the code. You’ll usually find 8 to 12 tiny switches on both the opener unit and the remote.
Step 1: Locate The Dip Switches
- Unplug the garage door opener for safety.
- Use your ladder to reach the opener unit, usually on the ceiling.
- Find the cover panel and remove it with a screwdriver if needed.
- You’ll see a row of small switches labeled ON/OFF or UP/DOWN.
Step 2: Set A New Code
- Decide on a new pattern of up/down or on/off.
- Use the tip of a screwdriver or pen to flip the switches.
- Write down your new pattern in a safe place.
Step 3: Match The Remote
- Open your remote control.
- Find the matching switches inside.
- Move the switches to the same positions as the opener unit.
Step 4: Test The System
- Plug the opener back in.
- Press the remote to check if the door responds.
- If not, double-check that both sets of switches match.
Practical Tips
- Avoid simple patterns (like all switches up or alternating).
- If you have more than one remote, update each one.
For Rolling Code Garage Door Openers
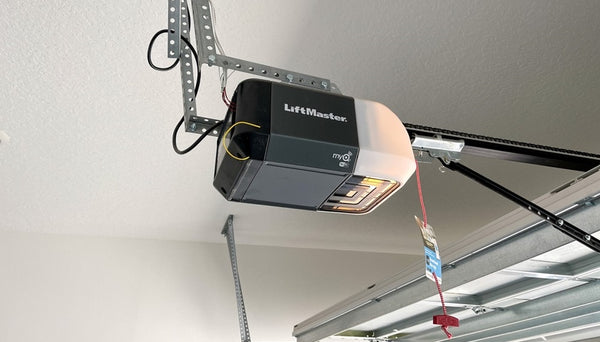
Modern openers use a “learn” or “smart” button to set new codes. This is the most common system in homes built after the mid-1990s.
Step 1: Find The Learn Button
- The learn button is usually on the back or side of the opener unit.
- It may be under a light cover and is often colored (red, yellow, purple, or green).
Step 2: Press The Learn Button
- Press and release the learn button. An indicator light will turn on or blink.
- You typically have 30 seconds to complete the next step.
Step 3: Program The Remote
- On your remote, press and hold the button you want to program.
- Hold it until the opener’s light blinks or you hear a click—this means it’s programmed.
Step 4: Test The Remote
- Wait a few seconds, then press the remote button.
- The garage door should operate.
Pro Tips
- If you want to erase all codes (after a lost remote), hold the learn button for 6-10 seconds until the light goes out. This wipes all existing remotes.
- Reprogram each remote one by one.
For Keypad Entry Systems
Keypad systems let you open the garage without a remote. These are useful for families, but the code should be changed regularly.
Step 1: Locate The Keypad
- Most keypads are mounted outside, near the garage door.
- Some require you to open the battery cover to access the programming button.
Step 2: Enter Programming Mode
- Press the “learn” button on the opener unit, or enter a specific code on the keypad (see your manual).
- A light will usually blink to show it’s ready.
Step 3: Enter A New Code
- Enter your new 4-6 digit code on the keypad.
- Press the “enter” or “send” button.
- The opener light should flash or you’ll hear a beep.
Step 4: Test The New Code
- Wait a minute, then enter your code again to make sure it works.
Advanced Tip
- Don’t use obvious codes like birthdays or street numbers.
- If your keypad allows, set temporary codes for guests or service people, and delete them after use.
Special Instructions For Popular Brands
Every garage door brand has its own features. Here’s how to handle the most common brands in the US.
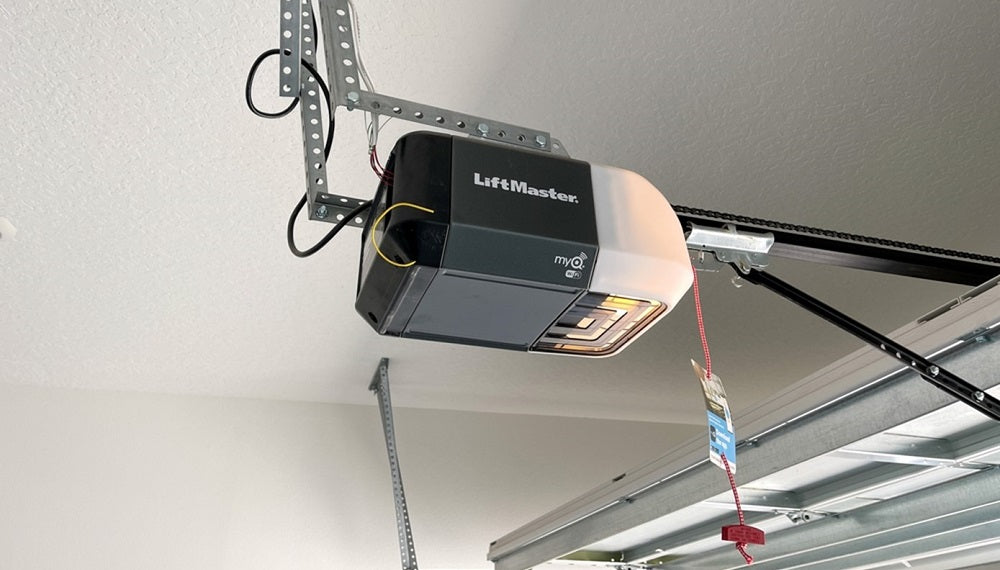
Chamberlain And Liftmaster
- Both brands use rolling code technology.
- The learn button is typically yellow or purple.
- After pressing the learn button, you have 30 seconds to program the remote or keypad.
- For wireless keypads, enter the new PIN and press ENTER within 30 seconds.
Genie
- Learn buttons may be black or red.
- Some Genie remotes have a “learn” or “program” button inside the remote itself.
- For keypads, enter the current PIN, press PROGRAM, enter your new PIN, then press PROGRAM again.
Craftsman
- Craftsman units often use the same process as Chamberlain and LiftMaster.
- For older dip switch models, update both the opener and all remotes.
Overhead Door
- Overhead Door openers may require you to enter the old code before setting a new one.
- Some newer models have a “reset” button on the keypad for quick code changes.
Marantec
- Marantec systems often use a “teaching” process, holding two remotes close together and pressing buttons to transfer codes.
- Consult the manual for exact steps, as this process is less common.
If you’re unsure of your brand or model, search for the model number (usually on the back of the opener) along with the words “change code” online for brand-specific help.
How To Change The Code For Smart Garage Door Openers
Smart openers connect to Wi-Fi and can be controlled through apps. Changing the code often means updating your login or the app’s access settings.
Step-by-step For Smart Openers
- Open the manufacturer’s app on your phone.
- Go to settings or “User Management.”
- Change your PIN or password, or remove old users.
- Re-add trusted users only.
- Test the new code by opening the door from your phone.
Some smart systems allow you to set different codes for family, guests, or deliveries. Always delete old or unused codes to maintain security.
Benefits And Security
- You can change codes from anywhere using your phone.
- Many apps send alerts when the door is used, so you know if someone is entering.
- Keep your app updated to prevent hacking risks.
Troubleshooting: Common Problems And Fixes
Sometimes, things don’t work as planned. Here’s how to solve the most frequent issues.
Remote Doesn’t Work After Code Change
- Double-check that the remote’s dip switches match the opener.
- For rolling code systems, make sure you pressed the learn button and remote button within the time limit.
- Replace remote batteries.
- Reprogram all remotes if you erased all codes.
Keypad Won’t Accept New Code
- Ensure the opener is in programming mode (light blinking).
- Use fresh batteries in the keypad.
- Wait a few minutes and try again; some systems lock out after failed attempts.
- Reset the keypad by removing batteries for 60 seconds, then try again.
Opener Light Doesn’t Blink
- The opener might be unplugged.
- The learn button may be stuck or not working—clean around it and try again.
- Some openers need you to hold the learn button for several seconds.
Door Opens On Its Own
- Someone nearby may have the same code (rare but possible with old dip switch models).
- Erase all codes and reprogram remotes from scratch.
- Check for stuck buttons on remotes or keypads.
Remote Range Is Poor
- Weak or old batteries are the most common cause.
- Interference from LED bulbs or other electronics can reduce range.
- Try moving the opener’s antenna for better reception.
How Often Should You Change Your Garage Door Code?
Security experts recommend changing your code at least once a year, or whenever:
- You move into a new home.
- You lose a remote or keypad.
- You give out a code to someone (cleaner, repair person, neighbor).
- You notice suspicious activity.
Regular changes make your home safer. It’s a small task with big benefits.
Real-life Example: Why Regular Code Changes Matter
Consider this scenario: A family moved into a new house and kept the garage code set by the previous owners. Months later, their car was broken into. It turned out that a relative of the old owner still had a remote. If the new owners had changed the code right away, they could have avoided the problem.
This example shows that even if you trust the people who had access before, you can’t control what happens to old remotes or codes. Changing the code is a simple step to protect your family.
Comparison: Dip Switch Vs. Rolling Code Vs. Smart Openers
Here’s a side-by-side look at how the main types of openers compare in terms of security and convenience:
| Feature | Dip Switch | Rolling Code | Smart Opener |
|---|---|---|---|
| Security Level | Low | High | Very High |
| Ease of Code Change | Manual (switches) | Button press | App-based |
| Remote Code Stealing Risk | High | Very Low | Very Low |
| Cost | Low | Moderate | High |
| Typical Age | Pre-1995 | 1995–2015 | 2015–present |
You can see that upgrading to a rolling code or smart opener makes a big difference for home safety.
Safety Tips And Mistakes To Avoid
Changing your garage door code isn’t risky, but a few smart habits can prevent trouble:
- Don’t use obvious codes like 1234 or your address.
- Change codes after sharing access with workers or guests.
- Update all remotes and keypads—don’t forget any.
- Store old remotes safely or dispose of them properly.
- Keep a record of your new code somewhere private, not on your phone or in your car.
- Check batteries in remotes and keypads after changing codes.
- Test the new code several times before finishing the job.
- Avoid storing your remote in plain sight inside your car, especially if parked outside.
A common mistake: People update the code on the opener but forget to update all remotes and keypads. This can lead to frustration or even lockouts.
How Garage Door Code Technology Has Changed
Garage door security has improved a lot in the last 30 years. Early openers used only a few switches, which made codes easy to guess—there were just a few hundred possibilities. Modern rolling code systems use millions of combinations, and smart openers can alert you if someone tries to break in.
Here’s a look at how technology has evolved:
| Year | Common Technology | Security Level | Popular Brands |
|---|---|---|---|
| Before 1995 | Dip Switch | Low | Genie, Craftsman |
| 1995–2015 | Rolling Code | High | LiftMaster, Chamberlain |
| 2015–Present | Smart/Wi-Fi | Very High | Chamberlain, myQ, Genie Aladdin |
Newer openers also work with digital assistants, like Alexa or Google Home, making them more flexible—but also requiring stronger passwords and regular code changes.
What To Do If You’re Locked Out
If you change your code and something goes wrong, don’t panic. Here are your options:
- Try the manual release: Most garage doors have a red cord inside. Pulling it will let you open the door by hand (from inside).
- Check for another remote or keypad: Sometimes a family member has one you forgot about.
- Look for an exterior key lock: Some garages have a backup key lock that lets you open the door manually.
- Call a professional: If you’re stuck and can’t get in, a licensed locksmith or garage door technician can help—just be ready to show proof you live there.
When To Replace Your Garage Door Opener
Sometimes, changing the code isn’t enough. If your opener is more than 20 years old, or if you notice signs of tampering or failure, consider upgrading to a newer, safer model. Signs it’s time to replace:
- The opener is very noisy or unreliable.
- The system uses dip switches (easy for thieves to bypass).
- You can’t find replacement remotes or keypads.
- There are frequent power or wiring issues.
Modern openers are safer, quieter, and come with extra features, like motion lighting and smartphone control. For more on opener upgrades, you can read about the latest standards at the Consumer Product Safety Commission.
The Cost Of Changing Your Garage Door Code
Good news: For most homeowners, changing the code costs nothing but a few minutes of your time. You might spend $5–$20 for fresh batteries or a new remote. If you need a professional’s help, expect to pay $75–$150 for a service call, depending on your area and opener type.
Upgrading to a new rolling code or smart opener costs more—usually $150–$400 for parts and installation. But for the added security and convenience, many homeowners find it worthwhile.
Garage Door Code Change: Step-by-step Recap
If you want a quick summary, here’s the process in six simple steps:
- Identify your opener type (dip switch, rolling code, smart).
- Gather needed tools (ladder, screwdriver, manual).
- Access the code mechanism (switches, learn button, or app).
- Set your new code (and record it somewhere safe).
- Update all remotes and keypads.
- Test everything before finishing.
Frequently Asked Questions
What If I Lost My Garage Door Remote Before Changing The Code?
If you lose a remote, especially before updating the code, it’s important to erase all existing codes from your opener. Press and hold the learn button for 6-10 seconds until the light turns off. This removes all old remotes. Then, reprogram only the remotes you still have. This step ensures anyone who finds or steals your old remote can’t access your garage.
How Do I Know If My Garage Door Opener Uses Rolling Code Technology?
Most openers made after 1995 use rolling code systems. Check your opener’s manual or look for a “learn” or “smart” button on the opener unit. Brands like Chamberlain, LiftMaster, and Genie often use rolling code. If your remote says “Security+” or “Intellicode,” it’s rolling code.
Can Changing The Garage Door Code Be Done Without Professional Help?
Yes, most homeowners can change the code themselves. The process is designed to be simple and usually takes 10-20 minutes. However, if you have an older or unusual model, or if you’re not comfortable on a ladder, calling a professional is a safe option.
Will Changing The Code Erase My Home Automation Connections?
Changing the code on your opener or keypad usually won’t affect smart home connections. But if you reset the entire opener (factory reset), you may need to reconnect your device to smart home systems like Alexa or Google Home. Always check your owner’s manual for specific details.
Is It Safe To Share My Garage Code With Family Or Neighbors?
It’s best to share codes only when necessary. If you do, change the code afterward or use temporary codes if your system allows. Don’t use the same code for long periods, and avoid writing it in obvious places. This keeps your home secure while letting you share access when needed.
Changing your garage door code is a simple job with big rewards. It makes your home safer, keeps your family secure, and gives you more control over who comes and goes. Whether you use an old dip switch, a rolling code, or the latest smart opener, a few careful steps can protect your home for years to come.
If you’re ever unsure, don’t hesitate to look up your specific model, check with the manufacturer, or call a professional for help. Stay safe, and enjoy the peace of mind that comes with a secure garage.