Now Reading: How to Tighten Chain on Garage Door: Easy DIY Guide
- 01
How to Tighten Chain on Garage Door: Easy DIY Guide
A noisy, loose, or sagging garage door chain can turn a simple daily task into a constant frustration. If you notice your garage door opener making new sounds, moving jerkily, or not closing as smoothly as before, the chain may have become loose over time. Learning how to tighten the chain on a garage door not only solves these problems but also extends the life of your opener and keeps your garage secure. You don’t need to be a professional to do this job, but you do need clear steps, safety precautions, and a good understanding of your opener’s design.
Many homeowners don’t realize how much a loose chain can affect their garage door system. A chain that sags or rattles puts extra stress on the opener’s motor, wears out gears more quickly, and can even throw the door out of alignment.
On the other hand, a chain that’s too tight can cause just as much trouble, leading to premature failure of parts. This guide will walk you through everything you need to know, from recognizing when adjustment is needed to completing the job safely and effectively.
If you’re new to garage door maintenance, don’t worry. You’ll find practical tips, real examples, and solutions to common mistakes that beginners often overlook. Whether you’re looking to fix a minor annoyance or prevent a major repair bill, you’ll finish this article with the confidence and skills to handle your garage door chain like a pro.
Why Chain Tension Matters On A Garage Door
The chain in your garage door opener acts like the backbone of the entire lifting system. When it’s at the right tension, your door moves smoothly and quietly. If the chain is too loose, it can slap against the track, make loud noises, and cause your door to jerk or stop. If it’s too tight, you risk damaging the opener or bending the rail.
Garage door openers are designed with a specific chain tension in mind. Over time, the chain can stretch from regular use or changes in temperature. Even a small amount of slack can have a big impact. You may notice:
- The door makes a clattering or slapping sound as it moves.
- The chain sags down from the rail.
- The door seems slow, uneven, or struggles to close completely.
- The opener vibrates or shakes more than usual.
Proper chain tension keeps all moving parts in sync. This reduces wear and tear, extends the life of your opener, and keeps your door safe to use. Ignoring chain tension can lead to expensive repairs or even a stuck garage door.
Signs Your Garage Door Chain Needs Tightening
You don’t have to wait for a major problem to check your garage door chain. Here are the most common signs that it’s time to tighten the chain:
- Visible sag or droop: Stand back and look at the chain along the rail. A properly tensioned chain should sag no more than about half an inch in the center. More than that usually means it’s too loose.
- Loud noises: If you hear rattling, slapping, or metal-on-metal sounds as the door opens or closes, the chain is probably hitting the rail or cover.
- Jerky movement: The door may move in fits and starts, or shake as it travels. This can be subtle at first, but gets worse with more use.
- Chain comes off the rail: In severe cases, the chain can actually jump off the track, leaving the door stuck.
- Slow response or incomplete closure: A loose chain can cause the door to move slowly, stop before it’s fully closed, or reverse direction unexpectedly.
Pro tip: Don’t rely only on sound. Check the chain’s appearance and how the door moves every few months, especially if your opener is more than a few years old.
Tools And Materials You’ll Need
Having the right tools ready makes the job much easier and safer. Most garage door chain adjustments require only basic hand tools. Here’s what you’ll need:
- Wrench or socket set (usually 7/16” or 10mm, but check your opener’s manual)
- Stepladder to safely reach the opener’s rail
- Work gloves to protect your hands from grease and sharp edges
- Flashlight for better visibility, especially in dim garages
- Safety glasses (optional, but recommended)
- Screwdriver (if you need to remove the opener’s cover)
- Owner’s manual for your specific opener model (download from the manufacturer if you don’t have it)
It’s a good idea to have some lithium-based garage door lubricant handy. After adjusting the chain, lubricating it will help keep it running smoothly.
Safety Precautions Before You Begin
Working on a garage door opener is usually safe if you follow basic steps, but the system is under tension and can be dangerous if handled carelessly. Here’s what to do before you start:
- Unplug the opener: Always disconnect power at the outlet before touching the chain or opener mechanism. This prevents accidental activation.
- Keep the area clear: Move cars, bikes, and anything stored near or under the opener.
- Secure the door: If possible, close the garage door fully before starting. This reduces tension on the chain and makes work safer.
- Use a sturdy ladder: Never stand on a box or unstable surface.
- Wear gloves: Chains and metal parts can be greasy or sharp.
- Don’t overtighten: A chain that’s too tight can be just as dangerous as one that’s too loose.
If you feel unsure at any point, stop and consult a professional. Safety comes first.
Understanding Your Garage Door Opener Design
Not all garage door openers are the same. Most residential openers use either a chain drive, belt drive, or screw drive. This guide focuses on chain drive systems, which are the most common and usually the noisiest.
A typical chain drive opener has:
- A motor unit mounted to the ceiling
- A rail running from the motor to the wall above the garage door
- A chain (sometimes combined with a cable) that pulls a trolley along the rail
- An adjustment bolt or turnbuckle near the end of the rail, close to the motor or the door
Some openers use a chain only; others use a combination of chain and cable. The adjustment method is similar for both.
Before you start, take a moment to locate the adjustment mechanism. It’s usually a threaded bolt with two nuts—one for adjustment, one for locking. Some older models use a tension screw or a turnbuckle.
If you’re not sure, check your owner’s manual or look up your model number on the manufacturer’s website. This small step saves a lot of confusion later.
Step-by-step Guide: How To Tighten Chain On Garage Door
Now you’re ready to tackle the main task. Follow these steps carefully for the best results.
1. Disconnect Power
Locate the power cord for your garage door opener. Unplug it from the outlet. Never skip this step—even a quick tap of the remote can start the opener and cause injury.
2. Close The Garage Door
Make sure the door is fully closed. If it won’t move, or is stuck partly open, don’t force it—this may mean a larger mechanical issue.
3. Locate The Chain Adjustment Mechanism
Use your ladder to safely reach the opener rail. Look for the adjustment bolt or turnbuckle. This is typically at the end of the rail, near the motor unit, or at the opposite end near the wall.
You’ll see a threaded rod running through a metal bracket, with two nuts. One is the adjustment nut; the other is the lock nut.
4. Measure The Sag
Check the chain’s sag at the midpoint of the rail. For most openers, a sag of about ½ inch (12 mm) is ideal. If the sag is more than 1 inch, tightening is needed.
Pro tip: Use a ruler or tape measure for accuracy. Too little sag means the chain is too tight.
5. Loosen The Lock Nut
With your wrench, hold the adjustment nut steady. Loosen the lock nut (the nut farthest from the bracket) by turning it counterclockwise. Slide it away from the bracket to allow movement.
6. Tighten The Adjustment Nut
Turn the adjustment nut clockwise. This pulls the chain tighter. Go slowly—one full turn at a time. Check the chain sag after each turn.
It’s easy to overtighten, especially on older openers. Stop when the chain sags about ½ inch in the center. The chain should be tight enough not to slap the rail, but loose enough to move smoothly.
7. Re-tighten The Lock Nut
Hold the adjustment nut steady. Slide the lock nut up to the bracket and tighten it securely. This keeps the adjustment from slipping.
8. Lubricate The Chain (optional But Recommended)
Spray a light coat of garage door lubricant on the chain. Avoid using WD-40 or heavy grease, which can attract dirt. Lubrication reduces noise and wear.
9. Plug The Opener Back In
Reconnect the power cord. Stand clear of the door and any moving parts.
10. Test The Door Operation
Use the wall button or remote to open and close the door a few times. Watch and listen:
- The chain should move smoothly, without slapping or jerking.
- The door should open and close completely.
- Listen for any new or unusual sounds.
If you notice problems, unplug the opener and check your adjustment again.
Common Mistakes To Avoid
Tightening a garage door chain is simple, but small errors can cause big problems. Here are mistakes to watch out for:
- Overtightening the chain: Many beginners think a tighter chain is better. In fact, too much tension strains the motor, bends the rail, and can break the chain.
- Forgetting to unplug the opener: This is a top safety risk. Even if you’re careful, a family member could activate the door by accident.
- Ignoring the lock nut: Failing to tighten the lock nut means the chain will loosen again quickly.
- Using the wrong lubricant: Grease or thick oil can gum up the chain and attract dirt, leading to more noise and wear.
- Skipping regular checks: Chains stretch gradually. Waiting for a major problem means you’ll miss small issues that are easier to fix early.
Pro insight: If you notice the chain loosening repeatedly, check for worn sprockets, a bent rail, or a failing motor gear. These can cause ongoing tension problems.
When To Call A Professional
Most homeowners can tighten a chain themselves, but some situations call for expert help:
- The chain will not stay tight, even after adjustment.
- The door moves unevenly, shakes, or gets stuck partway.
- The opener is very old (more than 10-15 years) or makes grinding noises.
- You see broken, bent, or missing parts on the opener or rail.
- You don’t feel comfortable working on the opener.
A professional can quickly diagnose and fix deeper problems, like worn gears or a failing drive assembly. Spending a little on a service call can save a lot in future repairs.
How Chain Drive Compares With Other Systems
Many people wonder how chain drive openers compare to belt drive or screw drive systems. Here’s a quick comparison to help you understand the pros and cons.
| Drive Type | Noise Level | Maintenance Needs | Lifespan | Cost |
|---|---|---|---|---|
| Chain Drive | High | Moderate (chain tightening, lubrication) | 15-20 years | Lowest |
| Belt Drive | Low | Low (belt inspection) | 10-15 years | Higher |
| Screw Drive | Medium | Moderate (lubrication) | 10-15 years | Medium |
Chain drive openers are tough and reliable, but need regular chain adjustment. They’re ideal for detached garages or places where noise isn’t a big concern. Belt drive openers are much quieter and require less adjustment, but cost more.
Maintenance Tips To Prevent Future Problems
Tightening the chain is just one part of garage door opener maintenance. A little attention every few months keeps your system running smoothly and helps you spot small issues before they become major headaches.
Here’s what to do:
- Inspect the chain: Every 3-6 months, check the sag, listen for noise, and look for rust or damage.
- Lubricate moving parts: Use a spray lubricant on the chain, rail, and hinges. Never use heavy grease or engine oil.
- Check fasteners: Make sure all bolts, nuts, and brackets are tight. Vibration can loosen them over time.
- Test the safety reversal system: Place a small object (like a 2×4 board) under the door. The door should reverse when it touches the object.
- Clean the opener and rail: Wipe away cobwebs, dust, and debris that can build up around the motor and chain.
Regular maintenance takes just a few minutes and can add years to the life of your opener.
Troubleshooting: If The Chain Still Sags Or Makes Noise
Sometimes, tightening the chain doesn’t fully solve the problem. Here are possible causes and what to do:
The Chain Sags Again Quickly
- Possible cause: Worn sprocket, stripped gear, or a bent rail.
- Solution: Inspect the sprocket at the top of the opener. If it’s worn or loose, it may need replacement. Check the rail for bends or damage.
Chain Is Tight, But Door Still Jerks
- Possible cause: Dirty or dry rail, misaligned track, or worn trolley.
- Solution: Clean and lubricate the rail. Check track alignment. Replace worn trolley parts if needed.
Opener Makes New Noises After Tightening
- Possible cause: Chain is now too tight, or a lock nut is loose.
- Solution: Loosen the adjustment slightly and re-tighten the lock nut.
Chain Won’t Tighten
- Possible cause: Threads on the adjustment rod are stripped, or there’s a broken part inside the opener.
- Solution: Replacement parts or professional repair may be needed.
If you’re unable to diagnose the issue, don’t force the opener to run. This can cause more damage.
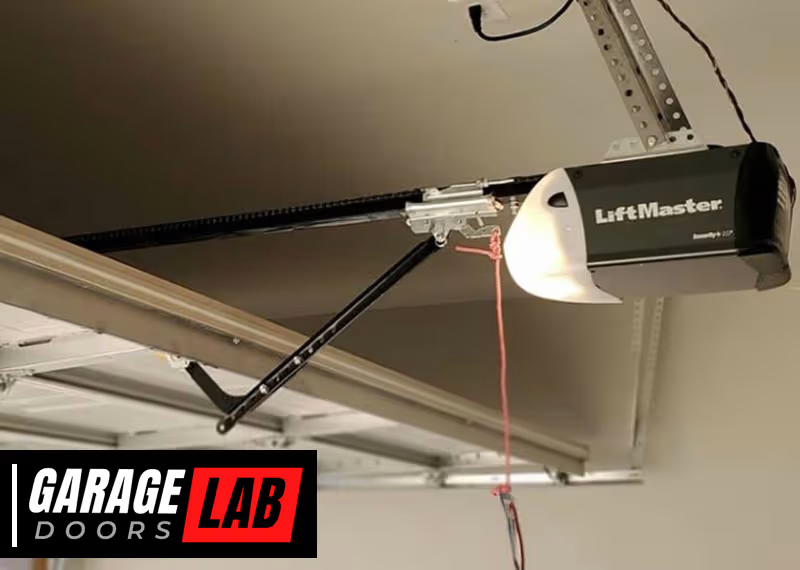
Real Example: Tightening A Chain On A Liftmaster Opener
Let’s walk through a real-world example using a LiftMaster chain drive opener, one of the most common brands.
- Unplug the opener.
- Close the garage door fully.
- Use a 7/16” wrench to loosen the lock nut at the chain’s threaded rod (near the motor unit).
- Turn the adjustment nut clockwise until the chain sags about ½ inch at the midpoint.
- Hold the adjustment nut and tighten the lock nut firmly.
- Plug the opener back in.
- Run the door through a full open/close cycle and listen for noise.
This process takes about 10 minutes for most DIYers. Always double-check that both nuts are secure before finishing.
How Often Should You Tighten The Chain?
A new garage door opener chain may need its first adjustment after a few months, as it stretches slightly during break-in. After that, check the tension every 6-12 months, or any time you notice new noise or movement problems.
In most homes, chain tightening is only needed once or twice a year. If you find yourself adjusting more often, look for worn or failing parts.
Cost Of Professional Adjustment Vs Diy
You may wonder if it’s worth hiring a pro or tackling the job yourself. Here’s a quick cost comparison:
| Option | Average Cost | Time Required | Best For |
|---|---|---|---|
| DIY Adjustment | $0 (if you have tools) | 15-30 minutes | Most homeowners |
| Professional Service | $75–$150 | 30–60 minutes | Busy or unsure users, major issues |
Doing it yourself saves money and time, but don’t hesitate to call a technician if you run into trouble or feel uncomfortable.
Environmental Factors That Affect Chain Tension
Few people realize that temperature changes and humidity can affect chain tension. In cold weather, metal contracts; in heat, it expands. This means your chain may seem tighter in winter and looser in summer.
If your garage isn’t heated or cooled, check the chain tension at least once per season. Rapid shifts in weather can accelerate chain stretch.
Rust is another hidden enemy. If your chain is exposed to damp air or leaks, keep it lubricated and check for rust often. Replace a rusty chain promptly—it’s more likely to break.
Upgrading From Chain To Belt Drive
If you’re tired of chain noise or frequent adjustments, you may consider switching to a belt drive opener. Belt drive models are much quieter and require less maintenance.
The upgrade cost is higher—often $250–$500 installed—but many homeowners appreciate the peace and reliability. For more details, see this guide from the Family Handyman.

Non-obvious Insights Most Beginners Miss
Even with good instructions, beginners often overlook these two points:
- Chain and cable systems: Some openers use a chain only for part of the rail, with a steel cable making up the rest. If you adjust only the chain, but the cable is slack, you may still have noise and movement problems. Check the entire drive system, not just the visible chain.
- Locking both nuts: It’s easy to forget to hold the adjustment nut while tightening the lock nut. If the adjustment nut moves, your hard work is undone. Use two wrenches if needed.
Remember, patience and attention to detail make the biggest difference.

Frequently Asked Questions
How Tight Should The Garage Door Chain Be?
The chain should sag about ½ inch in the middle when the door is closed. It should not be tight as a guitar string, nor so loose that it hits the rail.
How Often Do I Need To Tighten The Garage Door Chain?
Check and adjust the chain every 6–12 months, or whenever you hear new noise or see the chain sag more than 1 inch.
What Happens If The Chain Is Too Tight?
A chain that’s too tight puts extra stress on the motor, sprocket, and rail. This can cause parts to wear out early, the opener to overheat, or the chain to break.
Can I Use Any Lubricant On The Garage Door Chain?
Use only lithium-based garage door lubricant or the type recommended by your opener’s manufacturer. Avoid thick grease or general-purpose oils like WD-40.
Is It Safe To Adjust The Chain Myself?
Yes, for most homeowners, it’s a safe DIY task if you unplug the opener and follow the steps. If you’re unsure or see broken parts, call a professional.
Keeping your garage door chain properly tightened is a simple way to avoid costly repairs, reduce noise, and keep your home secure. With a few basic tools and regular checks, you can handle this task confidently—and enjoy a smoother, quieter garage every day.


