Now Reading: How Do You Reprogram Garage Door Keypad: Easy Step-by-Step Guide
- 01
How Do You Reprogram Garage Door Keypad: Easy Step-by-Step Guide
How Do You Reprogram Garage Door Keypad: Easy Step-by-Step Guide

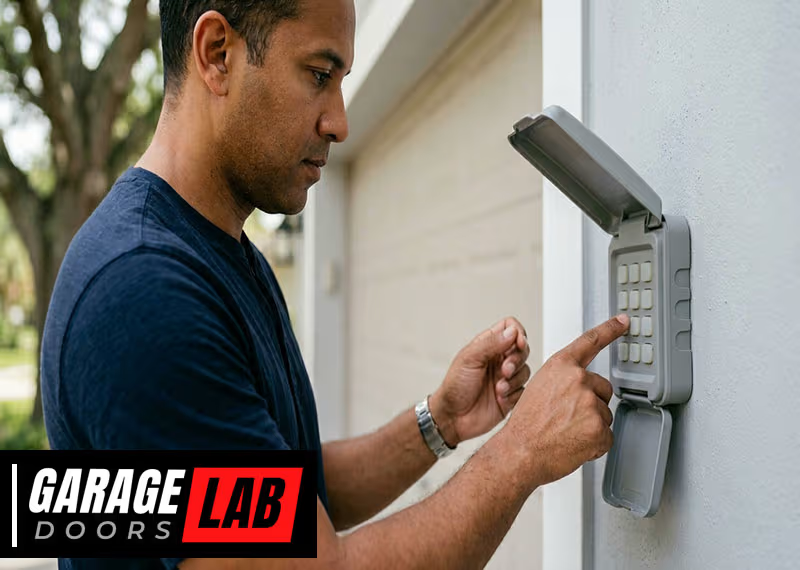
Reprogramming a garage door keypad may sound technical, but it’s something most homeowners can do without calling a professional. If your keypad isn’t working, you’ve forgotten your code, or you just moved into a new home, knowing how to reprogram it can save you time and money.
This guide will walk you through every step, from the basics to advanced tips, so you feel confident and secure using your garage every day.
Why Reprogram Your Garage Door Keypad?
Many people don’t think about their garage door keypad until there’s a problem. But there are important reasons for reprogramming:
- Security: If you move into a new home, the old owner may still know the code.
- Lost or Forgotten Code: It happens to everyone—codes get forgotten or shared too widely.
- Malfunction: Sometimes, the keypad just stops working as expected.
- Upgrading or Changing Remotes: New remotes or openers may require a keypad reset.
Reprogramming is a practical way to keep your home safe and ensure only those you trust can enter.
Understanding How Garage Door Keypads Work
Before jumping into the steps, it helps to know what’s happening when you press those numbers. A garage door keypad is a wireless device that sends a signal to the garage door opener. The opener is the main unit, usually mounted on the ceiling, that controls the door motor.
When you enter the right code, the keypad sends a radio signal with a unique frequency to the opener. The opener checks if the code matches what’s programmed in its memory. If yes, it opens the door. Most systems use a feature called “rolling code” for extra security, which means the code changes every time you use it.
Keypads are powered by batteries or sometimes wired to your house electricity. They’re weather-resistant and designed for outdoor use. If your keypad is old, some steps may be a bit different, but most modern systems follow the same basic process.
What You Need Before Starting
To avoid frustration, gather everything you need before you start:
- Ladder: Most garage door openers are mounted high.
- Owner’s Manual: If you have it, check for brand-specific instructions.
- New Batteries: Weak batteries can cause programming failures.
- A Pen and Paper: Note the new code for your records.
- Flashlight: Some garages aren’t well-lit near the opener.
Also, check the brand and model of your opener. The steps are similar for most brands like LiftMaster, Chamberlain, Genie, and Craftsman, but small differences can matter.
Step-by-step Guide: How To Reprogram A Garage Door Keypad
Let’s break down the process into clear steps. Most openers use a “Learn” or “Program” button to pair with the keypad.
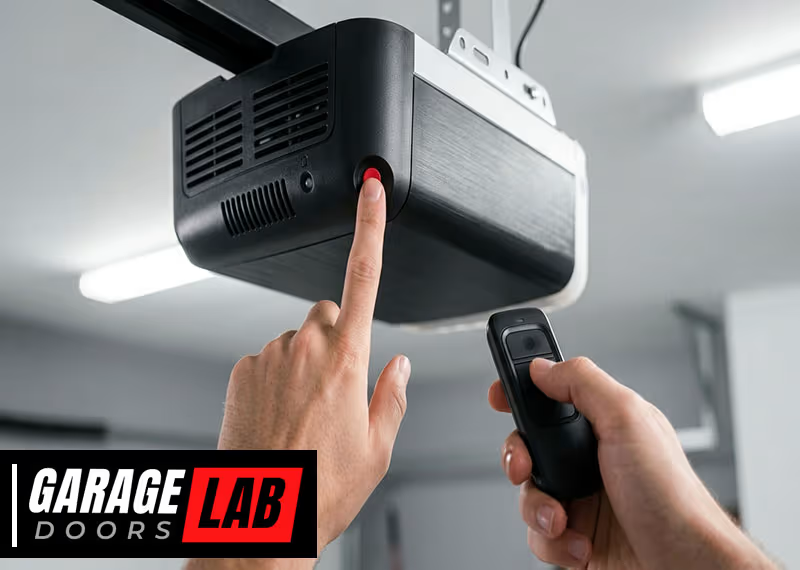
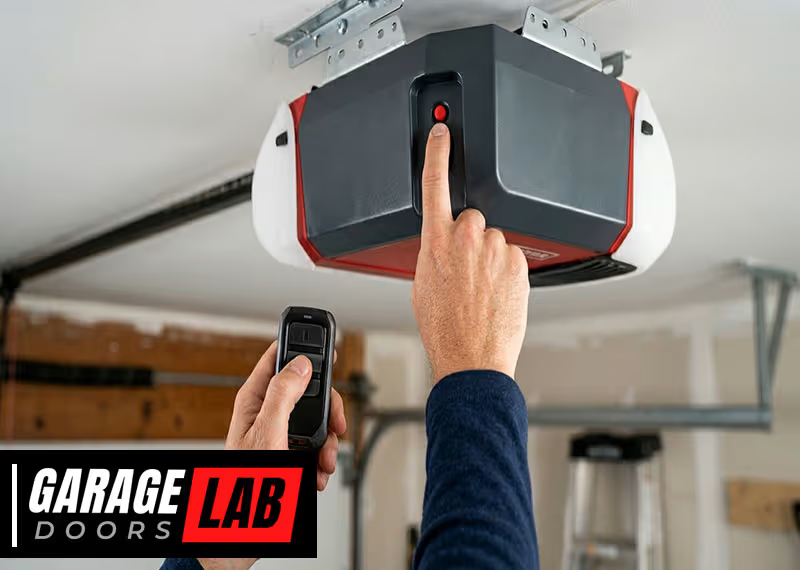
Step 1: Locate The Learn/program Button
The first step is to find the Learn or Program button on the garage door opener. Here’s how:
- Look for the main motor unit on the ceiling.
- The button is usually on the back or side, sometimes under a light cover.
- It might be labeled as Learn, Program, or just a colored button (often yellow, red, orange, or purple).
If you can’t find it, check your opener’s manual or search online for your model.
Step 2: Clear The Old Code (if Needed)
If you suspect someone else knows your old code, or you want a clean start, clear the opener’s memory.
- Press and hold the Learn button for about 6-10 seconds until the indicator light turns off or blinks.
- All remote controls and keypads will disconnect. You’ll have to reprogram them all.
This step is optional but adds security, especially when you move into a new place.
Step 3: Enter Programming Mode
Now, you’re ready to pair your keypad:
- Press and release the Learn button. An indicator light should come on or blink.
- You now have about 30 seconds to enter the new code on your keypad.
Step 4: Enter Your New Code
- On the keypad, enter your desired code (usually 4 digits, sometimes 3-6).
- Press the Enter or Send button.
- The garage opener light might blink, or you may hear a click. This means the pairing worked.
If the light doesn’t blink or the door doesn’t respond, repeat the process. Most failures are caused by entering the wrong sequence or not pressing buttons fast enough.
Step 5: Test The Keypad
- Wait a few seconds, then enter your new code and press Enter.
- The door should open or close.
- Test it a few times to make sure it works reliably.
If it fails, check the batteries and repeat the steps. Some brands need a different button press (like holding Enter a bit longer).
Key Differences Between Popular Garage Door Keypad Brands
Each garage door opener brand has its own style and programming details. Here’s a quick comparison:
| Brand | Learn Button Color | Typical Code Length | Special Steps |
|---|---|---|---|
| LiftMaster/Chamberlain | Yellow, Purple, Red, Orange | 4 digits | Press Enter after code |
| Genie | Black or Red | 3-4 digits | Press Program, then Enter |
| Craftsman | Purple, Orange, Red | 4 digits | Similar to LiftMaster |
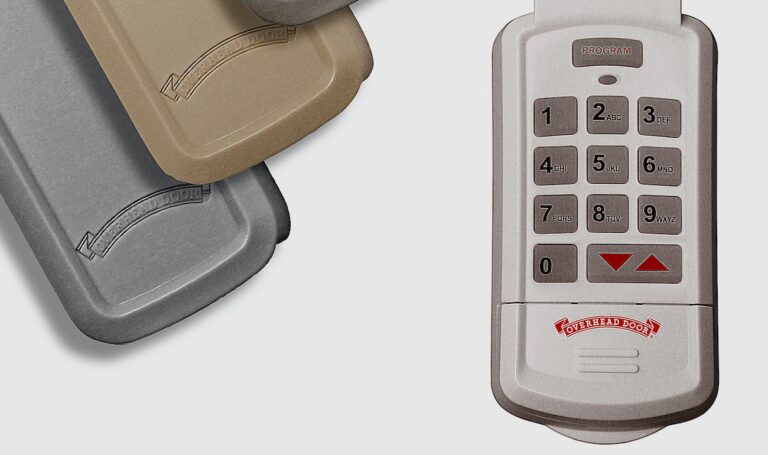
| Overhead Door | Usually Red | 3-8 digits | Hold Enter for 2 seconds |
Knowing your opener’s brand helps avoid confusion during programming.
Common Problems And How To Solve Them
Even with clear instructions, you might hit a snag. Here are some common issues and solutions:
Keypad Not Responding
- Check batteries: Weak batteries are the most common reason for keypad failure.
- Clean the buttons: Dirt or moisture can block signals.
- Check for physical damage: Cracks, water damage, or worn buttons mean it may need replacement.
Code Not Accepted
- Wrong code length: Some openers need exactly 4 digits, others allow 3-8.
- Programming too slow: The opener times out quickly. Be ready before you press the Learn button.
- Interference: Nearby electronics can block signals. Try turning off any strong wireless devices.
Door Opens Randomly Or Won’t Open
- Old remotes still programmed: Clear all codes and start fresh.
- Keypad installed too far from opener: Most keypads have a range of 15-30 feet.
- Wiring issues: For wired keypads, check for loose or corroded wires.
Brand-specific Quirks
Some systems, especially older ones, require special steps like holding buttons longer or pressing a unique sequence. Always double-check your manual if things don’t work as expected.
Advanced Features: Temporary And Multi-user Codes
Modern keypads offer features beyond simple open/close. Here are two popular options:
Temporary (guest) Codes
You can set a temporary code for visitors, cleaners, or deliveries. This code works for a set time or number of uses, then expires.
- Enter your main code, then press Program or # (brand-specific).
- Enter the temporary code, then confirm with Enter.
- Check your manual for exact steps.
Temporary codes are great for letting someone in without sharing your main code.
Multiple Codes For Different Users
Some systems allow you to program several codes at once. You can assign each family member a unique code and delete them individually if needed.
- Enter programming mode as before.
- Add a new code instead of replacing the old one.
- To delete a code, enter a special sequence—this varies by brand.
This feature is useful for keeping track of who enters your garage and for removing access when needed.
How To Reset A Forgotten Garage Door Keypad Code
If you’ve forgotten your code and can’t get in, don’t panic. Most systems let you reset the code without needing the old one.
- Access the opener unit: Use a ladder if needed.
- Press and hold the Learn button: Hold for 6-10 seconds to erase all codes.
- Reprogram as a new keypad: Follow the steps above with a fresh code.
Some older models may require you to open the keypad case and press a small reset button inside. Always work carefully to avoid damaging the electronics.

How To Change The Batteries In Your Keypad
Weak batteries are a leading cause of keypad problems. Here’s how to replace them:
- Open the keypad cover: Most covers slide or pop off.
- Remove old batteries: Note the orientation (positive/negative).
- Insert new batteries: Use the correct type (usually AAA or 9V).
- Test the keypad: Enter your code to make sure it’s working.
Change the batteries at least once a year, or anytime you notice slow response or dim lights.
Safety Tips When Reprogramming Your Keypad
Changing your keypad code is simple, but safety matters:
- Don’t share your code with anyone you don’t trust.
- Change your code regularly (every 6-12 months) for best security.
- Clear all codes when moving to a new home.
- Stand on a stable ladder when working near the opener.
- Keep instructions for future use.
Many people forget to update remote controls and vehicle openers after changing the keypad code. Reprogram those devices as well to keep everything in sync.
How To Program A Keypad For Multiple Garage Doors
If you have more than one garage door, some keypads let you control both with different codes.
- Enter programming mode on the opener for Door 1.
- Program a unique code for Door 1.
- Repeat the process for Door 2, using a different code.
- Test both codes to ensure they operate the correct doors.
Not all keypads support this feature. Check your keypad’s manual for details.
Wired Vs Wireless Garage Door Keypads
There are two main types of keypads:
| Type | Power Source | Installation | Pros | Cons |
|---|---|---|---|---|
| Wireless | Batteries | Mount anywhere (within range) | Easy to install, flexible placement | Battery changes needed |
| Wired | Home wiring | Wires run to opener | No batteries, reliable | Harder to install, less flexible |
Most newer homes use wireless keypads for ease of installation and flexibility.
When To Call A Professional
While most keypad issues are simple, sometimes you need expert help:
- Keypad won’t program after multiple tries
- Opener or keypad is physically damaged
- You’re uncomfortable using ladders or working with electronics
- Complex systems with integrated security features
A technician can diagnose deeper problems, such as signal interference, failed circuit boards, or compatibility issues.
Garage Security: More Than Just The Keypad
Your garage is often the largest entry point to your home. A weak keypad code is like leaving your front door unlocked. Here are ways to increase security:
- Choose a unique code: Avoid birthdates, addresses, or simple patterns.
- Update codes regularly
- Use a keypad with rolling code technology
- Install motion lights near your garage
- Lock the door between your garage and house
According to the FBI, over 9% of home burglaries start with access through the garage. Taking simple precautions can greatly reduce your risk.
Garage Door Keypad Programming: Real-world Examples
Let’s walk through examples with two common brands for clarity.
Example 1: Reprogramming A Liftmaster Keypad
- Find the Learn button on the opener (often yellow).
- Press and release the Learn button; indicator light comes on.
- Enter your new 4-digit code on the keypad.
- Press and hold Enter until the opener light blinks.
- Test the code.
Example 2: Reprogramming A Genie Keypad
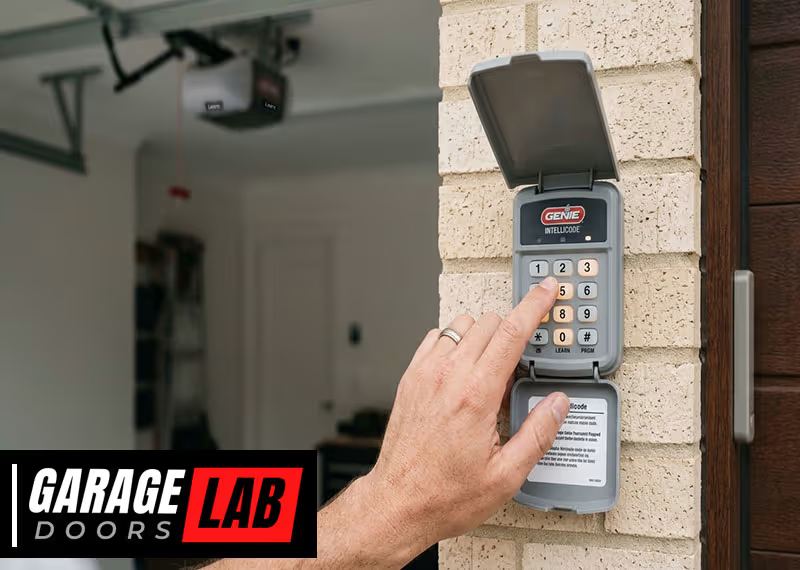
- Open the keypad cover and press Program.
- Enter your desired code.
- Press Program again; the LED will blink.
- On the opener, press the Learn button.
- Within 30 seconds, enter your code on the keypad, then press Enter.
- Test the system.
These examples highlight small differences. Always adapt the process for your specific brand.
Troubleshooting: Why Your Keypad Still Isn’t Working
If you’ve followed every step and your keypad still fails, consider these less obvious issues:
- Antenna problems: The opener has a hanging wire antenna. Make sure it’s not broken or tucked inside.
- Old firmware: Very old openers may not work with new keypads. Check for compatibility.
- Sunlight interference: Some keypads perform poorly in direct sunlight. Try shading the unit.
- Neighbor’s system interference: Rare, but sometimes two homes use the same frequency. Changing the code usually fixes this.
Upgrading Your Garage Door Keypad
If your keypad is more than 10 years old, consider upgrading. Newer models offer:
- Backlit keys for night use
- Weatherproof design
- Keyless entry with fingerprints or smartphones
- Improved security features
Look for models compatible with your opener brand. For the latest options, visit the manufacturer’s website or a trusted retailer.
How To Keep Track Of Your Garage Door Codes
Many people forget their keypad code after a few months. Here’s how to stay organized:
- Write down your code and keep it in a safe place, not near the garage.
- Use a password manager app if you’re comfortable with technology.
- Change the code to something memorable, but not obvious.
Never use simple codes like “1234” or your home address. These are the first guesses for intruders.
Environmental Factors That Affect Keypad Performance
Sometimes, your keypad’s location or weather can cause problems:
- Extreme cold or heat: Can drain batteries quickly.
- Rain or moisture: May cause short circuits in old units.
- Direct sunlight: Can fade numbers or overheat electronics.
If your keypad is exposed, consider adding a weather shield or moving it to a shaded spot.
Comparing Garage Door Keypad Features
Here’s a quick look at what features matter most when choosing a keypad:
| Feature | Why It Matters | What to Look For |
|---|---|---|
| Backlit Keys | Night visibility | LED or glow-in-the-dark |
| Rolling Code | Security against hacking | Advertised as “Security+” or “Intellicode” |
| Multiple Codes | For family or guests | Stores 2 or more codes |
| Weatherproof Rating | Outdoor durability | IP rating or “weatherproof” label |
| Battery Indicator | Warns when low | LED or screen alert |
For most people, backlit keys and rolling code security are the most important upgrades.
Tips For Smooth Programming
- Practice entering the code before you start programming.
- Have someone help: One person at the opener, one at the keypad.
- Double-check the code length required for your opener.
- Replace batteries before you start, even if the keypad seems fine.
- Keep your manual: Even if you don’t need it now, it’s helpful for troubleshooting later.
When You Should Upgrade Your Whole Garage Door Opener
If your opener is very old, reprogramming the keypad may not help. Signs you need a new opener:
- No rolling code technology (openers from the 1990s or earlier)
- Noisy or slow operation
- Lack of safety sensors
- Frequent breakdowns
Modern openers are quieter, safer, and more secure. For more information, visit the official LiftMaster site.
Frequently Asked Questions
How Often Should I Change My Garage Door Keypad Code?
Change your code at least every 6-12 months for best security, or immediately if you think someone unauthorized knows it.
Can I Program A Universal Keypad With Any Garage Door Opener?
Most universal keypads work with popular brands, but always check compatibility before buying. Some very old openers may not support modern keypads.
What Should I Do If My Keypad Gets Stuck Or Unresponsive?
First, change the batteries and clean the buttons. If it still doesn’t work, the keypad may be damaged and need replacement.
Is It Safe To Let Delivery Services Use My Garage Keypad Code?
Use a temporary code for delivery people, not your main code. Delete the temporary code after the delivery to keep your home secure.
My Garage Door Opens By Itself. Could My Keypad Be Hacked?
It’s unlikely, but possible if you use an old opener without rolling code security. Clear all codes and reprogram with a new code. If the problem continues, consider upgrading your system.
Reprogramming your garage door keypad is a simple way to boost security and convenience. With these steps, you can keep your home safer and avoid the hassle of lost or outdated codes. Regular maintenance and mindful use will keep your garage working smoothly for years to come.