Now Reading: How to Change Battery in Chamberlain Garage Door Remote Easily
- 01
How to Change Battery in Chamberlain Garage Door Remote Easily
If your Chamberlain garage door remote stops working suddenly, the battery is often the reason. Many people are surprised at how simple it is to fix this problem on their own. You do not need special tools or advanced skills—just a bit of patience and the right guidance. Changing the battery yourself can save time, money, and the hassle of waiting for a technician. In this guide, you will learn everything you need: how to identify your remote, which battery you need, the steps for safe replacement, what to do if something goes wrong, and tips to keep your remote working longer. Even if you have never opened a remote before, you’ll finish this article confident and prepared.
Understanding Your Chamberlain Garage Door Remote
Before you touch the battery, you must know exactly what remote you have. Chamberlain makes different models, and not all use the same battery or have the same opening method.
Common Chamberlain Remote Models
Here are some popular Chamberlain remote models:
- Chamberlain 953EV/EVC
- Chamberlain 950ESTD
- Chamberlain 953CB
- Chamberlain 940EV
- Chamberlain Clicker KLIK1U
Each remote may look similar, but there are differences in size, button design, and especially how you open the case. The model number is usually found on the back of the remote or inside the battery compartment.
Why Model Identification Matters
Not all Chamberlain remotes use the same battery. Some use a CR2032 coin cell, others use a CR2016, and a few older models use a small 9V battery. If you open the remote without checking, you might buy the wrong battery or accidentally damage the remote.
Tip: Take a photo of your remote and compare it to images on the Chamberlain official website. This can help you identify the exact model if the label is worn or missing.
Tools And Items You Need
Changing a battery is simple, but having the right items makes the job safer and easier. Here’s what you’ll need for most Chamberlain remotes:
- Small flathead screwdriver (jeweler’s or eyeglass type)
- Replacement battery (check type: CR2032, CR2016, or 9V)
- Soft cloth (to protect surface and remote)
- Pen (for writing down codes or notes, if needed)
Some people use a coin (like a quarter) instead of a screwdriver to open the case. This works for certain models but not all.
Insight: If you have a new remote, sometimes a spare battery is included in the package. Check your original box before buying a new one.

Choosing The Correct Replacement Battery
The most common mistake is buying the wrong battery. Here’s how you can avoid it.
How To Find Your Battery Type
- Check the remote’s back label. Look for “Battery: CR2032” or a similar marking.
- Open the battery compartment (see next section if unsure how).
- Compare the old battery’s number with the new one.
Do not guess or use a battery that “looks close. ” The wrong battery can cause poor performance or damage.
Most Used Battery Types
Here’s a quick comparison of the most common types for Chamberlain remotes:
| Battery Type | Voltage | Diameter (mm) | Height (mm) | Common Models |
|---|---|---|---|---|
| CR2032 | 3V | 20 | 3.2 | 953EV/EVC, 950ESTD |
| CR2016 | 3V | 20 | 1.6 | Clicker KLIK1U |
| 9V Alkaline | 9V | 26.5 x 17.5 | 48.5 | Older 953CB |
Where To Buy
You can find these batteries in most supermarkets, hardware stores, or online. Buying a well-known brand (like Energizer or Duracell) gives you better life and fewer leaks.
Non-obvious tip: Check your local recycling center for free used batteries. Sometimes, they offer new or almost-new batteries collected from electronics.
Preparing To Change The Battery
It’s tempting to just open the remote and swap the battery. But a few minutes of preparation can prevent problems.
Safety Steps
- Work in a clean, dry place. Moisture can damage the remote’s circuit board.
- Gather your tools and new battery before starting.
- Wash your hands or wear gloves to avoid oil from your fingers touching the battery contacts.
- If you have multiple remotes, change only one at a time. This way, if something goes wrong, you know exactly where the issue is.
Record Remote Settings
Some Chamberlain remotes store codes that control your garage door. While most modern remotes keep these even when the battery is removed, older ones may not. Write down any codes or settings before you begin. This makes reprogramming easy if needed.
Practical insight: Take a photo of the inside of your remote before removing the battery. This helps you remember the orientation and placement.
Step-by-step: How To Change Battery In Chamberlain Garage Door Remote
Let’s get to the main part. These steps will work for nearly all Chamberlain remotes. If your model looks very different, check the user manual or the Chamberlain website.
Step 1: Open The Remote
Most Chamberlain remotes have a small slot on the side or bottom. Here’s how to open it safely:
- Place the remote on a soft cloth. This keeps it from scratching.
- Insert the small flathead screwdriver or coin into the slot.
- Twist gently. Do not force it. If it does not open, try the other side—some models have a hidden latch.
- Carefully separate the two halves. Note how the circuit board sits inside.
Expert tip: Do not pull the remote apart quickly. Some models have a tiny spring or button that can fall out.
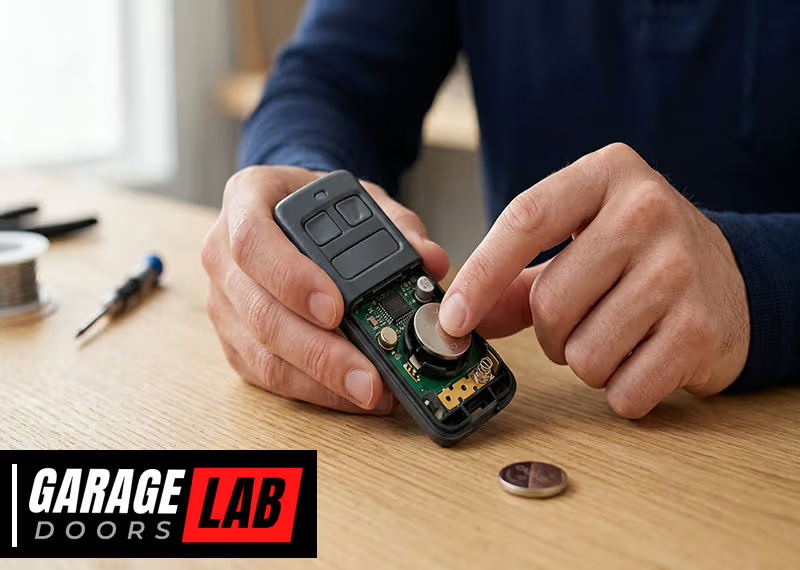
Step 2: Remove The Old Battery
- Look for the battery. It will be a round, silver coin cell or a small 9V block.
- Gently slide the old battery out. Use your finger or the screwdriver.
- Do not touch the battery contacts with metal tools. This can cause a short.
Step 3: Insert The New Battery
- Check the orientation. Most coin batteries have a “+” symbol that should face up.
- Slide the new battery into the slot. It should fit snugly, not loose.
- For 9V batteries, match the terminals correctly.
Step 4: Reassemble The Remote
- Align the two halves carefully. Make sure no buttons are stuck or out of place.
- Snap the case shut. You should hear a click.
- Press a button to check that the LED lights up.
Extra insight: If the buttons feel loose after reassembly, reopen and check for misalignment. Chamberlain remotes are precise and need to be closed properly for the best function.
Step 5: Test The Remote
- Go to your garage door.
- Press the main button. The door should respond immediately.
- If nothing happens, repeat the steps. Double-check the battery’s orientation and that the case is fully closed.
Troubleshooting: If Your Remote Still Doesn’t Work
Sometimes, the remote will not work even after a fresh battery. Here’s how to solve common problems.
Problem: No Light When Button Is Pressed
- Check battery orientation. The “+” side should match the marking inside the case.
- Try another new battery. Sometimes, even new batteries are dead.
- Look for corrosion on the contacts. Clean gently with a pencil eraser.
Problem: Light Blinks, But Door Does Not Open
- Remote may need reprogramming. Some Chamberlain remotes lose their memory if the battery is out too long.
- Follow your opener’s programming instructions (usually on the garage door opener unit).
Problem: Remote Works Intermittently
- Check if the battery is loose. Remove and reinsert.
- Inspect for dirt or moisture inside the case.
- Try the remote closer to the opener. Weak signal can mean battery contacts are dirty.
Problem: Buttons Stick Or Do Not Respond
- Open the remote and check for misaligned buttons.
- Wipe with a dry cloth. Do not use water.
When To Replace The Remote
If your remote is very old or damaged (cracked case, rust inside), it may be time for a new one. Replacement is often cheaper than repeated repairs.
Advanced tip: Universal remotes (like the Chamberlain Clicker) can be programmed to work with many garage door openers, but always check compatibility first.

How Long Do Chamberlain Remote Batteries Last?
Most coin cell batteries (like CR2032 or CR2016) last 2 to 3 years with normal use. If you use your remote often, the battery will drain faster. Extreme cold or heat can also shorten battery life.
9V batteries in older remotes may last only 1 to 2 years.
| Remote Type | Battery Type | Average Life (Normal Use) | Factors That Shorten Life |
|---|---|---|---|
| Modern Keychain | CR2032/CR2016 | 2-3 years | Frequent use, extreme temperatures |
| Older Handheld | 9V | 1-2 years | Moisture, corrosion |
Keeping Your Remote In Top Condition
A well-maintained remote lasts longer and works more reliably. Try these tips:
- Keep your remote dry. Avoid leaving it in your car during rain or snow.
- Clean the case regularly. Dust and dirt can get inside and cause problems.
- Do not drop the remote. Hard impacts can loosen the battery or damage the circuit.
- Replace the battery as soon as you see a weak signal. Do not wait until it stops working completely.
- Store spare batteries in a cool, dry place. Heat and humidity can reduce shelf life.
Non-obvious tip: If you have a spare remote, use it every few months. This keeps the battery contacts fresh and prevents corrosion.
Understanding The Risks Of Incorrect Battery Replacement
Some people rush the battery change and damage their remote. Here’s what to avoid:
- Forcing the case open. This can break the plastic latches or crack the housing.
- Using the wrong battery type. Even if it fits, the wrong voltage can fry the circuit board.
- Touching the battery terminals with metal tools. This may cause a short and permanent damage.
- Leaving fingerprints or dirt on the battery. Skin oils can cause poor contact.
If you’re unsure, watch a video guide for your specific model or call Chamberlain support.
When To Call A Professional
Most battery changes are simple. But call a pro if:
- The remote has water damage or visible rust inside.
- The case will not close properly after replacement.
- The opener still does not respond after reprogramming and battery change.
- You have physical limitations (weak grip, arthritis) and find the small parts hard to handle.
A technician can check for deeper problems, like a faulty receiver in the garage door opener or a broken remote.
Recycling And Disposal Of Old Batteries
Coin cell batteries and 9V batteries should not go in the regular trash. They contain chemicals that are harmful to the environment.
- Take old batteries to a recycling center or a store that accepts used batteries.
- Do not burn or crush batteries.
- Store used batteries out of reach of children and pets until you can recycle them.
For more information on proper battery disposal, check the EPA’s guide at EPA Used Household Batteries.
Alternative Solutions: Universal Remotes And Smart Upgrades
If you find your Chamberlain remote too old, lost, or beyond repair, consider these options:
- Universal garage door remotes: These work with most openers made after 1993. They are affordable and easy to program.
- Smartphone control: Newer Chamberlain openers support MyQ technology. This lets you open or close your garage with your phone, no remote needed.
- Wall-mounted keypads: These are battery-powered and can be installed outside your garage for easy access.
Example: If you have frequent battery issues, a wall keypad or phone app may save you time and maintenance.
Real-world Examples
Example 1: Easy Fix For A Dead Remote
Sarah noticed her garage door remote stopped working on cold mornings. She opened her Chamberlain 950ESTD with a small screwdriver, replaced the CR2032 battery, and it worked again immediately. She now keeps a spare in her car.
Example 2: Troubleshooting After Battery Change
Mike changed his battery but the remote still did not work. He realized he had inserted the battery upside down. After flipping it, the remote responded perfectly.
Example 3: Upgrading To Smart Control
After several battery changes, Linda decided to switch to a MyQ smart garage opener. She now uses her phone instead of carrying a remote. She still keeps the old remote as a backup, with a new battery installed.
Frequently Asked Questions
What Battery Does My Chamberlain Remote Use?
Most Chamberlain remotes use CR2032 or CR2016 coin cell batteries. Some older models use a small 9V battery. Check the label on your remote or inside the battery compartment for the exact type.
How Do I Open The Chamberlain Remote Without Damaging It?
Use a small flathead screwdriver or a coin. Find the slot on the side or bottom, insert the tool, and twist gently. Do not force it. If it feels stuck, try the other side or check for hidden screws.
Will I Lose My Garage Door Programming When I Change The Battery?
Most modern Chamberlain remotes keep their programming even if you remove the battery. But some older models may lose their code. Write down your code or check the manual before changing the battery, just in case.
Why Does My New Battery Not Fix The Remote?
If the remote still does not work, check the battery orientation, make sure it is the correct type, and inspect for dirt or corrosion. Sometimes, the remote needs to be reprogrammed after a battery change.
How Can I Make My Remote Battery Last Longer?
Keep your remote dry, avoid dropping it, and replace the battery as soon as you notice a weak signal. Use high-quality batteries and store spares in a cool, dry place for best results.
Changing the battery in your Chamberlain garage door remote is a simple job that can be done in minutes. By following the steps in this guide, you will save money, avoid frustration, and keep your garage secure and easy to access.
Remember, the key is to know your remote model, use the correct battery, and handle everything with care. With these tips, your remote will work smoothly for years to come.


